Table of Contents
Advertisement
Quick Links
Advertisement
Table of Contents

Related Manuals for Hikmicro Panther LRF PH35L


Summary of Contents for Hikmicro Panther LRF PH35L
- Page 1 Thermal Image Scope User Manual...
- Page 2 INTERRUPTION, OR LOSS OF DATA, CORRUPTION OF SYSTEMS, OR LOSS OF DOCUMENTATION, WHETHER BASED ON BREACH OF CONTRACT, TORT (INCLUDING NEGLIGENCE), PRODUCT LIABILITY, OR OTHERWISE, IN CONNECTION WITH THE USE OF THE PRODUCT, EVEN IF HIKMICRO HAS BEEN ADVISED OF THE POSSIBILITY OF SUCH DAMAGES OR LOSS.
- Page 3 Thermal Image Scope User Manual NOT USE THIS PRODUCT FOR ANY PROHIBITED END-USES, INCLUDING THE DEVELOPMENT OR PRODUCTION OF WEAPONS OF MASS DESTRUCTION, THE DEVELOPMENT OR PRODUCTION OF CHEMICAL OR BIOLOGICAL WEAPONS, ANY ACTIVITIES IN THE CONTEXT RELATED TO ANY NUCLEAR EXPLOSIVE OR UNSAFE NUCLEAR FUEL-CYCLE, OR IN SUPPORT OF HUMAN RIGHTS ABUSES.
- Page 4 Thermal Image Scope User Manual Regulatory Information FCC Information Note: This product has been tested and found to comply with the limits for a Class B digital device, pursuant to Part 15 of the FCC Rules. These limits are designed to provide reasonable protection against harmful interference in a residential installation.
- Page 5 Thermal Image Scope User Manual Directive 2006/66/EC (Battery Directive): This product contains a battery that cannot be disposed of as unsorted municipal waste in the European Union. See the product documentation for specific battery information. The battery is marked with this symbol, which may include lettering to indicate cadmium (Cd), lead (Pb), or mercury (Hg).
- Page 6 Thermal Image Scope User Manual Symbol Conventions The symbols that may be found in this document are defined as follows. Symbol Description Indicates a hazardous situation which, if not avoided, will or could Danger result in death or serious injury. Indicates a potentially hazardous situation which, if not avoided, Caution could result in equipment damage, data loss, performance...
- Page 7 Thermal Image Scope User Manual Safety Instruction These instructions are intended to ensure that user can use the product correctly to avoid danger or property loss. Laws and Regulations ● Use of the product must be in strict compliance with the local electrical safety regulations. Transportation ●...
- Page 8 Thermal Image Scope User Manual ● DO NOT swallow the battery to avoid chemical burns. ● DO NOT place the battery in the reach of children. ● The battery cannot be charged with external power source directly. ● The device cannot be charged, please use the supplied charger to charge the battery. ●...
- Page 9 Thermal Image Scope User Manual COMPLIANCE NOTICE: The thermal series products might be subject to export controls in various countries or regions, including without limitation, the United States, European Union, United Kingdom and/or other member countries of the Wassenaar Arrangement. Please consult your professional legal or compliance expert or local government authorities for any necessary export license requirements if you intend to transfer, export, re-export the thermal series products among different countries.
-
Page 10: Table Of Contents
Handheld Thermal Monocular Camera User Manual Table of Contents Chapter 1 Overview ........................1 1.1 Device Description ......................1 1.2 Main Function ........................1 1.3 Appearance ........................1 Chapter 2 Preparation ........................5 2.1 Cable Connection ......................5 2.2 Install Battery ........................5 2.3 Power On/Off ........................ - Page 11 Handheld Thermal Monocular Camera User Manual Chapter 7 Measure Distance ......................20 Chapter 8 Picture and Video ......................21 8.1 Capture Picture ....................... 21 8.2 Record Video........................21 8.3 Export Files ........................22 Chapter 9 Client Software Connection ..................23 Chapter 10 CVBS Output ......................
-
Page 12: Chapter 1 Overview
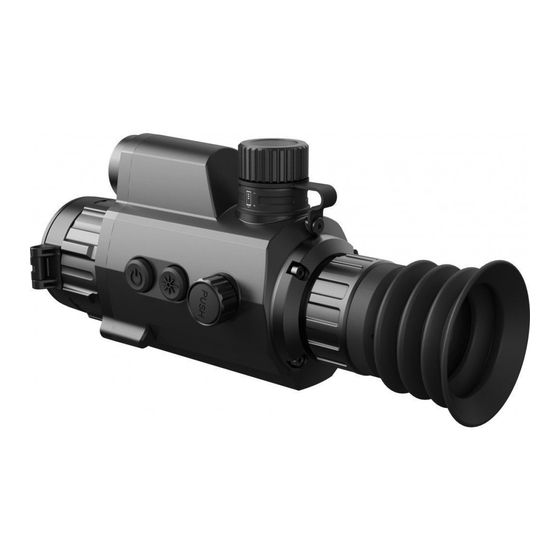
● Client Software Connection: The device can capture snapshots, record videos, and set parameters by HIKMICRO Sight App after being connected to your phone via hotspot. ● Image Correction: The device supports DPC (Defective Pixel Correction) and FFC (Flat Field Correction) which can optimize the image quality. - Page 13 Handheld Thermal Monocular Camera User Manual Figure 1-1 Appearance I of Device...
- Page 14 Handheld Thermal Monocular Camera User Manual Figure 1-2 Appearance II of Device Table 1-1 Buttons and Components Description Function ● Press: Standby Mode/Wake up Device Power Key ● Hold: Power On/Off...
- Page 15 Handheld Thermal Monocular Camera User Manual Description Function ● Press: measure the distance with laser Measure Key ● Hold: capture ● Press: switch palettes Wheel ● Hold: menu operation ● Rotate: switch digital zoom Lens Cover Protect the lens. Focus Ring Adjust the sight view.
-
Page 16: Chapter 2 Preparation
Handheld Thermal Monocular Camera User Manual Chapter 2 Preparation 2.1 Cable Connection Connect the device and power adaptor with a type-C cable to power on the device. Alternatively, connect the device and PC to export files. Steps 1. Lift the cable interface cover. 2. -
Page 17: Power On/Off
Handheld Thermal Monocular Camera User Manual Figure 2-1 Open the Battery Cover 2. Insert the battery into the battery compartment with the positive mark inward. Figure 2-2 Install the Battery 3. Turn the battery cover clockwise to tighten it. Note Remove the battery from the battery compartment if the device is not used for a long time. -
Page 18: Menu Description
Handheld Thermal Monocular Camera User Manual Power Off When the device is turned on, hold for 2 seconds to power off the device. Auto Power Off Set the auto power off time for your device, and then the device will automatically shut down as the set time. -
Page 19: Chapter 3 Image Settings
Handheld Thermal Monocular Camera User Manual Chapter 3 Image Settings 3.1 Adjust Diopter Steps 1. Power on the device. 2. Open the lens cover. 3. Hold the device and make sure the eyepiece covers your eye. 4. Rotate the adjust ring until the OSD text or image is clear. Figure 3-1 Adjust Diopter Note When adjusting diopter, DO NOT touch the surface of lens to avoid smearing the lens. -
Page 20: Adjust Brightness
Handheld Thermal Monocular Camera User Manual 3.3 Adjust Brightness In the menu mode, rotate the wheel to select and press the wheel to adjust brightness. In white hot mode, the higher the value of brightness is, the brighter the image is. The image effect in white hot mode is showed as picture below and effect in black hot mode is opposite. - Page 21 Handheld Thermal Monocular Camera User Manual Black Hot The hot part is black-colored in view. The higher the temperature is, the darker the color is. Red Hot The hot part is red-colored in view. The higher the temperature is, the redder the color is. Fusion From high temperature to low temperature, the image is colored in from white, yellow, red, pink to purple.
-
Page 22: Adjust Digital Zoom
Handheld Thermal Monocular Camera User Manual 3.7 Adjust Digital Zoom In the live view interface, rotate the wheel to switch the digital zoom of the device. The value of digital zoom can be set to 1×, 2×, 4×, and 8×. 3.8 Correct Defective Pixel The device can correct the defective pixels on the screen which are not performed as expected. -
Page 23: Flat Field Correction
Handheld Thermal Monocular Camera User Manual Figure 3-2 Correct Defective Pixel 3.9 Flat Field Correction This function can correct non-uniformity of display. Steps 1. Hold the wheel to enter the menu. 2. Rotate the wheel to select , and press the wheel to switch the FFC mode. –... -
Page 24: Set Osd
Handheld Thermal Monocular Camera User Manual Note If digital zoom is enabled, the PIP view also zooms. If the digital zoom ratio exceeds 4, the PIP does not zoom. 3.11 Set OSD You can choose whether to display the OSD information on the live view interface in this function. Steps 1. - Page 25 Handheld Thermal Monocular Camera User Manual Figure 3-2 Brand Logo Display...
-
Page 26: Chapter 4 Burning Prevention
Handheld Thermal Monocular Camera User Manual Chapter 4 Burning Prevention This function can prevent the detector of the thermal channel from being burned. When you enable this function, the shield will close if the grey scale of the detector reaches a certain value. Steps 1. -
Page 27: Chapter 5 Hot Tracking
Handheld Thermal Monocular Camera User Manual Chapter 5 Hot Tracking The device can detect the highest temperature spot in the scene and mark it on display. Steps 1. Hold the wheel to show the menu. 2. Rotate the wheel to select , and press the wheel to mark the spot of highest temperature. -
Page 28: Chapter 6 Aiming Point Settings
Handheld Thermal Monocular Camera User Manual Chapter 6 Aiming Point Settings 6.1 Correct Reticle Enable the reticle to view the position of the target. The functions such as freeze and zoom help to adjust the reticle more accurately. Steps 1. In the view mode, hold the wheel to show the menu. 2. -
Page 29: Set Reticle Color
Handheld Thermal Monocular Camera User Manual 10. Hold the wheel to exit the interface according to the prompt. – OK: Save the parameter and exit. – CANCEL: Exit but not save the parameters. Note ● 5 types of reticles can be selected. ●... - Page 30 Handheld Thermal Monocular Camera User Manual Steps 1. In the live view mode, hold the wheel to show the menu. 2. Select and press the wheel to enter the reticle setting interface. 3. Rotate the wheel to select Color, and press the wheel to switch the color of the reticle. White, Green, Black and Red are selectable.
-
Page 31: Chapter 7 Measure Distance
Handheld Thermal Monocular Camera User Manual Chapter 7 Measure Distance The device can detect the distance between the target and the observation position with laser. Before You Start When measuring the distance, keep the hand and the position steady. Otherwise, the accuracy may be affected. -
Page 32: Chapter 8 Picture And Video
Handheld Thermal Monocular Camera User Manual Chapter 8 Picture and Video You can manually record video or capture picture when displaying live view. 8.1 Capture Picture In the main live view interface, hold to capture picture. Note When capturing succeeds, the image freezes for 1 second and a prompt shows on the display. For exporting captured pictures, refer to Export Files. -
Page 33: Export Files
Handheld Thermal Monocular Camera User Manual 8.3 Export Files This function is used to export recorded videos and captured pictures. Before You Start ● Turn off the hotspot function. ● Turn on the device after connecting it to your PC, and keep the device on for 10 to 15 seconds before other operations. -
Page 34: Chapter 9 Client Software Connection
Handheld Thermal Monocular Camera User Manual Chapter 9 Client Software Connection Connect the device to the HIKMICRO Sight App via hotspot, then you can capture picture, record video, or configure parameters on your phone. Steps 1. Hold the wheel to show the menu of device. -
Page 35: Chapter 10 Cvbs Output
Handheld Thermal Monocular Camera User Manual Chapter 10 CVBS Output The CVBS output is used to debug the device. You can also view the device image on the display unit for details. Before You Start Connect the device to the display unit via CVBS interface of the aviation plug. Refer to Section Cable Connection. -
Page 36: Chapter 11 Language Settings
Handheld Thermal Monocular Camera User Manual Chapter 11 Language Settings You can select the device language in this function. Steps 1. Hold the wheel to show the menu. 2. Rotate the wheel to select , and press the wheel to enter the language configuration interface. -
Page 37: Chapter 12 Unit Settings
Handheld Thermal Monocular Camera User Manual Chapter 12 Unit Settings You can switch the unit for fusion levels and laser ranging functions. Steps 1. Hold the wheel to show the menu. 2. Rotate the wheel to select , and press the wheel to switch the unit. Yard and m (meter) are selectable. -
Page 38: Chapter 13 Maintenance
Handheld Thermal Monocular Camera User Manual Chapter 13 Maintenance This part introduces the operation of checking device information, upgrading device, and restoring to defaults, etc. 13.1 View Device Information Steps 1. Hold the wheel to show the menu of device. 2. -
Page 39: Chapter 14 Frequently Asked Questions
Handheld Thermal Monocular Camera User Manual Chapter 14 Frequently Asked Questions 14.1 Why is the monitor off? Check whether the device is off-battery. Check the monitor after charging the device for 5 minutes. 14.2 The image is not clear, how to adjust it? Adjust the diopter adjustment knob until the image is clear. -
Page 40: Chapter 15 Appendix
Chapter 15 Appendix 15.1 Device Command Scan the following QR code to get device common serial port commands. Note that the command list contains the commonly used serial port commands for HIKMICRO thermal cameras. 15.2 Device Communication Matrix Scan the following QR code to get device communication matrix. - Page 41 UD29801B...
Need help?
Do you have a question about the Panther LRF PH35L and is the answer not in the manual?
Questions and answers