urmet domus 1760 Configuration Booklet
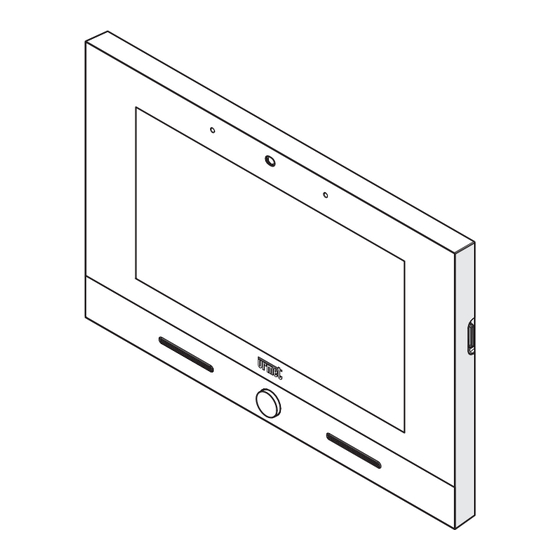
7'' video door phone
Hide thumbs
Also See for 1760:
- User booklet (64 pages) ,
- Installation handbook (29 pages) ,
- Quick manual (4 pages)

Related Manuals for urmet domus 1760


Summary of Contents for urmet domus 1760
- Page 1 Mod. 1760 DS 1760-034 LBT 21183 Interactive Links OOOOOOOO 7’’ VIDEO DOOR PHONE Ref. 1760/31 - 1760/31A (White) Ref. 1760/33 - 1760/33A (Black) PARAMETER CONFIGURATION BOOKLET...
- Page 2 All the trademarks mentioned in this document are the property of their respective owners. All rights reserved. We hereby authorise the partial or total reproduction of this document for the exclusive purpose of using the 1760/31 or /33 Video door phone. DS1760-034...
-
Page 3: Table Of Contents
Interactive Links The document contains INTERACTIVE LINKS for faster and more efficient consultation. INDEX 1. GENERAL DESCRIPTION ........................4 2. 2VOICE INSTALLER TOOLS APPLICATION ..................4 3. CONFIGURATIONS ..........................4 3.1 Configuring the parameters of the video door phone ..............4 3.1.1 Change the Homepage ......................4 3.1.2 Changing the background of the display ................5 3.1.3 Changing the language of the Video door phone ..............5... -
Page 4: General Description
GENERAL DESCRIPTION This booklet describes the configuration of parameters and functions in the configuration menu of the video door phone. 2VOICE INSTALLER TOOLS APPLICATION 2Voice Installer Tools is an application dedicated to the installer that allows configuring some of the functions featured on the video door phone Through the 2Voice Installer Tools app it is possible to: •... -
Page 5: Changing The Background Of The Display
3.1.2 Changing the background of the display To change the display background, follow the procedure below: • Switch on the screen, if switched off, by touching it anywhere or pressing the Home button. • Press the icon to access the Top Page. • Press the icon to access the video door phone parameter configuration page. • Press on Wallpaper (the active wallpaper is shown to the right) to display a pop-up window in which the display background can be chosen. Select the new wallpaper from the list or press the X icon in the top right-hand corner to close the window without making changes. -
Page 6: Change The Time Format
3.1.4 Change the time format To change the time format of the video door phone, follow the procedure below: • Switch on the screen, if switched off, by touching it anywhere or pressing the Home button. • Press the icon to access the Top Page. • Press the icon to access the video door phone parameter configuration page. • Press on the Date and Time to display the screen with the configurable parameters: Change Date and Time: allows you to select the date and time to be set on the video door phone. -
Page 7: Activate Wifi On Video Door Phone
3.1.5 Activate WiFI on video door phone WiFi can be activated on the video door phone in order to use the call forwarding function and to surf the Internet via the Firefox app on the Top Page. • Switch on the screen, if switched off, by touching it anywhere or pressing the Home button. • Press the icon to access the Top Page. - Page 8 • Press All Networks to display the networks detected by the video door phone. • Select the network you wish to connect to. • Enter the password and then press CONFIRM. • If the connection to the network has been made correctly, the following icon will appear in the top right-hand bar DS1760-034...
-
Page 9: Configuring The Call Forwarding Function (Master Only)
3.1.6 Configuring the call forwarding function (master only) The call forwarding function allows audio-video or audio-only call forwarding to one or more smartphones with Android or IOS operating system. On the smartphone, connected to the Internet via its own cellular data connection, or even WiFi, the Urmet CallMe App must instead be installed in order to receive the call. WARNING! To enable the function, a router must be present to provide Internet access to the video door phone. - Page 10 • After a few seconds the video door phone will switch to configuration mode and a QR code will appear on the display. • Configure the function via the Urmet CallMe Set app available for smartphones. • For the complete configuration procedure of the call forwarding function press the following link to CallMe Set app configuration booklet. download the • By activating the function, the video door phone automatically configures the Remote status • Once the configuration phase is complete, the call forwarding function menu screen is displayed. • On the user’s smartphone, it is necessary to pair the video door phone via the app CallMe, on the video door phone press on QR Code to display the pairing QR Code. DS1760-034...
-
Page 11: Maintenance Mode (Installer Only)
• For the procedure to activate the call forwarding function on the user’s smartphone, see chapter “Call Forwarding Service Activation” in the CallMe app configuration booklet. • By activating the function when receiving a call from the call station, smartphones on which the CallMe app has been installed and configured will ring in addition to the video door phone. 3.1.6.1 Maintenance mode (installer only) Maintenance mode allows the installer to test calls with the CallMe Set App using the account used to configure the call forwarding function. With maintenance mode active, calls to the user’s account will be temporarily disabled. In addition to call tests, it is also possible to update the device’s firmware via the CallMe Set app. - Page 12 • The display prompts a pop-up window in which maintenance mode can be activated. • Press YES to enable the mode. Press NO to close the pop-up and return to the call forwarding function menu screen. • By enabling the maintenance mode, the display shows the following screen: • Maintenance mode is characterised by the green colour at the top and bottom of the display and the indication Maintenance mode in the middle of the top bar.
-
Page 13: Changing The Brightness Of The Video Door Phone
3.1.7 Changing the brightness of the video door phone To change the brightness of the video door phone, follow the procedure below: • Switch on the screen, if switched off, by touching it anywhere or pressing the Home button. • Press the icon to access the Top Page. • Press the icon to access the video door phone parameter configuration page. • Press on Screen Brightness to display a pop-up window in which the screen brightness can be adjusted. -
Page 14: Configuring The Automatic Switch-Off Of Screen
3.1.8 Configuring the automatic switch-off of screen The Automatic Screen Power Off function allows the user to set the idle time after which the video door phone screen switches off. • Switch on the screen, if switched off, by touching it anywhere or pressing the Home button. • Press the icon to access the Top Page. • Press the icon to access the video door phone parameter configuration page. • Press on Automatic Screen Power Off to display a pop-up screen where you can select the idle time before switching off the screen. •... -
Page 15: Configure The Alarms
3.1.9 Configure the alarms The Alarms function provides access to a menu in which video door phone alarms can be configured. • Switch on the screen, if switched off, by touching it anywhere or pressing the Home button. • Press the icon to access the Top Page. • Press the icon to access the video door phone parameter configuration page. • Press on Alarms to display a menu with alarm configuration parameters. • The various items in the alarm menu are described in detail below. DS1760-034... -
Page 16: Reset Alarms
3.1.9.1 Reset alarms The following function allows the alarm status to be reset. To reset, follow the procedure below: • Go to alarm menu and press Reset alarms. Reset panic alarm: enables resetting the panic alarm status. – Reset alarm input 1 (Intrusion): enables resetting the status of alarm 1 (intrusion alarm). –... -
Page 17: Configure Input Of Alarm 1 (Intrusion)
3.1.9.3 Configure input of Alarm 1 (intrusion) The following item allows the parameters of the intrusion alarm to be configured. Follow the steps below to carry out the configuration: • Within the alarm menu, press on the item Configure input of Alarm 1 (intrusion). Enable Yokis: by enabling the following parameter, a previously configured Yokis command or – scenario can be activated after the intrusion alarm has been sent. Enable special decoding: by enabling the following parameter, a special code can be activated –... -
Page 18: Configure Floor Call
3.1.9.5 Configure floor call The following item allows the floor call parameters to be configured. Follow the steps below to carry out the configuration: • Within the alarm menu, press on the item Configure floor call contact. Enable Yokis: enabling the following parameter activates a previously configured Yokis command – or scenario when a floor call is made. Enable special decoding: by enabling the following parameter, a special code can be activated on – a special decoding Ref. 1083/80 present in the system, when a floor call is made. Set custom message: it is possible to set a custom message that will be shown on the display of –... -
Page 19: Maintenance
• Press on the MIFARE item to display a pop-up window requesting authorisation to activate the MIFARE key reader. • Press YES to enable the MIFARE key reader, pressing NO cancels the operation and returns to the configuration menu. • To disable the MIFARE key reader, repeat the procedure described above. 3.1.11 Maintenance The Maintenance item provides access to a menu in which a series of parameters are available for carrying out maintenance operations on the video door phone. -
Page 20: Video Door Phone Firmware Version
• Press on the Maintenance item to display the maintenance functions and parameters of the video door phone. 3.1.11.1 Video door phone firmware version The firmware version of the video door phone and microcontroller can be displayed. • Within the maintenance menu display the item Version. • On the right-hand side, the video door phone firmware version ‘1.0.0_135’ and the microcontroller firmware version [N: 1.0.0-57, μ2V:AE]. -
Page 21: Reboot
3.1.11.2 Reboot The following function allows the video door phone system to be restarted. To reboot, follow the procedure below: • Within the maintenance menu, press on the item Restart. • The video door phone will reboot the system. 3.1.11.3 How to update the video door phone firmware The following function enables the firmware update of the video door phone via an SD card. The update file must be loaded onto the SD memory card and then inserted into the slot on the right side of the video door phone. -
Page 22: Reset To Factory Settings
• Press on the update file, e.g. “1760.31_2V_1.0.0_135_t3_p1_fup.zip” to start the firmware update procedure. Pressing the X button closes the pop-up and cancels the operation. 3.1.11.4 Reset to factory settings Resetting to factory settings deletes all configurations made on the video door phone. To reset to factory settings, follow the procedure below: • Within the maintenance menu, press on Reset Factory Settings. • A pop-up window confirming the operation appears on the screen. -
Page 23: Configuration Of Video Door Phone Application Parameters
• Press the YES button to perform the operation and delete all configurations on the video door phone and return it to the factory configuration. Pressing the NO button cancels the operation and closes the pop-up window. WARNING! The Factory Reset operation is irreversible and involves reconfiguring the video door phone, as it deletes all customisations made, e.g. the choice of the Home Page, activation of the automatic door opener, selection of ringtones, etc. CONFIGURATION OF VIDEO DOOR PHONE APPLICATION PARAMETERS 3.2.1 How to change the ringtones of video door phone To change the video door phone ringtones, follow the procedure below •... -
Page 24: How To Change Audio Volume
3.2.2 How to change audio volume To change audio volume, follow the procedure below; • Switch on the screen, if switched off, by touching it anywhere or pressing the Home button. • Press the icon to access the Top Page and then the icon for the video door phone application. • Press the icon on top right to access the video door phone configuration page: •... -
Page 25: How To Change The Screen Settings
3.2.3 How to change the screen settings To change the screen settings, follow the steps below: • Switch on the screen, if switched off, by touching it anywhere or pressing the Home button. • Press the icon to access the Top Page and then the icon for the video door phone application. • Press the icon on top right to access the video door phone configuration page: •... -
Page 26: Large Button Mode
3.2.3.1 Large Button Mode To activate the following mode, follow the procedure indicated: • Press on the Video Appearance during a Call parameter (see previous paragraph) and select the Large Button mode. • By activating the following mode, the call screens are displayed in 4:3 with the button icons larger than in standard mode. -
Page 27: Automatic Door Opener
• Press on the Operating Mode Settings to display the screen with the configurable functions listed: The following chapters describe the functions displayed above. 3.2.4.1 Automatic Door Opener The following parameter allows the door to be opened automatically when a call is received without the need to answer; to activate the function, follow the procedure below: •... -
Page 28: Answering Machine Settings
3.2.4.2 Answering machine settings To activate or change the video door phone answering machine settings, follow the procedure indicated: • Press on the Operating Mode Settings parameter and then select the item Video door phone Answering Machine. • The screen with the various answering machine settings listed is displayed (to the right of each setting is the current value; in the case of Audio Message the date and time of its recording): –... -
Page 29: Accessibility
3.2.5 Accessibility The following menu item allows you to configure and enable different modes of using the video door phone. Follow the steps below to carry out the configuration: • Switch on the screen, if switched off, by touching it anywhere or pressing the Home button. • Press the icon to access the Top Page and then the icon for the video door phone application. -
Page 30: Touchless Actions
3.2.5.1 Touchless actions The following parameter enables gesture commands (Gesture) or voice commands on the video door phone. • Press on the Accessibility parameter and then select the item Touchless Actions. • A pop-up screen appears where you can select the mode of use. – Disabled: gesture and voice commands disabled. –... -
Page 31: Impaired Hearing Function On Yokis 8 Key
3.2.5.3 Impaired Hearing function on Yokis 8 key The video door phone has a function for the deaf that allows the 8 Yokis button on the video door phone to be automatically activated by switching the relay of a receiver module (e.g. by flashing a light bulb) when the video door phone receives a call from a video door phone, switchboard, another video door phone (intercom) or a call to the floor. -
Page 32: Blind Mode
3.2.5.4 Blind mode The following parameter enables and configures the parameters of the blind mode. • Press on the Accessibility parameter and then select the item Blind. • The screen with the various mode settings and parameters is displayed. In this mode, it is not possible to access the video door phone book due to the lack of visual feedback from the user. However, it is possible to define 2 contacts in the address book as favourites that can be called by making a single or double tap on the screen, on the Homepage page. - Page 33 3.2.5.4.1 Using the blind mode Below is an example of the main screen with the blind mode active. In active mode, it is no longer possible to display all the various icons on the normal main screen (e.g. panic alarm, voice memo, door opening, gate opening, etc.). in the bottom left-hand corner if pressed and held, it switches to normal mode. The icon If the screen is switched off, either voluntarily or after the timeout, the blind mode is automatically restored the next time it is switched on, and the video door phone will play the following voice message “THE SCREEN IS ON”.
- Page 34 Answering the call will open the door by making a single tap on the screen, the video door phone will play the following voice message “THE DOOR IS OPEN”. By performing a double tap it will be possible to open the gate, the video door phone will play the following voice message “THE GATE IS OPEN”. You can end the call by making a horizontal movement from right to left on the screen.
-
Page 35: Specials Activations
3.2.6 Specials activations The following function allows the addition, editing and deletion of commands to activate the special decoding Ref. 1083/80. Up to 32 activation commands can be entered. • Switch on the screen, if switched off, by touching it anywhere or pressing the Home button. • Press the icon to access the Top Page and then the icon for the video door phone application. - Page 36 - Name: Enter a name related to a special activation (e.g: Staircase light, Roller shutter opening, Lift going up, etc.). - Code: Enter the numbers that make up the special code. special codes range from 1 to 254. • Press on the CONFIRM button to add the special activation. • The special activations screen is displayed with all special activations added on the video door phone. •...
-
Page 37: Check Lift
3.2.7 Check lift The following function allows you to associate the Ascent and Descent commands of the button to 2 special activations. The association to the commands is only possible if special activations have been added to the video door phone, which allows the lift to be operated via a special decoder Ref. 1083/80 suitably programmed Activations). - Page 38 • Press on the Up command, a pop-up screen appears with a list of all special activations on the video door phone. • Select the special activation, created earlier, which allows the Ascent command to be executed. In this example, the special activation Lift up allows the lift to go up. • Tap on the X icon in the top right-hand corner to close the window. DS1760-034...
- Page 39 • Press on the Down command, a pop-up screen appears with a list of all special activations on the video door phone. • Select the special activation, created earlier, which allows the Descent command to be executed. In this example, the special activation Lift down allows the lift to descend. • Tap on the X icon in the top right-hand corner to close the window. DS1760-034...
-
Page 40: How To Enable Or Disable The Icon Panic
3.2.8 How to enable or disable the icon Panic To enable or disable the panic icon, follow the steps below: • Switch on the screen, if switched off, by touching it anywhere or pressing the Home button. • Press the icon to access the Top Page and then the icon for the video door phone application. -
Page 41: How To Enable Or Disable The Call Button At Switchboard
3.2.9 How to enable or disable the call button at switchboard To enable or disable the switchboard call button , comply with the instructions below: • Switch on the screen, if switched off, by touching it anywhere or pressing the Home button. • Press the icon to access the Top Page and then the icon for the video door phone application. -
Page 42: Restart The Video Door Phone Application
3.2.10 Restart the video door phone application To restart the video door phone application, follow the steps below: • Switch on the screen, if switched off, by touching it anywhere or pressing the Home button. • Press the icon to access the Top Page and then the icon for the video door phone application. • Press the icon on top right to access the video door phone configuration page: •... - Page 43 DS1760-034...
- Page 44 DS 1760-034 LBT 21183 URMET S.p.A. Area tecnica 10154 TORINO (ITALY) servizio clienti +39 011.23.39.810 VIA BOLOGNA 188/C http://www.urmet.com Telef. +39 011.24.00.000 (RIC. AUT.) e-mail: info@urmet.com +39 011.24.00.300 - 323...
Need help?
Do you have a question about the 1760 and is the answer not in the manual?
Questions and answers