Advertisement
Quick Links
Advertisement

Subscribe to Our Youtube Channel
Related Manuals for VEVOR TLM38385


Summary of Contents for VEVOR TLM38385
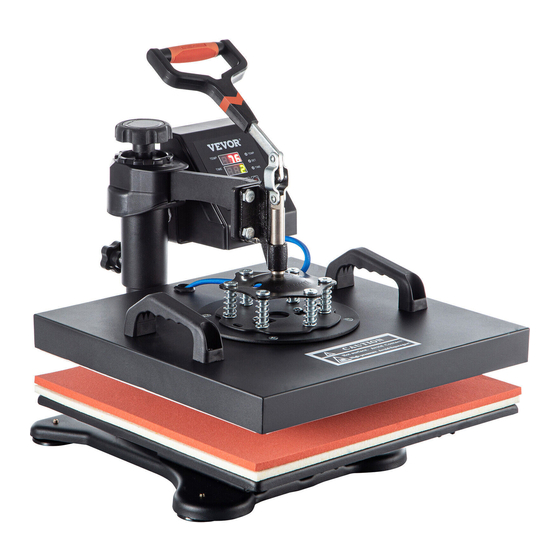
- Page 1 MULTIFUNCTIONAL DIGITAL HEAT PRESS MACHINE USER GUIDE...
- Page 2 NEED HELP? CONTACT US! 15-16 This is the original instruction, please read all manual instructions carefully before operating. VEVOR reserves clear interpretation of our user manual. The appearance of the product shall be subject to the product you received. Please forgive us that we won't inform you again if there is any technology or...
-
Page 3: Parts List
HEAT PRESS MACHINE PARTS INTRODUCTION PARTS LIST... - Page 4 ASSEMBLY & USE STEPS INTELLIGENT TEMPERATURE CONTROLLER OPERATION METHOD Pr ara Check the connection between power plug and electrical socket of electrical cabinet. Be sure to operate with safe ground wire!!! Heat press element must be securely plugged into the machine before you switch the machine on.Plug your electrical cord into the machine.
- Page 5 Replace Baking Tray Mat D.Finish the Setting and Stands by to Work Use a Phillips screwdriver to unscrew the screws in the two holes on the pressure plate to replace the accessories Note...
- Page 6 Replace Baking Cap Mat Replace Baking Tray Mat...
- Page 7 Replace Baking Cap Mat Replace Baking Cap Mat Unscrew the four butterfly screws at the bottom Loosen the bottom screw and remove. Lift the cushion up Use the screwdriver 4 to tighten the 2 screws just Shaped hat removed and put the cap on.
- Page 8 Replace Baking Coaster Replace Baking Coaster I or J ① ① Install G to Part E. F or H (Tighten the screws on both sides. We suggest to tighten the screws on the side (Tighten the screws on both sides. then tighten the screws on the side ) We suggest to tighten the screws on the side...
-
Page 9: Printing Methods
Printing methods CAUTION y r r ir m (N i l g i r cor i c ON. CHECK corr c vol g m c in r li l r ri i i l r ill ro c i TURN OFF m c in , DISCONNECT r l cing...
Need help?
Do you have a question about the TLM38385 and is the answer not in the manual?
Questions and answers