
Subscribe to Our Youtube Channel
Related Manuals for Kogan KASDA5123HA


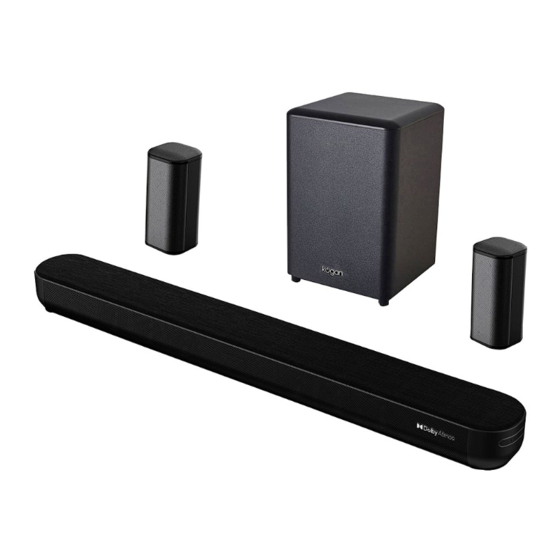
Summary of Contents for Kogan KASDA5123HA
- Page 1 KOGAN 5.1.2 CHANNEL 320W DOLBY ATMOS SOUNDBAR WITH SUBWOOFER & REAR SPEAKERS KASDA5123HA...
-
Page 3: Safety And Warnings
• Do not attempt to repair the product yourself. If the product shows any signs of damage, cease use immediately and contact help.Kogan.com for support. • Do not place the product where it may come into contact with water, moisture or other liquids. - Page 4 OVERVIEW Control panel (soundbar) Name Description Power button Power the soundbar. Mode button Switch between modes. Play/pause button Play/pause tracks. • Short press the button to decrease volume. Previous/Volume decrease button • Long press the button to play the previous track. •...
- Page 5 Ports (soundbar) HDMI OUT (ARC) port Coaxial port HDMI IN port Optical port USB port Power switch AUX port AC IN port Back view (subwoofer) Pair button Indicator light Power switch AC IN port...
- Page 6 Rear speakers RS IN port RS OUT port DC IN port Pair button Indicator light...
- Page 7 System overview Rear speaker Rear speaker Subwoofer RS output RS IN port Power input (Rear Speaker) Soundbar AC adapter (Rear Speaker...
- Page 8 Remote control Power button Mute button Volume increase button Play/pause button Previous button Next button Volume decrease button EQ button Mode button Track control button Bluetooth button Treble increase button Bass increase button Bass decrease button Treble decrease button 3D button...
-
Page 9: Operation
OPERATION Remote control Name Icon Description Press this button to turn the soundbar on/off Power button Press this button to mute/unmute the Mute button soundbar. VOL+ Volume increase button Press this button to increase the volume. Volume decrease Press this button to decrease the volume. VOL- button Press this button to play/pause tracks. - Page 10 Powering Plug one end of the power cords for the soundbar and subwoofer into the AC IN ports on both devices, then plug the other end into two power sockets. Switch the power sockets on. Place the power switch in the ON position on both the subwoofer and soundbar. Plug one end of the provided AC adapter into the DC IN port of the left speaker, then plug the other end into a power socket.
- Page 11 Optical mode Connect one end of an optical cable (not supplied) into the optical port of the soundbar. Connect the other end of the cable into the optical port on your device (for example, TV, gaming console, or DVD player). Press the mode button on the soundbar or remote control and change the soundbar to optical mode.
- Page 12 Ensure Bluetooth is turned on in your device and search for ‘Kogan Soundbar_512’. Once found, tap to connect. Once connected, the display will stop flashing and the devices will be paired.
- Page 13 3D mode Allows for audio optimisation for listening to audio designed for a virtual surround sound effect. Note: If using Dolby Atmos®, you do not need to activate this mode. Equaliser modes This soundbar features three equaliser modes (Music, Movie, News). Press the EQ button on the remote control to switch to different modes.
-
Page 14: Specifications
SPECIFICATIONS Power output 320W • L/R channel (58 x 90mm) • 30W speaker (x2) • Mid channel (58 x 90mm) Speaker drivers • 30W x 1 + Sky Channel 2.5" 35W (x2) • Rear speaker 2.25"/15W (x4) • Wireless subwoofer 8“/100W Bluetooth version V5.3 Bluetooth range... -
Page 15: Troubleshooting
TROUBLESHOOTING Pairing the subwoofer and rear speakers The subwoofer and rear speakers should come pre-paired to the soundbar. However, if the subwoofer and rear speakers needs pairing, follow the steps outlined below: Press the mode button until the soundbar displays and is flashing ‘BT’. Plug one end of the power cord for the subwoofer into the AC IN port. - Page 16 Need more information? We hope that this user guide has given you the assistance needed for a simple set-up. For the most up-to-date guide for your product, as well as any additional assistance you may require, head online to help.kogan.com...
Need help?
Do you have a question about the KASDA5123HA and is the answer not in the manual?
Questions and answers