Advertisement
Quick Links
Advertisement

Related Manuals for Kogan KASBDA20CA


Summary of Contents for Kogan KASBDA20CA
- Page 1 2.0.2 CH 120W DOLBY ATMOS SOUNDBAR KASBDA20CA...
-
Page 3: Safety And Warnings
SAFETY & WARNINGS TO REDUCE THE RISK OF ELECTRIC SHOCK DO NOT REMOVE COVER WARNING: Do not attempt to remove any screws or open the casing of the unit; there are no user-serviceable parts inside. Refer all servicing to qualified service personal. - Page 4 The appliance is not intended to be operated using an external timer or separate remote-control system. • If the supply cord is damaged, it must be replaced by Kogan.com to avoid a hazard. • Before operating this system, check the voltage of this system to see if it is identical to the voltage of your local power supply.
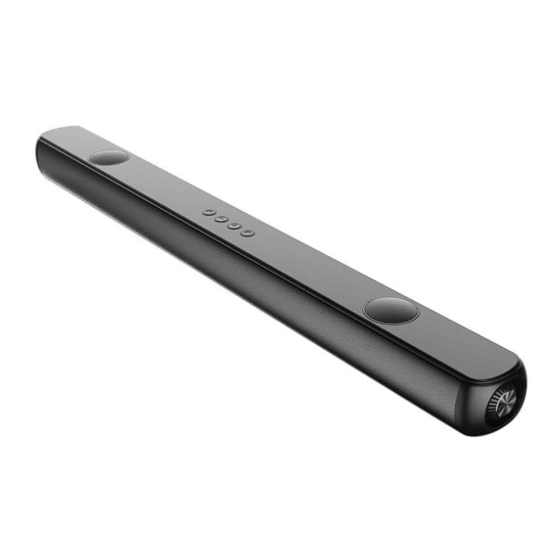
- Page 5 OVERVIEW HDMI IN 2: Connect to HDMI OUT of TV or 1 Display panel satellite or network set-top box or BD/Blue Ray DVD player HDMI IN 1: Connect to HDMI OUT of TV or Standby-on: Switch the Soundbar satellite or network set-top box or BD/Blue On or to standby Ray DVD player 9 HDMI OUT (ARC): Connect to the HDMI...
- Page 6 Power button: Press to switch the soundbar on/off or enter standby mode. Pair button: • In Bluetooth mode, press and hold the pair button more than 2 seconds to connect and disconnect the last device. • In other modes, press the pair button to turn on or off surround function or effect and the display will show “on or off”.
- Page 7 INSTRUCTION • Remove the soundbar from the carton and remove all packing material from the soundbar. Save the packing material, if possible, in case the soundbar ever needs to be serviced or transported. The original carton and packing material are the only safe way to pack your soundbar to protect it from damage in transit.
-
Page 8: Installation
INSTALLATION Table placement Place the soundbar horizontally on a solid surface such as a TV unit or shelves and align it centrally with the TV screen. For best sound output and good airflow around the soundbar, place your soundbar as shown in the image to the right. Wall mount installation •... -
Page 9: Operation
OPERATION Using the soundbar • Before connecting the AC power cord, ensure you have completed all other connections. • Risk of product damage: Ensure that the power supply voltage corresponds to the voltage printed on the back or the underside of the unit. •... - Page 10 Power on and off Plug-in the power cord with one side to AC IN on the soundbar and the other side to an AC wall outlet (see the following diagram). When you connect the soundbar to the main socket, the unit will be in standby mode. Switch on the soundbar by short-pressing the power button on the soundbar or remote control, and a welcome message will scroll across the display.
- Page 11 Select mode Press the INPUT button on the soundbar or remote control to select between BT, AUX, OPTICAL, HDMI ARC, HDMI 1, HDMI 2, USB modes. The selected mode will show on the display: • : Bluetooth Pairing mode, • : AUX mode •...
- Page 12 “ ” and begin flickering to show Bluetooth pairing mode. On the Bluetooth device, switch on Bluetooth, search for and select KASBDA20CA on your Bluetooth list to start connection (see the user manual of the Bluetooth device on how to enable Bluetooth). If prompted for a password, use “0000”.
- Page 13 Connections The HDMI in and HDMI (ARC) ports support both video & audio. • Video: max. 1080p/4K/HDR/60fps • Audio: Dolby Atmos, Dolby Digital, Dolby Digital Plus, Dolby TrueHD and Dolby Surround • HDMI: HDMI version 2.0 HDMI ARC) Optical HDMI IN Output Satellite or Network Set-top Box, or Optical...
- Page 14 Playing audio via USB port The soundbar automatically switches to USB input mode (with the LED display showing “ ”) when a USB flash drive is inserted. This mode is not selectable on the soundbar or remote control unless a USB flash drive is connected. Ensure that your USB flash drive contains MP3 or WMA audio files (other file types not supported).
- Page 15 Optical mode Using an optical cable (not included), connect the OPTICAL connector on your soundbar (Optical digital input) to the OPTICAL OUT connector on the TV or other device. The TV or other device must have an optical digital output. •...
- Page 16 HDMI IN & HDMI (ARC) modes Option 1: ARC (Audio Return Channel) The soundbar supports HDMI with Audio Return Channel (ARC). If your TV is HDMI (ARC) compliant, you can hear the TV audio through your soundbar by using a single HDMI cable. Using a high-speed HDMI cable, connect the HDMI OUT (ARC) on the soundbar to the HDMI (ARC) connector on your TV.
- Page 17 Note: To play Dolby ATMOS signals to the soundbar: Set the ATMOS device’s audio output to be “auto” or original code. Connect the device’s HDMI OUT to the soundbar’s HDMI 1 or 2 input. Connect the soundbar HDMI OUT (ARC) to the TV’s HDMI IN. If connecting the device’s HDMI OUT to a TV, connect the TV’s HDMI ARC to the ATMOS HDMI ARC port to share control with the soundbar (only power on/off, previous/next track, mute and volume of soundbar can be controlled...
- Page 18 Manufactured under license from Dolby Laboratories. Dolby, Dolby Audio, Dolby Vision, Dolby Atmos and the double -D symbol are trademarks of Dolby Laboratories. Using DOLBY ATMOS®: DOLBY ATMOS is only available in HDMI IN and HDMI OUT (ARC) mode. To use Dolby Atmos® in HDMI 1/HDMI 2/HDMI ARC mode, your TV must support Dolby Atmos®.
- Page 19 Select equalizer (EQ) effect Press the EQ button on the remote control to select your desired preset equalizer effects: Movie/Music/News/3D: Music mode Enhances the treble and adds greater depth to the music Movie mode Intensifies the bass and enhances the clarity of dialogue Enhances the clarity of voices.
-
Page 20: Troubleshooting
TROUBLESHOOTING Problem Cause Remedy The unit is out of the operating range. Use the remote control within the operating range. The unit cannot be The batteries are drained. Replace with new batteries. operated using the remote control. The remote-control sensor of the unit Adjust the lighting angle or is exposed to direct sunlight or strong reposition the unit. - Page 21 A device emitting electromagnetic Do not use this unit near waves (such as a microwave oven, a devices that emit wireless device and so on) may be electromagnetic waves. located nearby. Select an appropriate input Another input source is selected. source.
- Page 22 NOTES...
- Page 24 Need more information? We hope that this user guide has given you the assistance needed for a simple set-up. For the most up-to-date guide for your product, as well as any additional assistance you may require, head online to help.kogan.com...
Need help?
Do you have a question about the KASBDA20CA and is the answer not in the manual?
Questions and answers