
Related Manuals for Haier GE AZ95H09DACK1


Summary of Contents for Haier GE AZ95H09DACK1
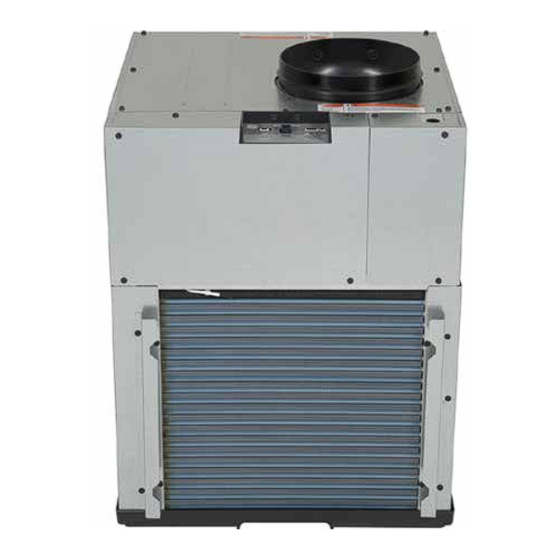
- Page 1 Technical Service Guide November 2021 2021 GEA Zoneline VTAC "Vertical Packaged Terminal Air Conditioner" AZ95H09DACK1 AZ95H09EACK1 AZ95H12DACK1 AZ95H12EACK1 AZ95H18DACK1 AZ95H18EACK1 31-9366...
-
Page 2: Safety Information
5. Locate the Warranty page. GE Appliances, a Haier Company Copyright © 2021 All rights reserved. This service guide may not be reproduced in whole or in part in any form without written permission from GE Appliances, a Haier Company. – 2 –... -
Page 3: Table Of Contents
Table of Contents Safety Information ........................2 Warranty ............................2 Table of Contents ..........................3 Safety Requirements ........................6 Nomenclature ..........................7 Specifications ..........................8 Features ..........................8 Weights and Dimensions ......................8 Power / Ratings ........................8 Certifications .........................10 Installation Requirements .....................10 Installation ............................11 Installation Overview ......................11 Return Air Grille Installation Options ..................12 Accessories for New Installation ..................13 Type of Electric Connections ....................14 Operation ............................15... - Page 4 Indoor Coil Thermistor ......................29 Indoor Outlet Thermistor .......................30 Outdoor Thermistors Locator ....................31 Outdoor Air Thermistor ......................32 Outdoor Coil Thermistor .......................33 Air Flow ............................34 Indoor Fan Motor ........................34 Outdoor Fan Motor .......................37 Condensate Removal ........................40 Slinger Ring on Outdoor Fan Blade ..................40 Drain Pan Plug ........................40 Electric Heat ..........................41 Electric Heater ........................41...
- Page 5 Refrigerant Charge .......................63 Refrigerant Recovery Connections ..................64 Refrigerant Charging Connections ..................65 Fault Codes ..........................66 Service Mode ..........................68 Wiring Diagram ..........................70 Index .............................71 – 5 –...
-
Page 6: Safety Requirements
Safety Requirements GEA Factory Service Employees are required to use safety glasses with side shields, safety gloves and steel toe shoes for all repairs. Prescription Safety Glasses Brazing Glasses Safety Glasses must be ANSI Z87.1-2003 compliant Plano Type Safety Glasses Cut Resistant Sleeve(s) Electrically Rated Glove and Dyneema®Cut Resistant... -
Page 7: Nomenclature
Nomenclature Model Number A Z 9 5 H 1 2 D A C W 1 Revision Brand AZ: Zoneline Chassis Series Special Features 95: Vertical AC K: GMCC/Midea Heating Special Features H: Cooling w/ Heat Pump and Electric C: Corrosion Treated Resistance Heat BTU/hr. -
Page 8: Specifications
Specifications Thermostat Quick Disconnect Features Ultra-Quiet Sensible Heat Ratio: 76% Heating System: Heat Pump Central Desk Control Compatibility: Yes Product Type: Vertical Air Conditioners (SPVU) Corrosion Treated: Yes Refrigerant Type: R410A Fan Speed Selections: 3 Cooling Freeze Sentinel: Yes Weights and Dimensions Heat Pump: Yes Approximate Shipping Weight: Heat Sentinel: Yes... - Page 9 AZ95H09EACK1 AZ95H12EACK1 Cooling - Amperes: 3.0 Cooling - Amperes: 4.0 Cooling - Watts: 775 Cooling - Watts: 925 Heating - Reverse Cycle - Amps: 2.8 Heating - Reverse Cycle - Amps: 3.7 Heating - Reverse Cycle - COP: 3.3 Heating - Reverse Cycle - COP: 3.3 Heating - Reverse Cycle - Watts: 660 Heating - Reverse Cycle - Watts: 865 Voltage (MAX): 230.000000 V...
-
Page 10: Certifications
AZ95H18EACK1 Cooling - Amperes: 6.3 Cooling - Watts: 1560 Heating - Reverse Cycle - Amps: 5.9 Heating - Reverse Cycle - COP: 3.3 Heating - Reverse Cycle - Watts: 1,435 Voltage (MAX): 265.000000 V Cooling BTUH (MAX): 17100.000000 Btu Cooling EER (BTUH / Watt): 11.0 CFM Indoor Fan Medium: 468 CFM Indoor Fan Low: 408 Dehumidification (pts./hr.): 4.4... -
Page 11: Installation
Installation Installation Overview Wall Thermostat Proper header for structural support. Apply proper caulking and flashing. Properly square and level plenum Architectural Louver RAVAL3 Exterior/Outside Return Air Grille Wall RAVRG2B Wall Plenum (telescoping) RAVWP15: 8” to 15”D x 23 3⁄4”W x 31 3⁄4”H Zoneline unit Drain Platform RAVDPLAT... -
Page 12: Return Air Grille Installation Options
Return Air Grille Installation Options The room return air grille may be installed toward the front or either side of the unit. Improper return air arrangements will cause performance problems. There are three indoor return air grille installation options. Choose the option that best suits the installation requirements. -
Page 13: Accessories For New Installation
Accessories for New Installation RAVRG2B: Return Air Grille Appearance Cutout Dimensions Plenum (telescoping) Cutout RAVWPT15 Dimensions: 8” to 15”D x 23 3/4”W x 31 24"W x 32"H 3/4”H *excluding flange Architectural Louver Architectural Louver designed to fit the following Plenums: RAVAL3 RAVWP15 8”... -
Page 14: Type Of Electric Connections
Type of Electric Connections Power Supply Kit Direct Connect A power supply kit must be used to supply power to the Zoneline unit. Models must be 208/230/265 Volt Applications installed using the appropriate GE Appliances power supply kit for the branch circuit amperage and the electrical resistance heater wattage desired. -
Page 15: Operation
Operation Auxiliary Control Features The electronic control for the unit comes preset from the factory to control the unit how “most” customers would prefer the unit to operate. The presets (called modes or functions) can be modified to accommodate differences in installation parameters or personal preferences on how the unit should operate and perform. - Page 16 While in AUX Mode, press the MODE button to scroll through the eight different modes. Continue to press the MODE button until the number corresponding to the mode to be modified is showing in the first digit of the display. Once the correct number is displayed, use the +/- buttons to change the second digit of the display for that mode to either "...
- Page 17 Mode 7 Fan Boost Mode This setting is used when the unit is installed with more restrictive duct work where additional airflow is needed. This increases the fan speed to ensure proper circulation. Press MODE until a 7 appears in the first digit of the display.
-
Page 18: Central Desk Control (Cdc)
Connect Auxiliary Features (If Required) Auxiliary Controls: Terminal Connections NOTE: Connector Kit RAKCDC is required to make CDC electrical connections. (See wiring diagrams for RAKCDC, shown in the next section.) The auxiliary control terminal connects are located on the front of the unit. 1. -
Page 19: Remote Thermostat
Remote Thermostat This unit must be controlled by a Class 2 remote control wall mounted heating and cooling thermostat. Refer to the operating instructions of the thermostat being used on how to control the unit. IMPORTANT: The Zoneline thermostat connections provide 24 VAC only. If using a digital/electronic Maximum Wiring wall thermostat, it must be set to the 24 VAC setting. -
Page 20: Normal Operating Conditions
Normal Operating Conditions A pinging noise caused by water being picked up and thrown against the condenser on rainy days or when the humidity is high may be heard. This design feature helps remove moisture and improve efficiency. “CLICK” Relays click when the controls cycle on and off or are adjusted to “CLICK”... -
Page 21: Controls
Controls Main Control Board Removal Main Control Board 1. Remove junction box cover and main control The electronic control for the unit comes preset board cover to gain access to the main from the factory to control the unit how “most” control board. -
Page 22: Main Control Board Connector Locations
Main Control Board Connector Locations J502 J503 J402 J405 J503 J103 J403 J104 J301 J404 K305 J303 J310 J306 J311 J303 J305 J307 J308 J309 – 22 –... -
Page 23: Service Main Control Board Set-Up
Service Main Control Board Set-Up Replacement of main control board on AZ95 Zonelines: 1. Disconnect power and access main control board. 2. Disconnect all connections on the original board. 3. Remove original board and install the new board. 4. Reconnect all connections. 5. - Page 24 H 1 2 D C W 1 Engineering/Service Zoneline Change Package Terminal Chassis 1: Original, 2-First 3: ..Change Chassis Series Vertical AC Vertical AC Variable Speed Compressor Type (Inverter) H: Highly M: Mei W: Rechi K: GMCC/ Midea Heating E: Cooling with Electric Resistance Heat H: Heat Pump with Electric Resistance Heat Special Features C: Corrosion Treated...
-
Page 25: User Interface (Ui) Board
User Interface (UI) Board User Interface (UI) Board Diagnosing If a user interface (UI) board were to fail, the Zoneline will not operate and the display will be blank. Verify Voltage to User Interface Board Verify voltage by gaining access to the main control board at the J402. -
Page 26: User Interface (Ui) Board Connector Locations
User Interface (UI) Board Connector Locations Thermostat RJ45 Connector Not Used Connector Connector Aux Button + Select Button Mode Button - Select Button Display J204 J302 J301 J201 J303 J203 J202 – 26 –... -
Page 27: Thermistors
Thermistors Thermistors provide temperature feedback to the main board to maintain proper room temperature and operating conditions of the sealed system. Thermistors also provide outdoor air temperature and outdoor coil temperature in order for the main board to operate the Zoneline by the most efficient means. -
Page 28: Indoor Air Thermistor
Indoor Air Thermistor Removal Indoor Air Thermistor 1. Remove junction box cover and main control The indoor air thermistor is located on the top board cover. of the indoor coil. This thermistor measures the indoor air temperature. Indoor Air Thermistor Diagnosing If an indoor air thermistor were to fail, the resistance heater and fan will continue to operate, but the compressor will not come on for cooling... -
Page 29: Indoor Coil Thermistor
Indoor Coil Thermistor Removal Indoor Coil Thermistor 1. Remove junction box cover, main control The indoor coil thermistor is located on the left board cover, top cover panel and left side side of the indoor coil. This thermistor measures panel. the indoor coil temperature. -
Page 30: Indoor Outletthermistor
Indoor Outlet Thermistor Removal: Indoor Outlet Thermistor 1. Remove junction box cover and main control The indoor outlet thermistor is located inside the board cover. outlet duct. This thermistor measures the air leaving the outlet duct. Indoor Outlet Thermistor Diagnosing Indoor Outlet If an indoor outlet thermistor were to fail, the Thermistor... -
Page 31: Outdoor Thermistors Locator
Outdoor Thermistors Locator All Zoneline models have two outdoor thermistors: the outdoor coil thermistor and the outdoor air thermistor. Outdoor Air Thermistor Outdoor Coil Thermistor – 31 –... -
Page 32: Outdoor Air Thermistor
Outdoor Air Thermistor Removal Outdoor Air Thermistor 1. Remove junction box cover and main control The outdoor air thermistor is located on the top board cover. left side of the outdoor coil. This thermistor measures the outside ambient temperature. Outdoor Air Thermistor Diagnosing Outdoor Air If an outdoor air thermistor were to fail, the Thermistor... -
Page 33: Outdoor Coil Thermistor
Outdoor Air Thermistor Removal Outdoor Coil Thermistor 1. Remove junction box cover and main control The outdoor coil thermistor is located on the board cover. top left side of the outdoor coil. This thermistor measures the outdoor coil temperature. Outdoor Air Thermistor Diagnosing If an outdoor coil thermistor were to fail, the resistance heater and fan will continue to operate, but the compressor will not come on for cooling or... -
Page 34: Air Flow
Air Flow Verify No Motor Binding Indoor Fan Motor Disconnect power and check for binding or a The indoor fan motor is a DC motor driven by the foreign object restricting the blade movement if main board and provides feedback to the main the indoor fan is not running. - Page 35 2. Remove top cover panel and left and right- 4. Remove two 5/16-in. screws from the indoor side panels. coil top cover. Top Cover Panel Indoor Coil Top Cover 5/16" Screw 5/16" Screw Connector Plate Left Side Right Side 5. Remove four 5/16-in. screws from the bottom Panel Panel of the indoor fan shroud.
- Page 36 6. Remove all harnesses from the left side going 8. Set indoor fan assembly to the right of the through the harness guides towards the back. Zoneline. Notice the compressor is still Disconnect both thermistor connectors, both connected. fan motor connectors and reversing valve connector form the main board.
-
Page 37: Outdoor Fan Motor
10. Remove four 5/16-in. screws from the rear of Verify Fan Operation the indoor fan motor and slide the motor from Enter Service Mode by pressing and holding the rear housing. + and - buttons. On entry, the display lights all LED's. - Page 38 Outdoor Fan Removal 3. Remove outdoor shroud cover by removing two 1/4-in. screws. 1. Remove main control board cover and junction box cover. All screws are 5/16-in. screws. 1/4" Screw 1/4" Screw Junction Box Main Control Cover Board Cover 4. Lift outdoor fan shroud cover up slightly and pull towards the outdoor coil.
- Page 39 7. Remove the fan assembly from the outdoor coil by pulling up on the assembly. 1/4" Screw 8. Remove outdoor fan blade from motor by removing one 13-mm nut. 6. Near the compressor, pull the outdoor coil and fan assembly slightly out. This will allow the fan assembly to slide up without hitting the outlet duct.
-
Page 40: Condensate Removal
Condensate Removal Drain Pan Plug Removal Slinger Ring on Outdoor Fan Blade 1. Remove main control board cover and The water that is collected through the normal junction box cover. All screws are 5/16-in. process of air conditioning is collected in the rear screws. -
Page 41: Electric Heat
Electric Heat Electric Heater Active Heater Coil Wattage (230V/265) Power Cord The electric heating element is located behind the [208V] Amp Size indoor coil and consists of a three-bank heater 2.45 kW [2.00 kW] Large Bank 15A, 20A, 30A assembly. It has two thermal switches located 1.55 kW [1.27 kW] Medium on top of the heater assembly;... - Page 42 • Self Resettable TCO trip temperature point is 170°F and the reset temperature is 140°F. • One Shot TCO trip temperature point is 270°F and will not reset once tripped. Electric Heater Removal 1. Remove main control board cover and junction box cover.
- Page 43 3. Remove four 1/4-in. screws from the heater assembly. 1/4" Screw 1/4" Screw 1/4" Screw 1/4" Screw 4. Remove three 3/8-in. nuts and a 1/4-in. ground screw from the heater assembly. 1/4" Screw 3/8" Nut 3/8" Nut 3/8" Nut 5. Slide the heater assembly out to the right from behind the indoor coil.
-
Page 44: Sealed System Components
Sealed System Components Zonelines have an indoor coil, outdoor coil, compressor, drier, refrigerant metering device (capillary tubes), check valve and reversing valve. NOTE: A new drier MUST be installed anytime a sealed system is repaired. Compressor Compressor Diagnosing Check for Fault Codes Check fault codes by pressing and holding MODE and then press AUX. - Page 45 Verify Continuity Through In-line Fuse 2. Remove top cover panel and right-side NOTE: Fuse is only located on 208/230 VAC panel. models. Fuse continuity can be checked from the main control board J303 to the compressor capacitor. • Pin 2 (red/white) to capacitor (red/white): Top Cover Panel Closed circuit.
-
Page 46: Compressor Capacitor
Service Compressor Verify Compressor Capacitor Microfarad Values Approximate compressor capacitor microfarad values can be checked from the capacitor. NOTE: The resistance values are depended on btu and supplied voltage. Compressor Capacitor Microfarad (µF) Voltage Microfarad 208/230V 25 µF 265V 15 µF 208/230V 35 µF 265V... -
Page 47: Reversing Valve
2. Remove one 1/4-in. screw from the capacitor 208/230 VAC holder. Gently slide the capacitor out of its • Pin 1 (pink) to pin 2 (pink): 1,500 Ohms + or clamp. - 15%. 265 VAC • Pin 1 (navy) to pin 2 (navy): 3,110 Ohms + or - 15%. -
Page 48: Filter Drier Capillary Tube Assembly
2. Remove top cover panel and left-side panel. Service Reversing Valve Assembly Top Cover Panel Left Side Panel 3. The reversing valve is located on the left-side of the Zoneline. Filter Drier Capillary Tube Assembly Filter Drier Capillary Tube Assembly Removal 1. -
Page 49: Indoor Coil
2. Remove top cover panel and left-side panel. Service Filter Drier Capillary Tube Assembly Check Valve Top Cover Panel Drier Left Side Panel Indoor Coil Indoor Coil Removal 1. Remove indoor fan assembly. See Indoor 3. The filter drier capillary tube assembly is Fan Removal under Indoor Fan Motor in the located on the left-side of the Zoneline. -
Page 50: Outdoor Coil
Service Indoor Coil Service Outdoor Coil Outdoor Coil Outdoor Coil Removal 1. Remove outdoor fan assembly. See Outdoor Fan Removal under Outdoor Fan Motor in the Air Flow section of this service guide. Outdoor Coil – 50 –... -
Page 51: Charging And Recovery Process
Charging and Recovery Process – 51 –... -
Page 52: Tools
Digital Refrigerant Scale Tools A CPS® Compute-a-Charge CC220 digital scale WARNING: Gauge manifold sets, hoses, is used when charging R-410A. recovery cylinders and the recovery machine must be rated for the higher pressures R-410A Refrigerant Cylinder encountered with R-410A. An attempt to use For instant identification, all brands of R-410A are standard refrigerant service tools on R-410A shipped in a rose-colored tank. -
Page 53: Recovery Pump
Recovery Pump NOTE: The pressure gauge for the high side reads up to 800 psi. High Main Power Pressure "OFF" "OFF" Recovery/Purge Set To "RECOVER" "IN" Port "OUT" Port Closed Closed In-line Filter During the recovery process, the recovery machine may be exposed to debris that can damage it. This includes brazing spatter and copper or brass slithers. -
Page 54: Sub Cooling The Recovery Tank
4. Throttle the output valve so that the output Sub Cooling the Recovery Tank pressure is 100 psi greater than the input pressure, but not more than 300 psi. When working in extreme ambient temperatures, the recovery tank can be sub cooled before the recovery procedures are performed. - Page 55 2. Attach one end of the blue recovery hose to 6. Set the black Recover/Purge valve of the the tap valve and the other end to the in-line recovery pump to RECOVER. filter attached to the recovery pump. 7. With all hoses connected and tight, open the liquid port of the recovery tank slowly to check hoses and connections for leaks.
-
Page 56: Self-Purge/Auto Evacuate
12. Slowly open the input port of the recovery 3. Set the Recover/Purge valve to PURGE. pump. Once the liquid has been recovered, 4. Restart the recovery pump until a 15-inch fully open the input valve. vacuum is achieved. 13. Run the recovery pump until a 15-inch vacuum is achieved. -
Page 57: Installation Of Charge Valve
Charge Valve 14. Turn the Recover/Purge valve to the Purge position. There are two basic types of Schrader charge valves available to the service technician. The 15. Restart the recovery pump. first type (Part No.: WJ56X10008) is swaged to fit 16. -
Page 58: Digital Refrigerant Scale
Digital Refrigerant Scale 1. Battery Level Indicator 2. Pounds of Refrigerant Scale Platform 3. Ounces of Refrigerant (in .25 oz. increments) 4. Power Button 5. LB/KG (select LB for pounds and ounces) 6. TARE (button allows to zero the scale) The CPS CC220 Scale The CPS CC220 scale is used to add the required amount of 410A refrigerant. -
Page 59: Manifold Gauges
Digital Scale Operating Instructions Low Side Pressure Gauge NOTE: All objects should be removed from the The inner dial of the low side pressure gauge scale platform. reads the temperature in °F from 80 to -40. After recovery is complete: The outer dial reads pressure in psi from 0 to 500. - Page 60 The high side pressure gauge must be capable of 5. Connect the red hose from the manifold reading pressures up to 800 psi. gauge to the filter on the inlet port of the recovery pump. NOTE: Using the recovery pump, achieve a 15- Inch vacuum prior to charging the system.
- Page 61 NOTE: Make sure to press the TARE key on the digital scale controller to set the scale to zero. 10. Open the low-pressure valve on the manifold to allow the refrigerant to enter the sealed system. High Side 8. Open the high-pressure valve on the manifold and start the recovery pump.
-
Page 62: Purging Non-Condensable Gasses From The Recovery Cylinder
13. Disconnect the yellow hose attached to the 4. If the pressure reading is higher than the sealed system. pressure listed for the ambient temperature, slowly open the manifold to release the non- condensable gas until the pressure reading is within 5 psi of the corresponding chart pressure. -
Page 63: Refrigerant Sub Cooling Recovery Tank Connections
Refrigerant Sub Cooling Recovery Tank Connections Recovery Pump With 800 psi Gauge for the High Side In-Line Filter DOT - 4BA400 or DOT - 4BW400 Recovery Cylinder – 63 –... -
Page 64: Refrigerant Recovery Connections
Refrigerant Recovery Connections Tap Valve Safety Switch Recovery Pump With 800 psi Gauge for the High Side Liquid Port Vapor Port In-Line Filter DOT - 4BA400 or DOT - 4BW400 Recovery Cylinder – 64 –... -
Page 65: Refrigerant Charging Connections
Refrigerant Charging Connections 410A Refrigerant Gauge Manifold Set with Hoses Digit Refrigerant Scale Recovery Pump With 800 psi Gauge for the High Side Safety Switch In-Line Filter DOT - 4BA400 or DOT - 4BW400 Recovery Cylinder – 65 –... -
Page 66: Fault Codes
Fault Codes Fault Code Effect on System Operation While Fault Is Fault Meaning Number Active Inside fan fault. No resistance heating, fan, heat pump or Fan motor not moving at command cooling available. speed after 90-seconds of drive. Fault clears after 10-minutes. Outside fan fault. - Page 67 Fault Code Effect on System Operation While Fault Is Fault Meaning Number Active Outlet temperature overheat. No resistance heating available. The outgoing air is too hot. Fault clears when air temperature drops below threshold. Outlet temperature overheat. No resistance heating available. The outgoing air is too hot.
-
Page 68: Service Mode
Service Mode 1. Enter Service Mode: Press and hold + and - for 2-seconds. All LED's will turn on in the display. 2. Toggle Function: Press mode to toggle through the entries. + turns the mode on and - turns the mode off. - Page 69 Entry Selection Cooling Heat pump (only on HP models) Resistance heat Indoor fan Outdoor fan Defrost (only on HP models) Indoor ambient temperature display Indoor coil temperature display Outdoor ambient temperature display Outdoor coil temperature display Outlet air temperature display LED test sequence Software version.
-
Page 70: Wiring Diagram
Wiring Diagram 30 AMP FUSE FOR 208/230V ONLY VOLTAGE SELECT JUMPER 208/230(PIN1-2) 265(PIN1-3) COIL COIL OUTLET – 70 –... -
Page 71: Index
Index Accessories 3, 10, 13 Junction Box 19, 34, 38, 42, 45, 46, 47, 48 airflow 17, 41, 66 Auxiliary 3, 15, 18, 20 Low Side 59 Capacitor 4, 44, 46 CDC 3, 18, 26 Main Control Board 3, 21, 22, 23, 25, 34, 38, 42, 45, Central Desk Control 3, 8, 18 46, 47, 48 Charge 4, 5, 52, 57, 62... - Page 72 Safety 2, 3, 6, 52, 55, 62, 64, 65 Scale 4, 52, 58, 59, 65 Service 1, 3, 5, 6, 23, 24, 28, 29, 30, 32, 33, 34, 37, 41, 44, 46, 47, 48, 49, 50, 68 Service Main Control 3, 23 Service Mode 5, 28, 29, 30, 32, 33, 34, 37, 41, 44, 46, 47, 68 Slinger 4, 40...
Need help?
Do you have a question about the GE AZ95H09DACK1 and is the answer not in the manual?
Questions and answers