Table of Contents
Advertisement
Quick Links
Advertisement
Table of Contents

Related Manuals for CDA SC020


Summary of Contents for CDA SC020
- Page 1 SC020 Built-in multifunction oven Use and maintenance...
-
Page 2: Table Of Contents
Contents Important information Appliance information First use of the oven Oven layout and accessories Control panel Oven functions Setting the time Adjusting the display brightness Using the grill ECO heating Practical tips Cleaning and maintenance Installation Mains electrical connection Technical assistance Specifications Product fiche Product information... -
Page 3: Important Information
The CDA Group Ltd. cannot be held responsible for injuries or losses caused by incorrect use or installation of this product. Please note that CDA reserves the right to invalidate the guarantee supplied with this product following incorrect installation or misuse of the appliance. -
Page 4: Appliance Information
Appliance information Please enter the details on the appliance rating plate below for reference, to assist CDA Customer Care in the event of a fault with your appliance and to register your appliance for guarantee purposes. Appliance Model Serial Number... -
Page 5: First Use Of The Oven
First use of the oven In order to remove oil residues accumulated during the manufacturing process and dust accumulated during storage and transport, we recommend a preliminary cleaning before first use. Preliminary heating Remove any packaging elements from the oven cavity 2. -
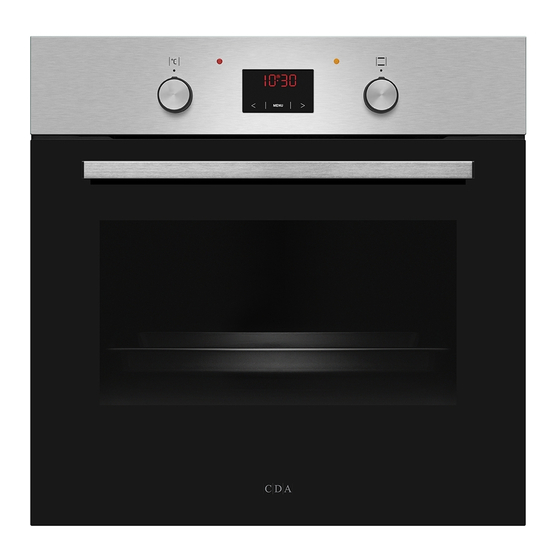
Page 6: Oven Layout And Accessories
Oven layout and accessories Electronic Programmer Oven Indicator Thermostat Lamp L Lamp R Function Selector Thermostat Control Control Side racks 6 | Instruction Manual... - Page 7 Included accessories: Baking tray Wire shelf Grill rack Wire shelf Instruction Manual | 7...
-
Page 8: Control Panel
Control panel Select the mode of operation MENU > Higher setting sensor < Lower setting sensor Appliance on indicator Kitchen timer Duration Operation Operation of the oven is controlled by the oven function knob – to set a required function you should turn the knob to the selected position, and the temperature regulator knob –... -
Page 9: Oven Functions
Oven functions Full grill In this setting both the Rapid preheating grill and top element are Use to preheat the oven. engaged. This increases the temperature in the top Defrost part of the oven chamber This function uses the fan making it suitable for to circulate air, at ambient browning and roasting... - Page 10 Fan oven Eco fan assisted heating This function uses the This is an optimised heating circular heating element with function designed to save a temperature between 50°C energy. When using this and 250°C. The fan then function the oven light is circulates the hot air which intentionally left off.
-
Page 11: Setting The Time
Setting the time When the appliance is plugged into the electrical mains supply, or when power is restored after a power cut, the digital display will flash 0.00. < > • Touch and hold (or simultaneously touch / ) until is shown MENU on the display and the dot below the symbol is flashing... - Page 12 Minute minder To set the appliance to switch off after a specific duration: • Set the function knob and the temperature control knob to your preferred settings. repeatedly until the display shows dur (duration) briefly and • Touch MENU symbol will be flashing. >...
-
Page 13: Adjusting The Display Brightness
Adjusting the display brightness You can adjust the display brightness 1 to 9, where 1 is the darkest and 9 is the brightest. The brightness setting applies to an inactive control panel, i.e. when no controls are touched for 7 seconds. You can adjust the display brightness as follows: <... -
Page 14: Using The Grill
Using the grill In order to switch on the grill you need to: • Set the Function Selector Control to a full or half grill position. • Preheat the oven for approx. 5 minutes (with the oven door closed). For grilling with the function grill and super grill the temperature must be set to 220ºC, but for the function fanned full grill it must be set to a maximum of 190ºC. -
Page 15: Eco Heating
ECO heating ECO heating is an optimised heating function designed to save energy when preparing food. You cannot reduce the cooking time by setting a higher temperature; preheating the oven is not recommended. Do not change the temperature setting and do not open the oven door during cooking. -
Page 16: Practical Tips
Practical tips The times given in the table below apply to any dish that is placed in to a cold oven. For a preheated oven the times should be reduced by 5 - 10 minutes. The figures given below are approximate and can be altered based on your own experience and cooking preferences. -
Page 17: Cleaning And Maintenance
Cleaning and maintenance Keeping your oven clean and well maintained helps to prolong its life. It is important that, before any cleaning or maintenance is performed, you switch off the oven at the mains supply. Do not start any cleaning or maintenance until the oven has been allowed to cool completely. - Page 18 Removing the inner panel 1. Using a flat screwdriver unhook the upper door slat, prying it gently on the sides (fig. B). 2. Pull the upper door slat loose. (fig. B, C) 18 | Instruction Manual...
- Page 19 3. Slide the inner glass out noting the position of any rubber spacers (fig. D). 4. Clean the panel with warm water with some cleaning agent added. Carry out the same in reverse order to reassemble the inner glass panel. Its smooth surface shall be pointed upwards. Important! Do not force the upper strip in on both sides of the door at the same time.
- Page 20 Replacing the halogen bulb in the oven Before replacing the halogen bulb, make sure the appliance is disconnected from the mains electricity to avoid the risk of electric shock. • Set all control knobs to the position “●”/“0” and disconnect the mains plug •...
-
Page 21: Installation
Installation The installation and technical assistance must only be performed by qualified staff. Carefully read the safety instructions in this manual before using the oven. Incorrect installation, maintenance, assistance and use can cause serious damage/injury to persons or objects. This product must be installed as instructed in this manual and in compliance with National Standards and local regulations in force. - Page 22 • Insert the oven completely into the opening without allowing the four screws in the places shown in the diagram to fall out • Ensure the oven is safely installed inside the cabinet • Use screws to fix the oven to the front face of the cabinet 5 6 0 6 0 0 5 6 0...
-
Page 23: Mains Electrical Connection
Mains electrical connection Warning! This appliance must be earthed. This appliance is intended to be connected to fixed wiring by a double pole switch, having a contact separation of at least 3mm in all poles and protected by a 13A fuse. The DOUBLE POLE SWITCHED FUSED switch must be positioned no further SPUR OUTLET... - Page 24 • This appliance is intended to be connected to the mains supply with a cable of cross sectional area 1.5 mm² • The current rating of the fuse or circuit breaker protecting this appliance should be marked on the socket outlet •...
-
Page 25: Technical Assistance
Technical assistance In the event of your appliance requiring technical assistance and/or spare parts, please contact CDA Customer Care. For more information about the warranty of your product, including terms and conditions, please visit www.cda.co.uk/warranty CDA Customer Care Phone: 01949 862 012 Email: customer.care@cda.co.uk... -
Page 26: Specifications
Specifications Model SC020 Oven Dimensions 595 x 595 x 575 mm (HxWxD) Rated voltage 230 V ~50 Hz Total power 2800 W grill 1900 W bottom heater 900 W grill + top heater 2700 W 1850 W Fan with ring... -
Page 27: Product Fiche
Commision Delegated Regulation (EU) NO 65/2014 supplementing Directive of the European Parliament and of the Council 2010/30/EU with regard to energy labelling of household ovens and range hoods. Supplier name Model identifier SC020 10227.3eEHiTsDX Energy efficiency index (EEI cavity) 95.1 Energy efficiency class... -
Page 28: Product Information
Product information given in accordance with Commission Regulation (EU) No 66/2014 supplementing Directive of the European Parliament and Council Directive 2009/125/EC with regard to eco-design requirements for household ovens, hobs and range hoods. Model identifier SC020 10227.3eEHiTsDX Oven type (electricity or gas) Electric Appliance weight [kg] 33.5... - Page 29 Product information given in accordance with Commission Regulation (EU) No 2019/2015: This product contains a light source of energy efficiency class G. Light source in this product can be replaced by the end-user. Notes Instruction Manual | 29...
- Page 30 The CDA Group Harby Road Langar Nottinghamshire NG13 9HY Sales Department Phone: 01949 862010 Email: sales@cda.co.uk Customer Care Department Phone: 01949 862012 Email: customer.care@cda.co.uk ©2023 CDA Group Ltd...
Need help?
Do you have a question about the SC020 and is the answer not in the manual?
Questions and answers