Table of Contents

Subscribe to Our Youtube Channel
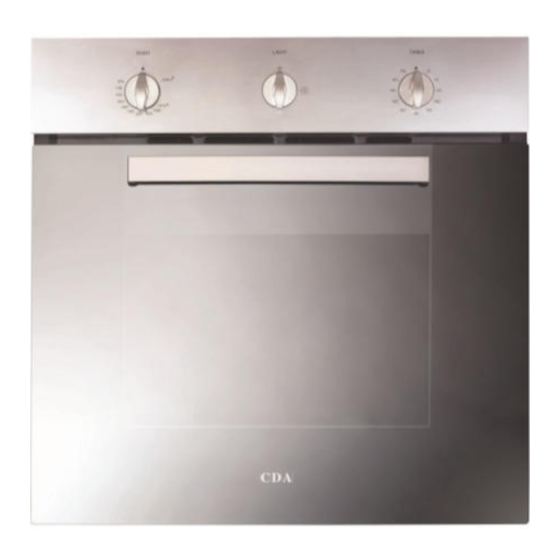
Related Manuals for CDA SC 310 Series


Summary of Contents for CDA SC 310 Series
- Page 1 Built-in Gas Ovens SC 310 .. Manual for Installation, Use and Maintenance Customer Care Department • The Group Ltd. • Harby Road • Langar • Nottinghamshire • NG13 9HY : 01949 862 012 : 01949 862 003 : service@cda.eu : www.cda.eu...
-
Page 2: Appliance Information
The CDA Group Ltd cannot be held responsible for injuries or losses caused by incorrect use or instal- lation of this product. Please note that CDA reserve the right to invalidate the guarantee supplied with this product following incorrect installation or misuse of the appliance. -
Page 3: Before Using For The First Time
Before Using for the First Time − Read the instructions carefully before installing and using the appliance. − After unpacking the appliance, make sure it is not damaged. In case of doubt, do not use the appliance and contact your supplier or a qualified engineer. −... - Page 4 Important Safeguards and Recommendations − Do not carry out any cleaning or maintenance without first disconnecting the appliance from the electrical supply. − During and after use of the oven, certain parts will become very hot. Do not touch hot parts. After use always ensure that the controls are in the OFF position ( −...
-
Page 5: Control Panel
Control Panel Fig. 1 Controls Description Gas oven/gas grill control knob 60’ timer control knob Oven light control knob Notes: − The electric ignition is incorporated in the thermostat control knob. − The appliance has a safety valve system fitted, the flow of gas will be stopped if and when the flame should accidentally go out. -
Page 6: Technical Features
Gas Oven Technical Features The oven is furnished completely clean. It is advisable however, upon first use, to turn the oven on to the maximum temperature to eliminate possible traces of grease from the oven burner. The same operation shall be done with the gas grill. This oven is fitted with: −... -
Page 7: How To Use The Oven
How to Use the Oven IMPORTANT NOTES: Do not use the appliance in case of power failure or if the cooling fan motor is damaged. − The appliance may overheat and get damaged due to the non-operation of the cooling fan motor. - Page 8 Lighting of Oven Burner IMPORTANT: The oven door must be open during this operation. To ignite the oven burner: Fully open the oven door. If this operation is not performed you should not proceed to light the oven. Press the thermostat knob throughly to start up the electric ignition and, keeping the knob under pressure turn it anti-clockwise (fig.
- Page 9 Lighting of Gas Grill Burner IMPORTANT: The oven door must be open during this operation. To light the burner, you need to: Fully open the oven door. If this operation is not performed you should not proceed to light the oven. Press the thermostat knob throughly to start up the electric ignition and, keeping the knob under (fig.
-
Page 10: Oven Light
Cooking With Gas Oven Before introducing the food, preheat the oven to the desired temperature. For a correct preheating operation, it is advisable to remove the tray from the oven and introduce it together with the food, when the oven has reached the desired temperature. Check the cooking time and turn off the oven 5 minutes before the theoretical time to recuperate the stored heat. -
Page 11: Cooking Guide
Cooking Guide Your gas oven is a newly designed oven which incorporates an indirect burner located under the oven base plate. If you have previously been used to cooking with gas you may need to slightly alter your cooking me- thods. -
Page 12: Temperature Recipe Guide
Temperature recipe guide APPROX. HEAT OF MARK TYPE OF DISH TO COOK TEMP. OVEN 125°C Very cool oven Meringue cakes, slow cooking items. 257°F 140°C Milk puddings, very rich fruit cakes, Cool oven 275°F i.e., Christmas. 150°C Stews, casseroles, braising, rich fruit Cool or slow oven 300°F cakes, i.e., Dundee. -
Page 13: Minute Counter
Minute Counter 60’ Timer The minute counter is a timed acoustic warning de- vice which can be set for a maximum of 60 minutes. The knob (Fig. 10) must be rotated clockwise as far as the 60 minute position and then set to the requi- red time by rotating it anticlockwise. -
Page 14: Care And Maintenance
Care and Maintenance IMPORTANT: Before ope- It is advisable to clean when the appliance is cold and especially for clea- ration of cleaning ning the enamelled parts. maintenance Avoid leaving alkaline or acidic substances (lemon juice, vinegar, etc.) on disconnect the ap- the surfaces. -
Page 15: Replacing The Oven Lamp
Replacing the Oven Lamp WARNING: Ensure the appliance is switched off be- fore replacing the lamp to avoid the possibility of electric shock. − Let the oven cavity and the heating elements to cool down. − Switch off the electrical supply. −... -
Page 16: Oven Door
Oven Door Removing the Oven Door Take care, the oven door is heavy. If you have any doubts, do not attempt to remove the door. The oven door can easily be removed as follows: − Open the door to the full extent (fig. 15). Open the lever A completely on the left and right hinges −... - Page 17 Refitting the Oven Door − Hold the door firmly (fig. 19). − Insert the hinge tongues into the slots, ma- king sure that the groove drops into place as shown in the fig. 20. − Open the door to its full extent. −...
- Page 18 Removing the Inner Pane of Glass The oven door is fitted with no. 2 panes: − no. 1 outside; − no. 1 inner. To clean all panes on both sides it is necessary to remove the inner pane as follows: Lock the door open: Fig.
- Page 19 After Cleaning, Replace the Inner Glass Pane When replacing the inner glass pane, make sure that: − You replace the pane correctly, as shown. The pane must be in the position described below in order to fit into the door and to ensure that the oven operates safely and correctly.
-
Page 20: Do's And Do Not's
Do’s and do not’s − Do always grill with the oven door ajar. − Do read the user instructions carefully before using the oven for first time. − Do allow the oven to heat for about two hours, before using for the first time, in order to expel any smell from the new oven insulation, without the introduction of food. -
Page 21: Advice For The Installer
Advice for the Installer Appliance installation and maintenance must only be carried out by QUALIFIED TECHNICIANS and in compliance with the local safety standards. − Failure to observe this rule will invalidate the warranty. − Always disconnect the appliance from the electrical supply before carrying out any maintenance operations or repairs. - Page 22 Important Ensure that air can flow freely around the housing area. Failure to allow adequate ven- tilation to the appliance may result in over heating or dama- ge to adjacent units. Lift the oven carefully into position on the shelf, taking care NOT to lift it by the door handle.
-
Page 23: Fixing The Oven
Fixing the Oven Introduce the oven into the furniture opening and fix it with 4 screws (not supplied) as figure 31. It is essential that the oven rests on a surface which will support its weight, as the screw fixing is only complementary. -
Page 24: Provision For Ventilation
Provision for Ventilation – The appliance should be installed into a room or space with an air supply in accordance with BS 5440-2: 2000. – For rooms with a volume of less than 5m - permanent ventilation of 100cm free area will be required. -
Page 25: Gas Installation
Gas Installation Important Note This appliance is supplied for use on NATURAL GAS or LPG (check the gas regulation label attached on the appliance). – Appliances supplied for use on NATURAL GAS: they are adjusted for this gas only and cannot be used on any other gas (LPG) without modification. -
Page 26: Gas Connection
Gas Connection The installation of the gas appliance to Natural Gas or LP Gas must be carried out by a suitably qualified and registered installer. Installers shall take due account of the provisions of the relevant British Stan- dards Code of Practice, the Gas Safety Regulations and the Building Standards (Scotland) (Consolida- tion) Regulations issued by the Scottish Development Department. - Page 27 Installing the Test Point Adaptor Appliance gas inlet pipe Nipple G 1/2 cylindrical (ISO 228-1) male Gasket G 1/2 cylindrical (ISO 228-1) female Conical adaptor R 1/2 conical (ISO 7-1) male Rc 1/2 conical (ISO 7-1) female Test point adaptor Test point Rc 1/2 conical Fig.
- Page 28 Maintenance and Conversion to Natural Gas or to LPG Table for the Choice of the Injectors Cat: II 2H3+ Natural Gas G30 (28-30 mbar) G20 (20 mbar) Nominal Reduced G31 (37 mbar) BURNERS power power Ring Ring [kW] [kW] Ø injector Ø...
- Page 29 Operations to Be Executed for the Replacement of the Injectors of the Oven and Grill Burners Some models are provided with a set of injectors for the various types of gas. If the injectors are not supplied they can be obtained from the “Service Centre”. Select the injectors to be replaced according to the “Table for the choice of the injectors”.
-
Page 30: Grill Burner
Grill Burner − Unscrew and remove the burner securing screw “A” (fig. 40). − Withdraw the burner as shown in figure 41. Take care not to damage the safety valve probe and the electric ignition electrode. − Using a 7 mm box spanner, unscrew the injector (indicated by the arrow in fig. 41) and replace it with a new one selected in accordance with the “Table for the choice of the injectors”. - Page 31 Regulation of Air Supply to Oven and Grill Burners To regulate the air supply it is necessary to remove the burners from their housings (figs. 39 - 41). − Using a cross-head screwdriver, slacken the screws “A” securing the air flow regulation collar “B” (fig.
- Page 32 Flame Flame Flame correct Flame faulty in with excess correct primary air primary air short and flong, yellow clear sharp too blue Flame faulty in interior blue interior cone primary air trembling cone tending to detach CAUSE Flame with excess air regulating correct air regulating...
-
Page 33: Mains Electricity Connection
Mains Electricity Connection Incorrect installation may be dangerous and the manufacturer can not be held responsible. Warning! This appliance must be earthed. The manufacturer declines all responsibility for any problem caused by failure to observe this rule. THIS APPLIANCE MUST BE CONNECTED TO THE MAINS SUPPLY BY A COMPETENT PERSON, USING FIXED WIRING VIA A DOUBLE POLE SWITCHED FUSE SPUR OUTLET AND PROTECTED BY A 3A FUSE. -
Page 34: Appliance Servicing
Appliance Servicing CDA provide a quality and effective after-sales service to cover all your servicing needs. Please attach your receipt to this page for safekeeping. Please help us to help you by having the following information available when booking a service-call: Model type, make and model –... - Page 36 To contact our Customer Care Department, or for Service, please contact us on the details below. Customer Care Department • The Group Ltd. • Harby Road • Langar • Nottinghamshire • NG13 9HY : 01949 862 012 : 01949 862 003 : service@cda.eu : www.cda.eu...
Need help?
Do you have a question about the SC 310 Series and is the answer not in the manual?
Questions and answers