Teltonika FMB001 Getting Started
Started with aws iot core
Hide thumbs
Also See for FMB001:
- User manual (110 pages) ,
- Quick manual (18 pages) ,
- First start-up quick start manual (6 pages)
Table of Contents
Advertisement
Quick Links
https://wiki.teltonika-gps.com/view/FMB001_Getting_Started_with_AWS_IoT_Core
FMB001 Getting Started with AWS IoT Core
Main Page
>
OBD Trackers
Contents
1 Document Information
7 Other software required to develop and debug applications for the device
10.2 Merging certificates into a single file (FW Ver. 03.28.03.Rev.311)
FOTA WEB)
14 Troubleshooting
15 Debugging
Document Information
>
FMB001
>
FMB001 Manual
> FMB001 Getting Started with AWS IoT Core
Advertisement
Table of Contents

Subscribe to Our Youtube Channel
Related Manuals for Teltonika FMB001


Summary of Contents for Teltonika FMB001
-
Page 1: Table Of Contents
FMB001 Getting Started with AWS IoT Core Main Page > OBD Trackers > FMB001 > FMB001 Manual > FMB001 Getting Started with AWS IoT Core Contents 1 Document Information 1.1 Glossary 1.2 Revision History (Version, Date, Description of change) 2 Overview 3 Hardware Description 3.1 DataSheet 3.2 Standard Kit Contents... -
Page 2: Glossary
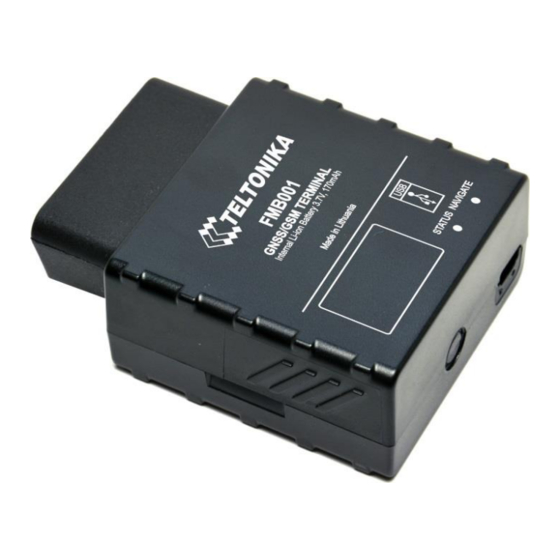
This device is perfectly suitable for applications where location acquirement of remote objects is needed: fleet management, car rental companies, taxi companies, public transport, logistics companies, personal cars and so on. FMB001 can perform tasks on remote objects, such as monitoring engine status, controlling truck’s door etc. -
Page 3: User Provided Items
MicroUSB to USB A cable. Set up your Development Environment Tools Installation (IDEs, Toolchains, SDKs) FMB001 comes with our created firmware, therefore no additional development or scripting is required for this unit to support AWS IoT. Only by using Teltonika Configurator FM Configurator versions, connection point of AWS IoT server is required. -
Page 4: Setup Your Aws Account And Permissions
Setup your AWS account and Permissions Refer to the online AWS documentation at Set up your AWS Account. Follow the steps outlined in the sections below to create your account and a user and get started: Sign up for an AWS account Create a user and grant permissions Open the AWS IoT console Pay special attention to the Notes. - Page 5 Figure 1. Accessing AWS IoT core from AWS console NOTE: If you can't see "Services" in the top left, click on "My account" in the top right and "AWS Management Console" Select Manage, Security, Policies (Manage > Security > Policies) and press Create policy or Create buttons.
- Page 6 Figure 5. Creating single thing After creating a single thing, enter Thing’s name and in the Device Shadow tab select Unnamed shadow (classic). Then click Next. Figure 6. Thing's properties Then when selecting Device certificate, select Auto-generate a new certificate and click Next.
- Page 7 Figure 7. Certificate configuration Now, select the policy you have created before to attach it to the certificate and thing. After that click Create thing. Figure 8. Attaching policy to certificate Then window with Certificate files and key files download options should pop out. It‘s recommended to download all files, because later some of them will not be available for download.
-
Page 8: Finding Device Data Endpoint (Server Domain)
Figure 9. Certificate and key download Finding device data endpoint (server domain) To receive server domain (in AWS endpoint) click on the side bar on the left Settings (AWS IoT->Settings). Or click on the side bar on left side Things, select the created thing, after it click Interact->View Settings. -
Page 9: Configuring The Device
NOTE: for FW Ver. 03.28.03.Rev.311 it is possible to upload a single merged file instead of 3 separate files. First, double click certificate merger to execute the program. Figure 11. Certificate merger Then, a screen will pop out asking to select a certificate. Go to the folder with your certificate, private key and root certificate. -
Page 10: Using Fw Ver. 03.28.03.Rev.311 And Merged_Cert.pem File
Figure 17. Certificate, private key and root certificate Upload the mentioned files in the Security tab in the Teltonika Configurator. Figure 18. Uploading certificates and keys After uploading certificates, go to System tab and in Data protocol section select - Codec JSON. - Page 11 Figure 20. Selecting device A “Create task” window will pop up. Select task type “Transfer user TLS certificate”. Press “Upload new file” to upload your merged certificate. If you already have uploaded the merged certificate skip the next step. Figure 21. Creating task “Upload file”...
-
Page 12: Device Gprs Configuration For Aws Iot Custom Mqtt Settings
Figure 26. Choosing data protocol Device GPRS configuration for AWS IoT Custom MQTT settings In the GPRS tab, under Server Settings select: Domain – Endpoint from the AWS, Port: 8883 Protocol – MQTT TLS Encryption – TLS/DTLS In the MQTT Settings section select: MQTT Client Type –... - Page 13 Figure 29. MQTT test client Incoming data is received in JSON format, for e.g.: Figure 30. Received data format To send SMS/GPRS commands to the device subscribe to a topic name - *DeviceIMEI*/commands, and, in the same MQTT test client window select Publish to a topic. Enter topic name - *DeviceIMEI*/commands.
-
Page 14: Debugging
USB connection port, or by receiving internal logs via FotaWEB in task section. Troubleshooting The information can be submitted to Teltonika HelpDesk and Teltonika engineers will assist with troubleshooting. For a more detailed information regarding what information should be collected for debugging, please visit the dedicated page on Teltonika Wiki.
Need help?
Do you have a question about the FMB001 and is the answer not in the manual?
Questions and answers