Table of Contents
Advertisement
Quick Links
© 2009, Videolarm, Inc. All Rights Reserved
R M 7CN-9 & RM7CS-9
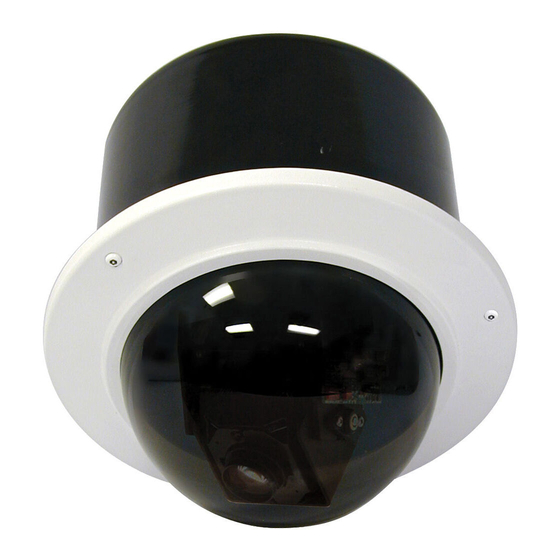
Vandal-Resistant Dome Housing
Installation and Operation Instructions for the following models:
RM7TN-9
IP Network Ready 7" Vandal-Resistant Outdoor Recessed
dome PTZ camera system with 23x zoom day/night camera, wall mount,
MPEG-4 & MJPEG video compression, Full D1. Tinted dome, with 24Vac
input, heater/blower
RM7TS-9
7" Vandal-Resistant Outdoor Recessed ceiling mount dome PTZ camera
system with 23x zoom day/night camera, wall mount, RS422 MOOG-
Videolarm, Pelco D&P protocols. Tinted dome, with 24Vac
input, heater/blower
IRM7C2N
IP Network Ready 7" Vandal-Resistant Indoor Recessed ceiling mount
dome PTZ camera system with 23x zoom day/night
MPEG-4 & MJPEG video compression, Full D1, Tinted dome
IRM7TS-9
7" Vandal-Resistant Indoor Recessed ceiling mount dome PTZ camera
system with 23x zoom day/night camera, wall mount, MOOG-
Videolarm, Pelco D&P protocols. Tinted dome
Before attempting to connect or operate this product, please read these
instructions completely
To be used with the 81-IN5409 Instruction Manual.
.
ceiling mount
www.videolarm.com
CERTIFIED
81-IN5401
01-29-2009
Advertisement
Table of Contents

Related Manuals for Moog Videolarm SView IRM7CN-3


Summary of Contents for Moog Videolarm SView IRM7CN-3
- Page 1 RM7TS-9 7” Vandal-Resistant Outdoor Recessed ceiling mount dome PTZ camera system with 23x zoom day/night camera, wall mount, RS422 MOOG- Videolarm, Pelco D&P protocols. Tinted dome, with 24Vac input, heater/blower IRM7C2N IP Network Ready 7” Vandal-Resistant Indoor Recessed ceiling mount dome PTZ camera system with 23x zoom day/night MPEG-4 &...
-
Page 2: Important Safeguards
IMPORTANT SAFEGUARDS Read these instructions. Keep these instructions. Heed all warnings Follow all instructions. Do not use this apparatus near water. Clean only with damp cloth. Do not block any of the ventilation openings. Install in accordance with the manufacturers instructions. Cable Runs- All cable runs must be within permissible distance. -
Page 3: Limited Warranty
1. NOTIFICATIONOF CLAIMS: WARRANTYSERVICE:If Purchaser believes that the Product is defective in material or workmanship, then written notice with an explanation of the claim shall be given promptly by Purchaser to Videolarm but all claims for warranty service must be made within the warranty period. -
Page 4: Electrical Specifications
Electrical Specifications RM7TN-9 Power 24VAC Class 2 Only RM7TS-9 24 VAC 3.3 Amps Total Power: 80 Watts Accessories: Heater: 50 Watts/Blower: 2 Watts Camera Power: English Tools Required: .100” Flat Head Screwdriver Phillips Head Screwdriver Note: IRM7CN includes no accessories 24 VAC 3.3 amperios Energía Total: 80 vatios... - Page 5 10.375” Using the provided template, mark the ceiling tile for the cutout. • Con la plantilla proporcionada, cortar el azulejo del techo para el agujero. • En utilisant le calibre fourni, marquez la tuile de plafond pour le coupe-circuit. • Mit der zur Verfügung gestellten Schablone kennzeichnen Sie die Decke Fliese für den Ausschnitt.
- Page 6 Add the safety wire to the flex conduit or continue to the next step. • Agregue el alambre de seguridad al conducto de la flexión o continúe al paso siguiente. • Ajoutez le fil de sûreté au conduit de câble ou continuez à...
-
Page 7: Captive Screw
Camera = red & orange wires to terminal Heater/Blower = yellow & green wires to terminal • Cámara fotográfica = alambres rojos y anaranjados al terminal Heater/Blower = alambres del amarillo y del verde al terminal • Appareil-photo = fils rouges et oranges à la borne Heater/Blower = fils de jaune et de vert à... - Page 8 The beam angle may be adjusted on the Hook the lanyard from the dome to the housing as shown. bottom of the unit. • Enganche el acollador de la bóveda a la cubierta según lo demostrado. • Accrochez la lanière du dôme au logement comme montré.
-
Page 10: Product Registration/Warranty
Product Registration/Warranty Thank you for choosing Videolarm. We value your patronage and are solely committed to providing you with only the highest quality products available with unmatched customer service levels that are second-to-none in the security industry. Should a problem arise, rest assure that Videolarm stands behind its products...
Need help?
Do you have a question about the SView IRM7CN-3 and is the answer not in the manual?
Questions and answers