Table of Contents
Advertisement
Quick Links
Advertisement
Table of Contents

Summary of Contents for LINOVISION IOT-S500DCS
- Page 1 Magnet Contact Switch Featuring LoRaWAN ® IOT-S500DCS User Guid...
- Page 2 Revision History Date Doc Version Description Apr. 13, 2021 V 1.0 Initial version June 30, 2021 V 1.1 Delete power button features 1. Add D2D controller feature; 2. Delete low power alarm interval, device Dec.9, 2021 V 1.2 only uplinks once when battery level is lower than 10%.
-
Page 3: Table Of Contents
Contents 1. Product Introduction ......................... 5 1.1 Overview ...........................5 1.2 Features ........................... 5 2. Hardware Introduction ........................5 2.1 Packing List ..........................5 2.2 Hardware Overview ......................... 6 2.3 LED Patterns ..........................6 2.4 Dimensions (mm) ........................6 3. Operation Guide ..........................7 3.1 NFC Configuration ........................ -
Page 4: Product Introduction
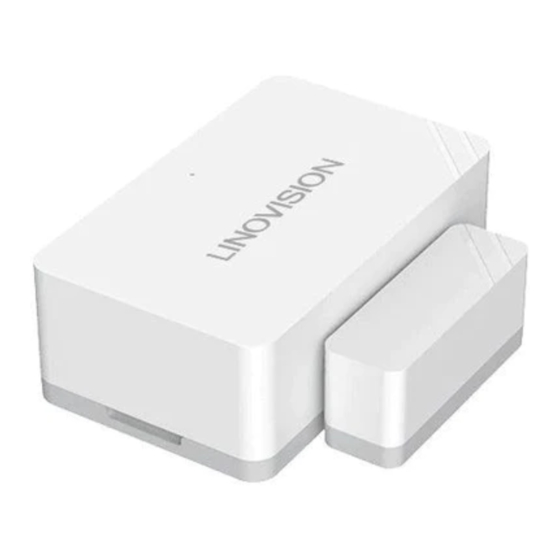
1. Product Introduction 1.1 Overview IOT-S500DCS simply enables you to know when someone enters the office/building through a door / window or something has been moved. The minimal magnet is placed inside the portable part, while the sensor is inside the fixed part that can be attached to door/window or other objects. IOT- S500DCS can be easily mounted on the doors, panes, or cabinets, greatly providing real applications for smart homes, smart offices or smart factories. -
Page 5: Hardware Overview
2.2 Hardware Overview Sensor: Magnet: 2.3 LED Patterns Function Action LED Indicator Switch On/Off (network unregistered) Red, blink once Door/Window Status Switch On/Off (network registered) Green, blink once Send join network requests Red, blink once Network Status Joined the network successfully Green, blink twice The device is un-installed (tamper is detected) Red, blink once... -
Page 6: Operation Guide
2) If the smartphone fails to read/write configurations via NFC, keep the phone away and back to try again. 3) IOT-S500DCS can also be configured by ToolBox software via a dedicated NFC reader provided by IoT, you can also configure it via TTL interface inside the device. -
Page 7: Lorawan Settings
3.2 LoRaWAN Settings Go to Device > Setting > LoRaWAN Settings of ToolBox App to configure join type, App EUI, App Key and other information. You can also keep all settings by default. Parameters Description Device EUI Unique ID of the device which can also be found on the label. App EUI Default App EUI is 24E124C0002A0001. - Page 8 Application Appskey for ABP mode, default is 5572404C696E6B4C6F52613230313823. Session Key RX2 Data Rate RX2 data rate to receive downlinks or send D2D commands. RX2 Frequency RX2 frequency to receive downlinks or send D2D commands. Unit: Hz Select Standard-Channel mode or Single-Channel mode. When Single-Channel Channel Mode mode is enabled, only one channel can be selected to send uplinks.
-
Page 9: General Settings
Spread Factor If ADR is disabled, the device will send data via this spread factor. If the device does not receive ACK packet from network server, it will resend Confirmed Mode data 3 times at most. Reporting interval ≤ 30 mins: the device will send a specific number of LinkCheckReq MAC packets to the network server every 30 mins to validate connectivity;... -
Page 10: D2D Settings
tamper button is activated. Enable or disable the light indicating in chapter 2.3. LED Indicator Note: The indicator of reset button is not allowed to disable. Change Password Change the password for ToolBox App to write this device. 3.4 Milesight D2D Settings Milesight D2D protocol is developed by Milesight and used for setting up transmission among Milesight devices without gateway. -
Page 11: Maintenance
3.5 Maintenance 3.5.1 Upgrade 1. Download firmware from Milesight website to your smartphone. 2. Open Toolbox App and click Browse to import firmware and upgrade the device. Note: 1) Operation on ToolBox is not supported during an upgrade. 2) Only Android version ToolBox supports the upgrade feature. 3.5.2 Backup WS301 supports configuration backup for easy and quick device configuration in bulk. -
Page 12: Reset To Factory Default
Note: Slide the template item left to edit or delete the template. Click the template to edit the configurations. 3.5.3 Reset to Factory Default Please select one of the following methods to reset device: Via Hardware: Hold on the reset button inside the device for more than 10s. After reset complete, the indicator will blink in green twice and device will reboot. -
Page 13: Installation
4. Installation 3M Tapes Fix: Tear the 3M tapes of both parts, then make sure the magnet part is placed inside the door (portable part) and sensor is inside the door frame (fixed part). For double doors, put every part on each door. -
Page 14: Basic Information
Value Channel Type Value 08(Device 6538b22321 0100 (Hardware version) (V1.0) Channel Type Value Channel Type Value 0102 (Software (V1.2) (Device Type) (Class A) version) 5.2 Sensor Data IOT-S500DCS reports open/close status and tamper status as follows: According to reporting interval;... -
Page 15: Downlink Commands
(Close) Channel Type Value (Tamper Status) (Un-installed) 5.3 Downlink Commands IOT-S500DCS supports downlink commands to configure the device. The application port is 85 by default Channel Type Description 03 (Set Reporting Interval) 2 Bytes, unit: s Example: Set reporting interval as 20 minutes.


Need help?
Do you have a question about the IOT-S500DCS and is the answer not in the manual?
Questions and answers