DoorBird A1101 Series Installation Manual
Ip video indoor station
Hide thumbs
Also See for A1101 Series:
- User manual (3 pages) ,
- Installation manual (37 pages) ,
- Installation manual (53 pages)
Table of Contents
Advertisement
Available languages
Available languages
Quick Links
Page 2-18
Installation Manual
IP Video Indoor Station
A1101 Series
Seite 19-35
Installationsanleitung
IP Video Innenstation
A1101 Serie
Page 36-52
Manuel d´installation
Moniteur intérieur IP
Série A1101
Páginas 52-69
Manual de instalación
Monitor Interior IP
Serie A1101
A1101
VERSION 2.1, MIN. HW 2.1
Advertisement
Table of Contents

Related Manuals for DoorBird A1101 Series


Summary of Contents for DoorBird A1101 Series
- Page 1 Page 2-18 Installation Manual IP Video Indoor Station A1101 Series Seite 19-35 Installationsanleitung IP Video Innenstation A1101 Serie Page 36-52 Manuel d´installation Moniteur intérieur IP Série A1101 Páginas 52-69 Manual de instalación Monitor Interior IP Serie A1101 A1101 VERSION 2.1, MIN. HW 2.1...
- Page 2 To make things easier we use the term “device” for a qualified electrician. Failure to observe this the product “DoorBird IP Video Indoor Station A1101” regulation could result in the risk of serious and “mobile device” for a smartphone or tablet.
- Page 3 sulfide (hot spring). WARNING ̵ Places subject to moisture and humidity extremes, such as bathrooms, cellars, proof: Keep the device away from water or any greenhouses, etc. other liquid. ̵ Places where the temperature is very low, such • Do not install or make any wire terminations as inside a refrigerated area or in front of an air while power supply is plugged in.
- Page 4 N OT I CE change the Password on a regular basis. • We will, under no circumstances, be liable • Avoid exposing the device to shocks or heavy for damage that occurs due to failures in pressure. power supply, network equipment or terminal •...
- Page 5 être co-localisés ou fonctionner en conjonction avec une autre antenne ou émetteur. Transportation When transporting the device, use the NOTI CE original packaging or equivalent to prevent damage to the device. Warranty Information For information about the device warranty, see www.doorbird.com/warranty...
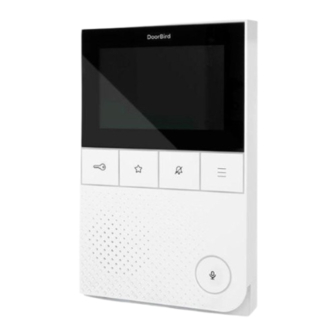
- Page 6 11) Microphone Back 12) Mounting points To mount the device on the mounting bracket 13) Screw connection terminal 14) Setup button (SET) of the device, to e.g. configure the WiFi interface of the device using the DoorBird App 15) Cable clamp...
-
Page 7: Installation Examples
High-speed Internet (via landline): DSL, cable or optical fibre Network: Ethernet, with DHCP Storey-call button Indoor Station DoorBird IP Video Door Station Electric door or gate opener. Can be secured required via DoorBird I/O Door Controller if (remote safety relay) - Page 8 SWITCHING OFF POWER One indoor station via WiFi Switch off the power to all wires leading to the assembly location, i.e. the door chime, electric door opener, power supply unit, PoE-Switch/ PoE-Injector etc. DISMANTLING THE EXISTING INDOOR STATION Should there already be an indoor station on the wall, please remove it.
-
Page 9: Network Connection Options
68 mm (2.68 in) stand (DoorBird A8003 Table Stand for IP hollow-wall box, which means Video Indoor Station A1101). you do not have to drill separate... -
Page 10: Prepare Power Supply
Ethernet) To power the device via a PoE-Switch (e.g. D-Link DGS-1008P) or PoE- Injector (e.g. DoorBird Gigabit PoE Injector A1091), use a CAT.5 cable or higher in accordance with the PoE standard IEEE 802.3af Mode A. If you must power more than one device... - Page 11 NOT IC E (mains adaptor) with the power supply via PoE. Theoretically (not recommended by us!), You can find further information about PoE here: www.doorbird.com/ an unshielded, but over the whole length (max. 80 m/262 ft) twisted bell wire with two pairs of wires (first twisted pair of wires: ”T+, T-“, second twisted pair of wires...
- Page 12 INFORMATION FOR PLANNERS OF NEW BUILDINGS If you know how many devices must be installed and you know the length of the cables, you can check the following chart to see which wire diameter is required. The following scenario is calculated and visualized in a chart under the worst-case scenario that all devices are connected to Wire diameter:...
-
Page 13: Assemble The Mounting Bracket
ASSEMBLE THE MOUNTING BRACKET Lead all cables and wires you want to connect to the device through the mounting bracket. Screw the mounting bracket to the wall. CONNECTING THE DEVICE It is possible to connect the cables and wires to the device conveniently and safely via the labelled screw connection terminal. - Page 14 You can configure the default state of the relay (open/ close) via the DoorBird App. These ports can be used to connect e.g. an electric door opener or to call an elevator. The device does not supply power to the connected device. The power supply for the electric door opener must be installed separately.
-
Page 15: Activate The Device
15 VDC - 15 to 48 V DC Power supply input, negative pole (-). Please connect the black wire of the power supply unit (mains adaptor) supplied with this device if you do not power the device using PoE. Do not power the device simultaneously via the power supply from the power NOT I CE supply unit (mains adaptor) and the power supply via PoE. -
Page 16: Downloading And Installing The App
> WiFi Setup” and follow the instructions. If you have finished the WiFi setup or have connected the device to your Internet Router by means of a network cable, go to the DoorBird App “ > Administration” and log in to the Administration area of the... -
Page 17: Troubleshooting
PoE-Switch / PoE Injector supports the PoE Standard IEEE 802.3af Mode In most cases, your Internet is down or your A, see also www.doorbird.com/poe router blocks Internet access for the device. Please see www.doorbird.com/downloads/ If the device is to be supplied with power by a ports.pdf... -
Page 18: Technical Specifications
• Digital input (0 V, 0 A (NO)) #2, Network: Ethernet Network, with e.g. for a second storey-call button DHCP • Bi-stable latching relay #1, Supported door Any DoorBird IP Video Door max. 24 VDC / VAC, 1 A, stations Station e.g. for electric door opener or elevator... -
Page 19: Legal Notes
Bird Home Automation cannot be held responsible for damages caused by improper existing installations or improper General remarks installation. 1. DoorBird is a registered trademark of Bird Home Automation GmbH. Software and operating system’s updates (so-called “firmware updates”) are generally automatically installed on the products 2. - Page 20 Verwendung des Die stets aktuelle Version der Installationsanleitung Geräts unterstützen. finden Sie unter www.doorbird.com/de/support Zur Vereinfachung der Begriffe verwenden wir „Gerät“ für das Produkt „DoorBird IP Video Innenstation Gefahrenhinweise A1101“ sowie „mobiles Endgerät“ für ein Smartphone/ Tablet. WARNUNG Haftung •...
- Page 21 und Kindern fern. Plastikfolien/-tüten, • Gerätemontage an Wand oder Decke: Styroporteile etc. sind kein Spielzeug und Vermeiden Sie Installationsorte, an denen das Gerät Erschütterungen oder Stößen ausgesetzt können gefährlich für Kinder sein. Entsorgen ist. Sie das Verpackungsmaterial sofort nach der Entnahme des Produkts.
- Page 22 Nichtbeachten der Gefahrenhinweise (12‘‘) entfernt von 100-240 V Wechselstromver- verursacht werden, übernehmen wir keine drahtung. Ansonsten können Wechselstrom- Haftung. In solchen Fällen erlischt jeder induzierte Geräusche und/oder Geräte- Gewährleistungsanspruch! Für Folgeschäden Störungen auftreten. übernehmen wir keine Haftung. • Installieren Sie das Gerät in einem Bereich, der •...
- Page 23 Bei den örtlichen Behörden erhalten Sie genauere Informationen zu Ihrer nächsten zuständigen Gewährleistung Sammelstelle. Abhängig von der nationalen Informationen zur Gewährleistung des Geräts finden Gesetzgebung können für die unvorschriftsmäßige Sie unter www.doorbird.com/de/warranty Entsorgung solcher Abfälle Strafen verhängt werden. KOMPONENTEN 1x Gerät 1x Installationsanleitung 1x Quickstartanleitung...
-
Page 24: Installation
13) Schraubanschlussklemmen 14) Setup Taste (SET) Setup Taste (SET) des Geräts, um z.B. die WLAN Schnittstelle des Geräts mit Hilfe der DoorBird App zu konfigurieren 15) Kabelklemme VIDEOS Netzwerkgeschwindigkeit und Netzwerkkomponenten Stellen Sie sicher, dass Ihre Internetverbindung über Sie können die Installation durch unsere mindestens 0,5 Mbit/s Uploadgeschwindigkeit verfügt. - Page 25 Drei Innenstationen per Netzwerkkabel Drei Innenstationen per WLAN Etagenruftaste Innenstation DoorBird IP Video Türstation Elektrischer Tür- oder Toröffner. Kann über DoorBird I/O Door Power over Ethernet Controller gesichert werden (abgesetztes Sicherheitsrelais) (PoE) Switch Router mit High-speed Separate Stromver sorgung, Separate Stromver sorgung,...
- Page 26 Alternativ zur Montage an einer Wand können Sie das Gerät auch auf einem 68 mm Hohlwanddose verwendet Tischständer montieren (DoorBird A8003 werden, sodass Sie keine separaten Tischständer für IP Video Innenstation Löcher in die Wand bohren müssen: A1101).
- Page 27 Sie können das Gerät entweder über ein Netzwerkkabel oder über eine WLAN 2,4 GHz-Verbindung mit dem Netzwerk verbinden. Wenn Sie nur zwei Drähte am Montageort zur Verfügung haben, können Sie den „DoorBird 2-Draht OPTION 1 Ethernet PoE Konverter A1071“ Netzwerkkabel (empfohlen, wartungsfrei) verwenden, der separat erhältlich ist.
- Page 28 Netzteil versorgen müssen, Zur Stromversorgung des Geräts per PoE-Switch (z.B. D-Link DGS-1008P) empfehlen wir Ihnen, einen PoE- oder PoE-Injektor (z.B. DoorBird Gigabit PoE Injektor A1091) verwenden Switch mit PoE-Standard IEEE 802.3af Sie ein Cat.5 Netzwerkkabel oder besser gemäß PoE Standard IEEE Mode A oder ein entsprechendes 802.3af Mode A.
- Page 29 OPTION 3 Stromversorgung per Hutschienennetzteil Alternativ zum Steckernetzteil bieten wir in unserem Shop Hutschienen- netzteile an, welche durch einen Fachmann installiert werden können. Die Netzwerkanbindung erfolgt per Netzwerkkabel oder WLAN. Wenn Sie mehr als ein Gerät mit einem einzigen Netzteil versorgen müssen, Planungsinformationen zur Stromversorgung mehrerer Geräte mit empfehlen wir Ihnen, einen PoE- Switch mit PoE-Standard IEEE 802.3af...
- Page 30 INFORMATIONEN FÜR PLANER VON BESTANDSGEBÄUDEN Die Länge der Kabel in bestehenden Gebäuden ist oft unbekannt und kann nur grob geschätzt werden. Der Durchmesser der Drähte und der Das folgende grafisch dargestellte Schleifenwiderstand (Ohm) sind bekannt oder zumindest leicht messbar. Szenario wurde unter der Worst-Case Dadurch ist es möglich, die maximale Anzahl der Geräte zu bestimmen, Annahme berechnet, dass alle Geräte die an ein einzelnes Adernpaar angeschlossen werden können.
-
Page 31: Gerät Anschliessen
GERÄT ANSCHLIESSEN Das Gerät verfügt für ein komfortables und sicheres Anschließen der Kabel und Drähte über beschriftete Schraubanschlussklemmen. Sie können alle erforderlichen Kabel und Adern jetzt anschließen. Zur einfacheren Installation empfehlen Entfernen Sie bitte die Kabel und Drähte von NOTI CE wir dringend, die Schraubanschluss- den Schraubanschlussklemmensteckern des klemmenstecker von der... - Page 32 Bi-stabiles selbsthaltendes Schaltrelais #1, max. 24 VDC / VAC, 1 A. Sicherheitsfeature: Das Relais behält den Zustand auch bei Spannungsverlust. Sie können den Standardzustand des Relais (geöffnet/ geschlossen) über die DoorBird App konfigurieren. Diese Anschlüsse können verwendet werden, um z.B. einen elektrischen Türöffner oder Aufzugruf anzuschließen.
- Page 33 Dies kann bis zu 5 Minuten dauern. DOWNLOAD UND INSTALLATION DER APP Laden Sie sich die App „DoorBird“ von Bird Home Automation aus dem Apple App Store bzw. Google Play Store auf Ihr mobiles Endgerät herunter. Die stets aktuelle Version der App Bedienungsanleitung finden Setzen Sie das Gerät auf den Montagehalterung auf.
-
Page 34: Fehlerbehebung
Diagnoseton). FEHLERBEHEBUNG In den meisten Fällen ist Ihr WLAN-Signal zu schwach. Bitte führen Sie das WLAN-Setup mit der DoorBird App erneut durch. Das Gerät startet nicht Sie können das WLAN-Signal verstärken, indem Wenn das Gerät per Steckernetzteil mit Sie sogenannte „WLAN-Repeater“ verwenden, Strom versorgt werden soll, stecken die Ihr WLAN-Signal verstärken können. -
Page 35: Technische Daten
Netzwerk: Ethernet Netzwerk, mit • Bi-stabiles selbsthaltendes DHCP Schaltrelais #1, max. 24 VDC / VAC, Unterstützte 1 A, z.B. für elektrischen Jede DoorBird IP Video Türstation Türstationen Türöffner oder Fahrstuhl Anschlüsse DISPLAY • Bi-stabiles selbsthaltendes Schaltrelais #2, max. 24 VDC / VAC, Abmessung 4“... -
Page 36: Rechtliche Hinweise
Weisen Sie bei Erfordernis an geeigneter Stelle und in geeigneter Form auf das Vorhandensein des Geräts hin. Allgemeines 1. DoorBird ist ein registriertes Warenzeichen der Bird Home Automation GmbH. Beachten Sie alle am Installationsort geltenden relevanten landespezifischen gesetzlichen Regelungen für den Einsatz von 2. -
Page 37: Manuel D'installation
également ce manuel. Indications de danger Vous trouverez la toute dernière version du manuel d’installation à l’adresse www.doorbird.com/fr/ Indications de danger support • L’installation, le montage et les travaux d’entretien des appareils électriques doivent Pour simplifier les termes, nous utiliserons le mot être exclusivement réalisés par un spécialiste... - Page 38 le produit. Ne réutilisez pas les matériaux • Pour les appareils munis d’une borne de terre, il d‘emballage. faut un raccordement effectif à la terre. Dans le cas contraire, il existe des risques d’incendie et de • Posez les câbles de telle façon qu’ils ne dysfonctionnement de l’appareil.
- Page 39 dommages matériels ou corporels suite à une • Installez l’appareil dans un endroit accessible en manipulation inappropriée ou au non-respect cas d’inspections, de réparations et d’entretiens des instructions de sécurité. Dans ce type à venir. de cas, il n’existe aucun recours en garantie ! •...
-
Page 40: Contenu De La Livraison
N OT IC E emballage d’origine ou dans un emballage adapté, afin d’éviter tout dommage. 1x bloc d'alimentation avec jusqu‘à quatre Garantie adaptateurs nationaux Vous trouverez les informations relatives à la garantie en consultant la page www.doorbird.com/fr/warranty 3x Connecteurs à vis Petits éléments... -
Page 41: Face Avant
Pour monter l'appareil sur le support de montage 13) Borne de raccordement à vis 14) Bouton de configuration (SET) de l'appareil, par ex. pour configurer l'interface WiFi de l'appareil à l'aide de l'application DoorBird 15) Serre-câble VIDÉOS Vitesse du réseau et composants du réseau Veuillez vous assurer que la vitesse de téléchargement... -
Page 42: Exemples D'installation
Trois moniteurs intérieurs par WiFi Bouton d'appel Moniteur Commutateur Power over Ethernet (PoE) d'étage intérieur Routeur avec Internet haute vitesse, DHCP Portier Vidéo IP DoorBird Alimentation Alimentation séparée séparée Ouvre-porte/portail électrique. 12 V DC, 1 A 15 V DC, 1 A Peut être sécurisé... - Page 43 Retirez à vous pouvez également monter l‘appareil nouveau le gabarit de perçage. Assurez-vous qu'aucun câble ne se trouve sur un socle de table (DoorBird A8003 dans le mur ou le plafond derrière les trous de perçage. pour moniteur intérieur IP 1101).
- Page 44 „ convertisseur 2 fils PoE Ethernet Vous pouvez connecter l'appareil au réseau en utilisant soit un câble DoorBird A1071“, vendu séparément. Il réseau, soit une connexion WiFi 2,4 GHz. vous permet de transférer les données réseau (Ethernet) et l‘alimentation...
- Page 45 Pour alimenter l'appareil via un commutateur PoE (par ex. D-Link DGS- nous vous recommandons d‘utiliser un 1008P) ou un injecteur PoE (par ex. Injecteur PoE Gigabit DoorBird A1091), commutateur PoE avec un standard PoE utilisez un câble CAT.5 ou supérieur, conformément à la norme PoE IEEE IEEE 802.3af Mode A ou une alimentation...
- Page 46 OPTION 3 ALIMENTATION ÉLECTRIQUE PAR UN BLOC D'ALIMENTATION SUR RAIL DIN En alternative à l'adaptateur secteur, nous proposons dans notre boutique Si vous devez alimenter plusieurs appareils avec une seule alimentation, en ligne des alimentations sur rail DIN qui peuvent être installées par nous vous recommandons d‘utiliser un un spécialiste agréé.
- Page 47 INFORMATION POUR LES ARCHITECTS DE BÂTIMENTS EXISTANTS La longueur des câbles dans les bâtiments existants est souvent inconnue Le scénario suivant est calculé et visualisé dans un graphique selon le pire des et ne peut être estimée qu'approximativement. Le diamètre des fils et la scénarios, à...
- Page 48 CONNECTEZ L’APPAREIL Les câbles et les fils peuvent être raccordés à l'appareil de manière confortable et sûre à l'aide de la borne de raccordement à vis étiquetée. Vous pouvez maintenant connecter tous les câbles et fils nécessaires à l'appareil. Nous vous recommandons fortement de Veuillez retirer tous les câbles et fils des ports retirer la fiche de la borne de raccordement de connexion de l'appareil dont vous n'avez...
- Page 49 état même en cas de coupure de courant. Vous pouvez configurer l’état par défaut du relais (ouvert/fermé) via l’application DoorBird. Ces ports peuvent être utilisés pour connecter par ex. un ouvre-porte électrique ou pour appeler un ascenseur. L’appareil n’alimente pas l’appareil connecté.
- Page 50 Si vous connectez l'appareil à votre routeur Internet via WiFi, allez d'abord dans l'application DoorBird " > Paramètres WiFi" et suivez les instructions. Si vous avez terminé la configuration WiFi ou si vous avez connecté...
-
Page 51: Guide De Dépannage
LEDs de contrôle, qui faible. Veuillez réexécuter la configuration WiFi s'allument aussitôt après la mise sous tension. à l'aide de l'application DoorBird. Vous pouvez augmenter le signal WiFi en SONS DE CONTRÔLE utilisant des "répéteurs WiFi", qui peuvent Lorsque l’appareil a été... -
Page 52: Caractéristiques Techniques
802.11 b/g/n 2.4 GHz (sans condensation) ACCESSOIRES SUPPLÉMENTAIRES 1 x Moniteur intérieur IP 1 x Support de montage Vendu Voir www.doorbird.com/fr/buy 1x Adaptateur RJ45 séparément 1 x Adaptateur secteur Contenu de la avec 4 adaptateurs pays Sous réserve d'erreurs et d'omissions. -
Page 53: Mentions Légales
MENTIONS LÉGALES Généralités Veuillez respecter les dispositions légales spécifiques à chaque 1. DoorBird est une marque déposée de Bird Home Automation pays conceernant l‘utilisation des composants et caméras de GmbH. surveillance applicables sur le site di‘installation. Veuillez vérifier auprès du propriétaire et de votre Syndic si vous êtes autorisé... - Page 54 Encontrará siempre la versión más actualizada del cualificado. El incumplimiento de esta puede manual de instalación en www.doorbird.com/support suponer un riesgo de daños graves para la Para hacer las cosas más fáciles usamos el término salud o de lesiones mortales debido a de „dispositivo“...
- Page 55 descarga eléctrica. ocasionar un incendio o problemas con el dispositivo. • En aparatos que no estén marcados como resistentes a la intemperie: mantenga el aparato • No instale el aparato en ninguna de las lejos del agua o de cualquier otro líquido. siguientes ubicaciones, podría ocasionar un incendio, una descarga eléctrica o problemas •...
- Page 56 Instrucciones de seguridad un mal funcionamiento del dispositivo. • En los aparatos con intercomunicador, debido al N OT ICE sonido ambiental alrededor del dispositivo, puede dificultar levemente la comunicación, pero esto • El aparato debe utilizarse de acuerdo con las no es un mal funcionamiento.
- Page 57 Transporte Cuando transporte el aparato, utilice el NOTICE embalaje original o un embalaje equivalente para evitar daños en el dispositivo. Información de garantía Para obtener información sobre la garantía del dispositivo, consulte www.doorbird.com/warranty...
- Page 58 12) Puntos de montaje Para montar el dispositivo en el soporte de montaje 13) Terminal de conexión de tornillo 14) Botón de configuración (SET) del dispositivo, por ej, para configurar la interfaz WiFi del dispositivo usando la aplicación DoorBird 15) Abrazadera de cable...
-
Page 59: Ejemplos De Instalación
¿Necesita ayuda con la instalación? Asegúrese de ver nuestros videos de instalación disponibles en http:// Por favor, asegúrese de que la velocidad de subida de www.doorbird.com/support su conexión a Internet es de al menos 0,5 Mbps. La calidad de la experiencia del usuario depende de la Cada paso de la instalación es claramente... - Page 60 12 V DC, 1 A Cable de red Abrepuertas/abreporton eléctrico Puede ser asegurado a través del « Controlador Cable de dos hilos de Puerta IP E/S DoorBird » si es necesario (relé de seguridad remoto) Conmutador PoE DESMANTELAMIENTO DEL MONITOR INTERIOR EXISTENTE DESCONECTAR LA ENERGÍA...
- Page 61 (Soporte de mesa A8003 DoorBird, para el Monitor Interior IP A1101). TACOS Si la pared de la casa no es de madera, perfore agujeros de 5 mm de diámetro en la pared de acuerdo con la plantilla de perforación y luego...
- Page 62 WiFi de 2,4 GHz. Si sólo dispone de dos cables en el lugar de montaje, puede utilizar el „Convertidor 2-cables PoE Ethernet DoorBird A1071“, OPCIÓN 1 que se vende por separado. Le permite Cable de red (recomendado, sin mantenimiento) transferir datos de red (Ethernet) y energía (PoE) con un simple cable de dos...
- Page 63 D-Link DGS-1008P) o un inyector PoE (por ej., Inyector PoE Gigabit alimentación, le recomendamos utilizar DoorBird A1091), utilice un cable CAT.5 o superior de acuerdo con la un conmutador PoE con el estándar PoE norma PoE IEEE 802.3af Modo A.
- Page 64 INFORMACIÓN PARA LOS INGENIEROS DE EDIFICIOS NUEVOS A menudo encontrará más de dos cables Si sabe cuántos dispositivos deben instalarse y conoce la longitud de los disponibles en el sitio para conectar un monitor interior. La corriente máxima cables, puede consultar el siguiente cuadro para ver qué diámetro de puede duplicarse para aumentar el cable se requiere.
- Page 65 ENSAMBLAR EL SOPORTE DE MONTAJE Pase todos los cables y alambres que quiera conectar al dispositivo a través del soporte de montaje. Atornille el soporte de montaje a la pared. CONECTAR EL DISPOSITIVO Es posible conectar los cables y alambres al dispositivo de forma cómoda y segura a través del módulo de terminales de tornillos etiquetado.
- Page 66 El relé mantiene su estado incluso en caso de un corte de energía. Puede configurar el estado por defecto del relé (abierto/cerrado) a través de la aplicación DoorBird. Estos puertos pueden utilizarse para conectar, por ej., un abrepuertas eléctrico o para llamar a un ascensor. El dispositivo no suministra energía al dispositivo conectado.
- Page 67 Entrada de la fuente de alimentación 15 a 48 V DC, polo negativo (-). Por favor, conecte 15 VDC - el cable negro de la fuente de alimentación (adaptador de corriente) suministrado con este dispositivo si no alimenta el dispositivo con PoE. No alimente el dispositivo simultáneamente a través de la fuente de NOT I CE alimentación (adaptador de corriente) y a través de PoE.
-
Page 68: Led De Diagnóstico
Si utiliza WiFi para conectar el dispositivo a su router de Internet, primero vaya a la aplicación DoorBird “ > Configuración de WiFi“ y siga las instrucciones. Si ha terminado la configuración de WiFi o ha conectado el dispositivo al router de Internet mediante un cable de red, vaya a la aplicación... - Page 69 PoE / inyector PoE es compatible (sonido de diagnóstico „No Internet“) con el estándar PoE IEEE 802.3af Modo A, véase también www.doorbird.com/poe En la mayoría de los casos, su Internet se ha caído o su router bloquea el acceso a Internet Si el dispositivo debe ser alimentado por para el dispositivo.
- Page 70 Red: Red Ethernet, con DHCP • Entrada digital #2 (0 V, 0 A (NO)), Videoporteros p.ej. para un segundo botón de Cualquier videoportero IP DoorBird soportados llamada de piso • Relé de enclavamiento biestable PANTALLA Conexiones n.º...
-
Page 71: Notas Legales
Observaciones generales 1. DoorBird es una marca registrada de Bird Home Automation Las actualizaciones del software o del sistema operativo (las GmbH. llamadas „actualizaciones de firmware“) normalmente se 2. -
Page 73: Eu Declaration Of Conformity (Doc)
EU DECLARATION OF CONFORMITY (DoC) EU KONFORMITÄTSERKLÄRUNG Manufacturer: Bird Home Automation GmbH Uhlandstraße 165 Hersteller: 10719 Berlin Germany Brand: DoorBird Marke: Product: IP Video Indoor Station Produkt: IP Video Innenstation Type number: A1101 Typnummer: Intended purpose: Indoor Station controlled via IP Verwendungszweck: Über IP angebundene Innenstation... - Page 74 À DÉPOSER À DÉPOSER EN MAGASIN EN DÉCHÈTERIE Cet appareil se recycle Part of ASSA ABLOY www.doorbird.com...
Need help?
Do you have a question about the A1101 Series and is the answer not in the manual?
Questions and answers