
Related Manuals for VWR 76533-876


Summary of Contents for VWR 76533-876
- Page 1 Instruction manual VWR Micro Star 21 and Micro Star 21R Centrifuge Series NA cat. no: Micro Star 21: 76533-876 Micro Star 21R: 76533-878 Version 01 Issue 03/2022...
- Page 2 Legal address of Manufacturer Avantor One Radnor Corporate Center Building One, Suite 200 100 Matsonford Road Radnor, PA 19087 1 610 386 1700 Country of Origin Germany...
-
Page 3: Table Of Contents
1� 3� Technical Data � � � � � � � � � � � � � � � � � � � � � � � � � � � � � � � � � � � 13 VWR Micro Star 21 � � � � � � � � � � � � � � � � � � � � � � � � � � � � � � � � � � 13 VWR Micro Star 21R �... - Page 4 3� Operation � � � � � � � � � � � � � � � � � � � � � � � � � � � � � � � � � � � � � � � 34 3�...
- Page 5 4� 2� Basics � � � � � � � � � � � � � � � � � � � � � � � � � � � � � � � � � � � � � � � � � � 52 4�...
-
Page 6: Preface
Observe the information contained in this instruction manual to keep yourself and your environment safe. General hazard Danger of cuts Hazard caused by hot Biological hazard surface. Refer to instruction manual Disconnect mains plug Batch code Manufacturer vwr.com I Instruction manual VWR Micro Star 21 6 / 87... -
Page 7: Symbols Used In The Instruction Manual
Do not modify the centrifuge and its accessories in any unauthorized way. Do not operate a centrifuge if its housing is open or incomplete. vwr.com I Instruction manual VWR Micro Star 21 7 / 87... - Page 8 Contact the customer service. Aerosols need time to settle before opening the centrifuge after a crash. Ventilated centrifuges bear a higher risk of being contaminated after a crash than refrigerated centrifuges. vwr.com I Instruction manual VWR Micro Star 21 8 / 87...
- Page 9 WA RN IN G Regularly check the lid springs for their proper function. Do not operate the centrifuge with a defective lid spring. Let an authorized service technician replace defective lid springs. vwr.com I Instruction manual VWR Micro Star 21 9 / 87...
- Page 10 Protection capability may be impaired due to using unapproved accessories. Use only accessories for this centrifuge which have been approved NOT ICE by VWR International. For a list of approved accessories refer to "List of Rotors" on page Exceptions to this rule are commercially available glass or plastic...
- Page 11 Make sure that the main switch and power supply plug can be accessed easily when setting up the centrifuge. The grounded electrical socket should be well accessible and located outside of the safety zone. vwr.com I Instruction manual VWR Micro Star 21 11 / 87...
-
Page 12: 1� Technical Specifications
10 x 5 mL rotor with ClickSeal biocontainment lid 76081-586 PCR 8 x 8 rotor with screw-on lid 76081-584 PCR 4 x 8 rotor with ClickSeal biocontainment lid Table 2: Rotors vwr.com I Instruction manual VWR Micro Star 21 12 / 87... -
Page 13: 1� 3� Technical Data
23.5 cm (9.2 in) Width 23.0 cm (9.0 in) Depth 36.5 cm (14.4 in) Weight (with rotor) 11 kg (24,2 lbs) Table 3: Technical Data VWR Micro Star 21 vwr.com I Instruction manual VWR Micro Star 21 13 / 87... -
Page 14: Vwr Micro Star 21R
28.5 cm (11.2 in) Width 33.0 cm (13.0 in) Depth 45.0 cm (17.7 in) Weight (with rotor) 28 kg (61.7 lbs) Table 4: Technical Data VWR Micro Star 21R vwr.com I Instruction manual VWR Micro Star 21 14 / 87... -
Page 15: 1� 3� 1� Directives And Standards
Connect the equipment into an outlet on a circuit different from that to which the receiver is connected. » Consult the dealer or an experienced radio/TV technician for help. vwr.com I Instruction manual VWR Micro Star 21 15 / 87... -
Page 16: 1� 4� Mains Supply
76533- VWR Micro R-134a 0.26 kg 21 bar 1 430 0.37 t Star 21R Contains fluorinated greenhouse gases in a hermetically sealed system. Table 7: Refrigerants vwr.com I Instruction manual VWR Micro Star 21 16 / 87... -
Page 17: 1� 6� Rotor Specifications
Acceleration / Braking Time 12 s / 13 s Min. Temperature at max. Speed, Ambient ≤ 0 °C Temperature of 23 °C Table 10: 24 x 1.5/2.0 mL Rotor Performance Data vwr.com I Instruction manual VWR Micro Star 21 17 / 87... - Page 18 20301-380 24 x 0.2 6 x 24 ClickSeal biocontainment lid 97000-056 - Replacement O-ring set for ClickSeal lid – 89423-845 - 521-1103 Table 11: Accessories 24 x 1.5/2.0 mL Rotor vwr.com I Instruction manual VWR Micro Star 21 18 / 87...
-
Page 19: 1� 6� 2� Dual Row 18 X 2�0/0�5 Ml Rotor
11 s / 13 s Min. Temperature at max. Speed, Ambient ≤ 4 °C Temperature of 23 °C Table 14: Dual Row 18 x 2.0/0.5 mL Rotor Performance Data vwr.com I Instruction manual VWR Micro Star 21 19 / 87... - Page 20 Technical Specifications Accessories Description VWR Cat� Rotor Max� Tube No� Capacity Dimensions Screw-on lid 76537-066 - Table 15: Accessories Dual Row 18 x 2.0/0.5 mL Rotor vwr.com I Instruction manual VWR Micro Star 21 20 / 87...
-
Page 21: 1� 6� 3� 36 X 0�5 Ml Rotor
Acceleration / Braking Time 9 s / 11 s Min. Temperature at max. Speed, Ambient ≤ 0 °C Temperature of 23 °C Table 18: 36 x 0.5 mL Rotor Performance Data vwr.com I Instruction manual VWR Micro Star 21 21 / 87... - Page 22 Technical Specifications Accessories Description VWR Cat� Rotor Max� Tube No� Capacity Dimensions Screw-on lid 76537-066 - Table 19: Accessories 36 x 0.5 mL Rotor vwr.com I Instruction manual VWR Micro Star 21 22 / 87...
-
Page 23: 1� 6� 4� 10 X 5 Ml Rotor
Acceleration / Braking Time 12 s / 13 s Min. Temperature at max. Speed, Ambient ≤ 0 °C Temperature of 23 °C Table 22: 10 x 5 mL Rotor Performance Data vwr.com I Instruction manual VWR Micro Star 21 23 / 87... - Page 24 Rotor Max� Tube No� Capacity Dimensions ClickSeal biocontainment lid 97000-056 - Replacement O-ring set for ClickSeal lid – 89423-845 - 521-1103 Table 23: Accessories 10 x 5 mL Rotor vwr.com I Instruction manual VWR Micro Star 21 24 / 87...
-
Page 25: 1� 6� 5� Pcr 8 X 8 Rotor
Acceleration / Braking Time 7 s / 9 s Min. Temperature at max. Speed, Ambient ≤ 0 °C Temperature of 23 °C Table 26: PCR 8 x 8 Rotor Performance Data vwr.com I Instruction manual VWR Micro Star 21 25 / 87... - Page 26 Technical Specifications Accessories Description VWR Cat� Rotor Max� Tube No� Capacity Dimensions Screw-on lid 76537-066 - Table 27: Accessories PCR 8 x 8 Rotor vwr.com I Instruction manual VWR Micro Star 21 26 / 87...
-
Page 27: 1� 6� 6� Pcr 4 X 8 Rotor
Acceleration / Braking Time 11 s / 13 s Min. Temperature at max. Speed, Ambient ≤ 0 °C Temperature of 23 °C Table 30: PCR 4 x 8 Rotor Performance Data vwr.com I Instruction manual VWR Micro Star 21 27 / 87... - Page 28 Rotor Max� Tube No� Capacity Dimensions ClickSeal biocontainment lid 97000-056 - Replacement O-ring set for ClickSeal lid – 89423-845 - 521-1103 Table 31: Accessories PCR 4 x 8 Rotor vwr.com I Instruction manual VWR Micro Star 21 28 / 87...
-
Page 29: 2� Transport And Set Up
Items Supplied Item Quantity Centrifuge Power Supply Cable Rotor Allen Wrench Manuals on USB If any items are missing, contact VWR International. vwr.com I Instruction manual VWR Micro Star 21 29 / 87... -
Page 30: 2� 2� Location
The main switch and power supply plug must be easily accessible at all times. The ƒ grounded electrical socket should be well accessible and located outside of the safety zone. vwr.com I Instruction manual VWR Micro Star 21 30 / 87... - Page 31 Transport and Set Up Figure 1: Safety Zone vwr.com I Instruction manual VWR Micro Star 21 31 / 87...
-
Page 32: 2� 3� Transporting
ƒ WARNING Always lift the centrifuge on both sides. Never lift the centrifuge by its front or back. Figure 2: Lifting the Centrifuge at Both Sides vwr.com I Instruction manual VWR Micro Star 21 32 / 87... -
Page 33: 2� 4� Mains Connection
Make sure that the power supply cable is plugged in properly. Connect the centrifuge into grounded electrical sockets only. NOT ICE Rated current is doubled during acceleration. Mind this load on the NOT ICE power supply line. vwr.com I Instruction manual VWR Micro Star 21 33 / 87... -
Page 34: 3� Operation
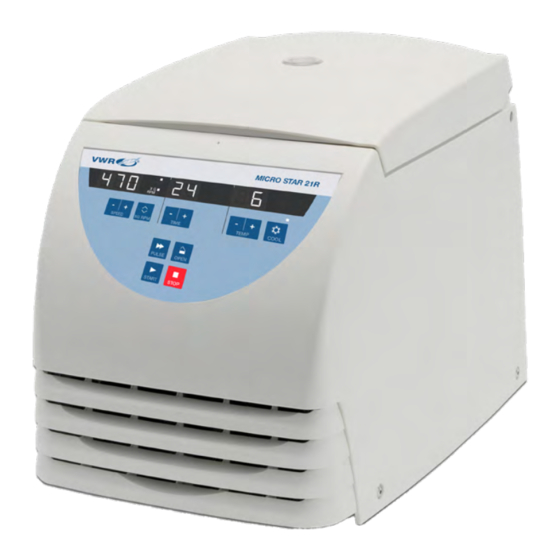
Use the up and down MINUS / PLUS buttons . to set the parameter in the field directly above. TOGGLE ➉ Use the TOGGLE button to change the display mode. Figure 4: Control Panel Overview vwr.com I Instruction manual VWR Micro Star 21 34 / 87... -
Page 35: 3� 2� Power On / Off
By default there is an acoustic signal at the end of any centrifugation run. To switch off this signal proceed as follows: Keep the TOGGLE button pressed when you turn on the centrifuge. The display shows: vwr.com I Instruction manual VWR Micro Star 21 35 / 87... -
Page 36: 3� 3� Open / Close The Centrifuge Lid
(refer to "Mechanical Emergency Lid Release" on page 58). vwr.com I Instruction manual VWR Micro Star 21 36 / 87... -
Page 37: 3� 4� How To Operate A Rotor
Make sure that the rotor is properly installed by lifting it slightly on the handle. If the rotor can be pulled up, then it must be re-clamped to the drive shaft. Make sure the rotor spins freely by turning it manually. vwr.com I Instruction manual VWR Micro Star 21 37 / 87... -
Page 38: 3� 4� 2� How To Remove A Rotor
Make sure not to tilt the rotor while doing this. CAUTION Be careful when you change a rotor after a run. The centrifuge spindle and motor may be hot (>55 °C) and burn your skin. vwr.com I Instruction manual VWR Micro Star 21 38 / 87... -
Page 39: 3� 4� 3� Rotor Lid
Turn the rotor handle clockwise to install the lid. Operating the Rotor without the Rotor Lid If you plan to operate the rotor without the lid you must remove the seals. vwr.com I Instruction manual VWR Micro Star 21 39 / 87... - Page 40 Tube Caps Always close the tube caps. Open caps can tear loose during operation and cause damage. = open cap; = closed cap ✕ ✓ Figure 6: Tube caps vwr.com I Instruction manual VWR Micro Star 21 40 / 87...
-
Page 41: 3� 4� 4� Load The Rotor
Incorrect loading can lead to damage. Always load the rotor symmetrically CAUT IO N to avoid imbalance, noisy spinning and possible damage. vwr.com I Instruction manual VWR Micro Star 21 41 / 87... - Page 42 Specifications" on page 17 to calculate the maximum admissible speed for a given load: = admissible maximum application speed = maximum rated speed = maximum rated load = applied load vwr.com I Instruction manual VWR Micro Star 21 42 / 87...
-
Page 43: Rcf Value Explained
(age or number of runs), ƒ undamaged, ƒ fitting well into the cavities. ƒ Please refer to manufacturers’ data sheets for further information. vwr.com I Instruction manual VWR Micro Star 21 43 / 87... -
Page 44: 3� 5� Entering Centrifugation Parameters
NOTICE Avoid if possible speed ranges close to natural resonances of the system. Runs at resonance speeds may cause vibration and have an adverse effect on the quality of separation. vwr.com I Instruction manual VWR Micro Star 21 44 / 87... -
Page 45: 3� 5� 3� Pre-Selecting The Rcf-Value
Press START to confirm the pre-selected value. If you do not press any key, the display flashes for a few seconds. The new preselected value is now stored and the display shows the actual value. vwr.com I Instruction manual VWR Micro Star 21 45 / 87... -
Page 46: 3� 5� 5� Pre-Selecting Temperature
Close the centrifuge lid. Restart the centrifuge. The refrigeration starts operating if the pre-selected temperature is below the current temperature of the rotor chamber. vwr.com I Instruction manual VWR Micro Star 21 46 / 87... -
Page 47: 3� 5� 6� Pre-Tempering The Centrifugation Chamber
You can change the settings during the run as follows: Press one of the three MINUS / PLUS button pairs in the control panel. The current value will switch into the pre-selecting value mode. vwr.com I Instruction manual VWR Micro Star 21 47 / 87... -
Page 48: 3� 6� Centrifugation
If run time has been pre-selected, all you have to do is wait until the centrifuge terminates the run automatically. As soon as the speed drops to zero, the message END will appear in the display. By vwr.com I Instruction manual VWR Micro Star 21 48 / 87... -
Page 49: 3� 7� Short-Term Centrifugation
Aerosol-tight rotors and tubes may only be opened in an approved safety CAUT IO N workbench when centrifuging dangerous samples. Mind the maximum permissible load. Be sure to check all seals before starting any aerosol-tight applications. CAUT IO N vwr.com I Instruction manual VWR Micro Star 21 49 / 87... -
Page 50: Replacing Seals
The tubes are only to be filled to a level which ensures that the sample is unable to reach the top of the tube during centrifugation. Nominal Volume Permissible Volume 2.0 ml 1.5 ml 1.5 ml 1.0 ml others 2/3 of nominal volume vwr.com I Instruction manual VWR Micro Star 21 50 / 87... -
Page 51: Checking Aerosol Tightness
Dry the rotor, rotor lid and the cover seal. The quick test is not suited for validating the aerosol tightness of a rotor. CAUT IO N Check the seals and sealing surfaces of the lid thoroughly. vwr.com I Instruction manual VWR Micro Star 21 51 / 87... -
Page 52: 4� Maintenance And Care
Use only cleaning agents that will not damage the equipment. In doubt contact the manufacturer of the cleaning agent. If still in doubt, contact VWR International. Do not run any rotor or accessories with sign of damage. Ensure that... -
Page 53: 4� 3� Cleaning
Cutting injuries. CAUT IO N Do not touch the condenser while cleaning the backside of the centrifuge. Cutting damage can occur if you touch the condenser due to their sharpness. vwr.com I Instruction manual VWR Micro Star 21 53 / 87... -
Page 54: Cleaning The Filter Unit
Inserting the filter again the labeling Front must show to the front of the centrifuge. Push the filter upwards into the slot until the clip locks in the bottom plate. vwr.com I Instruction manual VWR Micro Star 21 54 / 87... -
Page 55: 4� 4� Disinfection
Make sure that the decontamination agent or the method will not damage the equipment. In doubt contact the manufacturer of the decontamination agent. Observe the safety precautions and handling instructions for the decontamination agents used. vwr.com I Instruction manual VWR Micro Star 21 55 / 87... -
Page 56: 4� 6� Autoclaving
VWR International offers inspection and service contracts for this work. Any necessary repairs are performed for free during the warranty period and afterwards for a charge. That is only valid if the centrifuge has only been maintained by an authorized VWR International service technician. -
Page 57: 4� 9� Shipping
When you remove the centrifuge and accessories from use, clean and if WARN IN G necessary disinfect or decontaminate the full system. If you are not sure speak to the VWR International customer service. vwr.com I Instruction manual VWR Micro Star 21 57 / 87... -
Page 58: 5� Troubleshooting
Remove the wire from the hole and open the centrifuge lid. The samples can be removed. ➀ View port; ➁ Emergency lid release Figure 7: Emergency Lid Release vwr.com I Instruction manual VWR Micro Star 21 58 / 87... -
Page 59: 5� 2� Ice Formation
Mains connection interrupted for some seconds, briefly. centrifuge runs down • Turn off mains switch. without being braked. • Check whether the mains power cord is connected properly • Restart the centrifuge. vwr.com I Instruction manual VWR Micro Star 21 59 / 87... - Page 60 Switch the instrument off and on again. The centrifuge cannot The display shows BR and a countdown from 100 - 0. be operated. If the error message still shows, contact a service technician. vwr.com I Instruction manual VWR Micro Star 21 60 / 87...
- Page 61 Rotor stops with Internal program error deceleration to standstill. Switch the instrument off and on again. The centrifuge cannot If the error message still shows, contact a service technician. be operated. vwr.com I Instruction manual VWR Micro Star 21 61 / 87...
-
Page 62: 5� 3� 8� Information For The Customer Service
This translates into the following information: » Software 0633 Version 02 » NV-RAM 5583 Version 01 Cycles completed 125 » NOT ICE The values shown above are just examples. vwr.com I Instruction manual VWR Micro Star 21 62 / 87... -
Page 63: Technical Service
VWR warrants that this product will be free from defects in material and workmanship for a period of two (2) years from date of delivery. If a defect is present, VWR will, at its option and cost, repair, replace, or refund the purchase price of this product to the customer, provided it is returned during the warranty period. -
Page 64: Equipment Disposal
By doing so, you will help to conserve natural and environmental resources and you will ensure that your equipment is recycled in a manner that protects human health. Thank you vwr.com I Instruction manual VWR Micro Star 21 64 / 87... -
Page 65: 6� Chemical Compatibility
Polycarbonate Polyallomer PET¹, Polyclear™,Clear Crimp™ Nylon Noryl™ Neoprene Glass EPDM rubber Delrin™ Composite Carbon Fiber/Epoxy Polyurethane Rotor Paint Cellulose Acetate Butyrate Buna N Anodic Coating for Aluminum Aluminium MATERIAL vwr.com I Instruction manual VWR Micro Star 21 65 / 87... - Page 66 Polycarbonate Polyallomer PET¹, Polyclear™,Clear Crimp™ Nylon Noryl™ Neoprene Glass EPDM rubber Delrin™ Composite Carbon Fiber/Epoxy Polyurethane Rotor Paint Cellulose Acetate Butyrate Buna N Anodic Coating for Aluminum Aluminium MATERIAL vwr.com I Instruction manual VWR Micro Star 21 66 / 87...
- Page 67 Polycarbonate Polyallomer PET¹, Polyclear™,Clear Crimp™ Nylon Noryl™ Neoprene Glass EPDM rubber Delrin™ Composite Carbon Fiber/Epoxy Polyurethane Rotor Paint Cellulose Acetate Butyrate Buna N Anodic Coating for Aluminum Aluminium MATERIAL vwr.com I Instruction manual VWR Micro Star 21 67 / 87...
- Page 68 Polycarbonate Polyallomer PET¹, Polyclear™,Clear Crimp™ Nylon Noryl™ Neoprene Glass EPDM rubber Delrin™ Composite Carbon Fiber/Epoxy Polyurethane Rotor Paint Cellulose Acetate Butyrate Buna N Anodic Coating for Aluminum Aluminium MATERIAL vwr.com I Instruction manual VWR Micro Star 21 68 / 87...
- Page 69 Polycarbonate Polyallomer PET¹, Polyclear™,Clear Crimp™ Nylon Noryl™ Neoprene Glass EPDM rubber Delrin™ Composite Carbon Fiber/Epoxy Polyurethane Rotor Paint Cellulose Acetate Butyrate Buna N Anodic Coating for Aluminum Aluminium MATERIAL vwr.com I Instruction manual VWR Micro Star 21 69 / 87...
- Page 70 Polycarbonate Polyallomer PET¹, Polyclear™,Clear Crimp™ Nylon Noryl™ Neoprene Glass EPDM rubber Delrin™ Composite Carbon Fiber/Epoxy Polyurethane Rotor Paint Cellulose Acetate Butyrate Buna N Anodic Coating for Aluminum Aluminium MATERIAL vwr.com I Instruction manual VWR Micro Star 21 70 / 87...
- Page 71 Polycarbonate Polyallomer PET¹, Polyclear™,Clear Crimp™ Nylon Noryl™ Neoprene Glass EPDM rubber Delrin™ Composite Carbon Fiber/Epoxy Polyurethane Rotor Paint Cellulose Acetate Butyrate Buna N Anodic Coating for Aluminum Aluminium MATERIAL vwr.com I Instruction manual VWR Micro Star 21 71 / 87...
- Page 72 Polycarbonate Polyallomer PET¹, Polyclear™,Clear Crimp™ Nylon Noryl™ Neoprene Glass EPDM rubber Delrin™ Composite Carbon Fiber/Epoxy Polyurethane Rotor Paint Cellulose Acetate Butyrate Buna N Anodic Coating for Aluminum Aluminium MATERIAL vwr.com I Instruction manual VWR Micro Star 21 72 / 87...
- Page 73 Polycarbonate Polyallomer PET¹, Polyclear™,Clear Crimp™ Nylon Noryl™ Neoprene Glass EPDM rubber Delrin™ Composite Carbon Fiber/Epoxy Polyurethane Rotor Paint Cellulose Acetate Butyrate Buna N Anodic Coating for Aluminum Aluminium MATERIAL vwr.com I Instruction manual VWR Micro Star 21 73 / 87...
- Page 74 Polycarbonate Polyallomer PET¹, Polyclear™,Clear Crimp™ Nylon Noryl™ Neoprene Glass EPDM rubber Delrin™ Composite Carbon Fiber/Epoxy Polyurethane Rotor Paint Cellulose Acetate Butyrate Buna N Anodic Coating for Aluminum Aluminium MATERIAL vwr.com I Instruction manual VWR Micro Star 21 74 / 87...
- Page 75 Polycarbonate Polyallomer PET¹, Polyclear™,Clear Crimp™ Nylon Noryl™ Neoprene Glass EPDM rubber Delrin™ Composite Carbon Fiber/Epoxy Polyurethane Rotor Paint Cellulose Acetate Butyrate Buna N Anodic Coating for Aluminum Aluminium MATERIAL vwr.com I Instruction manual VWR Micro Star 21 75 / 87...
- Page 76 Polycarbonate Polyallomer PET¹, Polyclear™,Clear Crimp™ Nylon Noryl™ Neoprene Glass EPDM rubber Delrin™ Composite Carbon Fiber/Epoxy Polyurethane Rotor Paint Cellulose Acetate Butyrate Buna N Anodic Coating for Aluminum Aluminium MATERIAL vwr.com I Instruction manual VWR Micro Star 21 76 / 87...
- Page 77 Polycarbonate Polyallomer PET¹, Polyclear™,Clear Crimp™ Nylon Noryl™ Neoprene Glass EPDM rubber Delrin™ Composite Carbon Fiber/Epoxy Polyurethane Rotor Paint Cellulose Acetate Butyrate Buna N Anodic Coating for Aluminum Aluminium MATERIAL vwr.com I Instruction manual VWR Micro Star 21 77 / 87...
- Page 78 Polycarbonate Polyallomer PET¹, Polyclear™,Clear Crimp™ Nylon Noryl™ Neoprene Glass EPDM rubber Delrin™ Composite Carbon Fiber/Epoxy Polyurethane Rotor Paint Cellulose Acetate Butyrate Buna N Anodic Coating for Aluminum Aluminium MATERIAL vwr.com I Instruction manual VWR Micro Star 21 78 / 87...
- Page 79 Polycarbonate Polyallomer PET¹, Polyclear™,Clear Crimp™ Nylon Noryl™ Neoprene Glass EPDM rubber Delrin™ Composite Carbon Fiber/Epoxy Polyurethane Rotor Paint Cellulose Acetate Butyrate Buna N Anodic Coating for Aluminum Aluminium MATERIAL vwr.com I Instruction manual VWR Micro Star 21 79 / 87...
- Page 80 Polycarbonate Polyallomer PET¹, Polyclear™,Clear Crimp™ Nylon Noryl™ Neoprene Glass EPDM rubber Delrin™ Composite Carbon Fiber/Epoxy Polyurethane Rotor Paint Cellulose Acetate Butyrate Buna N Anodic Coating for Aluminum Aluminium MATERIAL vwr.com I Instruction manual VWR Micro Star 21 80 / 87...
- Page 81 Polycarbonate Polyallomer PET¹, Polyclear™,Clear Crimp™ Nylon Noryl™ Neoprene Glass EPDM rubber Delrin™ Composite Carbon Fiber/Epoxy Polyurethane Rotor Paint Cellulose Acetate Butyrate Buna N Anodic Coating for Aluminum Aluminium MATERIAL vwr.com I Instruction manual VWR Micro Star 21 81 / 87...
- Page 82 Polycarbonate Polyallomer PET¹, Polyclear™,Clear Crimp™ Nylon Noryl™ Neoprene Glass EPDM rubber Delrin™ Composite Carbon Fiber/Epoxy Polyurethane Rotor Paint Cellulose Acetate Butyrate Buna N Anodic Coating for Aluminum Aluminium MATERIAL vwr.com I Instruction manual VWR Micro Star 21 82 / 87...
- Page 83 Polycarbonate Polyallomer PET¹, Polyclear™,Clear Crimp™ Nylon Noryl™ Neoprene Glass EPDM rubber Delrin™ Composite Carbon Fiber/Epoxy Polyurethane Rotor Paint Cellulose Acetate Butyrate Buna N Anodic Coating for Aluminum Aluminium MATERIAL vwr.com I Instruction manual VWR Micro Star 21 83 / 87...
- Page 84 Polycarbonate Polyallomer PET¹, Polyclear™,Clear Crimp™ Nylon Noryl™ Neoprene Glass EPDM rubber Delrin™ Composite Carbon Fiber/Epoxy Polyurethane Rotor Paint Cellulose Acetate Butyrate Buna N Anodic Coating for Aluminum Aluminium MATERIAL vwr.com I Instruction manual VWR Micro Star 21 84 / 87...
- Page 85 Index Ice Formation Information for the Customer Service Symbole Intended Use Items Supplied 10 x 5 mL Rotor 24 x 1.5/2.0 mL Rotor 36 x 0.5 mL Rotor List of Centrifuges List of Rotors Load the Rotor Aerosol-tight Applications Location Audible Alarm Autoclaving Mains Connection...
- Page 86 Standards Storage Technical Data Technical Specifications Transport and Set Up Troubleshooting Troubleshooting by Guide Unpacking...
- Page 87 Avantor One Radnor Corporate Center Building One, Suite 200 100 Matsonford Road Radnor, PA 19087 1 610 386 1700...
Need help?
Do you have a question about the 76533-876 and is the answer not in the manual?
Questions and answers