Origin Acoustics Director DSUB6 Series Installation Manual
Hide thumbs
Also See for Director DSUB6 Series:
- Installation manual (15 pages) ,
- Installation manual (20 pages)
Table of Contents
Advertisement
Quick Links
Advertisement
Table of Contents

Related Manuals for Origin Acoustics Director DSUB6 Series


Summary of Contents for Origin Acoustics Director DSUB6 Series
- Page 1 DSUB6 Series Director Collection Installation Manual DSUB6F5, DSUB6F3...
-
Page 2: Table Of Contents
Table of Contents Introduction Specifications What’s Included Tools & Items Wire Recommendation Planning About Speaker Wire Installing the Enclosure Installation before Drywall Installation after Drywall Wire Routing Installing the Wire Connecting the Wire Wiring: Separate Sub Amplifier & 2-Channel Amplifier Painting the Grille Installing the Grille Troubleshooting... -
Page 3: Introduction
Introduction Thank you for purchasing the Director Subwoofer 6. At Origin Acoustics, we take pride in providing you with a high quality product. All of Origin Acoustics’ speakers are designed to have excellent sound quality, longevity, and a simple installation process. -
Page 4: Specifications
Specifications Model DSUB6F5 DSUB6F3 Part Number DSUB6F500 DSUB6F300 Woofer Cone Polypropylene Polypropylene Woofer 6.5 (165mm) 6.5 (165mm) Diameter Frequency 33Hz - 100 kHz ± 3dB 33Hz - 100 kHz ± 3dB Response Impedance 8 ohm 8 ohm Power 100 Watts 100 Watts Handling Dimensions... -
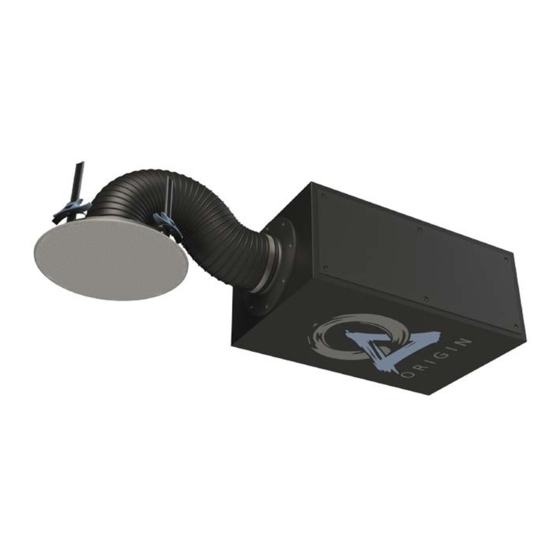
Page 5: What's Included
What’s Included Bandpass Subwoofer Bracket & Trim Ring Grille Tools & Items • Drywall Saw • Measuring Tape • Stud Finder • Speaker Wire • Drill • Fish Tape • Pencil • Drill Bit ⅛” (3mm) • Spray Paint • Wire Stripper •... -
Page 6: Planning
Planning: Amplifier Wiring Will you be driving it with a 2-channel amplifier or a designated subwoofer am- plifier? The 2-channel option works fine but the separate subwoofer amplifier will allow you to adjust the subwoofer output to achieve the sub-to-satellite balance you want regardless of subwoofer location or number of satellite speakers used. -
Page 7: Installing The Enclosure
colors or patterns are used. You can choose whichever color of wire you want to be positive and negative as long as you remain consistent throughout the install. On both your amplifier and your speaker the connectors will be identified as red for positive and black for negative. -
Page 8: Installation Before Drywall
2. Installation before Drywall Use the 8 supplied screws to attach the port tube to the enclosure. Test the wired DSUB to see that it’s working properly. If you are using 2 channels of input, make sure to test both. The Mini Port Bracket will serve as your new construction bracket. -
Page 9: Wire Routing
Wire Routing Plan how you’ll route the wire to the desired speaker location. There are several methods for routing the wire, and you may need to combine several of them. Behind the Baseboard Through Walls The wire can be routed behind the When running wires through a wall, be baseboard by cutting a groove out of sure to avoid all obstacles such as AC... -
Page 10: Installing The Wire
4. Installing the Wire Strip ¼ to ½ inches (6 to 12 mm) of the insulation off both ends of the wire. To avoid stray strands, twist them at the 0.25 - 0.5” end. Connect the wire to the amplifier, (6 - 12mm) and make sure the wire connected to the left speaker output will be routed... -
Page 11: Wiring: Separate Sub Amplifier & 2-Channel Amplifier
6. Wiring: Separate Subwoofer Amplifier Use the supplied terminal jumper to connect two of the DSUB input terminals, then connect the positive Subwoofer wire from the subwoofer amplifier to Amplifier the positive input terminal and the negative wire the remaining input terminal. -
Page 12: Painting The Grille
8. Painting the Grille In some situations the speakers may look better if the color matched the walls, ceiling, or trim in the room. This can be accomplished by painting the grille. The grille must be painted with spray paint, and most hardware stores will mix a can of paint to match whatever color you need. -
Page 13: Troubleshooting
Troubleshooting If possible, it’s often good to try to isolate the problem first. For example, if you’re playing a DVD on a television and there’s no sound, try connecting an MP3 player to the system to see if that works. If it does work, then the problem is with the tele- vision, DVD player, or the cables connecting them. -
Page 14: Technical Assistance
If you are considering returning the product, it’s required that you contact Origin Acoustics prior to any return at- tempts. This way we can determine if the issue can be resolved without returning the product, or if needed we can provide instructions and support for the return process. -
Page 15: Warranty
Limited Lifetime Warranty Origin Acoustics warrants to the original retail purchaser only that this Origin Acoustics product will be free from defects in materials and workmanship, pro- vided the speaker was purchased from an Origin Acoustics authorized dealer. If the product is determined to be defective, it will be repaired or replaced at Ori- gin Acoustics’... -
Page 16: Return Process
Before making any return attempts, it is required that you first contact Origin Acoustics. Return product to Origin Acoustics or your dealer, either in person or by mail. It’s preferable if the product is returned in the original packaging. If this isn’t possible, the customer is responsible for insuring the shipment for the full value of the product. - Page 18 • 844-674-4461 ©2017 Origin Acoustics...
Need help?
Do you have a question about the Director DSUB6 Series and is the answer not in the manual?
Questions and answers