
Subscribe to Our Youtube Channel
Related Manuals for Origin Acoustics D62DT/SUR


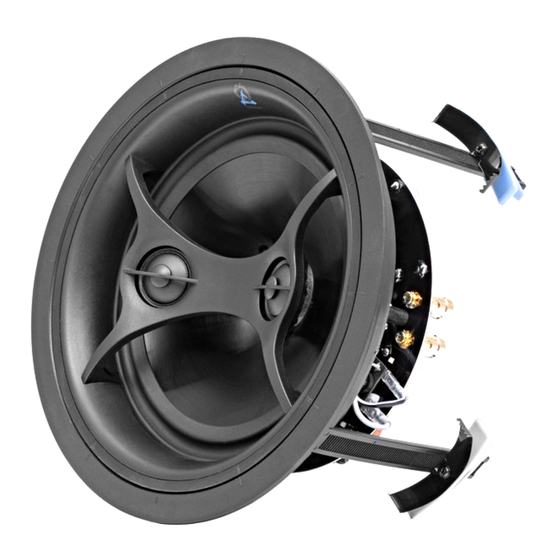
Summary of Contents for Origin Acoustics D62DT/SUR
- Page 1 D60 Series Director Collection Installation Manual D68, D66, D64, D62DT/SUR, D62, D60DT, D60...
-
Page 2: Table Of Contents
Table of Contents Introduction Specifications Dual Tweeter What’s Included Tools & Items Wire Recommendation Speaker Placement About Speaker Wire Installing the Wire Wire Routing Painting the Grille Cutting the Hole Installing the Bayonet Ring Connecting the Wire Installing the Speaker Testing &... -
Page 3: Introduction
Introduction Thank you for purchasing the Director 6 In-Ceiling Speaker. At Origin Acoustics, we take pride in providing you with a high quality product. All of Origin Acoustics’ speakers are designed to have excellent sound quality, longevity, and a simple installation process. -
Page 4: Specifications
Specifications Model D62DT/SUR Part Number SCD60800 SCD60600 SCD60400 SCD2T60200 Woofer Cone Kevlar Glass Fiber Woofer 6.5" (165mm) 6.5” (165mm) 6.5” (165mm) 6.5” (165mm) Diameter Tweeter Dome Silk DPSD Silk DPSD Aluminum Aluminum Tweeter 1" (25mm) 1” (25mm) 1” (25mm) 1” (25mm) - Page 5 Specifications Model D60DT/SUR Part Number SCD60200 SCD2T60000 SCD60000 Woofer Cone Poly/Rubber Woofer 6.5” (165mm) 6.5” (165mm) 6.5” (165mm) Diameter Tweeter Dome Aluminum Aluminum Silk Tweeter 1” (25mm) 1” (25mm) 1” (25mm) Diameter Frequency 48 Hz - 20 kHz 48 Hz - 20 kHz 48 Hz - 20 kHz Response Impedance...
-
Page 6: Dual Tweeter
Dual Tweeters The Dual Tweeter models can be used for either one channel (surround) or two channels (stereo). A switch is located on the back of the speaker to select which mode to use. One of the inputs is labeled for surround. This is the input that should be used if you’re only using one channel. -
Page 7: What's Included
What’s Included Speaker Tool-less Installation Grille Template Tools & Items • Drywall Saw • Measuring Tape • Stud Finder • Speaker Wire • Drill • Fish Tape • Pencil • Drill Bit ⅛” (3mm) • Spray Paint • Wire Stripper •... -
Page 8: Speaker Placement
Auxiliary Room (2 Speaker Placement) Position the two speakers in the mid- dle of the room, no less than 6’ (2m) apart. Ideally, the two speakers would 6’ (2m) be placed an equal distance from the listener. If the room has a lower ceiling, 3’... -
Page 9: About Speaker Wire
About Speaker Wire You will need a wire that has at least two conductors; one that can be identified as the positive and the other as the negative. All two conductor wires have some means of identifying which conductor is which, but at times this identification may be subtle. -
Page 10: Wire Routing
Wire Routing Plan how you’ll route the wire to the desired speaker location. There are several methods for routing the wire, and you may need to combine several of them. Behind the Baseboard Through Walls The wire can be routed behind the When running wires through a wall, be baseboard by cutting a groove out of sure to avoid all obstacles such as AC... -
Page 11: Painting The Grille
2. Painting the Grille In some situations the speakers may look better if the color matched the walls, ceiling, or trim in the room. This can be accomplished by painting the grille. The grille must be painted with spray paint, and most hardware stores will mix a can of paint to match whatever color you need. -
Page 12: Installing The Bayonet Ring
plate, check the Specifications section for cutout sizes.) If you’re unsure on wheth- er there may be obstacles (such as pipes or wires) where you plan on installing the speaker, drill a ⅛ inch hole in the center of the circle, then put a bent coat hanger through the hole to feel around. -
Page 13: Connecting The Wire
5. Connecting the Wire Insert the wires into the connectors, making sure that the positive wire is being attached to the red connec- tion and the negative wire is being Connector attached to the black connection. If the negative and positive wires are Speaker Wire switched, speaker performance will be... -
Page 14: Testing & Adjustments
7. Testing & Adjustments The midrange and tweeter can be pivoted to direct the sound towards the listen- ing area. Or for a more diffused surround sound experience, the rear speakers can be aimed towards the wall. To aim the tweeter, gently apply pressure to the rim with your thumbs to pivot the tweeter. -
Page 15: Troubleshooting
Troubleshooting If possible, it’s often good to try to isolate the problem first. For example, if you’re playing a DVD on a television and there’s no sound, try connecting an MP3 player to the system to see if that works. If it does work, then the problem is with the tele- vision, DVD player, or the cables connecting them. -
Page 16: Technical Assistance
If you are considering returning the product, it’s required that you contact Origin Acoustics prior to any return at- tempts. This way we can determine if the issue can be resolved without returning the product, or if needed we can provide instructions and support for the return process. -
Page 17: Warranty
Limited Lifetime Warranty Origin Acoustics warrants to the original retail purchaser only that this Origin Acoustics product will be free from defects in materials and workmanship, pro- vided the speaker was purchased from an Origin Acoustics authorized dealer. If the product is determined to be defective, it will be repaired or replaced at Ori- gin Acoustics’... -
Page 18: Return Process
Before making any return attempts, it is required that you first contact Origin Acoustics. Return product to Origin Acoustics or your dealer, either in person or by mail. It’s preferable if the product is returned in the original packaging. If this isn’t possible, the customer is responsible for insuring the shipment for the full value of the product. - Page 20 Mission Inn Rotunda, 3649 Mission Ave, 1st Floor, Riverside CA 92501 • www.originacoustics.com • 844-674-4461 ©2016 Origin Acoustics. All copyrighted, trademarked and patented elements mentioned herein are the sole property of Origin Acoustics.
Need help?
Do you have a question about the D62DT/SUR and is the answer not in the manual?
Questions and answers