Table of Contents
Advertisement
Quick Links
Advertisement
Table of Contents

Related Manuals for Origin Acoustics DIRECTOR COLLECTION D39


Summary of Contents for Origin Acoustics DIRECTOR COLLECTION D39
- Page 1 DIRECTOR COLLECTION D39•DIRECTOR 3” SPEAKER MANUAL...
-
Page 2: Table Of Contents
Table of Contents 1. Introduction 2. Specifications 3. What’s Included 4. Required Tools & Speaker Wire 5. Speaker Wire Recommendation 6. System Wiring Options 7. Speaker Wire Installation Guidance 8. Cutting the Speaker Hole 9. Speaker Installation Guidance 9a. Removal Of Speaker From Bayonet Ring 9b. -
Page 3: Introduction
1. Introduction Thank you for purchasing the Director 3'' In-Ceiling Speaker. At Origin Acoustics, we take pride in providing you with a high quality product. All of Origin Acoustics’ speakers are designed to have excellent sound quality, longevity, and a simple installation process. -
Page 4: Specifications
Minimal Opening Collection Speaker Diameter 11 1/2” (286mm) Grille Diameter 11 3/4” (299mm) Grille Depth 3/16” (5mm) Origin Acoustics Cut-Out Template: 1/4” (83mm) O R I G I N® A C O U S T I C S SPECIFICATIONS ALL 8'' & 6'' SERIES Cutout Diameter 8 3/4”... -
Page 5: Required Tools & Speaker Wire
DIRECTOR COLLECTION 3'' MANUAL 4. Required Tools & Speaker Wire • Drywall Saw • Measuring Tape • Stud Finder • Speaker Wire • Drill • Fish Tape • Pencil • Drill Bit ⅛” (3mm) • Spray Paint • Wire Stripper •... -
Page 6: System Wiring Options
DIRECTOR COLLECTION 3'' MANUAL 6. System Wiring Options 6a. Single DSP Amplifier: 4 x D39 Speakers & 1 x Subwoofer There are several ways to configure the Director 3'' speakers. Our recommended option is to use the DSP3-150 amp, to easily run the entire system setup off this single amplifier, designed for best performance. - Page 7 DIRECTOR COLLECTION 3'' MANUAL 6b. 2 Channel Amplifier + Subwoofer Amplifier: 4 - 8 D39 Speakers & 1 - 2 Subwoofers With 4-Ohm stable amplifiers, you can use up to four Director 3'' Speakers per channel. If you’re using the Origin DSUB6 with the D39 speakers, we recommend our SubA150 or SubA500 for the subwoofer.
-
Page 8: Speaker Wire Installation Guidance
DIRECTOR COLLECTION 3'' MANUAL 6c. 2 Channel Amplifier: 4 x D39 Speakers & 1 x DSUB6 Subwoofer For a setup with four speakers and one subwoofer, a 2-Channel amp, such as the recommended the DSP2-200 Amp, can be used. First, both amplifier outputs DSUB6 Installation Manual should be connected to the DSUB6 subwoofer’s L/R inputs. - Page 9 DIRECTOR COLLECTION MANUAL • 10'' SERIES DIRECTOR COLLECTION 3'' MANUAL 7. Speaker Wire Installation Guidance Use a two conductor wire that allows you to identify one conductor from the oth- er. This designation may be obvious or as subtle as a ridge on one conductor. It’s crucial that you keep track of which wire you use for positive (+) and negative (-).
-
Page 10: Cutting The Speaker Hole
DIRECTOR COLLECTION MANUAL • 10'' SERIES DIRECTOR COLLECTION 3'' MANUAL 7b. Wire Routing Plan how you’ll route the wire to the desired speaker location. There are several methods for routing the wire, and you may need to combine several of them. •... -
Page 11: Speaker Installation Guidance
DIRECTOR COLLECTION MANUAL • 10'' SERIES DIRECTOR COLLECTION 3'' MANUAL Cutting the Hole 9. Cutting the Hole 8. Cutting the Speaker Hole en you’ve decided on the locations for all of the speakers, use the Cut- When you’ve decided on the locations for all of the speakers, use the Cut-Out mplate to trace a circle lightly in pencil where the hole should be. -
Page 12: 9A. Removal Of Speaker From Bayonet Ring
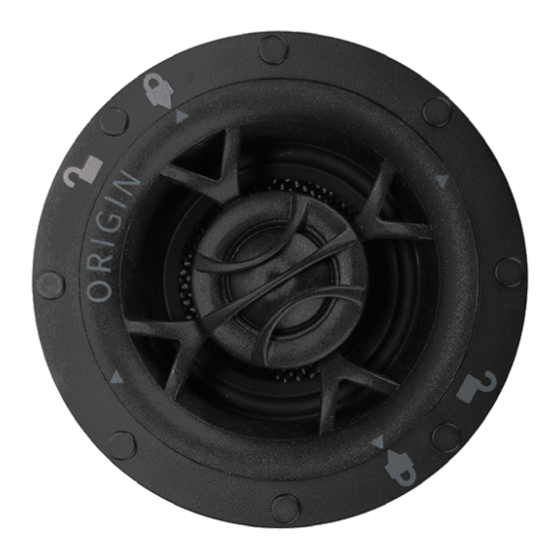
DIRECTOR COLLECTION 3'' MANUAL 9. Speaker Installation Guidance 9a. Removal of Speaker From Bayonet Ring The Speaker will arrive securely in its Bayonet Ring. To release the speaker, follow these steps: Twist Counter-Clockwise to Release Lock Twist Counter-Clockwise to Release Lock Twist the Speaker COUNTER- CLOCKWISE, so that the arrow on the Speaker Rim, aligns to the “UNLOCKED”... -
Page 13: 9B. Installing Bayonet Ring Into Ceiling
QUICK START GUIDE OPEN POSITION 9b. Installing Bayonet Ring Into Ceiling Twist Speaker AKER FROM BAYONET RING SPEAKER INSTALLATION ᵒ Origin Acoustics D109 install 6975 S Decatur Blvd Counter - Clockwise Suite 140 Las Vegas, NV 89118 SCALE:1:2 844-ORIGIN1 (674-4461) O R I G I N www.originacoustics.com... -
Page 14: 9C. Release Of Bayonet Ring From Ceiling
Bayonet installation, PUSH THE METAL LOCK TAB TOWARDS the Bayonet Ring. are aligned. Note: Grille may not sit flush until this Lock is properly engaged. originacoustics.com • 844-674-4461 nts mentioned herein are the sole property of Origin Acoustics. -
Page 15: 9D. Connecting The Speaker Wire
DIRECTOR COLLECTION MANUAL • 10'' SERIES DIRECTOR COLLECTION 3'' MANUAL 9d. Connecting the Speaker Wire 10d. CONNECTING THE SPEAKER WIRE Take the ceiling speaker wire and connect it to the Terminal Connector on the Speaker. Push down on each connector, and insert each wire into the opening with the correct polarity. -
Page 16: 9E. Installing Speaker Into Bayonet Ring
DIRECTOR COLLECTION 3'' MANUAL 9e. Installing Speaker Into Bayonet Ring After connecting speaker wires: • Insert the Speaker into the Unlocked Bayonet Ring Fit the Speaker into the Bayonet Ring, with the arrows on the Speaker Rim aligning to the “UNLOCKED” Symbol along the Bayonet Rim. Insert into UnLocked Position Insert into... - Page 17 DIRECTOR COLLECTION 3'' MANUAL • Twist the Speaker Clockwise Twist the Speaker CLOCKWISE, so that the arrow on the Speaker Rim slots into place, aligning to the “LOCKED” Symbol along the Bayonet Ring. Twist Clockwise to Lock Twist Clockwise to Lock Twist Clockwise to Lock Twist Clockwise...
- Page 18 DIRECTOR COLLECTION 3'' MANUAL • Ensure the Speaker is Locked Now the Speaker should be securely locked into the ring. Be sure that the arrows line up correctly, otherwise there’s a risk that the speaker will fall out of the ceiling. Locked Locked...
-
Page 19: Adding The Grille
DIRECTOR COLLECTION 3'' MANUAL 10. Adding the Grille 10a. Installing the Grille The magnetic grille easily fits over the speaker. Square replacement grilles are also available for purchase separately. 10b. Painting the Grille In some situations the speakers may look better if the color matched the walls, ceiling, or trim in the room. -
Page 20: Troubleshooting
DIRECTOR COLLECTION 3'' MANUAL 11. Troubleshooting If you have a problem, try isolating it first. For example, if you’re playing a DVD and there is no sound, try replacing the DVD with an MP3 player to see if you get sound. -
Page 21: Technical Assistance
If you are considering returning the product, it’s required that you contact Origin Acoustics prior to any return at- tempts. This way we can determine if the issue can be resolved without returning the product, or if needed we can provide instructions and support for the return process. -
Page 22: Limited Lifetime Warranty
3'' MANUAL 13. Limited Lifetime Warranty Origin Acoustics warrants to the original retail purchaser only that this Origin Acoustics product will be free from defects in materials and workmanship, provid- ed the speaker was purchased from an Origin Acoustics authorized dealer. -
Page 23: Return Process
Before making any return attempts, it is required that you first contact Origin Acoustics. Return product to Origin Acoustics or your dealer, either in person or by mail. It’s preferable if the product is returned in the original packaging. If this isn’t possible, the customer is responsible for insuring the shipment for the full value of the product. - Page 24 08-28-23 6975 S Decatur BLVD, Las Vegas, NV 89118 • www.originacoustics.com • 844-674-4461 ©2023 Origin Acoustics. All copyrighted, trademarked and patented elements mentioned herein are the sole property of Origin Acoustics.
Need help?
Do you have a question about the DIRECTOR COLLECTION D39 and is the answer not in the manual?
Questions and answers