
Related Manuals for EVEREST REFRIGERATION LAB Series


Summary of Contents for EVEREST REFRIGERATION LAB Series
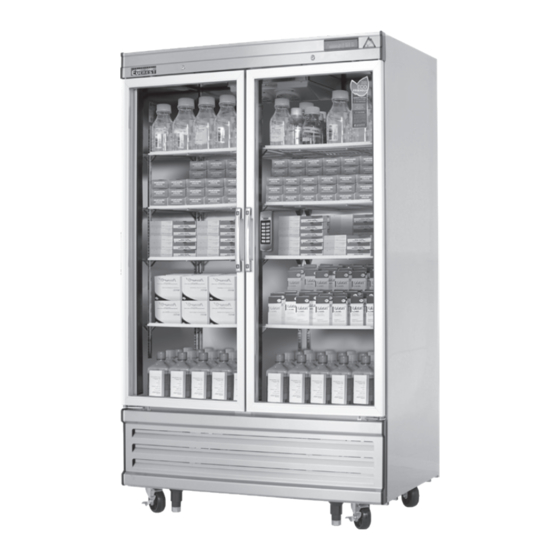
- Page 1 Laboratory Refrigerators & Freezers - LAB Series Owner’s Manual EBWR1-LAB, EBWR1-LAB, EBGWR1-LAB, EBR2-LAB, EBGR2-LAB, ETBF1-LAB, EBWF1-LAB, EBF2-LAB...
- Page 2 this page intentionally left blank...
-
Page 3: Table Of Contents
Laboratory Refrigerators & Freezers - LAB Series EBWR1-LAB, EBWR1-LAB, EBGWR1-LAB, EBR2-LAB, EBGR2-LAB, ETBF1-LAB, EBWF1-LAB, EBF2-LAB Contents Hydrocarbon Guidelines ......Installation Instructions ......... – General Safety ..........Electrical Safety ..........Operation ............ – Care and Maintenance ......Door Reversal Instructions ...... -
Page 4: Hydrocarbon Guidelines
Hydrocarbon Guidelines This section applies to R290 Hydrocarbon units only. To identify the refrigerant type, see the data plate in the cabinet interior. WARNING - THIS UNIT USES R290, A HYDROCARBON, PROPANE REFRIGERANT THAT IS ENVIRONMENTALLY FRIENDLY BUT IS ALSO HIGHLY FLAMMABLE AND EXPLOSIVE. PLEASE READ THIS MANUAL CAREFULLY AND FOLLOW ALL SAFETY PRECAUTIONS CONTAINED HEREIN TO AVOID THE RISK OF FIRE OR EXPLOSION. - Page 5 General service and repairs must be performed in well-ventilated areas. • General service and repairs must be performed only by professionals authorized by Everest Refrigeration. • Component shall be replaced with Everest-issued, like components to minimize the risk of possible ignition resulting from incompatible parts or improper repairs.
-
Page 6: Installation Instructions
Installation Instructions This section applies to all Everest products. Correct installation ensures proper performance and longevity of your appliance. Professional installation by a trained refrigeration technician and electrician is recommended. Warranty is void if the following guidelines are not met. 1. - Page 7 Shelf Installation 1. Attach the shelf clips onto the pilasters by inserting its top hook into a pilaster notch followed by the bottom hook. Do not use pliers or other crimping tools to modify the shape of the shelf clips. This will result in shelf mounting instability.
- Page 8 Product Load Level & Shelf Placement Product Load Level for EB Solid Door Load Level 12" Load Level 12" Airflow Guard Load Level 12" Shelf Load Level 12" Air Vent Air Flow Front Side View Rear Installation Instructions...
-
Page 9: General Safety
• If you suspect a refrigerant leak or a compromised refrigeration system, disconnect the unit, and contact Everest Refrigeration immediately. • When disposing the unit, remove all doors and shelves to avoid any risk of injury or entrapment. -
Page 10: Electrical Safety
Electrical Safety This section applies to all Everest products. Basic safety precautions must be observed when using electrical appliances in addition to the following. Warranty is void if these guidelines are not met. Everest units are equipped with a 115V/60Hz/1Ph, Do not use extension cords, adapter plugs NEMA 5-15P. -
Page 11: Operation
Operation This section applies to all Everest products. Use according to the described and intended functions. Warranty is void if these guidelines are not met. Starting your Everest Product After plugging in the unit, the current temperature and compressor symbol will appear on the digital temperature control’s LED display. - Page 12 Carel ‘Easy’ Digital Temperature Control Everest units are equipped with a Carel Digital Temperature Control. The type of controller is dependent on the model and production date. Evaporator Fan Running Compressor Running Alarm in Progress Power / Up Button Temperature Set Button Cabinet Temperature Manual Defrost / Down Button...
- Page 13 Setting the Temperature ( continued ) 2. Toggle through the desired temperature by pressing UP or DOWN The number increases or decreases by a decimal point. 3. The recommended setting is 35.0°F (2.0°C) for refrigerators and -4.0°F (-20.0°C) for freezers. The available temperature setting range is 33.0°F to 54.0°F (1.0°C to 12.0°C) for Refrigerators and -10.0°F to 54.0°F (-23.0°C to 12.0°C) for Freezers.
- Page 14 Carel ‘ir33’ Digital Temperature Control Everest units are equipped with a Carel Digital Temperature Control. The type of controller is dependent on the model and production date Evaporator Fan Running Program Button Compressor Running Up Button / Alarm in Progress Auxiliary Cabinet in Defrost Down Button /...
- Page 15 Initiating Manual Defrost The controller has an automatic defrost cycle in place so initiating manual defrost is not necessary unless there is an abnormal accumulation of ice around the evaporator coil. 1. Press and hold down the Manual Defrost Button until the Defrost Symbol appears on the LED display.
- Page 16 Electronic Keypad Lock Each Everest Laboratory Refrigerator and Freezer comes equipped with a standalone electronic keypad door lock featuring a programmable auto-lock function. Access can be obtained using either an RF keycard or a digital key/password. This section provides information on keycard and digital key registration and other setting adjustments.
- Page 17 Electronic Keypad Lock ( continued ) KEYPAD SETTING ADJUSTMENT Relay Output Time Adjustment Admin code (X2) → # → 11# → Press input time (01–60 sec) → #(End). • Key Switch Adjustment ON: Admin code (X2) → # → 22# → *(End). •...
- Page 18 EL-WiFi-VACX WiFi Connected High-Accuracy Vaccine Temperature Monitoring Kit with Alarm Warning Light and Sounder • Temperature measurement range -40 to +60 °C (-40 to +140 °F). • Configurable alarm levels with on-board warning light and sounder. • Digital calibratible probe with 3m cable. •...
- Page 19 EL-WiFi-VACX ( continued ) WiFi Connected High-Accuracy Vaccine Temperature Monitoring Kit with Alarm Warning Light and Sounder Easy Device Set Up and Connection EL-WIFI-VACX is easy to set up and connect to the EasyLog Cloud. Use the EasyLog WiFi software for PC* or the EasyLog Cloud app available from Google Play or on the App Store.
- Page 20 Easylog Cloud SMS Tutorial This tutorial guides you through setting up SMS notifications on your EasyLog Cloud account, and also explains how this very useful feature works. Step 1: Activate SMS Notifications on Your Account From the Account menu, click on the spanner icon to view the Account Settings tab. On the left hand. side you’ll see an option to view the SMS settings menu.
- Page 21 Easylog Cloud SMS Tutorial ( continued ) We will send you an email confirming when we have activated the SMS notifications feature on your account. When activated, you can go back into the Account Settings page, where the Contact Us button will have changed to Buy Now.
- Page 22 Easylog Cloud SMS Tutorial ( continued ) When the number of available SMS credits drops to 10, a reminder to top up your credits is sent to the billing email address. Another email will be sent if your credits actually run out. Step 2: Set Which Users Can Receive SMS Notifications You can decide which users on your EasyLog Cloud account are able to receive SMS notifications.
- Page 23 Easylog Cloud SMS Tutorial ( continued ) Your easylogcloud.com account has been enabled to receive SMS Notifications. Click on this link to opt-in. https://easylogcloud.com/ x99x9s99 IMPORTANT: You should advise your users to retain the original SMS message, so you can click on the link again in the future if they want to opt-out of the SMS system.
- Page 24 Easylog Cloud SMS Tutorial ( continued ) You can see that the button has changed so they can now opt out if they wish. As an administrator you can view the SMS status of each user on your account from the SMS settings section in the Accounts menu.
- Page 25 Easylog Cloud SMS Tutorial ( continued ) You now have the option to resend the opt-in message to that user if you wish. If you later deselect a user from receiving SMS notifications, they will receive another SMS telling them this has happened. Your easylogcloud.com Your easylogcloud.com account has been...
- Page 26 Easylog Cloud SMS Tutorial ( continued ) The selection for each user is divided between email and SMS notifications. The SMS icon is displayed for users who have been enabled to receive SMS notifications. As before, the icon is green if they have opted in or red if they have not.
- Page 27 Easylog Cloud SMS Tutorial ( continued ) Limiting the number of SMS messages you receive means that after an alarm event has occurred and the first SMS has been sent, you will not receive another message about any subsequent change in status for the same alarm in the time period you select.
-
Page 28: Care And Maintenance
Care and Maintenance This section applies to all Everest products. Regular care and maintenance of your appliance will significantly extend service life and dependability. In severe cases, lack of upkeep will contribute to the rapid decline in performance and component health. Care and maintenance is the product owner’s personal responsibility. - Page 29 Condenser Coil Cleaning Instructions * R404A freezer models are equipped with a condenser coil air filter. R290 refrigerator models are not equipped with a condenser coil air filter. If your product is an R290 refrigerator model, you may skip this section. This section applies to all Everest products.
-
Page 30: Door Reversal Instructions
Door Reversal Instructions Some products have field reversible doors to accommodate specific kitchen layouts. Door reversals must be performed by qualified technicians. A second person is required. Safety goggles must be worn to protect from spinning parts. Warranty is void if the following guidelines are not met. - Page 31 Door Reversal Instructions (Continued) 5. Extra precaution must be taken for the following steps. Release the door tension from the door spring by inserting a sharp pointed implement into one of the door hinge shaft’s unoccupied C- 2 tension lock screws 6.
-
Page 32: Troubleshooting Guide
Troubleshooting Guide In most cases, your Everest product may be exhibiting behavior that is typical of standard operation. Observe the following when troubleshooting symptoms. ‘cht’ or ‘CHt’ appears on the LED alternating The compressor operates continuously or for with the current temperature and accompanied prolonged periods. - Page 33 The cabinet temperature is too warm. Condensation in the interior cabinet. The condenser coil may be clogged with dust, The door or door gasket may not be sealing grime or debris. Clean it following the instructions properly. Check product placement in the cabinet on page 26.
- Page 34 Warranty Registration Registering your new appliance is important. In the unlikely event a safety notification or warranty service is required, we will have the means to contact you. Your completed appliance registration also verifies your ownership in the event of an insurance loss or theft. You may register online at www.EVERESTref.com or use your smart phone to scan the QR code below: 1.
- Page 35 Warranty Certificate YEAR YEAR YEAR PARTS & LABOR ELECTRICAL COMPRESSOR...
- Page 36 A Step Above The Standard 201 W. Artesia Blvd., Compton, CA 90220 Tel: 800-444-6285 / 310-323-6586 Fax: 310-323-7524 / 310-761-1127 www.EVERESTref.com v100623...
Need help?
Do you have a question about the LAB Series and is the answer not in the manual?
Questions and answers