Table of Contents
Advertisement
Quick Links
Advertisement
Table of Contents

Related Manuals for EVEREST REFRIGERATION EMGR33-SS


Summary of Contents for EVEREST REFRIGERATION EMGR33-SS
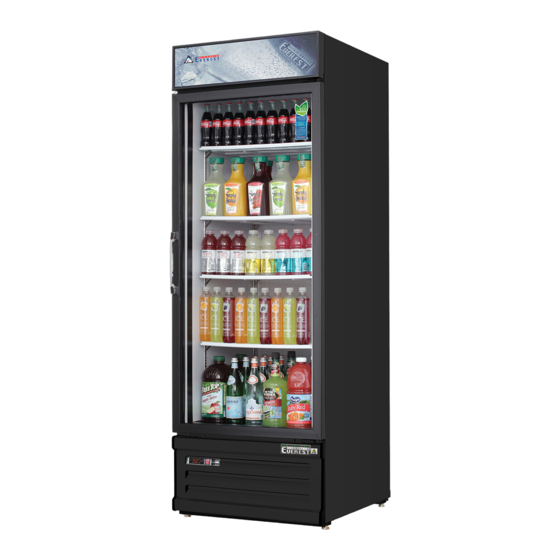
- Page 1 Glass Door Merchandisers & Chromatography Refrigerators Owner’s Manual EMGR5, EMGR8, EMGR10(B), EMGR20, EMGR24(B) EMSGR33, EMSGR48, EMSGR69 EMGR33(B), EMGR33-SS, EMGR48(B), EMGR48-SS, EMGR69(B), EMSGR24C, EMSGR33C, EMSGR48C, EMSGR69C, EMGR33C, EMGR48C, EMGR69C www.EVERESTref.com...
- Page 2 THIS PAGE INTENTIONALLY LEFT BLANK...
-
Page 3: Table Of Contents
Glass Door Merchandisers & Chromatography Refrigerators EMGR5, EMGR8, EMGR10(B), EMGR20, EMGR24(B), EMSGR33, EMSGR48, EMSGR69, EMGR33(B), EMGR33-SS, EMGR48(B), EMGR48-SS, EMGR69(B), EMGR24C, EMSGR33C, EMSGR48C, EMSGR69C, EMGR33C, EMGR48C, EMGR69C Contents 1. Hydrocarbon Guidelines 2. Installation Instructions 3. General Safety 4. Electrical Safety 5. Chromatography Features 6. -
Page 4: Hydrocarbon Guidelines
1. Hydrocarbon Guidelines This section applies to R290 Hydrocarbon units only. To identify the refrigerant type, see the data plate in the cabinet interior. WARNING - THIS UNIT USES R290, A HYDROCARBON, PROPANE REFRIGERANT THAT IS ENVIRONMENTALLY FRIENDLY BUT IS ALSO HIGHLY FLAMMABLE AND EXPLOSIVE. PLEASE READ THIS MANUAL CAREFULLY AND FOLLOW ALL SAFETY PRECAUTIONS CONTAINED HEREIN TO AVOID THE RISK OF FIRE OR EXPLOSION. - Page 5 • General service and repairs must be performed in well-ventilated areas. General service and repairs must be performed only by professionals authorized by Everest Refrigeration. • Component shall be replaced with Everest-issued, like components to minimize the risk of possible ignition resulting from incompatible parts or improper repairs.
-
Page 6: Installation Instructions
2. Installation Instructions This section applies to all Everest products. Correct installation ensures proper performance and longevity of your appliance. Professional installation by a trained refrigeration technician and electrician is recommended. Warranty is void if the following guidelines are not met. 1. - Page 7 Shelf Installation Some models come standard with shelves, shelf clips and notched pilasters. Each shelf requires four clips. 1. Attach the shelf clips onto the pilasters by inserting its top hook into a pilaster notch followed by the bottom hook. Do not use pliers or other crimping tools to modify the shape of the shelf clips.
- Page 8 Product Load Level & Shelf Placement Product Load Level for EM Series (Sliding Door Models) Glass Sliding Door Load Level 10” Load Level 10” Airflow Guard Rear Front Load Level 10” Shelf Load Level 10” Air Vent Airflow Side View Installation Instructions...
- Page 9 Product Load Level & Shelf Placement Product Load Level for EM Series (Swing Door Models) Glass Swing Door Load Level 10” Airflow Guard Load Level 10” Front Rear Load Level 10” Shelf Load Level 10” Load Level 10” Air Vent Airflow Side View Installation Instructions...
-
Page 10: General Safety
• If you suspect a refrigerant leak or a compromised refrigeration system, disconnect the unit and contact Everest Refrigeration immediately. • When disposing the unit, remove all doors and shelves to avoid any risk of injury or entrapment. Ensure that the refrigerant in the condensing unit is properly disposed of by a qualified refrigeration technician according to... -
Page 11: Electrical Safety
4. Electrical Safety This section applies to all Everest products. Basic safety precautions must be observed when using electrical appliances in addition to the following. Warranty is void if these guidelines are not met. Do not use extension cords, adapter plugs or Everest units come as 115 volts, 60 hertz, single other third party electrical connections. -
Page 12: Chromatography Features
5. Chromatography Features The following chromatography features come standard only for specific merchandiser models identified with a suffix C. • Two Access Ports on each side wall for routing probes and cables, as well as access to mixing compounds. • Water-Proof, heavy duty receptacle covers with locking tabs for each access port. -
Page 13: Operation
6. Operation This section applies to all Everest products. Use according to the described and intended functions. Warranty is void if these guidelines are not met. Starting your Everest Product The compressor, condenser and evaporator fan motors will run while the unit is on refrigeration cycle. After plugging in the unit, the current temperature and compressor symbol will appear on the... - Page 14 Carel ‘Easy’ Digital Temperature Control Everest units are equipped with a Carel Digital Temperature Control. The type of controller is dependent on the model and production date. Evaporator Fan Running Compressor Running Alarm in Progress Power / Up Button Temperature Set Button Cabinet Temperature Manual Defrost / Down Button...
- Page 15 Setting the Temperature ( continued ) 2. Toggle through the desired temperature by pressing UP or DOWN The number increases or decreases by a decimal point. 3. The recommended setting is 35.0°F (2.0°C) for refrigerators and -4.0°F (-20.0°C) for freezers. The available temperature setting range is 33.0°F to 54.0°F (1.0°C to 12.0°C) for Refrigerators and -10.0°F to 54.0°F (-23.0°C to 12.0°C) for Freezers.
- Page 16 Carel ‘ir33’ Digital Temperature Control Everest units are equipped with a Carel Digital Temperature Control. The type of controller is dependent on the model and production date Evaporator Fan Running Program Button Compressor Running Up Button / Alarm in Progress Auxillary Cabinet in Defrost Down Button /...
- Page 17 Initiating Manual Defrost The controller has an automatic defrost cycle in place so initiating manual defrost is not necessary unless there is an abnormal accumulation of ice around the evaporator coil. 1. Press and hold down the Manual Defrost Button until the Defrost Symbol appears on the LED display.
-
Page 18: Care And Maintenance
7. Care and Maintenance This section applies to all Everest products. Regular care and maintenance of your appliance will significantly extend service life and dependability. In severe cases, lack of upkeep will contribute to the rapid decline in performance and component health. Care and maintenance is the product owner’s personal responsibility. - Page 19 Condenser Coil Cleaning Instructions This section applies to all Everest products. The condenser coil requires monthly cleaning to keep the metal fins clear of lint, dust and grease build-up. A clogged condenser coil severely reduces your product’s energy efficiency and places strain on the compressor and other components leading to advanced failure. Cleaning the condenser coil is the product owner’s personal responsibility.
- Page 20 Swing Doors 1. Remove two screws from the top of the vented grill. 2. Pull on the top edge of the vented grill 3. Lift the vented grill vertically until the two keyholes on its bottom edge clears the stationary bolts. 4.
- Page 21 Sliding Doors 1. The top of the vented grill is held in place by magnets. 2. Lightly pull on the top edge of the vented grill so that it swings open a quarter of the way. 3. Lift the vented grill vertically until the two keyholes on its bottom edge clears the stationary bolts.
- Page 22 3. Use a long bristled brush in a vertical sweeping motion to remove lint, dust and debris from in between the metal fins of the condenser coil. Do not apply heavy pressure so as not to bend the fins. 4. Use a commercial condenser coil cleaner for metal fins that are coated in grease.
-
Page 23: Door Reversal Instructions
8. Door Reversal Instructions This section applies only to models EMGR20, EMGR24, EMGR24B and EMGR24C. Door reversals must be performed by qualified technicians. A second person is required. Safety goggles must be worn to protect from spinning parts. Warranty is void if the following guidelines are not met Before After 1. - Page 24 Door Reversal Instructions ( continued ) Lock Screw Right Top Hinge Shaft Right Bottom Hinge Shaft Lock Screw C- 1 C- 2 4. Locate the door spring shaft on the top right corner of the door . The head of the shaft has 4 screw C- 1 holes, one of which is occupied by a lock screw that maintains door spring tension .
- Page 25 Door Reversal Instructions ( continued ) 12. Detach the bottom hinge by removing the 3 screws holding it in place . Detach the bottom hinge. 13. The right top hinge becomes the left bottom hinge . Install the right top hinge into the left bottom position using 3 screws.
-
Page 26: Troubleshooting Guide
9. Troubleshooting Guide In most cases, your Everest product may be exhibiting behavior that is typical of standard operation. Observe the following when troubleshooting symptoms. ‘cht’ or ‘CHt’ appears on the LED alternating Check if the side and middle gaskets are properly with the current temperature and accompanied attached to the frames and sealing properly. - Page 27 The cabinet temperature is too warm. Condensation in the interior cabinet. The condenser coil may be clogged with dust, grime or The door or door gasket may not be sealing properly. debris. Clean it following the instructions in Chapter 7 Check product placement in the cabinet as it may prevent the door from fully closing.
-
Page 28: Warranty Information
Warranty Registration Registering your new appliance is important. In the unlikely event a safety notification or warranty service is required, we will have the means to contact you. Your completed appliance registration also verifies your ownership in the event of an insurance loss or theft. You may register online at www.EVERESTref.com or use your smart phone to scan the QR code below: 8. - Page 29 Warranty Certificate EVEREST warrants to the first purchaser of every new EVEREST unit, the cabinet and all parts thereof, to be free from defects in material or workmanship, under normal and proper use and maintenance service as specified by EVEREST and upon proper installation and start-up in accordance with the instruction packet supplied with each unit.
- Page 30 A Step Above The Standard 201 W. Artesia Blvd., Compton, CA 90220 Tel: 800-444-6285 / 310-323-6586 Fax: 310-323-7524 / 310-761-1127 www.EVERESTref.com...
Need help?
Do you have a question about the EMGR33-SS and is the answer not in the manual?
Questions and answers