Table of Contents
Advertisement
Quick Links
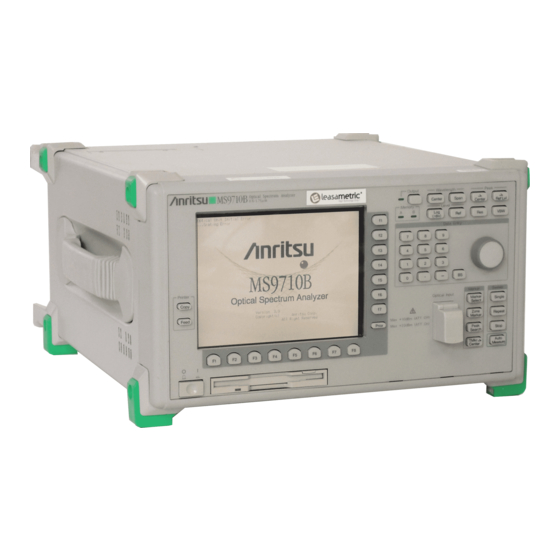
MS9710B/C
Optical Spectrum Analyzer
Service Manual
Fourth Edition
To ensure that this equipment is used safely,
important safety items are explained in the
MS9710A Optical Spectrum Analyzer Opera-
tion Manual. This manual explains important
service items related to service. Read both the
operation manual and this manual, and keep
both with the equipment.
Measurement Solutions
ANRITSU CORPORATION
Document No.: M-W1285BE-4.0
Advertisement
Table of Contents
Troubleshooting

Related Manuals for Anritsu MS9710B


Summary of Contents for Anritsu MS9710B
- Page 1 MS9710B/C Optical Spectrum Analyzer Service Manual Fourth Edition To ensure that this equipment is used safely, important safety items are explained in the MS9710A Optical Spectrum Analyzer Opera- tion Manual. This manual explains important service items related to service. Read both the operation manual and this manual, and keep both with the equipment.
- Page 2 Safety Symbols To prevent the risk of personal injury or loss related to equipment malfunction, Anritsu Corporation uses the following safety symbols to indicate safety-related information. Insure that you clearly understand the meanings of the symbols BEFORE using the equipment.
- Page 3 Always request repair by a trained engineer who understands the hazards. Anritsu Corporation will not accept liability for any injuries sustained as a result of opening the equipment covers.
- Page 4 This equipment cannot be repaired by the user. DO NOT at- tempt to open the cabinet or to disassemble internal parts. Repair Only Anritsu-trained service personnel or staff from your sales representative with a knowledge of electrical fire and shock hazards should service this equipment. There are...
- Page 5 CE Marking Anritsu affix the CE Conformity Marking on the following product(s) accordance with the Council Directive 93/68/EEC to indicate that they conform with the EMC directive of the European Union (EU). CE Conformity Marking 1. Product Name/Model Name Product Name:...
- Page 6 Power Line Fuse Protection For safety, Anritsu products have either one or two fuses in the AC power lines as requested by the customer when ordering. Single fuse: A fuse is inserted in one of the AC power lines. Double fuse: A fuse is inserted in each of the AC power lines.
-
Page 7: About This Manual
About This Manual This manual is written for service personnel trained by Anritsu Service Training Course and explains how to service the Anritsu MS9710B/C Optical Spectrum Ana- lyzer, how to install the optional light sources, how to install the latest software ver- sion, and how to troubleshoot faults. -
Page 8: Table Of Contents
Table of Contents For Safety ............About This Manual ........Section 1 Outline .......... Upgrading software ..............Installing optional light sources ..........Troubleshooting and repairing faults ........Section 2 Name and Function of Each Part Part Names ..............Removing Covers ............2.2.1 Removing Top Cover ........ - Page 9 Table of Contents Section 4 Installing Optional Light Sources Outline ................White Light Source ............4.2.1 Parts ............... 4.2.2 Installing ............4.2.3 Setting ............Wavelength Reference Light Source ......4.3.1 Parts ............... 4.3.2 Installing ............4-11 4.3.3 Settings ............4-14 Section 5 Troubleshooting ......
-
Page 11: Section 1 Outline
Section 1 Outline This section outlines the maintenance procedures, Upgrading software ........Installing optional light sources ...... Troubleshooting and repairing faults ..... -
Page 12: Upgrading Software
Installing optional light sources Optional light sources listed in Table 1-1 can be installed in this analyzer. Table 1-1 is in common at the MS9710B and the MS9710C. The installation method is described in Section 4. Table 1-1 Optional Light Sources Name Option No. -
Page 13: Troubleshooting And Repairing Faults
The codes on the right side of Table 1-2 and Table 1-3 corresponds to the codes in the circuit diagram and table of constants. Table 1-2 MS9710B Exchangeable Modules Module Name Code... - Page 14 The functions of each module are explained in Section 2. Sections 5 and 6 ex- plain how to troubleshoot faults and how to exchange modules. Faulty modules are repaired at the Anritsu Plant. For parts-level repair to mod- ules, send the module to Anritsu noting the description in item 6.2.
-
Page 15: Section 2 Name And Function Of Each Part
Section 2 Name and Function of Each Part This section explains how to remove the equipment covers and the location and function of each exchangeable module. Part Names ........Removing Covers ....... 2.2.1 Removing Top Cover ......2.2.2 Removing Left Side Cover ....2.2.3 Removing Right Side Cover .... -
Page 16: Part Names
Section 2 Name and Function of Each Part 2.1 Part Names The location of the replacable modules and related parts are shown in figures 2-1 to 2-6. Table 2-1 Location of Replacable Modules Module Name Figure Control Fig. 2-4 (6) Motor Drive Fig. - Page 17 (2) RS-232C Interface Connector (5) Printer Cover Button (1) GPIB Interface Connector Monitor output CLASS 1 LASER PRODUCT (10) Monitor Output Connector MS9710B (Option) (6) Frame Ground MS9710C (Standard) (7) AC Power Supply Input Connector (9) Reference Light Source Output Port 2 (Option) (8) Fan Fig.
- Page 18 Section 2 Name and Function of Each Part (2) Printer Module (1) Printer Driver Module (3) Interface Module (4) Optical Module (7) Power Unitt Module (6) White Light Module or (5) Lamp Module or Reference Light Module Reference Module Fig. 2-3 Top Cover Open (1) Printer Chassis (3) Optical Module (2) Interface Module...
- Page 19 (1) Panel Module (2) LCD Module Protective Cover Fig. 2-5 MS9710B Panel/LCD Modules (1) Panel Module (2) LCD Module Fig. 2-6 MS9710C Panel/LCD Modules...
- Page 20 Section 2 Name and Function of Each Part (1) Mother Board Module (2) FDD Module Fig. 2-7 Motherboard...
-
Page 21: Removing Covers
2.2 Removing Covers Rear Foot Holder Top Cover Printer Cover Button Printer Cover Rear Panel Front Foot Holder Rear Foot Holder Front Panel Front Foot Holder 2.2.1 Removing Top Cover Remove the screws 1 to 4 securing the Reear Foot Holders. Remove the screw 5 securing the center of the top cover to the Rear Panel. -
Page 22: Removing Left Side Cover
Section 2 Name and Function of Each Part 2.2.2 Removing Left Side Cover Rear Foot Holder Top Cover Side Frame Side Handle Rear Foot Rubber Cover Rear Panel Front Foot Holder Rear Foot Holder Front Foot Rear Foot Front Foot Side Frame Front Foot Holder Side Handle... -
Page 23: Removing Rear-Panel Cover 1
2.2.4 Removing Rear-Panel Cover 1 Remove the Top Cover. (See 2.2.1.) Disconnect the cables connected to the Control Module. (See Fig. 2-4 for the module location.) Disconnect the cables connected to the Measurement Module. (See Fig. 2-4.) Remove the eight screws securing the right and left Rear Foot Holders and Rear Feet. -
Page 24: Opening Printer Chassis
Section 2 Name and Function of Each Part 2.2.5 Opening Printer Chassis Remove the roll of printer paper. Disconnect the Measurement Module Cable 1 connected to the Measure- ment Module. Measurement Module Cable 1 Measurement Module Cable 2 Remove screws 1 to 6. Open the printer chassis. -
Page 25: Removing Bottom Cover
2.2.6 Removing Bottom Cover Bottom Cover Rear Foot Rear Foot Front Foot Front Foot Remove four screws 1 to 4 and remove the two Rear Feet. Remove the screw 5 securing the center of the Bottom Cover to the Rear Panel. -
Page 26: Explanation Of Modules
Section 2 Name and Function of Each Part 2.3 Explanation of Modules Each module is connected as shown in Figure below. Front Panel Motor Drive Optical Module A6 Motherboard Module Inverter Measure E2 Fan Module Control 2 Printer Driver See Note below. Power Interface Control 1... -
Page 27: Motor Drive (A2)
2.3.2 Motor Drive (A2) This module receives the wavelength data from the Measurement Module, sets the position of the refractive elements, generates voltage and outputs it to the Power Module. It drives the motors controlling the resolution, optical axis adjust- ment and optical attenuates, etc., and sends the position data for the motors to the Measurement Module. -
Page 28: Interface (A5)
Section 2 Name and Function of Each Part 2.3.5 Interface (A5) This module: (a) Controls the RS-232C signals, and sends data to and from the Control Module. (b) Controls the GP-IBC signals and sends data to and from the Control Mod- ule. -
Page 29: Motherboard (A12)
2.3.11 Motherboard (A12) The Motherboard Module connects the signals from the following modules and supplies power to each module. • Control Modules • Motor Drive Module • Panel Module • Measurement Module • Power Module • E1 • E2 • E3 •... - Page 30 Section 2 Name and Function of Each Part 2-16...
-
Page 31: Section 3 Maintenance Mode
Section 3 Maintenance Mode This section describes the maintenance mode operations for the MS9710B/C, MS9715A and MS9710A (Version 2.0 and later). Role of Maintenance Mode and Start Method ........ 3.1.1 Role of Maintenance Mode ....3.1.2 Starting Maintenance Mode .... -
Page 32: Role Of Maintenance Mode And Start Method
Section 3 Maintenance Mode 3.1 Role of Maintenance Mode and Start Method 3.1.1 Role of Maintenance Mode The Maintenance Mode is a special operation mode for maintenance including settings for the MS9710 series software updates and option additions. The Main- tenance Mode is not accessible by general users and is not used in day-to-day operations. -
Page 33: Maintenance Operations
3.2 Maintenance Operations This section explains the procedures required to maintain the MS9710 series. To execute the following procedures, first, start the MS9710 series in the Mainte- nance Mode (3.1.2). 3.2.1 Updating Software Version The software version can be updated via the floppy disk drive (FDD) using the Maintenance Mode download function. -
Page 34: Initializing Backup Ram
Section 3 Maintenance Mode 3.2.2 Initializing Backup RAM To initialize the backup RAM, select the Backup RAM card and then select Yes. Initializing the backup RAM deletes all the previously-saved measurement con- ditions, so only use this function when necessary such as after downloading up- date software. -
Page 35: Adding Options
3.2.4 Adding Options To add an option, select Option Setup and select the number of the option to be updated from the right side of the screen. Options 1 to 5 are displayed; to display more options, press the More key. When the option number to be updated is selected, an On/Off selection choice is displayed;... -
Page 36: Setting Equipment Version Display
Section 3 Maintenance Mode 3.2.5 Setting Equipment Version Display To set the equipment version, select Version No. Select the digit to update with the arrows, input the numeric value using the ten keys and complete the setting by pressing the Exec key. 3.2.6 Other Special Functions The Log Data Save card is a special function used for development. -
Page 37: List Of Function Keys
Exit f1 Exec f3 ← F5 Log Data Save f4 → f7 Exit f1 Exec f3 ← F6 Version No. Set f4 → f7 Exit f1 MS9710A f2 MS9710B f3 MS9710C F7 Type f4 MS9780A f5 MS9715B f6 MS_SP... - Page 38 Section 3 Maintenance Mode...
-
Page 39: Section 4 Installing Optional Light Sources
Section 4 Installing Optional Light Sources This section describes the installation and setting of optional light sources in the analyzer. Outline ..........White Light Source ......4.2.1 Parts ........... 4.2.2 Installing ..........4.2.3 Setting ..........Wavelength Reference Light Source .. 4.3.1 Parts ........... -
Page 40: Outline
Section 4 Installing Optional Light Sources 4.1 Outline This section describes the installation and setting of optional light sources in the analyzer. The following tools are required for the installation. Table 4-1 Installation Tools Name Remarks Driver Driver M2.6 Driver CAUTION The optical fibers are easily damaged during installa- tion. - Page 41 Fig. 4-1 LAMP MODULE Fig. 4-2 WHITE LIGHT PC-board Fig. 4-3 DF1B Cable...
- Page 42 Section 4 Installing Optional Light Sources Fig. 4-4 Optical Adapter Fig. 4-5 Connector Cap Fig. 4-6 Insulator Fig. 4-7 Plastic Screw Fig. 4-8 Label...
-
Page 43: Installing
4.2.2 Installing (1) Remove the Top Cover. (2) Remove the Left Side Cover. (3) Remove the Horizontal Cover of the Power Unit Module. (4) Secure the Lamp Module with plastic screws 5 through 8 to the Printer Chassis using the Insulator (Fig. 4-7) between the Printer Chassis and the Lamp Module. - Page 44 Section 4 Installing Optional Light Sources (12) Connect the Optical Connector of the Lamp Module to the Optical Adapter. (13) Run the Optical Connector through the hole in the back panel of the option parts and fit the Back Panel to the Back Panel Plate. (14) Fit the Optical Connector Cap to the Back Panel.
-
Page 45: Setting
4.2.3 Setting (1) Press POWER while pressing the SPAN key to display the Maintenance Mode screen. (2) Select Option Setup. (3) Select Option 2. (4) Select On. (5) Toggle the power OFF/ON. (6) Press the Opt Output key and check that white light is output. (7) Attach the label to the option column in the Name Plate on the Back Panel. -
Page 46: Wavelength Reference Light Source
Section 4 Installing Optional Light Sources 4.3 Wavelength Reference Light Source The Wavelength Reference Light Source outputs reference light with a waveform of 1.53 µm to 1.57 µm from a Super Luminescence Diode (SLD); the output is split into two, both of which can be used for calibration. 4.3.1 Parts The Wavelength Reference Light Source is composed of the following parts. - Page 47 (a) Option Module (03) (b) Option Module (04) (c) Option Module (05) Fig. 4-9 Option Modules Fig. 4-10 REFERENCE LIGHT PC-Board...
- Page 48 Section 4 Installing Optional Light Sources Fig. 4-11 Insulator 1 Fig. 4-12 Insulator 2 Fig. 4-13 Insulation Rubber 4-10...
-
Page 49: Installing
Fig. 4-14 Insulation Sheet Fig. 4-15 Label 4.3.2 Installing CAUTION After fitting this option, always check the electrical in- sulation between the Reference Module and Chassis. If the Reference Module is not isolated from the chassis, it will be damaged when the optical output is switched (1) Remove the Top Cover. - Page 50 Section 4 Installing Optional Light Sources (4) Fit the Insulator 1 at screw holes 3 and 4 to the Printer Chassis; fit the Insulator 2 at screw holes 1 and 2 to the Printer Chassis. Put the Insulation rubber on them. (5) Fit the Option Module on the Insulation rubber using the plastic screws.
- Page 51 (12) Fit the Printer Paper Case. (12) Fit the Optical Adapter to the Back Panel. (13) Connect the Optical Connector to the Optical Adapter. (14) Run the Optical Connector through the hole in the back panel of the option parts and fit the Back Panel. (15) Fit the Optical Connector Caps to the Back Panel.
-
Page 52: Settings
Section 4 Installing Optional Light Sources (20) Connect the DF1B Connector (2 pin) of the Reference Module to X2 of the Reference Light Module. (21) Fit the cover of the Power Unit Module. (22) Fit the Left Side Cover. (23) Fit the Top Cover. (24) Change the Name Plate. -
Page 53: Section 5 Troubleshooting
Section 5 Troubleshooting This section explains the types of faults that may occur and how to troubleshoot and replace the faulty module. General ..........Error Message at Initial Screen ..Abnormal Data I/O ......Abnormal Measurement ..... Abnormal Performance ...... Abnormal Light Source Option ... - Page 54 Table 5-1 shows the faults and related modules. For more details, refer to the relevant section in this manual. Refer to Appendix A in the MS9710B/C Operation Manual for a description of troubleshooting faults. Refer to Section 6 for a description of how to change a faulty module. When changing a module ALWAYS switch OFF the power and DISCONNECT the power cord from the power outlet.
-
Page 55: General
1.3 Equipment Composition 5.1 General Fault Exchange Module No power • LCD not lit Power Unit Module • Fan not turning • PC board LEDs not lit LCD Module Fan turning but LCD not lit Control Module LCD lit but Fan not turning Fan Module 5.2 Error Message at Initial Screen Fault... -
Page 56: Abnormal Data I/O
Section 5 Troubleshooting 5.3 Abnormal Data I/O Fault Exchange Module Panel Block Module No input at any key Control Module No input at specific keys Panel Block Module Key input OK but no input at Panel Block Module rotary encoder Interface Module No GPIB control Control Module... -
Page 57: Abnormal Performance
1.6 Precautions 5.5 Abnormal Performance Fault Exchange Module Following out-of-spec • Level accuracy Optical Module • Wavelength accuracy Measurement Module • Resolution accuracy • Wavelength flatness Following out-of-spec • Dynamic range • Polarization characteristics • Measurement level Optical Module range •... - Page 58 Section 5 Troubleshooting...
-
Page 59: Section 6 Repair
Section 6 Repair This section explains how to exchange faulty modules and how to test the equip- ment after making the exchange. Refer to Section 2 for a description of how to remove the covers and how to open the printer chassis. Removing and Testing Each Module . -
Page 60: Removing And Testing Each Module
Section 6 Repair 6.1 Removing and Testing Each Module This section explains how to exchange and test each module listed in Table 1-2. WARNING BEFORE exchanging a module, ALWAYS disconnect the power cord form the power outlet. If this precau- tion is ignored, there is a high risk of receiving a fatal or very serious electric shock. -
Page 61: Motor Drive Module
6.1.2 Motor Drive Module • Exchange Printer Chassis Motor Drive Module Remove the Top Cover. 2.2.1 Lift open the printer chassis. 2.2.5 Pull out the Power Module to remove the PC board clamps. Pull out the Motor Drive Module. Insert the exchange Motor Drive Module and re-assemble in the reverse procedure. -
Page 62: Panel Module
Section 6 Repair 6.1.3 Panel Module • Exchange Remove the Left Side Cover. 2.2.2 Remove the Right Side Cover. 2.2.3 Remove the Top Cover. 2.2.1 Remove the Bottom Cover. 2.2.6 Remove the Front Panel Frame. Remove the four screws on the left and right securing the Panel Block to the Chassis. - Page 63 13. Remove the two screws 3 and 4 securing the LCD Module from the inside of the Panel Block. (1) Panel Module (2) LCD Module Protective Cover MS9710B (1) Panel Module (2) LCD Module MS9710C 14. Remove the LCD Module by sliding it.
-
Page 64: Measure Cpu/Optical Module
Section 6 Repair 6.1.4 Measure CPU/Optical Module Measurement Module • Exchange Printer Chassis Measurement Module Remove the top cover. Open the Printer Chassis. Pull out the Power Module to remove the PC board clamps. Pull out the Measurement Module. Insert the exchange Measurement Module and re-assemble in the reverse procedure. - Page 65 Optical Module • Exchange Remove the Back Panel. Remove screws 1~4 and remove the Bracket. Remove cables 1~6. Pull out the Optical Module. Slide in the exchange Optical module and re-assemble in the reverse proce- dure. • Post-exchange Test If the initial screen is displayed at power-on and then the screen is changed to a screen displaying the scales, there is no problem.
-
Page 66: Interface Module
Remove Pillars 1 and 2 of the GPIB connector from the Rear Panel side. Disconnect the GPIB cable. Disconnect the VGA cable from control. (MS9710B: Option, MS9710C: Standard) Remove the five screws 1 through 5. Remove the Interface Module. Slide in the exchange Interface Module and re-assemble in the reverse pro- cedure. -
Page 67: White Light Module (Option)
6.1.6 White Light Module (Option) • Exchange White Light Module Remove the Top Cover. (See 2.2.1.) Disconnect the two cables. Remove screws 1 through 4 and remove the White Light Module. Install the exchange White Light Module using screws 1through 4. Re-assemble in the reverse procedure. -
Page 68: Lamp Module (Option)
Section 6 Repair 6.1.7 Lamp Module (Option) • Exchange Lamp Module Remove the Top Cover. (See 2.2.1.) Disconnect the cable attached to the Printer Driver Module from the con- nector at the Printer Driver Module side. Remove screws 1 through 4 securing the Lamp Module. Remove the Left Side Cover. - Page 69 Disconnect the optical cable connected to the optical connector. Remove the optical cable clamp from the Left Side Cover, free the optical cables and Remove the Lamp Module. Fit the exchange Lamp Module with screws 1 through 4. Connect the optical cable to the optical connector and secure them to the Left Side Panel with the cable clamp.
-
Page 70: Reference Light Module (Option)
Section 6 Repair 6.1.8 Reference Light Module (Option) • Exchange Reference Light Module Remove the Top Cover. (See 2.2.1.) Disconnect the two cables. Remove screws 1 through 4 and remove the Reference Light Module. Remove the Left Side Cover. (See 2.2.2.) Fit the exchange Reference Light Module with screws 1 through 4. -
Page 71: Reference Module (Option)
6.1.9 Reference Module (Option) • Exchange Reference Module Remove the Top Cover. (See 2.2.1.) Disconnect the cable attached to the Printer Driver Module from the con- nector at the Printer Driver Module side. Remove screws 1 through 4 securing the reference Module. Remove the Left Side Cover. - Page 72 Section 6 Repair Disconnect the two optical cables connected to the optical connectors. Remove the optical cable clamp from the Left Side Cover, free the optical cables and remove the Reference Module. Fit the exchange Reference Module with screws 1 through 4. Connect the two optical cables to the optical connectors and secure them to the Left Side Panel with the cable clamp.
-
Page 73: Power Module
6.1.10 Power Module • Exchange Printer Chassis Power Module Remove the Top Cover. (See 2.2.1.) Lift open the Printer Chassis. (See 2.2.5.) Pull out the Power Module. Slide in the exchange Power Module and re-assemble in the reverse proce- dure. •... -
Page 74: Motherboard Module
Section 6 Repair 6.1.11 Motherboard Module • Exchange (1) Mother Board Module (2) FDD Module Remove the Top Cover. (See 2.2.1.) Lift open the Printer Chassis. (See 2.2.5.) Remove the one screw and PC board clamp. Remove the four PC boards. Remove the Bottom Cover. -
Page 75: Power Unit Module
6.1.12 Power Unit Module • Exchange Remove the Bottom Cover. (See 2.2.6.) Remove the Left Side Cover. (See 2.2.2.) Remove the Top Cover. (See 2.2.1) Remove the Printer Paper. Remove screws 1 through 6 and remove the printer chassis. Printer Cable Printer Chassis 6-17... - Page 76 Section 6 Repair Protective Cover Power Unit Module Disconnect the cable connected to the Measurement Module. Remove the one screw securing the PC board clamps. Remove all the PC board modules. Remove screws 7 and 8, and remove the protective cover. 10.
-
Page 77: Fan Module
6.1 13 Fan Module • Exchange Remove the four screws securing the Fan Cover. Disconnect the cable to the Motherboard. Remove the Fan Module. Fit the exchange Fan Module using screws 1~4 mounting the Fan Cover at the same time. Re-assemble in the reverse procedure. -
Page 78: Printer Driver Module
Section 6 Repair 6.1.15 Printer Driver Module • Exchange Printer Driver Module Remove the Top Cover. (See 2.2.1.) Disconnect three cables. Remove four screws and remove the Printer Driver Module. Install the exchange Printer Driver Module and re-assemble in the reverse procedure. -
Page 79: Printer Module
6.1.16 Printer Module • Exchange Printer Module Remove the Top Cover. (See 2.2.1.) Disconnect the two cables. Remove four screws and remove the Printer Cover. Remove four screws and remove the Printer Module. Install the exchange Printer Module and re-assemble in the reverse proce- dure. -
Page 80: Lcd Module
Section 6 Repair 6.1.17 LCD Module • Exchange Remove the Left Side Cover. 2.2.2 Remove the Right Side Cover. 2.2.3 Remove the Top Cover. 2.2.1 Remove the Bottom Cover. 2.2.6 Remove the Front Panel Frame. Remove the four screws on the left and right securing the Panel Block to the Chassis. - Page 81 (1) Panel Module (2) LCD Module Protective Cover MS9710B (1) Panel Module (2) LCD Module MS9710C 14. Remove the LCD Module by sliding it. 15. Fit the new LCD Module in the reverse procedure. • Post-exchange Test If the initial screen is displayed at power-on and then the screen is changed to a screen displaying the scales, there is no problem.
-
Page 82: Exchange Of Optical Connector Procedure
Section 6 Repair 6.1.18 Exchange of Optical Connector Procedure To remove the side cover Remove the cover on the right side of the optical unit. (Fig.6-1) Side Cover Fig. 6-1 To remove FC/PC Connecter Unit (1) Remove the connector on the left side of the adaptor. (Fig.6-2) Cut the adhesive which fixes the connector and the adaptor. - Page 83 Plier Fig. 6-3 6-25...
- Page 84 Section 6 Repair (2) Remove the FC/SPC Connector Unit from the panel. (Fig.6-4, Fig.6-5) When the optical fiber is drawn out, (a) take care not to let the connector and the optical fiber touch the slit disk (b) take care not to scratch the tip in the ferrule of the connector Front Panel FC/SPC Connector Unit Fig.
- Page 85 To replace to FC/APC Connector Unit (1) Replace the FC/APC Connector Unit. When you replace it, (a) take care not to let the connector and the optical fiber touch the slit disk. (b) take care not to scratch the tip in the ferrule of the connector. Pass the Optical Fiber FC/APC Connector Unit Fig.
-
Page 86: Factory Repair
6.2 Factory Repair Sometimes it may be necessary to return faulty equipment or modules to the Anritsu Plant for repair. Before sending the equipment, etc., contact the Anritsu Service Section and provide the following information. • Equipment Name or Module Name, and serial number on the Back Panel •... -
Page 87: Appendix A Software Update
In addition, it is necessary to obtain export permission under the Export Trade Control Order. Adding Option 10 to MS9710B To add Option 10 to MS9710B and later, to put up the option 10 seal on rear panel. Option 10 Seal... - Page 88 Appendix A Software Update...
-
Page 89: Appendix B List Of Options
Appendix B List of Options Option No. MS9710B MS9710A (Ver. 2.0 and later) MS9710C MS9715A Option 01 Option 02 White light source Yes = On, No = Off Wavelength reference + SLD light source Option 03 Yes = On, No = Off... - Page 90 Appendix B Options...
- Page 91 MS9710B/C Optical Spectrum Analyzer Service Manual Read this manual before using the equipment. Keep this manual with the equipment.
- Page 93 ANRITSU CORPORATION 5-10-27, Minamiazabu, Minato-ku, Tokyo 106 Japan / Phone: 81-3-3446-1111 Document No.: M-W1285BE Printed in Japan...
Need help?
Do you have a question about the MS9710B and is the answer not in the manual?
Questions and answers