Table of Contents
Advertisement
Available languages
Available languages
Quick Links
INSTRUCTION MANUAL
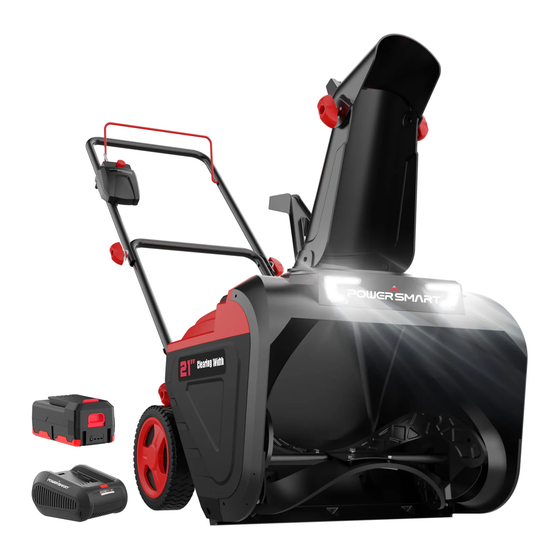
EN 40V Cordless Snow Thrower
FR Souffleuse à neige sans fil 40V
ES Lanzador de nieve inalámbrico de 40V
Model # HB2421A/HB2421
Have product questions or need technical support? Please feel free to contact us!
Website:
www.powersmartusa.com
Toll free: 1-800-791-9458 (Mon-Fri 9-5 EST)
Email:
support@amerisuninc.com
support@powersmartusa.com
Website
Advertisement
Chapters
Table of Contents

Subscribe to Our Youtube Channel
Related Manuals for Power smart HB2421A


Summary of Contents for Power smart HB2421A
- Page 1 INSTRUCTION MANUAL EN 40V Cordless Snow Thrower FR Souffleuse à neige sans fil 40V ES Lanzador de nieve inalámbrico de 40V Model # HB2421A/HB2421 Have product questions or need technical support? Please feel free to contact us! Website: www.powersmartusa.com Toll free: 1-800-791-9458 (Mon-Fri 9-5 EST) Email: support@amerisuninc.com...
-
Page 3: Table Of Contents
Maintenance ....................10 Troubleshooting .................... 11 Exploded view and part list ................12 Two (2) years limited warranty ..............15 TECHNICAL DATA 40V Cordless Snow Thrower Model#: HB2421A/HB2421(Bare tool) Charger power input: 120V, 60Hz Battery type: 40V Lithium-ion Battery model: DB2102... -
Page 4: Introduction
INTRODUCTION ® Thank You for Purchasing a PowerSmart Product. This manual provides information regarding the safe operation and maintenance of this product. Every effort has been made to ensure the accuracy of ® the information in this manual. PowerSmart reserves the right to change this product and specifications at any time without prior notice. - Page 5 • To avoid accidental start-ups, remain in the starting position when turning the snow thrower on. The operator and the snow thrower must be in a stable position during start-up. See the section titled Starting/Stopping Instructions. • Use this snow thrower only for the purposes it was designed. •...
- Page 6 Wear hearing protection. Wear Safety Alert. Caution. eye protection. WARNING! To reduce the risk of The rotating part will injury, user must read instruction continuously run for several manual. seconds after you turn off the machine. Do not expose to rain. Keep dry. DANGER! Keep hands and feet away from openings while the machine is running.
-
Page 7: Knowing Your Snow Thrower
KNOWING YOUR SNOW THROWER Use the illustrations below to become familiar with the locations and functions of the various components and controls of this snow thrower. Auger Control Bar Auger Upper handle Wheel Switch button Middle handle Battery box Knob Chute Rotation Handle Clean out tool Discharge Chute... -
Page 8: Operating Your Snow Thrower
OPERATING YOUR SNOW THROWER The following section describes steps to use your Snow Thrower for use. If after reading this section, you are unsure about how to perform any of the steps please call 1-800-791-9458 for customer service. Failure to perform these steps properly can damage your Snow Thrower or shorten its life. Review the SAFETY section in this manual before operating snow thrower. - Page 9 POWERING ON AND OFF 1. To power on, after putting the battery pack into its holder, insert the safety key. 2. Press the rod start button in fully and hold in. The start button is located on the switch housing. 3.
-
Page 10: Maintenance
• When moving the snow thrower, use the wheels on one side as the pivot point. Slightly tilt the snow thrower on this pivot point to move it forward or backward. • Start your clearing path outward, throwing snow in a back and forth motion. To clear in the opposite direction, pivot the snow thrower on its wheels. -
Page 11: Troubleshooting
BATTERY CAUTION + DISPOSAL INFORMATION Always dispose of your battery packs according to federal, state, and local regulations. Contact a recycling agency in your area for recycling locations. CAUTION! Even discharged battery packs contain some energy. Before disposing, use electrical tape to cover the terminals to prevent the battery packs from shorting, which could cause a fire or explosion. -
Page 12: Exploded View And Part List
EXPLODED VIEW AND PARTS LIST... - Page 13 Item Stock# Description Item Stock# Description 303020282 Bolt M6x16 28.3 203010890 LED right lampshade Deep groove ball 303100034 28.4 301013048 Left light panel bearing 303070797 Bearing platen welded 28.5 301013049 Right light panel 202450150 Auger assembly 28.6 303160513 Spacer sleeve 303181494 Auger shaft welding 28.7...
- Page 14 Item Stock# Description Item Stock# Description 303020282 Bolt M6x16 303071695 Right support plate 203021363 8" right wheel cover 303010363 Self tapping screw 203021266A Charger insert holder 303020124 Bolt M8x35 303010159 Self tapping screw 303030077 Lock nut M8 203051072 Battery pack holder 303081214 Lower Tube 303130355...
-
Page 15: Two (2) Years Limited Warranty
PowerSmart is committed to building tools that are dependable for years. Our warranties are consistent with our commitment and dedication to quality. TWO (2) YEARS LIMITED WARRANTY OF POWER SMART PRODUCTS FOR HOME USE. PowerSmart (“Seller") warrants to the original purchaser only, that all PowerSmart consumer power tools will be free from defects in material or workmanship for a period of two (2) years from date of purchase. - Page 16 Vue éclatée et liste des pièces Garantie limitée de deux (2) ans DONNÉES TECHNIQUES Souffleuse à Neige Sans Fil 40V Numéro de modèle : HB2421A/HB2421(Outils nus) Entrée d'alimentation du chargeur : 120 V, 60 Hz Type de batterie : 40 V Lithium-ion Modèle de batterie :...
- Page 17 INTRODUCTION Merci d'avoir acheté un produit PowerSmart®. Ce manuel offre des informations concernant le fonctionnement et la maintenance de ce produit en toute sécurité. Nous avons fait de notre mieux pour assurer l'exactitude des informations contenues dans le présent manuel. PowerSmart® se réserve le droit de modifier ce produit et ses spécifications à...
- Page 18 •Veuillez porter des lunettes de sécurité ou des lunettes de protection qui répondent aux normes ANSI Z87.1. • Veuillez utiliser la souffleuse à neige sous la lumière du jour ou sous la bonne lumière artificielle. Si ce produit est utilisé la nuit, veuillez allumer la LED et faire attention à votre environnement. •...
- Page 19 • Veuillez conserver ce manuel d’instructions dans un endroit sûr pour référence future. Veuillez le consulter souvent et l’utiliser pour instruire d'autres utilisateurs. Toute personne qui utilise cette souffleuse à neige doit lire attentivement ce manuel d’instructions. • Veuillez entretenir la souffleuse à neige avec soin. Veuillez suivre les instructions pour la lubrification et le remplacement.
- Page 20 AVERTISSEMENT L'utilisation de tout outil électrique peut causer la projection d'objets étrangers dans vos yeux, ce qui peut provoquer de graves lésions oculaires. Avant de commencer à utiliser un outil électrique, veillez à porter des lunettes de sécurité ou des lunettes de protection avec écrans latéraux et, si nécessaire, un écran facial complet.
- Page 21 FONCTIONNEMENT DE VOTRE SOUFFLEUSE À NEIGE La section suivante décrit les étapes nécessaires pour utiliser la souffleuse à neige. Après avoir lu cette section, si vous n'êtes pas sûr de la façon d'effectuer l'une des étapes, veuillez appeler le 1-800-791- 9458 pour profiter du service clientèle.
- Page 22 MISE SOUS TENSION ET HORS TENSION 1.Pour allumer cet appareil, après avoir mis le bloc-batterie dans le compartiment, veuillez insérer la clé de sécurité. 2. Veuillez appuyer à fond sur le bouton de démarrage de la tige et le maintenir enfoncé. Le bouton de démarrage se situe sur le boîtier de l'interrupteur.
- Page 23 tout objet étranger qui pourrait être ramassé et projeté par la turbine. • Veuillez garder la zone d'utilisation exempte de corps étrangers qui peuvent être projetés par la turbine. Veuillez effectuer une inspection approfondie de la zone puisque certains objets peuvent être cachés par la neige environnante.
- Page 24 MAINTENANCE ENTRETIEN L'entretien doit être effectué par un technicien qualifié. Les pièces de rechange pour cette souffleuse à neige doivent être identiques aux pièces qu'elles remplacent. Si des réparations sont nécessaires, veuillez contacter la ligne d'assistance gratuite, au 1-800-791-9458. Remarque : Veuillez identifier les côtés gauche et droit de la souffleuse à neige quand vous vous tenez debout dans la position de fonctionnement normal.
- Page 25 2. N’installez que des batteries neuves du même type dans votre produit (le cas échéant). 3. L’échec d’insérer les batteries dans la correcte polarité, comme indiqué dans le compartiment à batterie ou dans le manuel, peut raccourcir la durée de vie des batteries ou entraîner une fuite des batteries.
- Page 26 VUE ÉCLATÉE ET LISTE DES PIÈCES...
- Page 27 Article Stock# Description Qté Article Stock# Description Qté 303020282 Boulon M6x16 303070738A Capot gauche Roulement à billes à gorges Montage du panneau 303100034 202450120 profondes lumineux 303070797 Plateau de roulement soudé 28.1 203010885 Plaque logotypée 202450150 28.1-1 203010937 Tarière Plaque logotypée 303181494 Soudage de l'arbre de tarière 28.2...
- Page 28 Article Stock# Description Qté Article Stock# Description Qté 301030105 Moteur 303181495 plaque de support gauche 303010352 Vis autotaraudeuse 85.1 303020683 Boulon 303071697 Briquetage de moteur 85.2 303071694 Plaque de support gauche 303110039 Rondelle plate 303161001 Arbre 303071455A 303160845 Support de moteur Broche papillon 303041009 303071695...
- Page 29 Nous vous félicitons d'avoir acheté un article de qualité supérieure-PowerSmart. Nos produits sont conçus et fabriqués pour correspondre à toutes les normes de sécurité de l'industrie. GARANTIE LIMITÉE DES MACHINES POWER SMART DE DEUX(2) ANS. PowerSmart(“vendeur”) garantit seulement à l’acheteur original, tous les prouduits de PowerSmart seront gratuits à...
-
Page 30: Datos Técnicos
VISTA EN DESPIECE Y LISTA DE PIEZAS ................40 Garantía limitada de dos (2) años ...................... 43 DATOS TÉCNICOS Lanzador de nieve inalámbrico de 40 V Modelo#: HB2421A/HB2421(Herramienta desnuda) Entrada de energía del cargador: 120V, 60Hz Tipo de batería: Iones de litio de 40V Modelo de batería:... -
Page 31: Introducción
INTRODUCCIÓN ® Gracias por comprar un producto PowerSmart . Este manual proporciona información sobre la operación y el mantenimiento seguros de este producto. Se han realizado todos los esfuerzos posibles ® para garantizar la precisión de la información de este manual. PowerSmart se reserva el derecho de cambiar este producto y las especificaciones en cualquier momento sin previo aviso. - Page 32 • Use anteojos de seguridad o goggles que cumplan con los estándares ANSI Z87.1. • Use el lanzador de nieve a la luz del día o con buena luz artificial. Si lo usa de noche, encienda las luces LED y esté atento a su entorno. •...
- Page 33 PRECAUCIÓN USE ÚNICAMENTE BATERÍAS DE REPUESTO APROBADAS POR ® PowerSmart ; OTRAS BATERÍAS PUEDEN CAUSAR LESIONES O DAÑOS AL LANZADOR DE NIEVE. USE ÚNICAMENTE CON BATERÍAS 40V y CARGADOR DE ® PowerSmart Use protección auditiva. Use Alerta de seguridad. Precaución. protección para los ojos.
-
Page 34: Conocer Su Lanzador De Nieve
CONOCER SU LANZADOR DE NIEVE Use las ilustraciones siguientes para familiarizarse con las ubicaciones y funciones de los diversos componentes y controles de este lanzado. Barra de Control de Barrena Barrena Mango Superior Rueda Botone Asa central Caja de bateria Perilla Mango de Rotación de Rampa Herramienta de limpieza... -
Page 35: Operar Su Lanzador De Nieve
OPERAR SU LANZADOR DE NIEVE La siguiente sección describe los pasos para usar su lanzador de nieve. Si después de leer esta sección, no está seguro de cómo realizar alguno de los pasos, llame al 1-800-791-9458 para obtener servicio al cliente. No realizar estos pasos correctamente puede dañar su lanzador de nieve o acortar su vida útil. - Page 36 ENCENDIDO Y APAGADO 1. Para encender, después de colocar la batería en su soporte, inserte la llave de seguridad. 2. Presione completamente el botón de inicio de la varilla y manténgalo presionado. El botón de inicio está ubicado en la carcasa del interruptor. 3.
- Page 37 nieve circundante. Si el lanzador de nieve golpea una obstrucción o recoge un objeto extraño durante el uso, detenga el lanzador de nieve, retire la batería, retire la obstrucción e inspeccione la unidad en busca de daños. Repare o reemplace cualquier pieza dañada antes de reiniciar y operar la unidad. •...
-
Page 38: Mantenimiento
MANTENIMIENTO SERVICIO El servicio debe ser realizado por un técnico calificado. Las piezas de repuesto para este lanzador de nieve deben ser idénticas a las piezas que reemplazan. Si es necesario realizar reparaciones, comuníquese con la línea de ayuda gratuita al 1-800-791-9458. Nota: Identifique los lados izquierdo y derecho del lanzador de nieve cuando esté... -
Page 39: Solución De Problemas
SOLUCIÓN DE PROBLEMAS PROBLEMA CAUSA POSIBLE SOLUCIÓN Asegúrese de que los pernos estén instalados correctamente a través de las barras de la La manija no está Los pernos no están asentados manija. Verifique si las perillas de mano están en posición. correctamente. -
Page 40: Vista En Despiece Y Lista De Piezas
VISTA EN DESPIECE Y LISTA DE PIEZAS... - Page 41 Cant Item Stock # Descripción Cant. Item Stock # Descripción 303020282 Tornillo M6x16 303070738A Cubierta izquierda Rodamiento rígido de 303100034 202450120 Montaje del panel de luz bolas Platina de rodamiento 303070797 28.1 203010885 Placa de logotipo soldada 28.1- 202450150 Barrena 203010937 Placa de logotipo Soldadura del eje del...
- Page 42 Item Stock # Descripción Cant. Item Stock # Descripción Placa de soporte 301030105 Motor 303181495 izquierda Tornillo 303010352 85.1 303020683 Tornillo autorroscante Placa de soporte 303071697 Briquetas de motor 85.2 303071694 izquierda 303110039 Arandela plana 303161001 303071455A Soporte de motor 303160845 Aguja de mariposa 303041009...
-
Page 43: Garantía Limitada De Dos (2) Años
PowerSmart se compromete a crear herramientas que son fiables por años. Nuestras garantías son consistentes con nuestro compromiso y dedicación a la calidad. GARANTÍA LIMITADA DE DOS (2) AÑOS EN PRODUCTOS POWER SMART DE USO DOMÉSTICO. PowerSmart ("Vendedor") garantiza únicamente al comprador original, que todas las herramientas eléctricas de consumo PowerSmart estarán libres de defectos tanto en los materiales como en la mano de...
Need help?
Do you have a question about the HB2421A and is the answer not in the manual?
Questions and answers
battery seems to charge. But battery only lasts for a minute. Battery was only used once last year. Is there a reset or test for battery and charger