Table of Contents
Advertisement
Quick Links
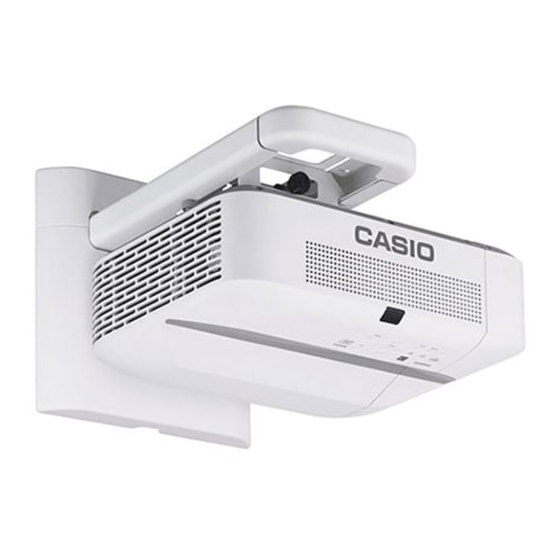
DATA PROJECTOR
XJ-UT331X/XJ-UT311WN*/
XJ-UT351W/XJ-UT351WN*
*Network Models
User's Guide
Be sure to read the "Safety Precautions" and "Operating Precautions" in the "Read this first"
document, and make sure you use this product correctly.
Keep this manual in a safe place for future reference.
Visit the site below for the latest version of this manual.
http://world.casio.com/manual/projector/
1
EN
Advertisement
Table of Contents
Troubleshooting

Related Manuals for Casio XJ-UT351W


Summary of Contents for Casio XJ-UT351W
- Page 1 DATA PROJECTOR XJ-UT331X/XJ-UT311WN*/ XJ-UT351W/XJ-UT351WN* *Network Models User’s Guide Be sure to read the “Safety Precautions” and “Operating Precautions” in the “Read this first” document, and make sure you use this product correctly. Keep this manual in a safe place for future reference.
- Page 2 CASIO COMPUTER CO., LTD. shall not be held liable for any loss or lost profits due to loss of data due to malfunction or maintenance of this product, or any other reason.
-
Page 3: Table Of Contents
Contents Safety Precautions............6 Operating Precautions..........12 About the Light Source Unit ..............12 Projector Light Emission ..............12 Laser and High Temperature Precautions (See the label on the projector) ............13 Other Precautions ................14 Precaution when Handling the Projector after Use ......15 Getting Ready.............. - Page 4 Configuring Remote Control ID and Projector ID Settings....30 Using the Presentation Timer (TIMER) ..........30 To display the timer ....................30 To display the timer function menu ................30 To configure timer settings..................31 Timer Operations ..................... 31 Using the Setup Menu (MENU) ............32 Setup Menu Settings ....................
- Page 5 Appendix ................ 51 Supplying Power to External Equipment..........51 Updating Firmware and Transferring a User Logo .......52 Mounting the Projector on a Wall............52 Using the MONITOR OUT Terminal .............53 Projection Distance and Screen Size ...........54 Aspect Ratio Setting and Projection Image .........55 Projector RS-232C Control ..............57 Specifications ..............
-
Page 6: Safety Precautions
Safety Precautions Thank you for selecting this CASIO product. Be sure to read these “Safety Precautions” before trying to use it. After reading this User’s Guide, keep it in a safe place for future reference. About safety symbols Various symbols are used in this User’s Guide and on the product itself to ensure safe use, and to protect you and others against the risk of injury and against material damage. - Page 7 Doing so creates the risk of electric warranty and are not eligible for repair shock. by CASIO. Be sure to leave all internal inspection, adjustment, and repair up to your original dealer or authorized CASIO service center.
- Page 8 Unplug the projector. other pliable surface. Contact your original dealer or authorized • Never stand the projector up on either end CASIO service center. during use. Disposal by burning Projector cabinet ’...
- Page 9 CASIO • Never use detergent to clean the power cord, service center. especially the power plug and jack.
- Page 10 YW-40 wireless adapter (included or Caution purchased separately) Keep the wireless adapter out of the Misuse of batteries can cause them to leak and reach of small children. Accidental stain the area around them, or to explode, swallowing of a wireless adapter can creating the risk of fire and personal injury.
- Page 11 Contact your original dealer or authorized CASIO service center once a year about having the interior of the projector cleaned. Note that you will be charged for cleaning.
-
Page 12: Operating Precautions
The failure of the light source unit to light or a noticeable drop in light source unit brightness indicates the end of the light source unit’s life. Contact your original dealer or authorized CASIO service center for replacement. Note that problems caused by unauthorized projector disassembly or modification are not covered by the warranty and are not eligible for repair by CASIO. -
Page 13: Laser And High Temperature Precautions (See The Label On The Projector)
Laser and High Temperature Precautions (See the label on the projector) Laser Precautions Non- U.S. Label : This projector is a Class 1 laser device that conforms to IEC 60825-1: 2014. U.S. Label : This projector is a Class 2 laser device that conforms to IEC 60825-1: 2007. ... -
Page 14: Other Precautions
Other Precautions This projector is made of precision components. Failure to observe the following precautions can result in inability to correctly save data and malfunction. Never use or store the projector in the following locations. Doing so creates the risk of malfunction of and damage to the projector. -
Page 15: Precaution When Handling The Projector After Use
Make it a habit to frequently save data on external equipment being powered by the projector. Note that CASIO COMPUTER CO., LTD. shall be held in no way liable for any loss or corruption of data. Precaution when Handling the Projector after Use The projector’s exhaust vents and the area around the vents... -
Page 16: Getting Ready
As you unpack the projector, check to make sure that all of the items listed below are present. Projector Wireless remote controller YT-131 (XJ-UT311WN, XJ-UT351WN) Wireless remote controller YT-160 (XJ-UT331X, XJ-UT351W) Test Batteries (AAA-size × 2) AC Power Cord ... -
Page 17: General Guide
Press the [P] key to turn on the projector. The first time you turn on the projector, a “Language” window will appear in the center of the projection screen. Select the language you want. Use the [INPUT] key to select the input source. ... -
Page 18: Terminals
DC (5V/2A) port (XJ-UT331X, XJ-UT351W) MIC terminal LOGO port AUDIO OUT terminal HDMI 2 terminal (XJ-UT351W and XJ-UT351WN only) AUDIO IN R L terminals HDMI 1 terminal VIDEO terminal AUDIO IN 1 terminal S-VIDEO terminal ... -
Page 19: Setting Up The Projector
Setting Up the Projector Locate the projector on a desk, table, or To adjust the vertical angle of the projector stand that is firm and level. Make sure Rotate the single foot on the bottom front of the that you allow sufficient space around projector to fine adjust the projector’s vertical angle. -
Page 20: Connecting With An External Device
Connecting with an External Device Before starting projection, you first need to connect a computer, video device, and/or other external devices to the projector. For information about locations of the terminals that correspond to the numbers in the “Projector Terminal”... - Page 21 Connecting to an Audio Input Device Projector Other Device / Terminal Type Projector Terminal Shape Cable Terminal Computer, Video Device, Audio Device, etc. / Stereo mini jack Audio Audio Out Terminal Computer, Video Device, Audio Device, etc. / RCA pin jack ×...
-
Page 22: Cover Included With The Yw-40 Wireless Adapter
Cover Included with the YW-40 Wireless Adapter Though a separately available YW-40 Wireless Adapter comes with an anti-theft cover, the cover cannot be attached to this type of projector. To protect the wireless adapter against theft while it is connected to the projector, use the cable cover that comes with the projector. Attaching and Removing the Cable Cover Before attaching or removing the cable cover, turn off the projector and unplug its power plug from the power outlet. -
Page 23: Remote Controller
Remote Controller Projector operations are performed using the remote controller that comes with it. Point the remote controller signal emitter at one of the signal receivers on the projector as you perform remote controller key operations. The maximum range of the remote controller signal is approximately 5 meters (16.4 feet) (between signal emitter and receiver). -
Page 24: Operating The Projector
Operating the Projector Unless specifically noted otherwise, the operations in this section are performed using the remote controller. If both the projector and the remote controller have the same key, either one can be used to perform the corresponding operation. Basic Image and Audio Operations During Projection Basic Operation List To end the operations below, press the [ESC] key. - Page 25 To do this: Perform this operation: Change the aspect ratio of 1. Press the [ASPECT] key. Each press of the [ASPECT] key cycles between the aspect ratio settings as the projected image (ASPECT) shown below. For the meaning of each setting, see “Aspect Ratio Setting Details”...
-
Page 26: Input Source Details
Network* USB-A (YW-40 Wireless Adapter connection) or USB-A or LAN (wired LAN connection) *1 XJ-UT351W and XJ-UT351WN only *2 Network models only Supported Signals For information about the signals that are supported by this projector, visit the CASIO website. -
Page 27: Light Control
Changing the Audio Input In place of the default audio input terminals shown the rightmost column of the above table, you can assign one of the following terminals for each input source: AUDIO IN 1, AUDIO IN 2, AUDIO IN R L. For details, see “Changing the Audio Input”... -
Page 28: Digital Screen Shift
Digital Screen Shift You can use the procedures in this section to reduce the size of the projected image while maintaining its aspect ratio and to shift the projection image vertically or horizontally, without physically moving the projector. To do this: Perform this operation: Adjust the projection 1. -
Page 29: Changing The Audio Input
Changing the Audio Input Selecting an input source causes the projector to output the image from the image input terminal that corresponds to the input source, and the audio from the audio input terminal. Though the input source of each image input terminal is fixed, you can change the initial default audio input terminal to one of the following terminals: AUDIO IN 1, AUDIO IN 2, AUDIO IN R L. -
Page 30: Configuring Remote Control Id And Projector Id Settings
Configuring Remote Control ID and Projector ID Settings The remote control ID and projector ID are numbers from 1 to 4. If the two IDs match, you will be able to perform all projector operations from the remote controller. This function helps to avoid remote control conflicts when there are multiple projectors (up to four) in the same area. -
Page 31: To Configure Timer Settings
To configure timer settings Use the [TIMER] key to display the timer function menu. Use the [] and [] keys to select the “Position”, “Continuous Display”, or “Start Time” setting and then change the settings as described in the table below. To do this: Perform this operation: Select “Position”, and then use the [ ... -
Page 32: Using The Setup Menu (Menu)
R: RGB input, C: Component input, V: S-video input or Video input, H: HDMI (PC) input, D: HDMI (DTV) input, F: File Viewer* , T: CASIO USB Tool* , N: Network* *1 Network model projectors only ... - Page 33 Use this menu item: To do this: Image Adjustment 2 3 Adjust the vertical and horizontal positions of the input source image in relation to Vertical Position (RCV) the target screen. Image Adjustment 2 3 Horizontal Position (RCV) Image Adjustment 2 3 When vertical bands appear in the projected image while RGB is selected as the Frequency (R) input source, it means that the frequency setting is not correct.
- Page 34 Use this menu item: To do this: Screen Settings 3 Specify whether projection will be from the front of the screen or the back of the Projection Mode screen. Front*: Select this option to project from the front of the screen. Rear: Select this option to project from the back of the screen.
- Page 35 Use this menu item: To do this: Option Settings 1 3 Specify whether the projector should detect the RGB input signal type (resolution, Auto Adjust (R) frequency) and adjust the projection image accordingly. On*: Auto Adjust enabled. Off: Auto Adjust disabled. Note ...
- Page 36 Use this menu item: To do this: Option Settings 2 3 Use this item to specify whether audio input from the input sources should be output Audio Out to the speaker (Speaker*) or output to an external destination from the projector’s AUDIO OUT terminal.
- Page 37 Use this menu item: To do this: Multimedia Settings 3 Specify whether to use (Enable*) or not use (Disable) the autorun function. For Autorun details, see “Autorun” (page 43). Multimedia Settings 3 Display the same menu (Function Menu) that appears when the remote controller’s Functions [FUNC] key is pressed.
-
Page 38: Password Protection
Password Protection The projector can be configured to prompt for input of a password immediately after power is turned on. This prevents unauthorized use of the projector. Note the following precautions whenever you use the password feature. The password feature protects against unauthorized use of the projector. Note that it is not an anti- theft measure. -
Page 39: If You Forget Your Password
If you forget your password... You will need to bring the projector and valid identification (original or copy of your employee I.D., driver’s license, etc.) to a specified repair service provider. Note that you will be charged to have the password cleared. -
Page 40: Connecting Usb Memory Devices To The Projector
Connecting USB Memory Devices to the Projector A memory device connects to the USB-A port This type of memory Connects this way: device: USB flash drive Connect USB flash drive to the projector’s USB-A port. Memory cards 1. Load the memory card into a USB card reader’s card slot. 2. -
Page 41: Operation During Image File Projection
Operation During Image File Projection To do this: Perform this operation: Project the previous image file Press the [] or [S] key. Project the next image Press the [] or [T] key. Rotate the image leftwards 90 degrees* Press the [s] key. Rotate the image rightwards 90 degrees* Press the [d] key. -
Page 42: File Viewer Setting Items
File Viewer Setting Items The initial default setting for each item is indicated by an asterisk (*). Setting Name Description Setting Name Description Display Specifies the sequence of images Slideshow Specifies how long each image will Sequence Setup in the file menu. Display Interval remain displayed during a slideshow. -
Page 43: Autorun
Autorun Autorun automatically starts playback of image files or movie files on a USB flash drive when the USB flash drive is connected to projector’s USB-A port, or if the projector is turned on while a USB flash drive is connected to the USB-A port. The setup menu settings shown below need to be configured before using Autorun. -
Page 44: File Viewer Error Messages
File Viewer Error Messages Message Cause and Required Action Folder does not contain any image There is no displayable folder, or file in the folder you are trying to access with files. the File Viewer. Use your computer to check the contents of the folder. For details about file formats supported for projector playback, see “Supported Playback Files”... -
Page 45: Projecting The Screen Image Of A Graphing Calculator
Projecting the Screen Image of a Graphing Calculator You can connect a CASIO graphing calculator to the projector using a USB cable and project the calculator’s screen image with the projector. USB connection of the following CASIO graphing calculators is supported. -
Page 46: Cleaning The Projector
Cleaning the Projector Make it a habit to clean the projector at regular intervals as described in this section. Before cleaning the projector, be sure to unplug it from the power outlet and make sure it is cooled down completely. Cleaning the Projector Exterior Wipe the exterior of the projector with a soft cloth that has been moistened in a weak solution of water and a mild neutral detergent. -
Page 47: Troubleshooting
Troubleshooting Indicators Indicators keep you informed about the current operational status of the projector. The following shows what the indicators look like when operation is normal. When the indicators appear It means this: like this: POWER/ You have just plugged the AC power cord into a power outlet. Wait LIGHT TEMP STANDBY... - Page 48 STANDBY indicator is lit red (without flashing), and then turn power back on again. If the error occurs again when you turn power back on, contact your retailer or nearest authorized CASIO Service Center. POWER : Red steady Power has turned off automatically due to a fan problem.
-
Page 49: Projector Troubleshooting
Projector Troubleshooting Check the following items whenever you experience any problem with the projector. Problem Cause and Recommended Action If the POWER/STANDBY indicator is not lit, the AC power cord is not connected Power does not turn on. correctly. Connect the AC power cord correctly. ... - Page 50 [BLANK] or [ESC] key. The light source unit has reached the end of its service life or it is malfunctioning. Contact your original dealer or authorized CASIO service center for replacement. Power suddenly turns off The projector periodically performs a self-check operation. In rare cases, the result of and the projector restarts.
-
Page 51: Appendix
CASIO projector website. Though power up to 5V DC 2A can be supplied to other devices not included on the CASIO website, note that doing so may make some functions unavailable on some devices. Before using output from this port to power another device, be sure to check the user documentation of the device and make sure you connect it correctly. -
Page 52: Updating Firmware And Transferring A User Logo
1. Use a commercially available USB cable to connect the projector’s LOGO port to projector your computer’s USB port. 2. Visit the CASIO website, refer to the “User Logo Transfer Guide”, and perform the required operation to update. Mounting the Projector on a Wall You can use special wall mounting hardware to mount the projector on a wall. -
Page 53: Using The Monitor Out Terminal
Video, S-Video, HDMI1, HDMI2, The video input signal is output from either Computer 1 or File Viewer, CASIO USB Tool, Network Computer 2, in accordance with the last selected input source (COMPUTER IN 1 terminal or COMPUTER IN 2 terminal).* *1 For example, even if the input source is switched from Computer 1 to S-Video, the MONITOR OUT terminal continues output the video input signal from COMPUTER IN 1. -
Page 54: Projection Distance And Screen Size
Projection Distance and Screen Size The projection distance values below are for reference when setting up the projector. WXGA models Projection Size Projection Distance Height from Projector Bottom to (Distance to projector front): Screen Bottom: Screen Diagonal L (cm / inch) h (cm / inch) Size (cm) -
Page 55: Aspect Ratio Setting And Projection Image
Aspect Ratio Setting and Projection Image The following shows how images are projected in accordance with the type of the input signal and the aspect ratio setting of the projector. WXGA models (1280 × 800) Input source: RGB or HDMI(PC) Input Signal Normal Full... - Page 56 XGA models (1024 × 768) Input source: RGB or HDMI(PC) Input Signal Normal Full 16:9 16:10 SVGA (800 × 600) XGA (1024 × 768) WXGA (1280 × 800) SXGA (1280 × 1024) Input source: Video, S-Video, Component or HDMI(DTV) Input Signal Normal 16:9 16:10...
-
Page 57: Projector Rs-232C Control
Projector RS-232C Control To control the projector using RS-232C commands from a computer, you need to connect the projector and computer using a commercially available serial cable (cross). Command Send Format Communication Data Rate: 19200 bps, Data Bit: 8 bit, Parity: None, Stop Bit: 1 bit, Flow Control: None Protocol Read Command Send Format... - Page 58 Source: 6: Auto1 (RGB/Component), 7: HDMI1, 8: Network, 9: S-Video 10: Auto2 (RGB/Component) , 11: File Viewer, 13: CASIO USB Tool 14: HDMI2 Selecting the Audio Input 1: AUDIO IN 1, 2: AUDIO IN 2, 3: AUDIO IN R L, 4: HDMI1 AUDIO IN...
- Page 59 Command Function Settings Name Setup Type* 0: Projection with top of projector upwards, screen in front 1: Projection with top of projector downwards, screen in back 2: Projection with top of projector upwards, screen in back 3: Projection with top of projector downwards, screen in front Auto Power Off 0: Off, 1: 5 minutes, 2: 10 minutes, 3: 15 minutes, 4: 20 minutes 5: 30 minutes...
-
Page 60: Specifications
Specifications Model Name XJ-UT331X XJ-UT311WN XJ-UT351W XJ-UT351WN ® ® Display system chip × 1, DLP system Display Chip Chip Size XGA 0.55 inches (Aspect WXGA 0.65 inches (Aspect ratio: 16:10) ratio: 4:3) Number of Pixels 786,432 1,024,000 (1280 × 800) (1024 ×... - Page 61 MONITOR OUT terminal: RGB 15-pin mini D-Sub × 1 Digital Video Input HDMI input terminal: HDMI type A terminal × 1 (XJ-UT331X, XJ-UT311WN) / HDMI type A × 2 (XJ-UT351W, XJ-UT351WN), HDCP support, audio signal support Analog Video Input Composite (RCA) terminal × 1, S-video terminal × 1 Audio Input RCA R/L terminals, 3.5 mm stereo mini jack ×...
-
Page 62: Tco Certified Document Url
Model Name XJ-UT331X XJ-UT311WN XJ-UT351W XJ-UT351WN Standby Power Consumption (220 to 240 V) When “Disable” is specified for 0.23W “Remote On” * When “Enable” is specified for – 2.3W – 2.3W “Remote On” * Approximate Dimensions * 338 (W) × 333 (D) × 153 (H) mm (13.3" × 13.1" × 6") - Page 63 Proper connectors must be used for connection to host computer and/or peripherals in order to meet FCC emission limits. Connector cable..XJ-UT331X/XJ-UT311WN/XJ-UT351W/XJ-UT351WN unit to PC Declaration of Conformity Model Number: XJ-UT331X/XJ-UT311WN/XJ-UT351W/XJ-UT351WN Trade Name: CASIO COMPUTER CO., LTD.
- Page 64 (including malfunctions due to This Software). (3) For details about the GPL and LGPL that This Software comes under, visit the CASIO website. Manufacturer: CASIO COMPUTER CO., LTD.
- Page 65 MA1705-B...
Need help?
Do you have a question about the XJ-UT351W and is the answer not in the manual?
Questions and answers