
Related Manuals for Gaggia Milano ESPRESSO EVOLUTION


Summary of Contents for Gaggia Milano ESPRESSO EVOLUTION
- Page 1 ITALIANO ENGLISH EG2115 (SIN045) EG2111 (SIN045) EG2111 (SIN045) ESPRESSO ESPRESSO ESPRESSO EVOLUTION DE LUXE STYLE Manuale d'istruzione User manual...
- Page 3 Italiano Informazioni di sicurezza importanti Questa macchina è dotata di funzionalità di sicurezza. Tuttavia, leggete e seguite con attenzione le istruzioni di sicurezza e utilizzate la macchina solo come descritto in questo manuale per evitare lesioni accidentali o danni dovuti a un uso improprio. Tenete a portata di mano questo libretto sulla sicurezza per eventuali riferimenti futuri.
- Page 4 Italiano Attenzione Indicazioni generali Questa macchina è destinata esclusivamente a un uso domestico. Non deve essere utilizzata in ambienti quali cucine dei dipendenti all’interno di punti vendita, uffici, aziende agricole o altri ambienti lavorativi. Posizionate sempre la macchina su una superficie piana e stabile. Tenetela in posizione verticale, anche durante il trasporto.
- Page 5 Italiano Macchine con il pannarello classico Avvertenza Per evitare il pericolo di ustioni, prestate attenzione: l’erogazione potrebbe essere preceduta da piccoli getti di acqua calda. Non toccate mai il pannarello classico a mani nude perché potrebbe diventare bollente. Utilizzate solo l’impugnatura protettiva appropriata. Attenzione Dopo aver preparato la schiuma di latte, pulite velocemente il pannarello classico erogando una piccola quantità...
-
Page 6: Segnali Led
Riscaldamento Vapore Richiesta raffreddamento da Reset decalcificazione Vapore Pronto macchina Allarme chiudi pomello vapore Riscaldamento caffè/acqua calda Segnale LED Messaggio Sequenza di avvenuta attivazione e memorizzazione della MEMO Sequenza di avvenuta disattivazione della MEMO Espresso Style Espresso De Luxe Espresso Evolution... - Page 7 Italiano Congratulazioni per l’acquisto della Gaggia Espresso! La preparazione di un buon espresso è un’arte che richiede un po’ di pazienza, una certa precisione e una buona dose di pratica. Questa macchina espresso di Gaggia rappresenta il primo passo nel mondo del barista a casa, per coloro che non sono degli esperti, ma che vogliono gustarsi un buon espresso imparando in maniera semplice i rituali del barista, fatto di piccoli gesti.
-
Page 8: Table Of Contents
Italiano Indice Segnali LED ..........................................................................................................................................................................................................................................Panoramica della macchina ......................................................................................................................................................................................Componenti lavabili in lavastoviglie ..........................................................................................................................................................Introduzione ...................................................................................................................................................................................................................................... Filtri in dotazione ....................................................................................................................................................................................................................Filtro crema perfetta 2 tazze ................................................................................................Filtro crema perfetta 1 tazza e cialda monodose + “Pod System” .................................................. -
Page 9: Panoramica Della Macchina
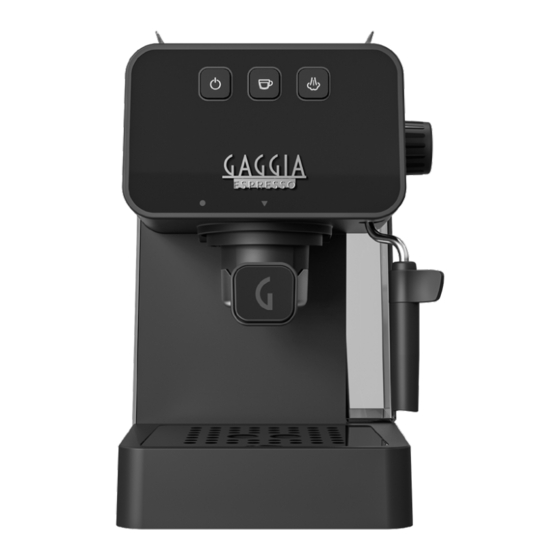
Tasto VAPORE Filtro crema perfetta 1 tazza / Cialda monodose Poggia tazze in acciaio Sistema per cialde "Pod System" Espresso De Luxe ed Espresso Evolution Manopola del vapore/acqua calda Parte inferiore Pannarello classico Tubi in silicone serbatoio acqua Parte superiore Pannarello classico... -
Page 10: Introduzione
Italiano Introduzione Un espresso perfetto con la tipica crema che lo caratterizza dipende da molti fattori tra i quali: • il tipo di caffè utilizzato. Il mercato offre diverse qualità di caffè, i chicchi maggiormente indicati per un buon espresso sono le tostature più scure che liberano più... -
Page 11: Prima Installazione
Italiano Prima installazione Estraete il serbatoio dell’acqua (9), sciacquatelo e riempitelo con acqua fredda fino al livello MAX. Inserite la spina del cavo di alimentazione in una presa di corrente a muro con tensione adeguata. Premete il tasto di accensione/spegnimento (1), che inizierà a lampeggiare. Collocate un contenitore sotto al pannarello (8), ruotate la manopola acqua calda/vapore (5) in senso antiorario ed erogate acqua finche' tutti e tre i tasti di accensione/spegnimento (1), caffè... -
Page 12: Come Inserire Ed Estrarre Il Portafiltro
Italiano Come inserire ed estrarre il portafiltro Inserite il portafiltro (19) nel gruppo erogatore dal basso, allineando il triangolino presente sul manico del portafiltro con il simbolo presente sulla carcassa, ruotando da sinistra verso destra finche’ il triangolo presente sul manico non è... -
Page 13: Preparazione Di Un Caffè
Italiano Riempite il serbatoio acqua fino al livello MAX. La macchina è ora pronta all’uso. Preparazione di un caffè Con caffè premacinato Il portafiltro monta il filtro per 1 (13) o 2 tazze (12). Per erogare il primo caffè è necessario preriscaldare prima il portafiltro: Inserite il portafiltro (19) con il filtro 1 o 2 tazze nel gruppo erogatore (20). -
Page 14: Funzione Memo
Italiano Con caffè in cialde Per la preparazione del caffè utilizzate l’apposito filtro per le cialde (13). Inserite la cialda nel filtro ed assicuratevi che la carta della cialda non fuoriesca dal portafiltro. Posizionate il sistema per cialde "Pod System" (14) sulla cialda. Seguite le istruzioni per la preparazione di un caffè... -
Page 15: Emulsione Del Latte Per La Preparazione Di Un Cappuccino
Italiano Raggiunto il volume desiderato rilasciate il tasto caffè, si spegneranno tutti i tasti e per due volte in sequenza si accenderanno il tasto di accensione/ spegnimento (1), il tasto caffè (2) ed il tasto vapore (3) a confermare l’avvenuto salvataggio della bevanda. Ad ogni pressione del tasto caffè... -
Page 16: Come Abbassare La Temperatura Della Caldaia
Italiano Ruotate la manopola vapore/acqua calda in senso antiorario fino a completa apertura per iniziare ad emulsionare il latte. Emulsionate il latte spostando delicatamente il bricco con movimenti circolari verso l'alto ed il basso. Quando si raggiunge l’emulsione desiderata, chiudete la manopola vapore/ acqua calda in senso orario per interrompere l’emulsione. -
Page 17: Erogazione Acqua Calda
Italiano Erogazione acqua calda Attenzione: All’inizio dell’erogazione possono verificarsi brevi spruzzi di acqua calda. Il tubo d’erogazione può raggiungere temperature elevate, evitate di toccarlo direttamente con le mani. Collocate una tazza o un bicchiere da tè sotto al pannarello. Ruotate la manopola vapore/acqua calda in senso antiorario fino a completa apertura per iniziare l’erogazione dell’acqua calda dal pannarello. -
Page 18: Pulizia Del Portafiltro, Dei Filtri E Del Sistema Per Cialde "Pod System
Italiano Settimanalmente: Rimuovete la parte inferiore del pannarello (15) e sfilate la parte superiore (16). Risciacquateli con acqua corrente. Pulite il tubo vapore con un panno umido. Rimontate la parte superiore e inferiore del pannarello sul tubo vapore. Pulizia del portafiltro, dei filtri e del sistema per cialde “Pod system”... -
Page 19: Pulizia Della Doccetta
Italiano Lavate se utilizzato anche il sistema per cialde “pod system” sempre con acqua tiepida. Nel caso in cui si notasse un malfunzionamento nell’erogazione del caffè, immergete i filtri in acqua bollente per 10 minuti e successivamente sciacquateli con acqua corrente. 10 min. -
Page 20: Pulizia Del Serbatoio Acqua
Italiano Pulizia del serbatoio acqua Rimuovete il serbatoio acqua (9) e lavatelo con acqua corrente. Reinserite il serbatoio assicurandovi che i tubi in silicone (6) siano all’interno del serbatoio e non siano né attorcigliati né bloccati. Decalcificazione Quando il tasto di accensione/spegnimento diventa arancione è necessario eseguire la decalcificazione. - Page 21 Italiano Ripetete le operazioni descritte dal punto 10 fino a raggiungere il livello MIN del serbatoio acqua. Risciacquate il serbatoio con acqua fresca e riempitelo fino al livello MAX. Inserite un contenitore capiente sotto al gruppo erogatore. Accendete la macchina premendo il tasto di accensione/spegnimento. Premete il tasto caffè...
-
Page 22: Risoluzione Dei Problemi
Italiano Risoluzione dei problemi Questo capitolo riassume i problemi più comuni che potreste riscontrare con la macchina. Se non riuscite a risolvere il problema con le informazioni riportate sotto, visitate il sito www.gaggia.com o www.gaggia.it. per un elenco di domande frequenti o contattate il Centro assistenza clienti o distributori del vostro Paese. -
Page 23: Accessori Gaggia
Italiano Problema Causa Soluzione Il caffè fuoriesce dai Portafiltro inserito male nel gruppo Inserite il portafiltro come descritto nel capitolo bordi. erogazione caffè. corrispondente. Bordo superiore del portafiltro Pulite il bordo del portafiltro. sporco. Troppo caffè nel portafiltro. Riducete la quantità di caffè utilizzando il misurino. -
Page 24: Dati Tecnici
Italiano Dati tecnici Tensione nominale - Potenza Vedi targhetta posta nel vano del nominale - Alimentazione serbatoio acqua Materiale corpo Termoplastico Dimensioni 255 x 199 x 303 mm Peso 3,7 kg Lunghezza cavo 900 mm Pannello comando Frontale Fino a 76 mm con vasca Dimensioni tazze raccogligocce inserita, senza 102 Serbatoio acqua... - Page 25 English Important safety information This machine is equipped with safety features. Nevertheless, read and follow the safety instructions carefully and only use the machine as described in these instructions, to avoid accidental injury or damage due to improp- er use of the machine. Keep this safety booklet for future reference. Warning General Check if the voltage indicated on the machine corresponds to the local mains voltage before you connect...
- Page 26 English Caution General This machine is intended for normal household use only. It is not intended for use in environments such as staff kitchens of shops, offices, farms or other work environments. Always put the machine on a flat and stable surface. Keep it in upright position, also during transport. Do not place the machine on a hotplate or directly next to a hot oven, heater or similar source of heat.
- Page 27 English Machines with classic milk frother Warning To avoid the danger of burns, be aware that dispensing may be preceded by small jets of hot water. Never touch the classic milk frother with bare hands, as it may become very hot. Use the appropriate protective handle only.
-
Page 28: Led Indicators
Steam heating up Descaling reset Cooling down steam needed Machine ready to use Alarm “Close the steam knob” Coffee/hot water heating up LED indicator Message Successful MEMO activation and storage sequence Successful MEMO disabling sequence Espresso Style Espresso De Luxe Espresso Evolution... - Page 29 English Congratulations on your purchase of Gaggia Espresso! Preparing a perfect espresso is a fine art that requires a bit of patience, some precision and a good dose of practice. This Gaggia espresso machine is the first step into becoming a barista at home, for those who aren’t experts but would like to enjoy a good espresso by learning the barista rituals made of small gestures in an easy way.
- Page 30 English Contents LED indicators ..............................................................................................................................................................................................................................Machine overview ..................................................................................................................................................................................................................Dishwasher safe components ..........................................................................................................................................................................Introduction ......................................................................................................................................................................................................................................Filters supplied ............................................................................................................................................................................................................................ 2-Cup Crema Perfetta filter ..................................................................................................1-Cup Crema Perfetta filter and single-dose pod + “Pod System” ..................................................First installation ............................................................................................................
-
Page 31: Machine Overview
2 cups “Crema perfetta” filter STEAM button 1 cup “Crema perfetta” filter/single dose pod Stainless steel cup plate Pod System Espresso De Luxe ed Espresso Evolution Steam/hot water knob Classic Pannarello lower part Water tank silicon hoses Classic Pannarello upper part... -
Page 32: Introduction
English Introduction A perfect espresso with the distinctive crema on top depends on many factors including: • the type of coffee used. There are different qualities of coffee available on the market, but the best beans for a good espresso are the darker roasts which release a richer aroma and a more intense flavour. -
Page 33: First Installation
English First installation Remove the water tank (9), rinse it and fill it with cold water up to the MAX level. Insert the power cord plug into a wall socket with suitable power voltage. Press the on/off button (1), which will start flashing. Place a container under the Pannarello (8), turn the steam/hot water knob (5) counter clockwise and dispense hot water until all three on/off (1), coffee (2) and steam (3) buttons flash simultaneously, signalling for you to turn the knob... -
Page 34: How To Insert And Remove The Filter Holder
English How to insert and remove the filter holder Insert the filter holder (19) into the brew group from below, aligning the triangle on the filter holder handle with the icon on the housing, turning from left to right until the triangle on the handle is aligned with that on the housing or slightly shifted rightwards. -
Page 35: Preparing A Coffee
English Preparing a coffee With pre-ground coffee The filter holder fits a filter for 1 (13) or 2 cups (12). You need to preheat the filter holder before brewing the first coffee: Insert the filter holder (19) with the filter for 1 or 2 cups into the brew group (20). -
Page 36: Using Coffee Pods
English Using coffee pods Use the special pod filter (13) to prepare your coffee. Place the pod into the filter and make sure that the paper of the pod does not stick out of the filter holder. Place the “Pod System” (14) on to the pod. Follow the same instructions for preparing coffee using pre-ground coffee from point 7. -
Page 37: How To Disable The Memo Function
English Once you have reached the desired quantity, release the coffee button, all the buttons will go off and then the on/off (1), coffee (2) and steam (3) buttons will light up twice in a row to confirm that your beverage has been saved. Each time you press the coffee button, the machine will brew the coffee amount for the set time. -
Page 38: How To Lower The Boiler Temperature
English Froth the milk by gently swirling the jug and moving it up and down. Once you have the desired froth, turn the steam/hot water knob clockwise to stop frothing. Once you have finished frothing, lightly tap the jug on a worktop and let it rest for about 30 seconds. -
Page 39: Hot Water Dispensing
English Hot water dispensing Warning: dispensing may be preceded by small jets of hot water. The dispensing tube may reach high temperatures: Never touch it with bare hands. Place a tea cup or glass under the Pannarello. Turn the steam/hot water knob counter clockwise as far as it goes to start dispensing hot water from the Pannarello. -
Page 40: Cleaning The Filter Holder, Filters And The "Pod System
English Weekly: Remove the lower part of the Pannarello (15) and slide off the upper part (16). Rinse with running water Clean the steam tube using a damp cloth. Refit the upper and lower part of the Pannarello to the steam tube. Cleaning the filter holder, filters and the “Pod System”... -
Page 41: Cleaning The Screen
English If you notice a malfunction when brewing coffee, steep the filters in boiling water for 10 minutes and then rinse them with running water. 10 min. To clean the filters more thoroughly, we recommend using the GAGGIA cleaning tablets specifically designed to keep your machine in perfect working order. -
Page 42: Cleaning The Water Tank
English Cleaning the water tank Remove the water tank (9) and wash it with running water. When reinserting the tank, make sure that the silicon hoses (6) are inside the tank and that they are neither twisted nor blocked. Descaling When the on/off button turns orange, it is time to descale the machine. - Page 43 English Repeat the steps from point 10 until the MIN level in the water tank has been reached. Rinse the tank with fresh water and fill it up to the MAX level. Place a large container under the brew group. Turn the machine on by pressing the on/off button.
-
Page 44: Troubleshooting
English Troubleshooting This chapter outlines the most common problems you may encounter while using the machine. If you are unable to solve the problem using the information provided below, visit the FAQ sections on www.gaggia.com or www.gaggia.it or contact either the Customer Service Centre or the local distributors in your country. Problem Cause Solution... -
Page 45: Gaggia Accessories
English Problem Cause Solution Coffee flows out of the The filter holder is not correctly Insert the filter holder as described in the rim. inserted in the brew group. relevant chapter. The upper rim of the filter holder Clean the rim of the filter holder. is dirty. -
Page 46: Technical Specifications
English Technical specifications Nominal voltage - Power rating - See the data plate inside the water Power supply tank compartment Machine body material Thermoplastic Dimensions 255 x 199 x 303 mm Weight 3,7 kg Power cord length 900 mm Control panel Frontal Up to 76 mm with drip tray inserted, Cup size... - Page 48 GAGGIA S.p.a. si riserva il diritto di apportare tutte le modifiche ritenute necessarie. GAGGIA S.p.A. reserves the right to make any necessary modification. GAGGIA S.p.A. Sede Amministrativa/Administrative Office Via Torretta, 240 40041 Gaggio Montano - Bologna - Italia +39 0534 771111 www.gaggia.it www.gaggia.com...
Need help?
Do you have a question about the ESPRESSO EVOLUTION and is the answer not in the manual?
Questions and answers