Table of Contents
Advertisement
Quick Links
Advertisement
Table of Contents

Related Manuals for Growatt MID 17-33KTL3-X


Summary of Contents for Growatt MID 17-33KTL3-X
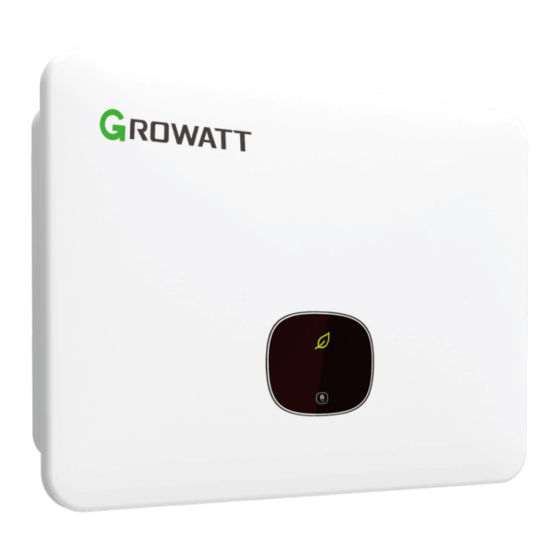
- Page 1 Installation & Operation Manual...
-
Page 2: Table Of Contents
Index 1 Notes on this manual ................1 1.1 Validity ......................... 1 1.2 Applicable personnel....................1 1.3 Symbols in this document ..................1 1.3.1 Markings in this document..................1 1.3.2 Markings on this product..................2 1.3.3 Glossary ........................3 2 Safety ..................... 4 2.1 Product description and features................ - Page 3 6.7.2 Method of asserting demand response modes ..........26 6.7.3 Using the Power Control Interface for EU............27 6.8 AFCI (Optional) ......................28 6.8.1 Arc-Fault Circuit Interrupter (AFCI)..............28 6.8.2 Danger information ..................... 28 6.8.3 Operation step ...................... 29 6.8.4 Earth Fault Alarm ....................29 7 Debugging ..................
- Page 4 12 Start and shut down the inverter..........39 12.1 Start the inverter....................39 12.2 Shut down the inverter ..................39 13 Maintenance , Repair and Cleaning (Australia model only) ..................40 14 Troubleshooting ................41 14.1 Error message ......................41 14.2 System warning ......................
-
Page 5: Notes On This Manual
If the procedure or practice is not properly implemented or followed, it may cause damage or destruction of part or all of the Growatt device and/or other equipment connected to the Growatt device, or cause personal injury. -
Page 6: Markings On This Product
NOTICE is used to address practices not related to personal injury. NOTICE Information that you must read and know to ensure optimal operation of the system. Information 1.3.2 Markings on this product Symbol Explanation Danger: Electricity! Danger:Flame! Danger:Hot surface! Operation after 5 minutes Point of connection for grounding protection Direct Current (DC) Alternating Current (AC) -
Page 7: Glossary
1.3.3 Glossary Abbreviation for "Alternating Current” Abbreviation for "Direct Current” Energy Energy is measured in Wh (watt hours), kWh (kilowatt hours) or MWh (megawatt hours). The energy is the power calculated over time. For example, your inverter operates at a constant power of 4600 W for half an hour and then at a constant power of 2300 W for another half an hour, it has fed 3450Wh of energy into the power distribution grid within that hour. -
Page 8: Safety 2
2.1 Product description and features 2.1.1 Product description Growatt series photovoltaic inverters are used to convert the direct current generated by photovoltaic panels into alternating current, and send it to the grid in a three-phase manner. MID 17-33KTL3-X(1)(AU) series inverter can be connected to six strings(MID 10-... -
Page 9: Qualification Of Skilled Person
"PV ISO Low". Comply with the local requirements for grounding the PV Ø modules and the PV generator. GROWATT recommends connecting CAUTION the generator frame and other electrically conductive surfaces in a manner which ensures continuous conduction with ground in order... -
Page 10: Electrical Connection Warnings
20 minutes to discharge for safety. Persons with limited physical or mental abilities may only work with Ø the Growatt inverter following proper instruction and under constant supervision. Must keep the Growatt inverter away from children. Make all electrical connections (e.g. conductor termination, fuses, Ø... -
Page 11: Operation Warnings
2.3.3 Operation Warnings Ensure all connectors are sealed and secure during operation. Ø Although designed to meet all safety requirements, some parts Ø and surfaces of inverter are still hot during operation. To reduce the risk of injury, do not touch the heat sink at the back of the PV- inverter or nearby surfaces while inverter is operating. -
Page 12: Product Overview 3
Product overview 3 3.1 Appearance overview Fig 3.1 The appearance instructions are as follows: Name Name DC switch PE terminal PV terminal USB port OLED indicator RS485 port LCD screen AC terminal Touch button Caution:MID17-40KTL3-X(1)-AU without DC switch. The label description on the inverter: LOGO Description Description... -
Page 13: Dimensions
3.2 Dimensions Fig 3.2 Size and weight: Model Height (H) Width (W) Depth (D) Weight MID 17-33KTL3- 580mm 430mm 230mm 30kg X(1)(AU) MID 10-20KTL3-XL/ 580mm 430mm 230mm 31kg MID 36-40KTL3-X(AU) 3.3 Storage Environment If you want to store the inverter in a warehouse, you must choose a suitable location for the inverter. -
Page 14: Storage Environment
PV terminal removal tool 14-6 O terminal Fixed AC side water proof cover M4*10 screw Note: PV+/ PV-terminal and PV+/ PV-metal terminal have 6/6PCS for MID 17-33KTL3-X(1)(AU); PV+/ PV-terminal and PV+/ PV-metal terminal have 8/8PCS for MID 10-20KTL3-XL and MID 36-40KTL3-X(AU). -
Page 15: Installation
5 Installation 5.1 Basic installation requirements The wall on which the inverter is mounted must be sturdy and can withstand the Ø weight of the inverter for a long time (refer to the specifications in Chapter 12 for the weight of the inverter); The installation location must match the size of the inverter;... - Page 16 ≥300mm ≥500mm ≥500mm ≥500mm Fig 5.2 Installation dimensions for one inverter Roof >1200mm Ground Fig 5.3 Installation dimensions for multiple inverters Do not install the inverter on the TV antenna, other antennas or antenna cables; Ø Do not install the inverter in the living area; Ø...
- Page 17 Fig 5.4 Installation Environment Make sure that the inverter is installed in a suitable place and is not allowed to be Ø installed in a closed box; Fig 5.5 Closed box In order to reduce the inverter load and extend the life of the inverter due to direct Ø...
-
Page 18: Install The Wall Mount
5.2 Install the wall mount To prevent electric shock or other damage, be sure to check the wall for power or other piping before opening the hole in the wall. DANGER keep the bracket installed horizontally Fig 5.7 Specifications of wall mount Secure the wall mount as shown, do not let the screws flush with the wall, instead expose 2 to 4 mm. - Page 19 Fig 5.9 Schematic diagram of inverter wall mounting...
-
Page 20: Inverter Wiring 6
Inverter wiring 6 6.1 Security There may be a high voltage in the conductive part of the inverter, which may cause electric shock.Therefore, when installing the inverter,make sure that the AC and DC sides of the inverter are powered off. DANGER Static electricity may damage the electronic components of the inverter.Anti-static measures should be taken during the... - Page 21 Preparation before wiring: Connect the protective ground wire (PE) Connect the inverter to the grounding bar through the protective earth (PE) to achieve grounding protection. Good grounding is good for resisting surge voltage impact and Ø improving EMI performance.Therefore,you need to ground the wire before connecting the AC,DC,and communication cables.
- Page 22 Inverter model Switch specification MID 12KTL3-XL1 50A/127V MID 15KTL3-XL 50A/127V MID 17KTL3-XL 80A/127V MID 20KTL3-XL 80A/127V AC connection steps(just for Vietnam models): 1. Pass the 5 wires (L1,L2,L3,N and PE wires) through the AC shield,connect them to the power grid, and then crimp the O/U terminal. 10-12mm Fig 6.2 2.
-
Page 23: Dc Side Wiring
Suggested line length: Maximum Wire Inverter model Cross-section area Recommendation Length MID 17KTL3-X1(AU) 10-16 MID 20KTL3-X1(AU) 10-16 MID 22KTL3-X1(AU) 10-16 MID 25KTL3-X1(AU) 10-16 MID 30KTL3-X(AU) 10-16 MID 33KTL3-X(AU) 10-16 MID 36KTL3-X(AU) 14-20 MID 40KTL3-X(AU) 14-20 MID 10KTL3-XL1 14-20 MID 12KTL3-XL1 14-20 MID 15KTL3-XL 14-20... - Page 24 The MID series inverter has two independent inputs, as shown in the figure below: Fig 6.5 Note: MID 17-33KTL3-X(1)(AU) (3-channel string); MID 10-20KTL3-XL and MID 36-40K TL3-X(AU)(4-channel string) . The following points should be concerned when choosing photovoltaic modules: The photovoltaic modules of each photovoltaic string are of the same specification Ø...
-
Page 25: Connect The Signal Cable
Connect DC terminal Positive connector Positive metal terminal Cables 4~6mm² 4~6mm² Cables Negative metal terminal Negative connector Fig 6.7 6.4 Connect the signal cable The MID series inverter has an 16-Pin signal connector except Vietnam models.The client signal line port is as follows: B just for Vietnam models Fig 6.8 1.Strip the cable 10mm through the waterproof gland, thread sleeve, and tighten the... - Page 26 2. Push the threaded sleeve into the socket and tighten the waterproof gland. Inverter side Click! Fig 6.10 3.Connect the client to the inverter plug until both are tightly locked on the inverter. Click! Fig 6.11 Remove the signal connector 1.Press down the fastener and pull it out of the inverter.
-
Page 27: Grounding The Inverter
6.5 Grounding the inverter The inverter must be connected to the AC grounding conductor of the power distribution grid via the ground terminal (PE) . Because of the transformerless design, the DC positive pole and DC negative pole of PV arrays are not permitted to be grounded. WARNING According to the relevant provisions of IEC 61643-32 "Connecting to photovoltaic devices surge protectors - selection and use of guidelines", whether for household or... -
Page 28: Active Power Control With Smart Meter , Ct Or Ripple Control Signal Receiver
A. When the safety distance S is satisfied: The position ①③ of the figure should be equipped with a lightning protection module. In general, it is recommended to install Type II in position ① and Type I in position ③. B. - Page 29 AC voltage withstand 4KV for 1 minute Impulse voltage withstand 6KV-1.2uS waveform Overcurrent withstand 20Imax for 0.5s Pulse output 1 1000imp/kWh (default) Pulse output 2 400imp/kWh Display LCD with white backlit Max. Reading 999999kWh Environment Operating temperature to +55 ℃ ℃...
-
Page 30: Inverter Demand Response Modes (Drms)
6.7 Inverter demand response modes (DRMS) This series inverter has the function of demand response modes, We use 16-Pin socket as inverter DRMS connection. DRMS application description Applicable to AS/NZS4777.2:2015 or Commission Regulation Ø (EU) 2016/631. Information DRM0, DRM5, DRM6, DRM7, DRM8 are available. Ø... -
Page 31: Using The Power Control Interface For Eu
6.7.3 Using the Power Control Interface for EU RRCR 1 2 3 4 5 6 7 8 DRM socket Fig 6.17 Inverter – RRCR Connection 6.7.3.1 The following table describes the connector pin assignment and function: Connect to RRCR DRM Socket Pin NO. Description Relay contact 1 input K1 –... -
Page 32: Afci(Optional)
6.8 AFCI(Optional) 6.8.1 Arc-Fault Circuit Interrupter (AFCI) In accordance with the National Electrical Code R, Article 690.11, the inverter has a system for the recognition of electric arc detection and interruption. An electric arc with a power of 300 W or greater must be interrupted by the AFCI within the time specified by UL 1699B. -
Page 33: Operation Step
6.8.3 Clearing the fault If "Error 200" is displayed, it indicates that an arc fault has been detected in the PV system. The AFCI will be triggered, and the inverter will be powered off. The inverter has large electrical potential differences between its conductors. Arc flashes can occur through air when high-voltage current flows. -
Page 34: Debugging 7
Debugging 7 1.Close the DC switch on the inverter.As long as the input DC voltage is greater than 140V,the inverter display will show the following information:No mains connection error,the inverter LED will turn red. If other information is displayed,please refer to Chapter 13.If you encounter any problems during the debugging process and cannot solve it,please contact customer service. -
Page 35: Oled Display And Touch Button
The current data returns to the Long press for 5s default value 9.1 Boot display When the inverter is turned on, the OLED display interface is as follows: FW Ver:DM1.0 Model:SXXBXXD Growatt XXTXXPXXUXXM0 PV inverter Connect in More info Connect OK Set parameter... -
Page 36: Function Setting
9.3 Function setting The inverter can support multiple touch modes: single touch, two consecutive touches, three consecutive touches, long press for 5S. Different types of taps have different functions. Advanced setting password: 123 All setting interfaces are as follows: Pa ssw o rd General General Advanced... -
Page 37: Enabling/Disabling Power Quality Response Modes(Pqrm) (Australia Model Only)
Tips and disclaimers When the inverter leaves the factory, the grid-connected voltage and frequency are set in accordance with the latest domestic standard; If the grid voltage is lower to or higher than the domestic legal requirements, the inverter cannot be connected to the grid. After obtaining the permission of the local power operator, the user can choose other voltage levels according to the voltage situation of the grid connection point. - Page 38 The inverter power output will vary in response to the AC grid voltage. This is switched on by default.This function belongs to advanced function, if you need to change, please contact the after-sales operation and maintenance to make adjustments. Reset Country General Password Set parameter...
-
Page 39: Generation & Export Limitation Control And Power Sensor Setting (Australia Model Only)
9.3.4 Generation & Export limitation control and Power Sensor setting (Australia model only) Single touch to switch display or make the number +1. Double touch to confirm you setting. Control type: SW stands for enabling software limit control function HW stands for enabling hardware limit control function Both stands for enabling software and hardware limit control function at the same time. -
Page 40: Set Com Address
9.3.6 Set COM address The default COM address is 1.Touch twice in a row to enter the setting mode, single touch, the number +1,touch twice in a row to confirm the setting,long press for 5S number to return to zero. Set paramerter Set language Set Date... -
Page 41: Set Payload Rate
Set Date Set Time 2018-12-14 12:30:00 Set Date Set Time 2018-12-14 12:30:00 Set Date Set Time 2018-12-14 12:30:00 Set OK Set OK Fig 9.9 9.3.8 Set date and time Under the permission given by your energy provider, the ratio of your system output power divided by the rated power of the inverter is called Limit Rate.For instance,if the energy provider only accepts 8kVA/kW from your 10kW system, then the Limit Rate of 10kW inverter is 80.0%. -
Page 42: Communication And Monitoring 10
Communication and Monitoring 10 10.1 RS485 This series of inverters provide two RS485 ports. You can monitor one or more inverters via RS485. The other RS485 port is used to connect a smart meter (stand-alone anti- backflow function). Description Remarks Auxiliary output for driving +12V an external 2 W relay... -
Page 43: Maintenance And Cleaning
11 Maintenance and Cleaning 11.1 Checking Heat Dissipation If the inverter regularly reduces its output power due to high temperature, please improve the heat dissipation condition. Maybe you need to clean the heat sink. 11.2 Cleaning the Inverter If the inverter is dirty, turn-off the AC breaker and DC switch ,waiting the inverter shut down ,then clean the enclosure lid, the display, and the LEDs using only a wet cloth. -
Page 44: Maintenance , Repair And Cleaning (Australia Model Only)
Maintenance , Repair and Cleaning 13 (Australia model only) Prior to removal of any cover for maintenance or repair, turn off the switch on the AC and DC sides. WARNING... -
Page 45: Troubleshooting
When a malfunction occurs, an error message will be displayed on the OLED screen. Faults include system faults and inverter faults. In some cases, you may be advised to contact Growatt, please provide the following information. Information about the inverter: Ÿ... - Page 46 Warning Description Suggest message 1.Restart the inverter; Warning 205 Boost drive abnormal 2.If the fault message still exists,contact the manufacturer. 1.After shutdown,Check the AC SPD. AC SPD functIon Warning 206 2.If error message still exists,contact the abnormal manufacturer. 1Unplug the U disk; USB overcurrent 2.Reconnect the U disk after shutdown;...
- Page 47 Warning Description Suggest message 1.Please check the communication line; Wireless CT pairing Warning 307 2.If the fault information still exists,contact the timeout manufacturer. 1.Check the fan wiring after shutdown; Fan function is 2.Replace the fan; Warning 400 abnormal 3.If the fault information still exists,contact the manufacturer.
-
Page 48: System Error
14.3 System error Error code Description Suggest 1.Check the panel terminal wiring after shutdown; 2.Restart the inverter; Error 200 DC arc abnormal 3.If the fault message still exists,contact the manufacturer. 1.Restart the machine; Leakage current Error 201 2.If the fault information still exists,contact the is too high manufacturer. - Page 49 Error code Description Suggest Abnormal DC 1.Restart the machine; Error 400 component 2.If the fault information still exists,contact the offset manufacturer. The output 1.Restart the machine; voltage DC Error 401 2.If the fault information still exists,contact the component is too manufacturer.
- Page 50 Error code Description Suggest 1.Restart the machine; Error 413 Drive exception 2.If the fault information still exists,contact the manufacturer. 1.Restart the machine; Memory Error 414 2.If the fault information still exists,contact the exception manufacturer. Abnormal 1.Restart the machine; Error 415 auxiliary power 2.If the fault information still exists,contact the supply...
-
Page 51: Manufacturer Warranty
15 Manufacturer warranty Please refer to the warranty card. 16 Decommissioning 16.1 Dismantling the Inverter 1. Disconnect the inverter as described in section8. 2. Remove all connection cables from the inverter. Danger of burn injuries due to hot enclosure parts! Wait 20 minutes before disassembling until the housing has cooled down. -
Page 52: Eu Declaration Of Conformity 17
2011/65/EU RoHS Directive and its amendment (EU)2015/863 Ÿ Shenzhen Growatt New Energy Technology Co. Ltd confirms that the Growatt inverters and accessories described in this document are in compliance with the above mentioned EU directives. The entire EU Declaration of Conformity can be found at www.ginverter.com. -
Page 53: Specification
18 Specification 18.1 Parameter Model 17KTL3-X1 20KTL3-X1 22KTL3-X1 25KTL3-X1 Specifications Input data(DC) Max. recommended PV 25500W 30000W 33000W 37500W power(for module STC) Max. DC voltage 1100V Start voltage 250V Min. operating voltage 200V Nominal voltage 600V MPP voltage range 200-1000V No. - Page 54 Model 17KTL3-X1 20KTL3-X1 22KTL3-X1 25KTL3-X1 Specifications Power factor(@nominal >0.99 power) Adjustable power factor 0.8Leading ...0.8Lagging THDi <3% AC grid connection type 3W+PE /3W+N+PE Overvoltage category PV:II AC:III Others:I Efficiency Max. efficiency 98.75% 98.75% 98.75% 98.8% Euro-eta 98.5% Protection devices DC reverse-polarity protection DC switch DC Surge protection...
- Page 55 Model 17KTL3-X1 20KTL3-X1 22KTL3-X1 25KTL3-X1 Specifications Topology Non-isolated Cooling Smart air cooling Electronics protection IP66 degree Relative humidity 0~100% DC connection H4/MC4(OPT) AC connection Waterproof PG head+OT terminal or quick connect terminal Interfaces Display OLED+LED USB/RS485 WIFI/GPRS/4G/RF/LAN...
- Page 56 Model 30KTL3-X 33KTL3-X 36KTL3-X 40KTL3-X Specifications Input data(DC) Max. recommended PV 45000W 49500W 54000W 60000W power(for module STC) Max. DC voltage 1100V Start voltage 250V Min. operating voltage 200V Nominal voltage 600V MPP voltage range 200-1000V No. of MPP trackers No.
- Page 57 Model 30KTL3-X 33KTL3-X 36KTL3-X 40KTL3-X Specifications Adjustable power factor 0.8Leading ...0.8Lagging THDi <3% AC grid connection type 3W+PE /3W+N+PE Overvoltage category PV:II AC:III Others:I Efficiency Max. efficiency 98.8% Euro-eta 98.5% Protection devices DC reverse-polarity protection DC switch DC Surge protection typeII OPT Insulation resistance monitoring...
- Page 58 Model 30KTL3-X 33KTL3-X 36KTL3-X 40KTL3-X Specifications Electronics protection IP66 degree Relative humidity 0~100% DC connection H4/MC4(OPT) AC connection Waterproof PG head+OT terminal or quick connect terminal Interfaces Display OLED+LED USB/RS485 WIFI/GPRS/4G/RF/LAN...
- Page 59 Model 17KTL3-X1-AU 20KTL3-X1-AU 22KTL3-X1-AU 25KTL3-X1-AU Specifications Input data(DC) Max. recommended PV 25500W 30000W 33000W 37500W power(for module STC) Max. DC voltage 1100V Start voltage 250V Min. operating voltage 200V Nominal voltage 600V MPP voltage range 200-1000V No. of MPP trackers No.
- Page 60 Model 17KTL3-X1-AU 20KTL3-X1-AU 22KTL3-X1-AU 25KTL3-X1-AU Specifications Adjustable power factor 0.8Leading ...0.8Lagging Power factor(@nominal >0.99 power) THDi <3% AC grid connection type 3W+PE /3W+N+PE Overvoltage category PV:II AC:III Others:I Efficiency Max. efficiency 98.75% 98.75% 98.75% 98.8% Euro-eta 98.5% 98.5% 98.5% 98.5% Protection devices DC reverse-polarity protection...
- Page 61 Model 17KTL3-X1-AU 20KTL3-X1-AU 22KTL3-X1-AU 25KTL3-X1-AU Specifications Topology Non-isolated Cooling Smart air cooling Electronics protection IP66 degree Relative humidity 0~100% DC connection H4/MC4(OPT) AC connection Waterproof PG head+OT terminal or quick connect terminal Interfaces Display OLED+LED USB/RS485 WIFI/GPRS/4G/RF/LAN...
- Page 62 Model 30KTL3-X-AU 33KTL3-X-AU 36KTL3-X-AU 40KTL3-X-AU Specifications Input data(DC) Max. recommended PV 45000W 49500W 54000W 60000W power(for module STC) Max. DC voltage 1100V Start voltage 250V Min. operating voltage 200V Nominal voltage 600V MPP voltage range 200-1000V No. of MPP trackers No.
- Page 63 Model 30KTL3-X-AU 33KTL3-X-AU 36KTL3-X-AU 40KTL3-X-AU Specifications Adjustable power factor 0.8Leading ...0.8Lagging THDi <3% AC grid connection type 3W+PE /3W+N+PE Overvoltage category PV:II AC:III Others:I Efficiency Max. efficiency 98.8% Euro-eta 98.5% Protection devices DC reverse-polarity protection DC switch DC Surge protection typeII OPT Insulation resistance monitoring...
- Page 64 Model 30KTL3-X-AU 33KTL3-X-AU 36KTL3-X-AU 40KTL3-X-AU Specifications Cooling Smart air cooling Electronics protection Ip66 degree Relative humidity 0~100% DC connection H4/MC4(OPT) Waterproof PG head+OT terminal or quick AC connection connect terminal Interfaces Display OLED+LED USB/RS485 WIFI/GPRS/4G/RF/LAN...
- Page 65 Model Specifications 10KTL3-XL1 12KTL3-XL1 15KTL3-XL 17KTL3-XL 20KTL3-XL Input data(DC) Max. recommended PV 15000W 18000W 22500W 25500W 30000W power(for module STC) Max. DC voltage 800V Start voltage 250V Nominal voltage 360V MPP voltage range 200-800V No. of MPP trackers No. of PV strings per 2/2/2/2 2/2/2/2 2/2/2/2...
- Page 66 Model 12KTL3-XL1 15KTL3-XL 17KTL3-XL 20KTL3-XL 10KTL3-XL1 Specifications AC grid connection type 3W+PE /3W+N+PE Max. efficiency 98.0% Euro-eta 97.5% Protection devices DC reverse-polarity protection DC switch DC Surge protection typeII OPT Insulation resistance monitoring AC surge protection typeII OPT AC short-circuit protection Grid monitoring Anti-islanding protection Residual-current...
-
Page 67: Dc Connector And Isolator Info(Australia Model Only)
Model 12KTL3-XL1 15KTL3-XL 17KTL3-XL 20KTL3-XL 10KTL3-XL1 Specifications Waterproof PG head+OT terminal or quick AC connection connect terminal Interfaces Display OLED+LED/WIFI+APP USB/RS485 WIFI/GPRS/4G/RF/LAN The MID-XL(1) model needs to pay attention to the following two points when configuring the panel: 1.Based on the overall lifespan and reliability, the recommended voltage for the panel configuration of the MID-XL(1) model is below 650V;... -
Page 68: Annex
Shine LAN-X USB interface LAN monitoring module The inverter can be repaired on site or transported to the Growatt service center for repair, or it can be replaced with a new one based on the model and service life of the machine. -
Page 69: Compliance Certificates
CE,IEC 62109,AS 4777.2,EN50549,N4105,C10/11, MID 10-20KTL3-XL IEC 62116/61727,IEC 60068/61683 20 Contact If you have technical questions about our products, please contact the Growatt New Energy Service Hotline. We need the following information to provide you with the necessary help: Inverter type Ø... - Page 70 Growatt New Energy Download Manual Shenzhen Growatt New Energy Co., Ltd. 4-13/F, Building A, Sino-German (Europe) Industrial Park, Hangcheng Ave, Bao’an District, Shenzhen, China +86 755 2747 1942 service@ginverter.com www.ginverter.com GR-UM-249-A-06...
Need help?
Do you have a question about the MID 17-33KTL3-X and is the answer not in the manual?
Questions and answers