
Related Manuals for Stanley K50


Summary of Contents for Stanley K50
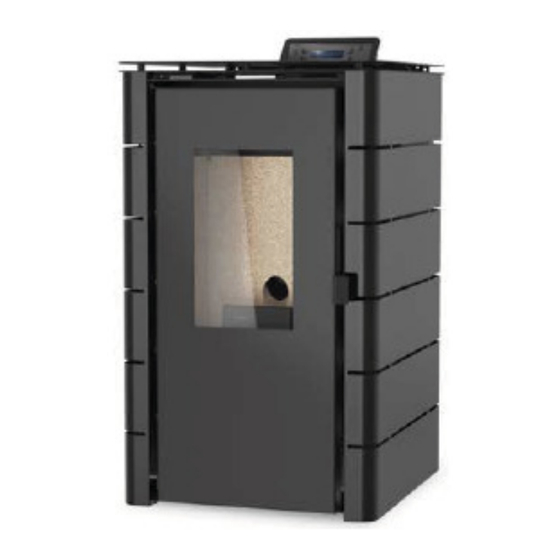
- Page 1 Wood Pellet Stove Installation and Operating Instructions Read these instructions carefully before installing, using and servicing the stove.
-
Page 2: Table Of Contents
Table of Contents SETTING THE LANGUAGE FOR THE FIRST TIME..................3 STANLEY PELLET STOVE WARRANTY ...................... 4 PACKAGE CONTENT ..........................5 3.1 U ..........................5 NPACKING THE STOVE IMPORTANT OPERATION / MAINTENANCE NOTES ................. 5 4.1 I ..........................7... -
Page 3: Setting The Language For The First Time
CE conformity mark; The Boiler pellet stoves are manufactured in compliance with the EN 14785:2008 Standards WATERFORD STANLEY bears no responsibility for any damage to the stove if it is installed by non- qualified personnel; WATERFORD STANLEY is not responsible for any damage to stoves not installed and used in compliance to the instructions included in this manual;... -
Page 4: Stanley Pellet Stove Warranty
Installation requirements or Building Regulations will void your warranty. Waterford Stanley reserve the right to replace any part due to manufacturing defect that fails within the warranty period under the terms of the warranty. The stove must be used for normal domestic purposes only and in accordance with manufacturer's operation instructions. -
Page 5: Package Content
Note: Adequate clearance must be maintained around the appliance to ensure the ease of part removal in the possible event of their damage/failure. Waterford Stanley are not responsible for any costs incurred in the removal of items installed in the vicinity of the appliance that must be moved to facilitate a part replacement. - Page 6 The manufacturer will not be responsible for any modifications made to this appliance by or on behalf of the user. The manufacturer will not be responsible for any eventual damage or loss as a result of unauthorised modifications. In the event that parts need to be replaced, only use parts recommended by Waterford Stanley.
-
Page 7: Installation Checklist
Installation Checklist Flue System • Minimum Flue Height of 2 metres. • Tee piece fitted at base of flue. • Appliance should be connected using an 80mm connecting flue pipe, increasing to 125mm within 1.5 metres of the appliance • Horizontal run of connecting pipe must not exceed 600mm. •... -
Page 8: Technical Specifications
Technical specifications Figure 2 Table 1 – Technical specifications Characteristics Units Height Width Depth Flue pipe outlet diameter. Pellet Hopper capacity Maximum overall thermal input Minimum thermal input Minimum fuel consumption kg / h Maximum fuel consumption 1,36 kg / h Rated electrical power Electrical power at start (<10 min.) Rated voltage... -
Page 9: Installation Of The Pellet Stove
*Tests performed using wood pellets with a heating capacity of 4.9 kWh/kg. The above information was obtained during product homologation tests performed at independent laboratories accredited for pellet stove tests. Installation of the pellet stove Installation of the pellet stove Before starting the installation, perform the following actions: Check immediately upon receipt that the delivered product is complete and in good condition. -
Page 10: Location
Adequate air supply for combustion/ ventilation • 6.3 Location The floor should be capable of supporting the weight of the product and hearth. A solid non-combustible hearth of minimum thickness 12 mm. The hearth should extend 150 to the side and 225mm to the front. The appliance should be installed centrally in Figure 4 the area to be heated. -
Page 11: Electrical Connection
If the power supply cable becomes damaged, switch off the power and have it repaired by an authorised Stanley service agent. Clearances to combustible A clearance to combustible of 50cm must be... -
Page 12: Fuel
Fuel The appliance is suitable for use with wood pellets certified to EN 14961-2 grade A1 with a diameter of 6 mm and a length that can range from 10 to 30 mm. No other fuel may be used. As a fuel, pellets are completely environmentally friendly, as they are made entirely of natural wood, without glue or other chemical compounds. -
Page 13: Remote Control
Avoid touching the equipment during the first burn so as not to leave permanent marks on the paint because it’s going through a plastic phase during its curing process. The stove has a probe for measuring the room temperature. This probe is attached to the grid on the rear panel. -
Page 14: Control And Display Panel
Control and Display Panel To set the year press “set”. The display starts to flash. Press the “+” or “-” key to select the desired year and then “ok” to confirm. Press "+" to scroll to the next menu. The “Month” is displayed. -
Page 15: Setting The Sleep Timer
Setting the sleep Timer This option is only displayed on the menu when the stove is on. Press the “ menu “ button” until “ day and time “ is displayed , then press the “ok “ button twice which will scroll to the right to show the display as below. - Page 17 To access the user information. press “set” twice and then press “+” until “ User Info is displayed” press set to access the “User info” then scroll through the following list of parameters using the “+” and “-”. Control board code. Security code Display code Parameters...
-
Page 18: User Information User Information
User Information User Information Once the pre-set time is elapsed, the unit shuts down. At the start of the Shutdown phase, another timer for a different pre-set period of time is triggered (Start-up delay time: factory setting: 20 minutes), that will make the unit To set the set point temperature for Programme Alternatively, the unit's programmer lets you enter the activation phase, when the thermostat... -
Page 19: Settings Menu
9.41 Settings menu To access the “settings” press “set” twice and then press “+” until “settings” is displayed. press “set” to access the “settings” then scroll through the following list of parameters using the “+” and “-”. Language Eco mode Back light Remote control ºC/ºF... -
Page 20: Co Alarm
Combustion settings. Shut down. This allows for adjustment of the “pellet” To turn off the pellet stove is carried out by quantity and the “air flow” pressing the ON / OFF button for 3 seconds. The display will show “shut down” until full Pellet completion of this phase. -
Page 21: Instruction For Installing The Casings
Remove the packaging inside the hopper containing the display. 11 Instruction for Installing the Casings Before proceeding with the installation of the display should immediately check if the packaging where the display is located is in perfect condition, any damage should be Figure 12Fitting of display.-1 reported and reported before proceeding with its installation. -
Page 22: Refill The Pellet Hopper
Note: Before proceeding with any cleaning operation it is imperative that the stove is turned off and sufficiently cold to avoid accidents. 12 Refill the pellet hopper Open the pellet hopper at the top of the equipment by moving the tab at the top, Figure 17 Maintenance label - pellet hopper door See label with warnings and maintenance tasks Figure 15Opening pellet hopper... -
Page 23: Daily/Weekly Maintenance
Figure 19Apply liquid to a cloth. Figure 22Interior cleaning Figure 20Clean glass with cloth Figure 23Burn-pot cleaning WARNING! the frequency of maintenance tasks 13.3 Daily/weekly maintenance depends on the quality of the pellets. For daily cleaning, the door must be opened by removing the burner and cleaning the ashes 13.4 Additional cleaning inside the combustion chamber. - Page 24 Figure 27Removal of interior grill Figure 24 Cover removal Figure 25 Screws removal Figure 28Removal of cleaning access plate Figure 26 Side panel removal. Figure 29Front access to flue path...
-
Page 25: Cleaning The Flue Passageway
Figure 31Vermiculite removal Figure 30 Side Cover removal Remove the front cleaning door and the side cleaning cover and vacuum clean the area behind the cleaning doors and refit making sure the doors are fitted correctly 13.5 Cleaning the flue passageway. Figure 32Smoke deflector removal-1 To perform this cleaning it is necessary to remove the front vermiculite (refractory material) from... -
Page 26: Cleaning Interior Of Extractor Fan
extractor. Figure 34Flue passageway cleaning Figure 36Removal of support leg and temperature probe Figure 35Flue passageway vacuuming If the extraction of fumes is not working properly following cleaning it will be necessary to remove the cover including the fan motor, Figure 37Removal of air hose and electrical connections recommend... - Page 27 surrounding area Figure 39 Motor and impeller removal Using a vacuum cleaner remove the ash that is accumulated in the housing of the extractor, in Figure 42Clean the exhaust pipe the turbine and in the gas outlet tube of the extractor fumes.
-
Page 28: Troubleshooting Guide
14 Troubleshooting guide Note When triggered, all the alarms below cause the machine to shutdown. The alarm must be reset and the unit restarted. To reset the unit, press the “On/Off” button for 10 seconds until the alarm sounds. - Page 29 The boiler pellet stove must be operated exclusively with pellets. No other fuel may be used. Use only pellets certified by standard EN 14961-2 grade A1, with a 6 mm diameter and measuring between 10 and 30 mm long. The pellets must not have a moisture content in excess of 8% . To guarantee a good combustion, the pellets must maintain these characteristics so they should be stored in a dry place.
-
Page 30: Stop
they will be ignited using a heat resistor. This process may take between 5 and 10 minutes, depending on whether the worm screw used to push through the pellets has been previously filled with fuel or is empty. Upon completion of the ignition phase, the word "On" should appear on the display. The heating power can be adjusted at any time by pressing the power selection button for approximately 1 second. - Page 31 Figure 18 – Refilling the pellet reservoir 3 - Turn on the stove and close the lid, pressing it down as shown in Figure xx...
- Page 33 Supplied by Waterford Stanley Ltd., Stove 401-403, IDA Industrial Estate, Cork Road, Waterford, Ireland. Tel: (051) 302300 www.waterfordstanley.com...
Need help?
Do you have a question about the K50 and is the answer not in the manual?
Questions and answers