Table of Contents
Advertisement
Quick Links
Advertisement
Table of Contents

Related Manuals for SMART Board 7000 Series


Summary of Contents for SMART Board 7000 Series
- Page 1 SMART Board USER’S MANUAL...
- Page 2 Important information NOTE Refer to the installation and maintenance guide for important information about installing and maintaining the display (see More information on page 8). WARNING Do not open or disassemble the display. You risk electrical shock from the high voltage ⚫...
- Page 3 Features The SMART Board 7000 or 7000 Pro series interactive display is the hub of your classroom or meeting room. PC-free embedded computing provides one-touch access to collaborative tools, including a whiteboard, wireless screen sharing and a web browser. There’s no need for wires, cables or manual software and firmware updates.
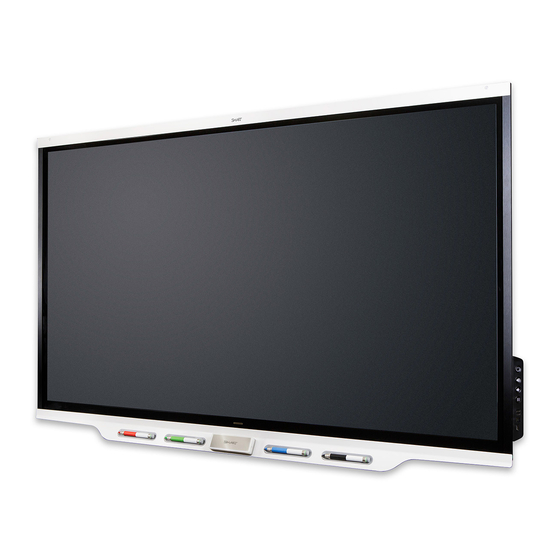
- Page 4 Components The display consists of the following components: Name Pictured Screen Presence detection sensor (×2) Home button Eraser Pen (×4) Convenience panel iQ appliance (and Intel Compute Card) Connector panel Not pictured AC power inlet, outlet and switch RS-232 connectors Speakers...
-
Page 5: Presence Detection Sensors
Presence detection sensors The display has two presence detection sensors on its top frame that can detect people up to 16' (5 m) away when the display is in Standby mode. When the sensors detect people in the room, the display is ready to turn on. To turn on the display, press the Power button or pick up a pen or eraser. - Page 6 Home button Tap the Home button to open the Home screen. From the Home screen, you can open the iQ appliance’s apps as well as the settings. For more information about the Home screen and the iQ experience, see Using the iQ experience on page 18.
-
Page 7: Smart Audio 400 Classroom Amplification System
SMART Audio 400 classroom amplification system Available for education models, the SMART Audio 400 classroom amplification system provides high-quality audio amplification. The system comes with a teacher microphone and optional student microphone. Multiple speaker options are available, including wall- and ceiling-mounted speakers. The amplifier receives audio signals from the microphones and translates them into crystal-clear sound through the speakers. -
Page 8: Waking Up The Display And Putting It Back To Sleep
Waking up the display and putting it back to sleep The display’s presence detection sensors can detect people up to 16' (5 m) away when the display is in Standby mode (in other words, sleeping). When the sensors detect people, the display enters Ready mode and is ready to wake. -
Page 9: Using The Power Button To Identify The Display's Status
Name Procedure Power Press to enter or exit Standby mode. ⚫ Press and hold for four seconds to turn off the display. ⚫ Press and hold for 10 seconds to reset the display. ⚫ Volume increase Press to increase the volume. Volume Press to decrease the volume. -
Page 10: Using Touch
InGlass™ core by optimizing both touch and pen performance, resulting in virtually no lag and zero contact detect height. Exclusive to SMART, HyPr Touch allows for SMART’s unique Simultaneous Tool Differentiation— the use of 10 touch points, four pens and two erasers (tool and palm) by multiple users for a truly natural, fully collaborative experience. -
Page 11: Using The Pens And Eraser
Pinch to zoom in / scale (enlarge) Pinch to zoom out / scale (reduce) Rotate Flick Using the pens and eraser Using the pens The display comes with black, red, blue and green pens. Each pen has an attached eraser and an indicator light. The display’s bottom frame includes magnetic holders for the pens. - Page 12 This pairs the pens with the display and charges them for testing purposes. If you previously paired a pen with a SMART Board 7000 series interactive display, you must ⚫ pair it with another display to use it with that display. When you do this, the pen’s firmware...
-
Page 13: Using The Eraser
Each pen has a light that turns on to indicate the pen’s status. ⚫ If you’re viewing the Intel Compute Card’s or a connected computer’s input, SMART Ink ⚫ enables you to write or draw in digital ink over applications, files, folders, websites and any... -
Page 14: Changing Pen Color, Thickness And Other Properties
To write or draw in digital ink 1. Pick up one of the display’s pens. Use the pen to write or draw in digital ink. NOTE The Pen ID feature enables you to use the pens at the same time and customize their colors and other settings independently. -
Page 15: Using The Apps Library
Tap the Home button at the bottom of the screen. Using the Apps Library The Apps Library contains the Browser, SMART Notebook Player and Whiteboard apps. You can also add apps from the web and SMART’s app store. NOTE SMART Notebook Player is available on education models only. - Page 16 Notebook Player makes it easy to present SMART Notebook files and play SMART lab™ activities on the display. You can also install the Notebook Player app on your iOS device to view and control SMART Notebook files from the device.
-
Page 17: Cleaning Up The Display
Intel Compute Card’s Windows 10 operating system on the display. You can install the SMART software that is included with the display on the Intel Compute Card. For more information on installing software, see Installing SMART software on computers you want to connect to the display below. -
Page 18: Connecting And Using Computers
Connecting and using computers NOTE SMART Learning Suite and SMART Meeting Pro software are bundled with the following software: Software Description SMART Product Drivers Enables the Intel Compute Card or connected computers to detect input from the display SMART Ink®... -
Page 19: Connecting Computers To The Display
Connecting computers to the display You can connect computers with SMART software to the display as shown below. NOTES To interact with content, connect a USB cable to the appropriate USB Type-B receptacle on ⚫ the connector panel or convenience panel (as shown in the above diagrams). -
Page 20: Using Smart Software On Connected Computers
4. Tap the computer’s thumbnail. Using SMART software on connected computers After you’ve connected a computer to the display and used the Input app to view its input on the display, you can use the SMART software to present content and enable collaboration.
Need help?
Do you have a question about the Board 7000 Series and is the answer not in the manual?
Questions and answers