Table of Contents
Advertisement
Available languages
Available languages
Quick Links
Advertisement
Table of Contents

Related Manuals for Future light PRO Slim Strobe


Summary of Contents for Future light PRO Slim Strobe
- Page 1 PRO Slim Strobe SMD 840 BEDIENUNGSANLEITUNG USER MANUAL...
- Page 2 2/40 00147575.DOCX, Version 1.0...
-
Page 3: Table Of Contents
Inhaltsverzeichnis / Table of contents EINFÜHRUNG ..............................4 Produktmerkmale ............................5 SICHERHEITSHINWEISE ..........................6 GERÄTEBESCHREIBUNG..........................8 INSTALLATION ..............................9 ANSCHLÜSSE ..............................10 DMX512-Ansteuerung ..........................10 Drahtlose DMX-Übertragung mit QuickDMX ....................10 Netzanschluss .............................. 11 BEDIENUNG ..............................12 Bedientasten ..............................12 Menüstruktur .............................. -
Page 4: Einführung
BEDIENUNGSANLEITUNG PRO Slim Strobe SMD 840 CW oder WW GEFAHR! Elektrischer Schlag durch Kurzschluss Seien Sie besonders vorsichtig beim Umgang mit gefährlicher Netzspannung. Bei dieser Spannung können Sie einen lebensgefährlichen elektrischen Schlag erhalten. Öffnen Sie das Gerät niemals und schützen Sie es vor Feuchtigkeit und Nässe. -
Page 5: Produktmerkmale
Produktmerkmale PRO Slimline-LED-Strobe mit kaltweißen oder warmweißen LEDs, 16 separat ansteuerbaren LED- Ringen und schaltbarem Frost 840 leistungsstarke LEDs 0,5 W SMD 5730 Kaltweiß (CW) Artikel Nr. 51842710 oder Warmweiß • (WW) Artikel Nr. 51842715 16 Segmente einzeln ansteuerbar • Frostfilter elektronisch •... -
Page 6: Sicherheitshinweise
SICHERHEITSHINWEISE WARNUNG! Lesen Sie aufmerksam die Sicherheitshinweise und benutzen Sie das Produkt nur wie in dieser Anleitung beschrieben, damit es nicht versehentlich zu Verletzungen oder Schäden kommt. Verwendungszweck • Bei diesem Gerät handelt es sich um einen LED-Strobe, mit dem sich dekorative Lichteffekte erzeugen lassen. - Page 7 Warnung vor Verbrennung und Brand • Der zulässige Umgebungstemperaturbereich (Ta) beträgt -5 bis +45 °C. Verwenden Sie das Gerät niemals außerhalb dieses Temperaturbereichs. • Die Gehäusetemperatur (Tc) kann im Betrieb bis zu 60 °C betragen. Vermeiden Sie den Kontakt mit Personen oder Gegenständen.
-
Page 8: Gerätebeschreibung
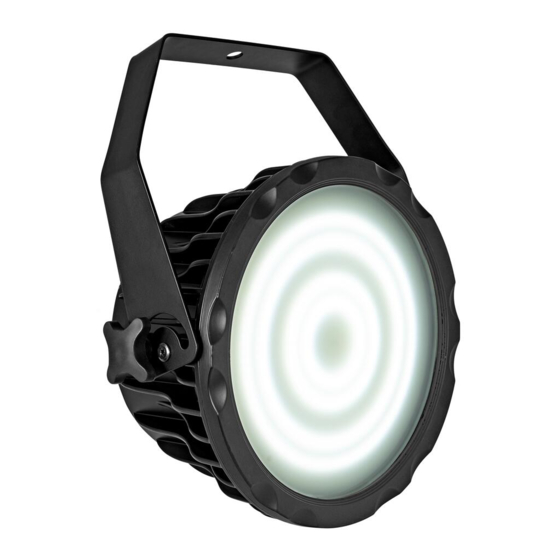
GERÄTEBESCHREIBUNG Montagebügel Elektronisch schaltbarer Frostfilter 840 leistungsstarke 0,5 W SMD 5730 LEDs Feststellschraube LCD Anzeige mit Bedientasten USB-Buchse für QuickDMX- Funkempfänger Fangseilöse Netzanschluss Netzausgang (10) Sicherung (11) DMX-Ausgang (12) DMX-Eingang 8/40 00147575.DOCX, Version 1.0... -
Page 9: Installation
INSTALLATION WARNUNG! Verletzungsgefahr durch Herabfallen Über Kopf installierte Geräte können beim Herabstürzen erhebliche Verletzungen verursachen! Stellen Sie sicher, dass das Gerät sicher installiert ist und nicht herunterfallen kann. Die Montage darf nur durch eine Fachkraft erfolgen, die mit den Gefahren und den einschlägigen Vorschriften hierfür vertraut ist. -
Page 10: Anschlüsse
ANSCHLÜSSE DMX512-Ansteuerung Gerät 1 Gerät 2 Gerät 3 Startadresse 1 Startadresse 24 Startadresse 47 DMX Controller Program Chase32 Step100 Für die Ansteuerung des Geräts per DMX512 ist eine Datenverbindung notwendig. Das Gerät verfügt dazu über 3-polige XLR-Anschlüsse. Verbinden Sie den Ausgang Ihres Controllers mit dem DMX-Eingang DMX IN des Geräts über ein DMX- Kabel. -
Page 11: Netzanschluss
Netzanschluss Schließen Sie das beiliegende Netzkabel an und stecken den Netzstecker in eine geerdete Schutzkontaktsteckdose ein. Damit ist das Gerät eingeschaltet. Zum Ausschalten ziehen Sie den Netzstecker aus der Steckdose. Schließen Sie das Gerät nicht über einen Dimmer an die Netzspannung an. Für besseren Bedienkomfort verwenden Sie eine schaltbare Steckdose. -
Page 12: Bedienung
BEDIENUNG Nach dem Anschluss ans Netz ist das Gerät betriebsbereit. Das Display zeigt die zuletzt eingestellte Betriebsart. Nehmen Sie nun die notwendigen Menüeinstellungen für die jeweilige Betriebsart mit den Bedientasten vor. Auch wenn Sie das Gerät vom Stromnetz trennen, bleiben alle Einstellungen gespeichert. Das Gerät kann entweder im Standalone-Modus über das Bedienfeld oder im DMX-gesteuerten Modus über einen handelsüblichen DMX-Controller, sowie mit QuickDMX USB-Funksender/Empfänger, betrieben werden. - Page 13 Standalone-Betrieb Manuelle Einstellung In diesem Modus können Sie manuell die Helligkeit, den Strobe-Effekt und den Frost-Effekt einstellen, sowie die Intensität der einzelnen LED-Ringe. Drücken Sie die Taste MODE so oft, bis das Display die Betriebsart Manual anzeigt. Bestätigen Sie mit der Taste ENTER.
- Page 14 Master/Slave-Betrieb Es lassen sich mehrere Geräte zusammenschalten (max. 32). Das Hauptgerät (Master) kann dann alle Nebengeräte (Slave) synchron steuern ohne die Notwendigkeit eines DMX-Controllers. Die Geräte müssen auf die jeweilige Betriebsart eingestellt werden. Konfigurieren Sie zuerst alle Slave-Geräte vor dem Anschluss an das Master-Gerät. Verbinden Sie den DMX-Ausgang des Master-Geräts mit dem DMX-Eingang des ersten Slave-Geräts.
-
Page 15: Dmx-Betrieb
DMX-Betrieb Anzahl der DMX-Kanäle und DMX-Startadresse einstellen Für den Betrieb über einen Controller mit DMX512-Protokoll verfügt das Gerät über 23 Steuerkanäle. Es kann aber auch in einen Modus mit 2, 3, 5, 7 oder 17 Kanälen umgeschaltet werden, wenn andere Funktionen benötigt werden. -
Page 16: Funktionen Im Dmx-Betrieb
Funktionen im DMX-Betrieb 2-Kanal-Modus Kanal Wert Funktion 000 – 009 Keine Funktion Strobe 010 – 255 Strobe mit zunehmender Geschwindigkeit 000 – 125 Keine Funktion Frost 126 – 255 Frost 3-Kanal-Modus Kanal Wert Funktion 000 – 255 Zunehmende Helligkeit 0 – 100% Dimmer 000 –... - Page 17 202 – 209 Programm 25 210 – 217 Programm 26 218 – 255 Programm 27 000 – 255 Zunehmende Geschwindigkeit der Auto-Programme Geschwindigkeit 000 – 125 Keine Funktion Frost 126 – 255 Frost 7-Kanal-Modus Kanal Wert Funktion 000 – 255 Gesamthelligkeit 0 – 100% Master Dimmer 000 –...
- Page 18 17-Kanal-Modus Kanal Wert Funktion 000 – 255 Dimmer 0-100%, Gruppe 1 000 – 255 Dimmer 0-100%, Gruppe 2 000 – 255 Dimmer 0-100%, Gruppe 3 000 – 255 Dimmer 0-100%, Gruppe 4 000 – 255 Dimmer 0-100%, Gruppe 5 000 – 255 Dimmer 0-100%, Gruppe 6 000 –...
- Page 19 000 – 255 Strobe-Spezialeffekte mit zunehmender Geschwindigkeit Strobe-Effekte 000 – 009 Keine Funktion 010 – 017 Programm 1 018 – 025 Programm 2 026 – 033 Programm 3 034 – 041 Programm 4 042 – 049 Programm 5 050 – 057 Programm 6 058 –...
-
Page 20: Reinigung Und Wartung
REINIGUNG UND WARTUNG Das Gerät sollte äußerlich in regelmäßigen Abständen von Verunreinigungen wie Staub usw. gereinigt werden. Insbesondere die Linse sollte sauber sein, damit das Licht mit maximaler Helligkeit abgestrahlt werden kann. Trennen Sie das Gerät vom Netz und lassen Sie es abkühlen, bevor Sie mit der Reinigung beginnen. Reinigen Sie die Oberflächen mit einem fusselfreien, angefeuchteten Tuch. -
Page 21: Technische Daten
TECHNISCHE DATEN Artikel Nr.: 51842710 (CW) 51842715 (WW) Stromversorgung: 100-240 V AC, 50/60 Hz Gesamtanschlusswert: 150 W Schutzart: IP20 Schutzklasse: SK I Stromeinspeisung über P-Con (blau), Einbauversion Stromanschluss: Stromanschlusskabel mit Schutzkontaktstecker Stromausgang: P-Con (grau), Einbauversion Lampenart: LED-Lampe Sicherung: T 2 A Sicherung auswechselbar 840 x 0,5 W SMD 5730 840 x 0,5 W SMD 5730 LED:... -
Page 22: Introduction
USER MANUAL PRO Slim Strobe SMD 840 CW or WW DANGER! Electric shock caused by short-circuit Be careful with your operations. With a dangerous voltage you can suffer a dangerous electric shock when touching the wires. Never open the housing. Keep the device away from rain and moisture. -
Page 23: Product Features
Product features PRO slimline LED strobe with cold white or warm white LEDs, 16 separately controllable LED rings and switchable frost 840 powerful LEDs 0,5 W SMD 5730 cold white (CW) for article no. 51842710 or warm white (WW) • for article no. -
Page 24: Safety Instructions
SAFETY INSTRUCTIONS WARNING! Please read the safety warnings carefully and only use the product as described in this manual to avoid accidental injury or damage. Intended use • This device is an LED strobe for creating decorative lighting effects. This device is designed for professional use in the field of event technology, e.g. - Page 25 Warning – risk of burns and fire • The admissible ambient temperature range (Ta) is -5 to +45°C. Do not operate the device outside of this temperature range. • The housing temperature (Tc) can be up to 60°C during use. Avoid contact by persons and materials. •...
-
Page 26: Description Of The Device
DESCRIPTION OF THE DEVICE Mounting bracket Electronically switchable frost filter 840 powerful 0.5 W SMD 5730 LEDs Fixation screw LCD with operating buttons USB port for QuickDMX wireless receiver Safety eyelet Power input Power output (10) Fuse (11) DMX output (12) DMX input 26/40 00147575.DOCX, Version 1.0... -
Page 27: Installation
INSTALLATION WARNING! Risk of injury caused by falling objects Devices in overhead installations may cause severe injuries when crashing down. Make sure that the device is installed securely and cannot fall down. The installation must be carried out by a specialist who is familiar with the hazards and the relevant regulations. The device may be fastened to a truss or similar rigging structure. -
Page 28: Connections
CONNECTIONS DMX512 control Device 1 Device 2 Device 3 Starting Address 1 Starting Address 24 Starting Address 47 DMX Controller Program Chase32 Step100 A DMX512 data link is required in order to control the device via DMX. The device provides 3-pin XLR connectors for DMX connection. -
Page 29: Power Supply
Power Supply Connect the device via the mains cable to a grounded mains socket. Thus the unit is switched on. To switch off the unit, disconnect the power plug. Do not connect the unit to the mains voltage via a dimmer. For a more convenient operation, use a mains outlet which is switchable. -
Page 30: Operation
OPERATION After connecting the device to the mains it is ready for operation. The display indicates the last operating mode. The operating modes can be selected by means of the display and the control buttons. All settings remain stored even if the device is disconnected from the mains. The device can be operated in stand-alone mode via the control board or in DMX-controlled mode via any commercial DMX controller as well as wireless QuickDMX... - Page 31 Stand-alone mode Manual setting In this mode, you can manually set the desired brightness, strobe speed and frost effect, as well as the intensity of the individual LED rings. Press the MODE button so many times until MANUAL is indicated on the display. Confirm with the ENTER button.
- Page 32 Master/Slave Operation Several devices may be interconnected (max. 32). Then all slave units can be synchronized and controlled with the master unit without the need for a DMX controller. The devices must be set to the corresponding operating modes. Configure all slave units before connecting the master unit. Connect the DMX output of the master unit to the DMX input of the first slave unit.
-
Page 33: Dmx Operation
DMX operation Setting the number of DMX channels and the DMX starting address For operation with a controller with DMX512 protocol, the device is equipped with 23 control channels. However, it can also be switched to a mode with 2, 3, 5, 7 or 17 channels if different functions are required. To be able to operate the device with a DMX controller, the DMX starting address must be set. -
Page 34: Functions In Dmx Mode
Functions in DMX mode 2-channel mode Channel Value Function 000 – 009 No function Strobe 010 – 255 Strobe with increasing speed 000 – 125 No function Frost 126 – 255 Frost 3-Kanal-Modus Channel Value Function 000 – 255 Increasing brightness 0 – 100% Dimmer 000 –... - Page 35 202 – 209 Program 25 210 – 217 Program 26 218 – 255 Program 27 000 – 255 Increasing speed of the auto programs Speed 000 – 125 No function Frost 126 – 255 Frost 7-channel mode Channel Value Function 000 –...
- Page 36 17-channel mode Channel Value Function 000 – 255 Dimmer 0-100%, Group 1 000 – 255 Dimmer 0-100%, Group 2 000 – 255 Dimmer 0-100%, Group 3 000 – 255 Dimmer 0-100%, Group 4 000 – 255 Dimmer 0-100%, Group 5 000 –...
- Page 37 000 – 255 Strobe special effects with increasing speed Strobe Effects 000 – 009 No function 010 – 017 Program 1 018 – 025 Program 2 026 – 033 Program 3 034 – 041 Program 4 042 – 049 Program 5 050 –...
-
Page 38: Cleaning And Maintenance
CLEANING AND MAINTENANCE The outside of the device should be cleaned periodically to remove contaminants such as dust etc. The lens, in particular, should be clean to ensure that light will be emitted at maximum brightness. Disconnect the device from power and allow it to cool before cleaning. Clean the surface with a soft lint-free and moistened cloth. -
Page 39: Technical Specifications
TECHNICAL SPECIFICATIONS Article no.: 51842710 (CW) 51842715 (WW) Power supply: 100-240 V AC, 50/60 Hz Power consumption: 150 W IP classification: IP20 Protection class: Protection class I Mains input via P-Con (blue), mounting version Power connection: Power supply cord with safety plug Power output: P-Con (gray), mounting version Fuse:... - Page 40 Futurelight is a brand of Steinigke Showtechnic GmbH Andreas-Bauer-Str. 5 97297 Waldbüttelbrunn Germany D00147575 Version 1.0 Publ. 31/07/2023...
Need help?
Do you have a question about the PRO Slim Strobe and is the answer not in the manual?
Questions and answers