Table of Contents
Advertisement
Available languages
Available languages
Quick Links
BEDIENUNGSANLEITUNG
USER MANUAL
MODE D'EMPLOI
MANUAL DEL USUARIO
PPP-60
LED-Floor Panel
©
Für weiteren Gebrauch aufbewahren!
Copyright
Keep this manual for future needs!
Nachdruck verboten!
Gardez ce mode d'emploi pour des
Reproduction prohibited!
utilisations ultérieures!
Réproduction interdit!
Guarde este manual para posteriores usos.
Prohibida toda reproducción.
Advertisement
Table of Contents

Related Manuals for Future light PPP-60


Summary of Contents for Future light PPP-60
-
Page 1: Manual Del Usuario
BEDIENUNGSANLEITUNG USER MANUAL MODE D'EMPLOI MANUAL DEL USUARIO PPP-60 LED-Floor Panel © Für weiteren Gebrauch aufbewahren! Copyright Keep this manual for future needs! Nachdruck verboten! Gardez ce mode d’emploi pour des Reproduction prohibited! utilisations ultérieures! Réproduction interdit! Guarde este manual para posteriores usos. -
Page 2: Table Of Contents
MULTI-LANGUAGE-INSTRUCTIONS Inhaltsverzeichnis/Table of contents Sommaire/Contenido EINFÜHRUNG ..............................3 SICHERHEITSHINWEISE..........................3 BESTIMMUNGSGEMÄßE VERWENDUNG..................... 5 GERÄTEBESCHREIBUNG..........................6 MONTAGE................................. 6 BEDIENUNG ..............................9 REINIGUNG UND WARTUNG........................10 TECHNISCHE DATEN ............................ 10 INTRODUCTION ............................. 11 SAFETY INSTRUCTIONS..........................11 OPERATING DETERMINATIONS........................13 DESCRIPTION OF THE DEVICE ........................14 INSTALLATION .............................. -
Page 3: Einführung
- sich die letzte Version der Anleitung im Internet herunter laden EINFÜHRUNG Wir freuen uns, dass Sie sich für ein FUTURELIGHT PPP-60 Panel entschieden haben. Wenn Sie nachfolgende Hinweise beachten, sind wir sicher, dass Sie lange Zeit Freude an Ihrem Kauf haben werden. - Page 4 Das Gerät darf nicht in Betrieb genommen werden, nachdem es von einem kalten in einen warmen Raum gebracht wurde. Das dabei entstehende Kondenswasser kann unter Umständen Ihr Gerät zerstören. Lassen Sie das Gerät solange uneingeschaltet, bis es Zimmertemperatur erreicht hat! Bitte überprüfen Sie vor der ersten Inbetriebnahme, ob kein offensichtlicher Transportschaden vorliegt.
-
Page 5: Bestimmungsgemäße Verwendung
Kinder und Laien vom Gerät fern halten! Das Gerät darf niemals unbeaufsichtigt betrieben werden! Verletzungsgefahr! Die Panels und die Rampen dürfen nur nach Anlegen geeigneter Schutzhandschuhe montiert werden. Stolpergefahr! Die Glasplatten der Panels müssen immer über die Nivellierfüße auf die identische Höhe eingestellt werden. -
Page 6: Gerätebeschreibung
• Quadratische Felder 610 x 610 mm sind erweiterbar, komplette Tanzflächen realisierbar • Vorteile der LED-Technologie: extrem lange Lebensdauer, niedriger Gesamtanschlusswert, minimale Wärmeentwicklung, quasi wartungsfrei bei brillantem Abstrahlverhalten • Steuerung für maximal 500 PPP-60 Panels über optionalen FUTURELIGHT LC-01 Controller • Nach jeweils 8 LED-Panels muss neu eingespeist werden Geräteübersicht (1) Gehäuseschraube... - Page 7 Kabel stets nach unten zeigen. Setzen Sie nun die Glasscheibe vorsichtig auf den dafür vorgesehenen Gummiring am Metallrahmen auf. Verbinden mehrerer PPP-60: Für die Montage mehrerer Panels verwenden Sie bitte die beiliegenden Schrauben. Jedes Panel hat auf jeder der vier Seiten zwei Arretierösen im Metallrahmen, um weitere Panels miteinander zu verbinden.
- Page 8 Installation Seitenrampe: Führen Sie die 4 Arretierbolzen der Seitenrampe in die 4 Arretierösen des PPP-60 Metallrahmens ein. Stolpergefahr! Das Riffelblech der Rampen muss immer über die Nivellierfüße auf die exakte Höhe des PPP- 60 eingestellt werden. Montieren Sie alle Seitenrampen und achten Sie darauf, dass die Oberflächen der Panels und Rampen auf gleicher Höhe sind.
-
Page 9: Bedienung
Stolpergefahr! Das Riffelblech der Rampen muss immer über die Nivellierfüße auf die exakte Höhe des PPP- 60 eingestellt werden. Schrauben Sie das Riffelblech wieder auf dem Metallrahmen fest. Montieren Sie alle Eckrampen und achten Sie darauf, dass die Oberflächen der Panels und Rampen auf gleicher Höhe sind. -
Page 10: Reinigung Und Wartung
Anzahl der LEDs: Zubehör: FUTURELIGHT LC-01 Controller Best.-Nr. 51834100 FUTURELIGHT LED Booster Best.-Nr. 51834110 FUTURELIGHT SEC-03 Verlängerung f. PPP-60 Best.-Nr. 51841410 FUTURELIGHT PEC-03 Verlängerung f. PPP-60 Best.-Nr. 51841411 FUTURELIGHT PC-03 Netzleitung für PPP-60 Best.-Nr. 51841412 FUTURELIGHT Rampe für PPP-60 Seite Best.-Nr. -
Page 11: Introduction
- download the ultimate version of the user manual from the Internet INTRODUCTION Thank you for having chosen a FUTURELIGHT PPP-60 panel. If you follow the instructions given in this manual, we are sure that you will enjoy this device for a long period of time. - Page 12 If the device has been exposed to drastic temperature fluctuation (e.g. after transportation), do not switch it on immediately. The arising condensation water might damage your device. Leave the device switched off until it has reached room temperature. Please make sure that there are no obvious transport damages. Should you notice any damages on the A/C connection cable or on the casing, do not take the device into operation and immediately consult your local dealer.
-
Page 13: Operating Determinations
Danger of injury! The panels and the ramps must only be installed when wearing appropriate protection gloves. Danger of trippling! Via the adjustable feet, the surface of the PPP-60 and the ramps must always be levelled at the same height. -
Page 14: Description Of The Device
• Control for a maximum of 500 PPP-60 panels via optional FUTURELIGHT LC-01 controller • After every 8 PPP-60 panels, the fixtures must have a renewed connection with the power mains Overview (1) Housing screw... - Page 15 Now attach glass panel carefully onto the appropriate rubber ring in the metal frame. Connecting several PPP-60: Please use the enclosed screws to mount several panels. Every panel features 2 locking eyes at every side of the metal fram in order to connect several panels.
- Page 16 Danger of trippling! Via the adjustable feet, the surface of the PPP-60 must always be levelled at the same height. Installation side ramp: Insert the 4 locking bolts of the side ramp into the 4 locking eyes of the PPP-60 metal frame.
-
Page 17: Operation
Danger of trippling! Via the adjustable feet, the surface of the PPP-60 and the ramps must always be levelled at the same height. Screw down the chequer plate to the metal frame. Install all corner ramps and make sure that the surfaces of the panels and of the ramps are at the same height. -
Page 18: Cleaning And Maintenance
FUTURELIGHT LED Booster No. 51834110 FUTURELIGHT SEC-03 extension for PPP-60 No. 51841410 FUTURELIGHT PEC-03 extension for PPP-60 No. 51841411 FUTURELIGHT PC-03 Power cord for PPP-60 No. 51841412 FUTURELIGHT ramp for PPP-60 side No. 51841420 FUTURELIGHT ramp for PPP-60 corner No. 51841425 Please note: Every information is subject to change without prior notice. -
Page 19: Introduction
- télécharger la version ultérieure du mode d'emploi d'Internet INTRODUCTION Nous vous remercions d'avoir choisi un FUTURELIGHT PPP-60 panel. Si vous respectez les instructions de service suivantes, vous allez profiter longtemps de votre achat. Sortez le PPP-60 de son emballage. - Page 20 Attention: Tout dommage occasionné par la non observation des instructions de montage ou d'utilisation n'est pas couvert par la garantie. L'appareil ne devrait pas être mis en service lorsqu'il à été transporté d'un endroit froid à un endroit chaud. Il se forme de la condensation qui pourrait endommager l'appareil.
-
Page 21: Emploi Selon Les Prescriptions
des éclats métalliques devraient entrer dans l'appareil, il faut immédiatement mettre l'appareil hors service et le séparer du secteur avec tous les pôles (tirer la fiche secteur). Des dysfonctionnements et court-circuits peuvent avoir des blessures mortelles comme conséquence. RISQUE DE MAL! Ne jamais regarder directement à... -
Page 22: Description De L'appareil
• Contrôlé pour maximal 500 panneaux PPP-60 par le FUTURELIGHT LC-01 contrôleur optionnel • Apres chaque groupe de 8 panneaux PPP-60, on doit brancher les panneaux encore avec la fiche au secteur Aperçue des parties... - Page 23 Avant la première mise en marche, l’installation doit être contrôlé par un organisme agrée! Connexion des panneaux Attention: Apres chaque groupe de 8 panneaux PPP-60 on doit brancher les panneaux encore avec la fiche au secteur. Attention: Contrôlé pour maximal 500 panneaux PPP-60 par le FUTURELIGHT LC-01 contrôleur optionnel.
-
Page 24: Maniement
Numéro de DELs: Accessoires: FUTURELIGHT LC-01 contrôleur N° d'art. 51834100 FUTURELIGHT LED Booster N° d'art. 51834110 FUTURELIGHT SEC-03 rallonge pour PPP-60 N° d'art. 51841410 FUTURELIGHT PEC-03 rallonge pour PPP-60 N° d'art. 51841411 FUTURELIGHT PC-03 câble d'aliment. PPP-60 N° d'art. 51841412 FUTURELIGHT ramp for PPP-60 side N°... -
Page 25: Introcucción
-pasar el manual a cada sucesivo poseedor o usuario del producto -descargar la última versión del manual del Internet INTROCUCCIÓN Gracias por haber elegido un FUTURELIGHT PPP-60 panel. Si Vd. respecte las instrucciones sucesivas, aseguremos que vaya a gozarse mucho de su compra. Desembale su PPP-60. -
Page 26: Instrucciones De Manejo
Si el aparato ha estado expuesto a grandes cambios de temperatura (p.e. tras el transporte), no lo enchufe inmediatamente. La condensación de agua producida podría dañar su aparato. Deje el aparato desconec- tado hasta que llegue a la temperatura ambiente. Antes de la puesta en marcha inicial, por favor asegúrese de que no hay daños causados durante el transporte. -
Page 27: Descripción Del Aparato
• Ventajas de la tecnología LED: larga vida de los LEDs, consumo muy bajo, producción mínima de calor, casi no mantenimiento con iluminación perfecta • Controlado para máximo 500 paneles PPP-60 mediante controlador opcional FUTURELIGHT LC-01 controller • Después de 8 paneles PPP-60 debe conectar a la red otra vez 27/30 00016794.DOC, Version 1.6... -
Page 28: Montaje
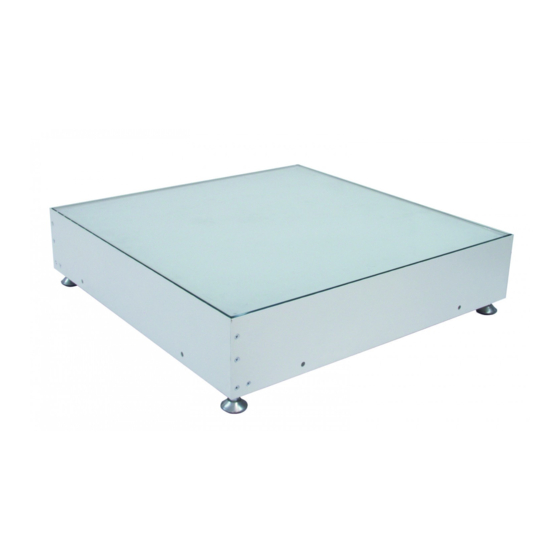
Descripción de las partes (1) Tornillo de caja (2) Alimentación de 3-polos (3) Signal Input de 5-polos (4) Alimentación Output de 3-polos (5) Signal Output de 5- polos (6) Marco de aluminio (7) Orificio (8) Vidrio (9) Pedestal MONTAJE Este aparato es previsto para una montaje de pie. El aparato debe ser instalado absolutamente plano en un sitio firme, sin concusiones, sin oscilaciones y resistente al fuego. -
Page 29: Operación
Conexiones Atención: Después de 8 paneles PPP-60 debe conectar a la red otra vez. Atención: Controlado para máximo 500 paneles PPP-60 mediante controlador opcional FUTURELIGHT LC-01 controller. Alimentación Conectar el aparato a la red mediante el cable de alimentación opcional. -
Page 30: Limpieza Y Mantenimiento
FUTURELIGHT LED Booster Referencia 51834110 FUTURELIGHT SEC-03 alargador para PPP-60 Referencia 51841410 FUTURELIGHT PEC-03 alargador para PPP-60 Referencia 51841411 FUTURELIGHT PC-03 cable de alimen. PPP-60 Referencia 51841412 FUTURELIGHT ramp for PPP-60 side Referencia 51841420 FUTURELIGHT ramp for PPP-60 corner Referencia 51841425 Nota: Todas las especificaciones dadas en este manual están sujetas a modificación sin previo...
Need help?
Do you have a question about the PPP-60 and is the answer not in the manual?
Questions and answers