Table of Contents
Advertisement
Advertisement
Table of Contents

Subscribe to Our Youtube Channel
Related Manuals for Analytik Jena SPECORD 50 PLUS


Summary of Contents for Analytik Jena SPECORD 50 PLUS
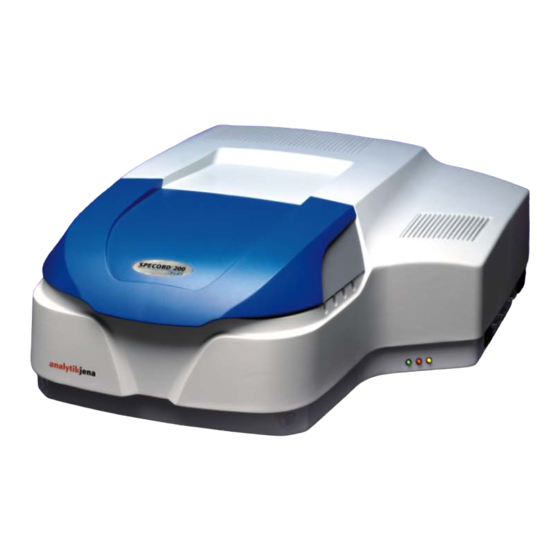
- Page 1 SPECORD PLUS UV VIS Spectrophotometer Operating manual...
- Page 2 Copyrights and Trademarks SPECORD and WinASPECT are trademarks of Analytik Jena AG registered in Germany. Microsoft, Windows XP/VISTA/7, MS Excel are registered trademarks of Microsoft Corp. The identification with ® or TM is omitted in this manual.
-
Page 3: Table Of Contents
Contents Table of Contents Introduction ........................5 Use of the SPECORD PLUS ................5 Notes on the manual ................... 5 Warranty and liability ................... 6 Safety instructions ...................... 7 General notes ...................... 7 Symbols and signal words used in the user manual ........... 7 Warning and notice signs on the SPECORD PLUS .......... - Page 4 Contents Additional accessories ..................35 Service, maintenance, lamp replacement ............... 36 Care and maintenance ..................36 Cleaning ......................36 Lamp replacement ..................... 37 Inserting or replacing the desiccant cartridge (optional) ........40 Replacing the fuses ................... 41 Disposal ........................42 CE declaration of conformity ..................
- Page 5 Prinziple design – optical diagram of the SPECORD PLUS 200/210/250 PLUS ... 19 Fig. 4 Principle design – optical diagram of the SPECORD 50 PLUS ......19 Fig. 5 Sample chamber of the SPECORD 200/210/250 PLUS (from the top) ....21 Fig.
- Page 6 Figures Edition 03/2013 SPECORD PLUS...
-
Page 7: Introduction
190 to 1100 nm. The individual devices have different optical properties/concepts and implement different spectral resolutions: SPECORD 50 PLUS 1.4 nm, split beam with internal reference channel SPECORD 200 PLUS 1.4 nm, double-beam spectrophotometer SPECORD 210 PLUS 0.5;... -
Page 8: Warranty And Liability
SPECORD PLUS other than intended improper commissioning, operation and service of the device modifications of the equipment without prior consultation with Analytik Jena AG unauthorized intervention in the equipment operation of the device with faulty safety equipment ... -
Page 9: Safety Instructions
Safety instructions Safety instructions General notes For your own safety and for a trouble-free operation carefully read this chapter before com- missioning the SPECORD PLUS. Comply with all safety instructions in the manual and pay careful attention to all messages and notes which are displayed on the screen by the control software. -
Page 10: Warning And Notice Signs On The Specord Plus
Safety instructions Warning and notice signs on the SPECORD PLUS Observe the warning signs on the SPECORD PLUS! Fig. 1 Notice signs at the rear of the device Before opening the spectrometer disconnect the mains plug! Before opening the service flap read the manual! Fig. -
Page 11: Requirements For The Operating Personnel
Safety instructions Requirements for the operating personnel The SPECORD PLUS must only be operated by qualified specialist personnel instructed in the use of the device. The instruction must also include conveying the content of this user manual and the user manuals of the accessories and the program WinASPECT PLUS. In addition to the safety at work instructions in this user manual the generally applicable safety and accident prevention regulations of the respective country of operation must be observed and adhered to. -
Page 12: Safety Instructions - Operation
Safety instructions Safety instructions - operation 2.6.1 General The operator of the SPECORD PLUS must make sure before each commissioning that the condition of the device is sound. This applies in particular after each modification or exten- sion of the device or its repair. Observe the following notes: ... -
Page 13: Handling Of Samples And Reagents
Any work on the electronics may only be carried out by the customer service of Analytik Jena AG and specially authorized technicians. The device must be switched off immediately at the device switch (on the enclo- sure wall) and the power supply disconnected from the mains if there is any inter- ference with the electric components. -
Page 14: Safety Instructions - Service And Repair
Service tasks and the replacement of system components (e.g. lamps) must only be carried out after a sufficiently long cooling down phase. Only use original accessories and original replacement parts from Analytik Jena AG. The notes in chapter "Service, maintenance, lamp replacement" p. 36 must be observed. -
Page 15: Standards And Directives
Safety instructions Standards and directives Safety class and safety type The SPECORD PLUS belongs to safety class I. The casing is safety type IP 20. Device safety The SPECORD PLUS conforms to the safety standards DIN EN 61010-1 (VDE 0411-1; IEC 61010-1) ... -
Page 16: Technical Data Of The Spectrometers
12000 nm/min Spectral bandwidth 1.4 nm Spectral resolution capability 1,6 – 1,8 Toluol/Hexane at 20 – 25 °C * taking into account the tolerances of the standards applied Overview 1 Physical/optical data of the SPECORD 50 PLUS Edition 03/2013 SPECORD PLUS... - Page 17 Technical data of the spectrometers SPECORD 200/210 PLUS Optical principle SPECORD 200/210 PLUS: Double-beam spectro- photometer Receiver SPECORD 200 PLUS: two large untempered photo diodes SPECORD 210 PLUS: two tempered photo diodes (CDD; Cooled Double Detection) Optics Monochromator with holographic grid Division into two beam paths through dividing plate Wavelength range 190 - 1100nm...
- Page 18 Technical data of the spectrometers SPECORD 250 PLUS Optical principle Double-beam spectrophotometer with two tempered photo diodes (CDD; Cooled Double Detection) Optics Upstream monochromator and monochromator with holographic concave grid Division into two beam paths through fixed 50/50 beam divider Wavelength range 190 - 1100nm Photometric display range...
-
Page 19: General Technical Data Of The Specord Plus
Technical data of the spectrometers General technical data of the SPECORD PLUS Mass SPECORD 50 PLUS 26.0 kg SPECORD 200 PLUS 26.6 kg SPECORD 210 PLUS 26.9 kg SPECORD 250 PLUS 27.5 kg Footprint (W x D) approx. 900 x 690 mm... -
Page 20: Device Description And Principle Of Operation
Device description and principle of operation Device description and principle of operation The SPECORD PLUS mainly consists of the modules: Radiation sources The halogen lamp and deuterium lamp generate the light radiating through the sample after monochromatization. Upstream monochroma- The upstream monochromator is a holographic grid moving syn- chronous with the monochromator grid. -
Page 21: Spectrometer System And Photometer Chamber
Prinziple design – optical diagram of the SPECORD PLUS 200/210/250 PLUS Fig. 4 Principle design – optical diagram of the SPECORD 50 PLUS The spectrometer system with the elements filter wheel, concave grid and slit group shown above functions as a monochromator. -
Page 22: Sample Chamber
The SPECORD 50 PLUS uses the portion of the radiation reflected on a quartz plate as an internal reference for compensating intensity fluctuations. The imaging mirrors generate the necessary beam cross sections in the sample chamber. -
Page 23: Fig. 5 Sample Chamber Of The Specord 200/210/250 Plus (From The Top)
Cell ducts to accept dispersing samples Fig. 6 SPECORD 50 PLUS sample chamber In the left sample chamber wall are the connection sockets for the electrical accessories or the identification connectors of the accessories. The left and right sample chamber wall can be removed after removing the attachment screws. -
Page 24: Fig. 7 Right Sample Chamber Wall
Device description and principle of operation The beam paths in the SPEORD 200/210/250 PLUS and the connections for the electrical accessories are marked: "M" – Measuring beam path for samples or connection for accessories in the measuring beam path ... -
Page 25: Fig. 9 Sample Chamber Dimensions Of The Specord 50 Plus
Device description and principle of operation Fig. 9 Sample chamber dimensions of the SPECORD 50 PLUS SPECORD PLUS Edition 03/2013... -
Page 26: Transport, Storage And Installation Conditions
Transport, storage and installation conditions Transport, storage and installation conditions Caution! Always observe the following installation conditions! Keep the ventilation slots clear! Do not deposit any objects on the device! Do not operate in explosive environments! No aggressive vapors, e.g. -
Page 27: Installation And Commissioning
Installation and commissioning Installation and commissioning Connections and display elements The connections and display elements of the SPECORD PLUS are easily accessible at the front face and the right side wall of the device. The folding cover of the sample chamber sits on the sample chamber walls and seals the sample chamber light-proof. -
Page 28: Removing The Transport Lock
Installation and commissioning Status lamps PC connection USB (PC) Mains switch Connection RS 232 Connection for the control of a second Peltier- Socket for mains connection and fuse tempered cell holder (ACC 1) holder Connection for the control of a second Peltier- tempered cell holder and the autosampler (ACC 2) Fig. -
Page 29: Fig. 14 Foam Blocks Protecting The Support Rods
Installation and commissioning Removing the transport locks Remove the white foam blocks protecting the support rods during transport from the sample chamber. Fig. 14 Foam blocks protecting the support rods Turn the transport locking screw on the left rear side with a screwdriver counterclock- wise up to the stop. -
Page 30: Specord Plus Installation
Installation and commissioning SPECORD PLUS installation Warning! Electric shock! Before connecting the SPECORD PLUS and the PC to the mains check that the operating voltage specified on the rating plates of the devices matches the mains voltage. Operation with a voltage other than the specified operating voltage can destroy the devices. ATTENTION! Mind the device orientation! Only transport the SPECORD PLUS in the upright position (note the marking on the... -
Page 31: Switching On The Specord Plus
Installation and commissioning Switching on the SPECORD PLUS ATTENTION! Keep the ventilation slots clear! Ensure that the ventilation slots at the top and bottom of the SPECORD PLUS device are clear. The openings must not be obstructed by any objects. The intake openings for the two fans on the right device bottom must be clear and must not be covered even by a loose sheet of paper. -
Page 32: Switching Off The Specord Plus
Installation and commissioning Activate the D2E or HL options as required. AUTOMATICALLY AUTOMATICALLY Exit the measuring parameter window with During the next device initialization the lamps are automatically switched on in accordance with the selected options. Switching the lamps on at a later time The device can be initialized without switching on the lamps. - Page 33 Installation and commissioning Preparing the SPECORD PLUS for the measurement If you have completed the installation in accordance with the operating instructions, you have already accomplished the following: The SPECORD PLUS and the PC are connected via the USB interface cable. ...
- Page 34 Installation and commissioning Activate AUTOMATICALLY Activate AUTOMATICALLY Scan EASUREMENT MODE 190.0 – 1100.0 ANGE TEP SIZE 20,0 PEED 0.10 (calculated and displayed only) NTEGRATION TIME CCESSORIES none CCESSORIES Save the compiled measuring parameters. Use [Save as...] to call up the standard dialog window S The default path is \\WinASPECT PLUS para.
-
Page 35: Accessories
The double-beam devices are delivered with two cell holders, the SPECORD 50 PLUS with one cell holder. The cell holders are designed for standard cells with a layer thickness of 50 mm and a width of 12.5 mm. -
Page 36: Measuring Location For Cloudy Samples
Accessories Inserting the cell into the standard cell holder Fill the cell with your sample at least 20 mm high. Insert the cell tight against the contact surface of the cell holder (arrow in Fig. 19). The optical surfaces of the cell (bare surfaces) are vertical to the measuring or reference channel and are radiated. -
Page 37: Additional Accessories
Accessories After the measurement is complete remove the cells from the cell ducts and close the duct openings with the foam closures. Otherwise extraneous light can reach the receiv- er and distort subsequent measurements. Measuring location for cloudy samples in the Measuring location for cloudy samples in the measuring beam path, open reference beam path, closed with plug... -
Page 38: Service, Maintenance, Lamp Replacement
For decontamination the device is wiped with a lint-free cloth. If the SPECORD PLUS has to be sent to Analytik Jena AG for service after infectious mate- rial has been processed with it, a prior decontamination must be carried out and documented. -
Page 39: Lamp Replacement
Service, maintenance, lamp replacement Lamp replacement Lamp service life The lamp service life is: Halogen lamps: > 2000 h Deuterium lamps: > 2000 h Frequent switching on and off of the SPECORD PLUS reduces the service life of the lamps, especially with the Deuterium lamp due to its relatively high ignition voltage. -
Page 40: Fig. 21 Lamps And Desiccant Cartridge (Optional)
Service, maintenance, lamp replacement Desiccant cartridge (optional) Deuterium lamp holder Deuterium lamp connector Front halogen lamp cover Knurled head screw for mounting the deuteri- Knurled head screw for mounting the halo- um lamp gen lamp cover Fig. 21 Lamps and desiccant cartridge (optional) Remove the three pin plug connector (2 in Fig. -
Page 41: Fig. 23 Halogen Lamp Replacement
Service, maintenance, lamp replacement The SPECORD PLUS can now be switched back on. Halogen lamp replacement WARNING! Electric shock! Before replacing the halogen lamp switch off the mains switch and disconnect the mains cable from the SPECORD PLUS connection. CAUTION! Risk of burns! Allow the halogen lamp to cool down. -
Page 42: Inserting Or Replacing The Desiccant Cartridge (Optional)
Service, maintenance, lamp replacement Hold the lamp from the socket and pull it out of the holder. Insert the new halogen lamp into the holder and screw it finger-tight. Ensure that the groove in the lamp socket surrounds the pin in the bottom socket. Attach the front halogen lamp cover and screw on the cover. -
Page 43: Replacing The Fuses
Service, maintenance, lamp replacement Fig. 24 Protective cap of the desiccant cartridge Replacing the fuses WARNING! Electric shock! Before replacing the fuses switch off the SPECORD PLUS from the mains switch and dis- connect the mains cable from the device connection. Switch off the device and disconnect the mains cable from the SPECORD PLUS. -
Page 44: Disposal
Disposal Disposal The operator of the SPECORD PLUS must dispose the waste materials arising during measurements (sample materials) in accordance with the statutory and local regulations. Dispose of the device and its electronic components in accordance with the applicable regu- lations as electronic waste after its service life has expired. -
Page 45: Ce Declaration Of Conformity
EC Declaration of Conformity EG-Konformitätserklärung Analytik Jena AG Konrad-Zuse-Straße 1 07745 Jena We declare the compliance of that device with the Wir erklären hiermit die Übereinstimmung des requirements of the Electromagnetic Compatibility genannten Gerätes mit der EG-Richtlinie Council Directive 2004/108/EC and the Low 2004/108/EG über die elektromagnetische...
Need help?
Do you have a question about the SPECORD 50 PLUS and is the answer not in the manual?
Questions and answers