Table of Contents
Advertisement
Available languages
Available languages
Quick Links
Advertisement
Chapters
Table of Contents

Related Manuals for Silvercrest 346881 2001


Summary of Contents for Silvercrest 346881 2001
- Page 1 ENVASADORA AL VACÍO MACCHINA SIGILLASACCHETTI SV 125 C3 ENVASADORA AL VACÍO MACCHINA SIGILLASACCHETTI Instrucciones de uso Istruzioni per l'uso APARELHO DE SELAGEM A VÁCUO VACUUM SEALER Manual de instruções Operating instructions VAKUUMIERER Bedienungsanleitung IAN 346881_2001...
- Page 2 Antes de empezar a leer abra la página que contiene las imágenes y, en seguida, familiarícese con todas las funciones del dispositivo. Prima di leggere aprire la pagina con le immagini e prendere confidenza con le diverse funzioni dell'apparecchio. Antes de começar a ler abra na página com as imagens e, de seguida, familiarize-se com todas as funções do aparelho.
- Page 3 Soft...
-
Page 4: Table Of Contents
Índice Introducción ........... 2 Derechos de propiedad industrial . -
Page 5: Introducción
Introducción ¡Felicidades por la compra de su aparato nuevo! Ha adquirido un producto moderno y de alta calidad. Las instrucciones de uso forman parte del producto y contienen indicaciones importantes acerca de la seguridad, el uso y el desecho de este aparato. Antes de usar el producto, familiarícese con todas las indicaciones de manejo y de seguridad. -
Page 6: Volumen De Suministro E Inspección De Transporte
Volumen de suministro e inspección de transporte El aparato se suministra de serie con los siguientes componentes: ▯ Envasadora al vacío ▯ 1 rollo de bolsas ▯ 2 tubos ▯ 3 adaptadores ▯ 1 anillo de sellado de repuesto ▯ Estas instrucciones de uso INDICACIÓN ►... -
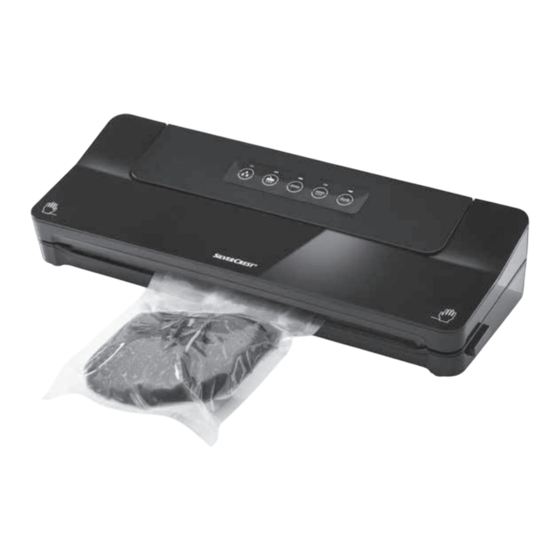
Page 7: Descripción Del Aparato
INDICACIÓN ► Si es posible, conserve el embalaje original durante el periodo de garantía del aparato para poder empaquetarlo correctamente en caso de una reclamación conforme a la garantía. Descripción del aparato Figura A 1 Tapa 2 Tubo de succión 3 Enrollacables 4 Alambres fundentes 5 Anillo inferior de sellado... -
Page 8: Características Técnicas
Características técnicas 220-240 V ∼ (corriente alterna), Tensión de funcionamiento 50/60 Hz Consumo de potencia 125 W Clase de protección (aislamiento doble) Indicaciones de seguridad ¡PELIGRO POR DESCARGA ELÉCTRICA! Antes de usar el aparato, compruebe si hay signos de ■ daños externos visibles. No ponga en funcionamiento el aparato si está... - Page 9 ¡PELIGRO DE LESIONES! Las reparaciones en el aparato deben ser realizadas ■ exclusivamente por talleres autorizados o por el servicio de asistencia técnica. Una reparación indebida puede provocar un riesgo de lesiones para el usuario o daños en el aparato. Además, se anulará la garantía. La base de enchufe debe quedar fácilmente accesible de ■...
-
Page 10: Colocación Y Conexión
Colocación y conexión Requisitos del lugar de emplazamiento Para un funcionamiento correcto y seguro del aparato, el lugar de emplazamiento deberá cumplir con los siguientes requisitos: ■ Debe colocarse el aparato sobre una superficie firme, plana y horizontal. ■ No utilice el aparato en un entorno caliente, mojado o muy húmedo ni cerca de material inflamable. -
Page 11: Funciones
Funciones Botón Función Activación/desactivación de la función adicional "Wet" (para alimentos especialmente húmedos) Inicio/cancelación de la función "Envasado al vacío externo" (para el envasado al vacío con tubo y adaptador) Inicio/cancelación de la función "Sellado" (sin envasado al vacío) Inicio/cancelación de la función "Envasado al vacío y sellado"... - Page 12 2) Para abrir la tapa 1, presione los desencastres de la tapa 8 y tire de la tapa 1 hacia arriba. 3) Introduzca el lado abierto de la bolsa en el aparato hasta que la abertura de la bolsa quede centrada dentro del anillo inferior de sellado 5. La bolsa debe alcanzar como máximo los topes traseros 6 y debe quedar colocada entre los topes delanteros 7.
- Page 13 INDICACIÓN ► Puede detenerse en cualquier momento el proceso de sellado con solo r. Tras esto, el piloto de control r parpadea volver a pulsar el botón y se apaga. ¡ATENCIÓN: DAÑOS MATERIALES! Si el piloto de control r no se apaga tras un máximo de 10 segundos, el aparato está...
-
Page 14: Envasado Al Vacío
Envasado al vacío Envasado al vacío del rollo de bolsas de plástico Al sellar la bolsa, también puede extraerse el aire (envasado al vacío): INDICACIÓN ► No envase al vacío ninguna bolsa que solo contenga líquido, ya que podría aspirarse al generar el vacío. Si se aspiran pequeñas cantidades de líquidos o alimentos involuntaria- mente, acaban en la pequeña bandeja colectora situada en el espacio intermedio del anillo inferior de sellado 5. - Page 15 INDICACIÓN Asegúrese de que el anillo superior 0 y el anillo inferior de sellado 5 no estén ► dañados. De lo contrario, el aparato no podrá succionar el aire de la bolsa. Si uno de los anillos de sellado 0/5 está dañado, tire de este para ►...
-
Page 16: Envasado Al Vacío De Recipientes Y De Bolsas Reutilizables
INDICACIÓN ► Puede interrumpirse en cualquier momento el proceso de envasado al t. Tras esto, el piloto de vacío con solo volver a pulsar el botón control t se apaga. Vuelva a pulsar el botón t para continuar con el proceso de envasado al vacío. - Page 17 INDICACIÓN ► Pueden adquirirse por separado las bolsas y recipientes aptos para el aparato en nuestra tienda online; consulte el capítulo "Pedido de recam- bios y accesorios". Los tubos de envasado al vacío u, y los adaptadores i/o/p también ► son compatibles con las bolsas y recipientes de otros fabricantes.
-
Page 18: Limpieza
3) Cierre la tapa 1. Asegúrese de que las dos esquinas de la tapa 1 queden encastradas. En caso necesario, presiónelas hacia abajo sobre las marcas de forma que la tapa 1 quede encastrada y cerrada. 4) Conecte el adaptador i/o/p en el dispositivo correspondiente del recipiente. -
Page 19: Almacenamiento
♦ Limpie la bandeja colectora situada en el espacio intermedio del anillo inferior de sellado 5 en agua caliente con un poco de jabón lavavajillas para eliminar los líquidos acumulados. En caso necesario, también puede limpiarse la bandeja colectora en el lavavajillas. -
Page 20: Garantía De Kompernass Handels Gmbh
Garantía de Kompernass Handels GmbH Estimado cliente: Este aparato cuenta con una garantía de 3 años a partir de la fecha de compra. Si se detectan defectos en el producto, puede ejercer sus derechos legales frente al vendedor. Estos derechos legales no se ven limitados por la garantía descrita a continuación. - Page 21 El producto está previsto exclusivamente para su uso privado y no para su uso comercial. En caso de manipulación indebida e incorrecta, uso de la fuerza y apertura del aparato por personas ajenas a nuestros centros de asistencia técnica autorizados, la garantía perderá su validez. Proceso de reclamación conforme a la garantía Para garantizar una tramitación rápida de su reclamación, le rogamos que observe las siguientes indicaciones:...
-
Page 22: Asistencia Técnica
Asistencia técnica Servicio España Tel.: 902 59 99 22 (0,08 EUR/Min. + 0,11 EUR/llamada (tarifa normal)) (0,05 EUR/Min. + 0,11 EUR/llamada (tarifa reducida)) E-Mail: kompernass@lidl.es IAN 346881_2001 Importador Tenga en cuenta que la dirección siguiente no es una dirección de asistencia técnica. -
Page 23: Pedido De Recambios Y Accesorios
Pedido de recambios y accesorios Solicite los recambios o accesorios, como los rollos de bolsas o las bolsas, a tra- vés de nuestra línea directa de asistencia técnica (consulte el capítulo “Asistencia técnica”) o cómodamente a través de nuestro sitio web www.kompernass.com. Con este código QR, podrá... - Page 24 Indice Introduzione ..........22 Diritto d’autore .
-
Page 25: Introduzione
Introduzione Congratulazioni per l’acquisto del Suo nuovo apparecchio! È stato scelto un prodotto moderno e di alta qualità. Il manuale di istruzioni è parte integrante del presente prodotto. Esso contiene importanti indicazioni per la sicurezza, l’uso e lo smaltimento. Prima di utilizzare il prodotto, familiarizzare con tutte le indicazioni relative ai comandi e alla sicurezza. -
Page 26: Volume Della Fornitura E Ispezione Per Eventuali Danni Da Trasporto
Volume della fornitura e ispezione per eventuali danni da trasporto La fornitura standard dell’apparecchio comprende i seguenti componenti: ▯ Macchina sigillasacchetti ▯ 1 rotolo di pellicola ▯ 2 tubi flessibili ▯ 3 adattatori ▯ 1 anello di guarnizione di ricambio ▯... -
Page 27: Descrizione Dell'apparecchio
AVVISO ► Durante il periodo di validità della garanzia conservare l'imballaggio originale per poter imballare adeguatamente l'apparecchio in caso di intervento in garanzia. Descrizione dell’apparecchio Figura A 1 Coperchio dell’apparecchio 2 Tubo di aspirazione 3 Avvolgicavo 4 Cordoni di sigillatura 5 Anello di guarnizione inferiore 6 Limiti posteriori 7 Limiti anteriori... -
Page 28: Dati Tecnici
Dati tecnici 220 - 240 V ∼ (tensione alternata), Tensione di esercizio 50/60 Hz Potenza assorbita 125 W Classe di protezione II / (doppio isolamento) Indicazioni relative alla sicurezza PERICOLO DI SCOSSA ELETTRICA! Controllare l'apparecchio prima dell'uso per rilevare ■ eventuali danni visibili. - Page 29 PERICOLO DI LESIONI! Fare eseguire le riparazioni solo da aziende specializzate ■ o dall'assistenza ai clienti. Le riparazioni eseguite in modo non conforme possono causare il pericolo di lesioni per l'utente o di danni all'apparecchio. Inoltre la garanzia decade. La presa deve essere facilmente accessibile, in modo da ■...
-
Page 30: Installazione E Collegamento
Installazione e collegamento Requisiti del luogo d’installazione Per l’uso sicuro e privo di guasti dell’apparecchio, il luogo di installazione deve soddisfare i seguenti requisiti: ■ Nell’installazione dell’apparecchio, collocare l’apparecchio su una superfi- cie solida, piana e orizzontale. ■ Non azionare l’apparecchio in un ambiente surriscaldato, molto umido o bagnato o nelle vicinanze di materiale infiammabile. -
Page 31: Funzioni
Funzioni Tasto Funzione Attivazione/disattivazione della funzione aggiunti- va "Wet" (per alimenti particolarmente umidi) Avvio/interruzione della funzione "messa sotto- vuoto esternamente" (per la messa sottovuoto con tubo flessibile e adattatore) Avvio/interruzione della funzione "sigillatura" (senza messa sottovuoto) Avvio/interruzione della funzione "messa sotto- vuoto e sigillatura"... - Page 32 2) Aprire il coperchio dell’apparecchio 1 premendo i dispositivi di sblocco 8 e aprire il coperchio 1 verso l’alto. 3) Infi lare l’estremità aperta del sacchetto dentro l’apparecchio fi no a quando l’apertura del sacchetto non viene a trovarsi al centro all’interno dell’anello di tenuta inferiore 5.
- Page 33 AVVISO ► È possibile interrompere in ogni momento l’operazione di sigillatura r. La spia di controllo r lampeggia e premendo nuovamente il tasto poi si spegne. ATTENZIONE - DANNI MATERIALI Se la spia di controllo r non si spegne dopo massimo 10 secondi, ciò...
-
Page 34: Messa Sotto Vuoto
Messa sotto vuoto Messa sottovuoto della pellicola tubolare All’atto della sigillatura è possibile estrarre al contempo l’aria dal sacchetto (sottovuoto): NOTA ► Non mettere sottovuoto sacchetti contenenti esclusivamente liquidi. Possono essere aspirati durante la messa sottovuoto. Qualora si aspirassero involontariamente piccole quantità di liquidi o alimenti, essi fi... - Page 35 AVVISO Badare che l'anello di tenuta superiore 0 e l'anello di tenuta inferiore 5 ► non siano danneggiati! Altrimenti l'apparecchio non riesce ad aspirare l'aria dal sacchetto. Qualora uno degli anelli di guarnizione 0/5 fosse danneggiato, sfilarlo ► semplicemente dall’incavo e inserire in quest’ultimo la guarnizione di ricambio.
-
Page 36: Messa Sottovuoto Di Contenitori E Sacchetti Richiudibili
NOTA ► È possibile interrompere in ogni momento l'operazione di messa sottovuoto t. La relativa spia di controllo t si premendo nuovamente il tasto t, l'operazione di messa spegne. Se si preme nuovamente il tasto sottovuoto viene proseguita. Se l'apparecchio è già passato all'operazione di sigillatura e la spia di controllo r è... - Page 37 NOTA ► I contenitori e sacchetti adeguati sono reperibili separatamente nel nostro negozio online, vedere al riguardo il capitolo "Ordinazione di ricambi e accessori". I tubi flessibili per messa sottovuoto u e gli adattatori i/o/p sono ► compatibili anche con sacchetti e contenitori di altri produttori. Adattatore adatto ad es.
-
Page 38: Pulizia
3) Chiudere il coperchio dell’apparecchio 1. Assicurarsi che entrambi gli angoli del coperchio dell’apparecchio 1 scattino in posizione. All’occorrenza pre- merli ancora una volta verso il basso al livello delle apposite marcature in modo tale che il coperchio dell’apparecchio 1 scatti in posizione e si blocchi. -
Page 39: Conservazione
All’occorrenza si può lavare la vaschetta anche in lavastoviglie. Assicurarsi che non la vaschetta non si incastri nella lavastoviglie e utilizzare se possibile il cestello superiore della lavastoviglie. Conservazione L’apparecchio possiede un dispositivo integrato di avvolgimento del cavo 3 sul lato inferiore dell’alloggiamento, con il quale si può avvolgere il cavo di rete quando l’apparecchio stesso non viene utilizzato. -
Page 40: Garanzia Della Kompernass Handels Gmbh
Garanzia della Kompernass Handels GmbH Egregio Cliente, Questo apparecchio ha una garanzia di 3 anni dalla data di acquisto. Qualora questo prodotto presentasse vizi, Le spettano diritti legali nei confronti del vendi- tore del prodotto. La garanzia qui di seguito descritta non costituisce alcun limite a tali diritti legali. - Page 41 Il prodotto è destinato esclusivamente all’uso domestico e non a quello commer- ciale. La garanzia decade in caso di impiego improprio o manomissione, uso della forza e interventi non eseguiti dalla nostra filiale di assistenza autorizzata. Trattamento dei casi di garanzia Per garantire una rapida evasione della Sua richiesta, La preghiamo di seguire le seguenti istruzioni: ■...
-
Page 42: Assistenza
Assistenza Assistenza Italia Tel.: 02 36003201 E-Mail: kompernass@lidl.it Service Malta Tel.: 80062230 E-Mail: kompernass@lidl.com.mt IAN 346881_2001 Importatore Badi che il seguente indirizzo non è quello del servizio di assistenza clienti. Contatti innanzitutto il servizio di assistenza clienti indicato. KOMPERNASS HANDELS GMBH BURGSTRASSE 21 44867 BOCHUM GERMANIA... -
Page 43: Ordinazione Di Ricambi E Accessori
Ordinazione di ricambi e accessori Ordinare i ricambi o gli accessori come rotoli di pellicola o sacchetti alla linea diretta di assistenza (v. capitolo “Assistenza”) o comodamente tramite il nostro sito Web www.kompernass.com. Con questo codice QR si giunge al nostro sito Web ed è possibile ordinare i ricambi disponibili: NOTA ►... - Page 44 Índice Introdução ........... 42 Direitos de autor .
-
Page 45: Introdução
Introdução Parabéns pela compra do seu novo aparelho! Optou por um produto moderno de elevada qualidade. O manual de instruções é parte integrante deste produto. Este contém instruções importantes para a segurança, utilização e eliminação. Antes de utilizar o produto, familiarize-se com todas as instruções de operação e segurança. -
Page 46: Material Fornecido E Inspeção De Transporte
Material fornecido e inspeção de transporte Por norma, o aparelho é fornecido com os seguintes componentes: ▯ Aparelho de selagem a vácuo ▯ 1 Rolo de película ▯ 2 Mangueiras ▯ 3 Adaptadores ▯ 1 Anel vedante sobresselente ▯ Este manual de instruções NOTA ►... -
Page 47: Descrição Do Aparelho
NOTA ► Se possível, conserve a embalagem original durante o período de garantia para que possa embalar o aparelho corretamente em caso de devolução. Descrição do aparelho Figura A 1 Tampa do aparelho 2 Tubo de aspiração 3 Dispositivo de enrolamento do cabo 4 Fios para selar 5 Anel vedante inferior 6 Limites traseiros... -
Page 48: Dados Técnicos
Dados técnicos 220 - 240 V ∼ (corrente alternada), Tensão de funcionamento 50/60 Hz Consumo de energia 125 W Classe de proteção II / (isolamento duplo) Instruções de segurança PERIGO DE CHOQUE ELÉTRICO! Antes da utilização, verifique a existência de eventuais ■... - Page 49 PERIGO DE FERIMENTOS! Solicite a reparação do aparelho apenas a empresas ■ autorizadas ou ao Serviço de Assistência Técnica. Repa- rações inadequadas podem originar riscos de ferimentos para o utilizador ou danificar o aparelho. Além disso, a garantia extingue-se. A tomada tem de ser de fácil acesso para que, em caso ■...
-
Page 50: Instalação E Ligação
Instalação e ligação Requisitos em relação ao local de instalação Para um funcionamento seguro e sem falhas do aparelho, o local de instalação tem de cumprir as seguintes condições: ■ Ao instalar o aparelho, colocá-lo sobre uma base fixa, plana e nivelada. ■... -
Page 51: Funções
Funções Botão Função Ativar/desativar a função adicional "Wet" (para alimentos bastante húmidos) Iniciar/parar a função "Embalar em vácuo externo" (para embalar a vácuo com mangueira e adaptador) Iniciar/parar a função "Selar) (sem embalar a vácuo) Iniciar/parar a função "Embalar a vácuo e selar" Ativar/desativar a função adicional "Soft"... - Page 52 2) Abra a tampa do aparelho 1, pressionando os desbloqueios da tampa 8 e levante a tampa do aparelho 1 para cima. 3) Coloque a extremidade aberta do saco dentro do aparelho, de forma que a abertura do saco fi que centrada dentro do anel vedante inferior 5. O saco pode chegar no máximo até...
- Page 53 NOTA ► Pode interromper o processo de selagem em qualquer altura, premindo r. A luz de controlo r pisca e apaga-se em novamente o botão seguida. ATENÇÃO - DANOS MATERIAIS Se a luz de controlo r não se apagar o mais tardar após 10 segundos, isto significa que existe uma anomalia no aparelho! ►...
-
Page 54: Embalar Em Vácuo
Embalar em vácuo Embalar em vácuo com película tubular Ao selar também pode aspirar o ar do saco (embalar em vácuo): NOTA ► Não embale a vácuo sacos que contenham exclusivamente líquidos. Ao embalar a vácuo, estes podem ser aspirados. Se forem aspiradas, involuntariamente, pequenas quantidades de líquidos ou alimentos, estas fi... - Page 55 NOTA Observe se o anel vedante superior 0 e o anel vedante inferior 5 não es- ► tão danificados! Caso contrário o aparelho não pode aspirar o ar do saco. Se um dos anéis vedantes 0/5 estiver danificado, remova-o simplesmente ►...
-
Page 56: Embalar Em Vácuo Com Recipientes E Sacos Reutilizáveis
NOTA ► Pode interromper o processo de embalagem em vácuo em qualquer altura, t. A respetiva luz de controlo t apaga-se. premindo novamente o botão t , o processo de embalagem a vácuo Se premir novamente o botão prossegue. Se o aparelho já tiver mudado para o processo de selagem e a luz de controlo r estiver também acesa, o processo pode ser interrompido com r. - Page 57 NOTA ► Os sacos e os recipientes adequados podem ser adquiridos em separado através da nossa loja online. Para este efeito, consulte o capítulo "Enco- mendar peças sobresselentes e acessórios". As mangueiras de vácuo u e os adaptadores i/o/p também são ►...
-
Page 58: Limpeza
3) Feche a tampa do aparelho 1. Certifique-se de que ambos os cantos da tampa do aparelho 1 encaixam. Pressione estes, em caso de necessidade, , para que a tampa do aparelho 1 mais uma vez nas marcações encaixe e fique bloqueada. 4) Ligue o adaptador i/o/p ao dispositivo correspondente do recipiente. -
Page 59: Armazenamento
Se necessário, também pode lavar o recipiente de recolha de líqui- dos na máquina de lavar loiça. Certifique-se de que o recipiente de recolha de líquidos não fique preso na máquina de lavar loiça e, se possível, utilize o cesto superior da máquina de lavar loiça. Armazenamento O aparelho possui um dispositivo de enrolamento do cabo 3 integrado na parte inferior da caixa, no qual pode enrolar o cabo de rede em caso de não... -
Page 60: Garantia Da Kompernass Handels Gmbh
Garantia da Kompernass Handels GmbH Estimada Cliente, Estimado Cliente, Este aparelho tem uma garantia de 3 anos a contar da data de compra. No caso deste produto ter defeitos, tem direitos legais contra o vendedor do produto. Estes direitos legais não são limitados pela nossa garantia que passamos a transcrever. Condições de garantia O prazo de garantia tem início na data da compra. -
Page 61: Assistência Técnica
Procedimento em caso de acionamento da garantia Para garantir um processamento rápido do seu pedido, siga, por favor, as seguintes instruções: ■ Para todos os pedidos de esclarecimento, tenha à mão o talão de compra e o número do artigo (p. ex. IAN 123456) como comprovativo da compra. ■... -
Page 62: Encomendar Peças Sobresselentes E Acessórios
Encomendar peças sobresselentes e acessórios Encomende as peças sobresselentes ou acessórios como rolos de película ou sacos através da nossa linha direta de Assistência Técnica (ver capítulo “Assis- tência Técnica”) ou comodamente no nosso website, em www.kompernass.com. Com o código QR pode aceder diretamente ao nosso site e pode encomendar as peças sobresselentes disponíveis: NOTA ►... - Page 63 ■ 60 │ SV 125 C3...
- Page 64 Contents Introduction ..........62 Copyright .
-
Page 65: Introduction
Introduction Congratulations on the purchase of your new appliance! You have decided in favour of a modern, high-quality product. These operating instructions are part of this product. They contain important information on safety, usage and disposal. Before using the product, familiarise yourself with all handling and safety guidelines. -
Page 66: Package Contents And Transport Inspection
Package contents and transport inspection The appliance is supplied with the following components as standard: ▯ Vacuum sealer ▯ 1 x film roll ▯ 2 x tubes ▯ 3 x adapters ▯ 1 x replacement sealing ring ▯ These operating instructions NOTE ►... -
Page 67: Description Of The Appliance
Description of the appliance Figure A 1 Appliance lid 2 Suction tube 3 Cable retainer 4 Welding wires 5 Lower sealing ring 6 Rear limiters 7 Front limiters 8 Lid release 9 Suction fitting 0 Upper sealing ring q Press seal Figure B button (activate/deactivate additional function “wet”) with control lamp (green) -
Page 68: Safety Guidelines
Safety guidelines RISK OF ELECTRIC SHOCK Prior to use, check the device for visible external damage. ■ Never operate an appliance that is damaged. To avoid risks, arrange for a defective power cable to ■ be replaced by qualified technicians or by our Customer Service Department. - Page 69 RISK OF INJURY! Cleaning and user maintenance tasks may not be carried ■ out by children unless they are supervised. The appliance and its connecting cable must be kept ■ away from children younger than 8 years old. This appliance may be used by children aged 8 years ■...
-
Page 70: Setting Up And Connecting
Setting up and connecting Set-up location requirements For safe and trouble-free operation of the device , the set-up location must fulfil the following requirements: ■ When setting it up, place the appliance on a firm, flat and horizontal surface. ■ Do not place the device in a hot, wet or extremely damp environment or in the vicinity of flammable materials. -
Page 71: Functions
Functions Button Function Activate/deactivate additional function "wet" (for particularly moist food products) Start/cancel "external vacuuming" function (for vacuuming using the hose and adapter) Start/cancel "sealing" function (without vacuuming) Start/cancel "vacuuming and sealing" function Activate/deactivate additional function "soft" Soft (for pressure-sensitive foods such as fruit or cakes) Welding a tube film NOTES ON THE FILM ►... - Page 72 3) Lay the open end of the bag as far into the appliance so that the opening of the bag is located centrally under the lower sealing ring 5. The bag should be inserted no further than the rear limiters 6 and must lie between the front limiters 7.
- Page 73 CAUTION – PROPERTY DAMAGE! If the control lamp r does not go out after a maximum of 10 seconds, there is a fault with the appliance! ► Remove the plug from the mains power socket immediately. Do not attempt to repair the appliance yourself. Contact the Customer Service department. 6) Open the appliance lid 1 by pressing the lid release 8 and flipping the lid 1 upwards.
-
Page 74: Vacuum Sealing
Vacuum sealing Vacuuming the tube fi lm You can also suck the air out of the bag (vacuum) during welding: NOTE ► Do not evacuate bags that contain only liquids. These could be sucked up during the vacuum sealing process. If small quantities of liquid or food do get sucked up, they will be deposited in the small drip tray that is located between the lower sealing ring 5. - Page 75 NOTE Ensure that the upper 0 and the lower sealing rings 5 are not damaged! ► Otherwise the device cannot suck the air out of the bag. If either one of the sealing rings 0/5 is damaged, simply pull it out of the ►...
-
Page 76: Vacuuming Containers And Resealable Bags
NOTE ► You can stop the vacuuming process at any time by pressing the button t again. The corresponding control lamp t goes out. Press the button t again to resume the vacuuming process. If the appliance has already switched to the sealing process and the control lamp r is also lit, the process can be stopped with the button r. - Page 77 NOTE ► You can order suitable bags and containers separately. Please refer to section "Ordering spare parts and accessories". The vacuum hoses u and adapters i/o/p are also compatible with ► bags and containers made by other manufacturers. Adapters e.g. suitable for FoodSaver lunch boxes, Ernesto, various Adapter A i bags with a valve...
-
Page 78: Cleaning
3) Close the appliance lid 1. Ensure that both corners of the appliance lid 1 click closed. If necessary, press them down once again on the markings so that the appliance lid 1 clicks into place and locks shut. 4) Connect the adapter i/o/p to the appropriate fitting on the container. Please refer to the instruction manual of the container for further information. -
Page 79: Storage
Storage The appliance has a built-in cable retainer 3 on the underside of the housing, on which you can wrap the power cable when it is not in use. Wind the power cable around the cable retainer 3 in the direction indicated by the arrows. This prevents the power cable from getting caught or soiled, or becoming a source of danger by hanging loosely down. -
Page 80: Kompernass Handels Gmbh Warranty
Kompernass Handels GmbH warranty Dear Customer, This appliance has a 3-year warranty valid from the date of purchase. If this product has any faults, you, the buyer, have certain statutory rights. Your statutory rights are not restricted in any way by the warranty described below. Warranty conditions The warranty period starts on the date of purchase. -
Page 81: Service
Warranty claim procedure To ensure quick processing of your case, please observe the following instructions: ■ Please have the till receipt and the item number (e.g. IAN 123456) avail- able as proof of purchase. ■ You will find the item number on the type plate on the product, an engraving on the product, on the front page of the operating instructions (below left) or on the sticker on the rear or bottom of the product. -
Page 82: Ordering Spare Parts And Accessories
Ordering spare parts and accessories Order replacement parts such as fi lm rolls or bags via the Service hotline (see section “Service”) or simply visit our website at www.kompernass.com. With this QR code you can go directly to our website and order the available spare parts: NOTE ►... - Page 83 ■ 80 │ GB │ MT SV 125 C3...
- Page 84 Inhaltsverzeichnis Einleitung ........... . 82 Urheberrecht .
-
Page 85: Einleitung
Einleitung Herzlichen Glückwunsch zum Kauf Ihres neuen Gerätes! Sie haben sich damit für ein modernes und hochwertiges Produkt entschieden. Die Bedienungsanleitung ist Bestandteil dieses Produktes. Sie enthält wichtige Hinweise für Sicherheit, Gebrauch und Entsorgung. Machen Sie sich vor der Benutzung des Produkts mit allen Bedien- und Sicherheitshinweisen vertraut. Benutzen Sie dieses Produkt nur wie beschrieben und für die angegebenen Einsatzbereiche. -
Page 86: Lieferumfang Und Transportinspektion
Lieferumfang und Transportinspektion Das Gerät wird standardmäßig mit folgenden Komponenten geliefert: ▯ Vakuumierer ▯ 1x Folienrolle ▯ 2 x Schlauch ▯ 3 x Adapter ▯ 1x Ersatzdichtungsring ▯ Diese Bedienungsanleitung HINWEIS ► Prüfen Sie die Lieferung auf Vollständigkeit und auf sichtbare Schäden. ►... -
Page 87: Gerätebeschreibung
HINWEIS ► Heben Sie, wenn möglich, die Originalverpackung während der Garantiezeit des Gerätes auf, um das Gerät im Garantiefall ordnungsgemäß verpacken zu können. Gerätebeschreibung Abbildung A 1 Gerätedeckel 2 Absaugrohr 3 Kabelaufwicklung 4 Schweißdrähte 5 unterer Dichtungsring 6 hintere Begrenzungen 7 vordere Begrenzungen 8 Deckelentriegelung 9 Ansaugvorrichtung... -
Page 88: Technische Daten
Technische Daten Betriebsspannung 220 - 240 V ∼ (Wechselspannung), 50/60 Hz Leistungsaufnahme 125 W Schutzklasse II / (Doppelisolierung) Sicherheitshinweise GEFAHR EINES ELEKTRISCHEN SCHLAGES! Kontrollieren Sie das Gerät vor der Verwendung auf ■ äußere, sichtbare Schäden. Nehmen Sie ein beschädigtes Gerät nicht in Betrieb. Bei Beschädigung des Netzkabels lassen Sie dieses von ■... - Page 89 VERLETZUNGSGEFAHR! Lassen Sie Reparaturen am Gerät nur von autorisierten ■ Fachbetrieben oder dem Kundenservice durchführen. Durch unsachgemäße Reparaturen können Verletzungs- gefahren für den Benutzer entstehen oder das Gerät wird beschädigt. Zudem erlischt der Garantieanspruch. Die Steckdose muss leicht zugänglich sein, so dass das ■...
-
Page 90: Aufstellen Und Anschließen
Aufstellen und Anschließen Anforderungen an den Aufstellort Für einen sicheren und fehlerfreien Betrieb des Gerätes muss der Aufstellort folgende Voraussetzungen erfüllen: ■ Bei Aufstellung des Gerätes das Gerät auf eine feste, flache und waagerechte Unterlage stellen. ■ Betreiben Sie das Gerät nicht in einer heißen, nassen oder sehr feuchten Umgebung oder in der Nähe von brennbarem Material. -
Page 91: Funktionen
Funktionen Taste Funktion Zusatz-Funktion „Wet“ aktivieren/deaktivieren (für besonders feuchte Lebensmittel) Funktion „extern vakuumieren“ starten/abbrechen (zum Vakuumieren mit Schlauch und Adapter) Funktion „Verschweißen“ starten/abbrechen (ohne Vakuumieren) Funktion „vakuumieren und verschweißen“ star- ten/abbrechen Zusatz-Funktion „Soft“ aktivieren/deaktivieren (für Soft druckempfindliche Lebensmittel wie z. B. Früchte oder Torten) Schlauchfolie verschweißen HINWEISE ZUR FOLIE... - Page 92 2) Öff nen Sie den Gerätedeckel 1, indem Sie die Deckelentriegelungen 8 drücken und den Gerätedeckel 1 nach oben hin öff nen. 3) Legen Sie das off ene Ende des Beutels so weit in das Gerät, dass sich die Öff nung des Beutels mittig innerhalb des unteren Dichtungsringes 5 befi n- det.
- Page 93 HINWEIS ► Sie können den Versiegelungsvorgang jederzeit abbrechen, indem Sie die r erneut drücken. Die Kontrollleuchte r blinkt und erlischt dann. Taste ACHTUNG - SACHSCHADEN Wenn die Kontrollleuchte r nach spätestens 10 Sekunden nicht erlischt, liegt ein Defekt des Gerätes vor! ►...
-
Page 94: Vakuumieren
Vakuumieren Schlauchfolie vakuumieren Sie können beim Verschweißen auch die Luft aus dem Beutel saugen (vakuumieren): HINWEIS ► Vakuumieren Sie keine Beutel, in denen sich ausschließlich Flüssigkeiten befi nden. Diese können beim Vakuumieren eingesaugt werden. Sollten ungewollt kleinere Mengen an Flüssigkeiten oder Lebensmittel eingesaugt werden, gelangen diese in die kleine Auff... - Page 95 HINWEIS Achten Sie darauf, dass der obere 0 und der untere Dichtungsring 5 ► nicht beschädigt sind! Ansonsten kann das Gerät die Luft nicht aus dem Beutel saugen. Sollte einer der Dichtungsringe 0/5 beschädigt sein, ziehen Sie diesen ► einfach aus der Vertiefung heraus und drücken Sie die Ersatzdichtung in die Vertiefung rein.
-
Page 96: Behälter Und Wiederverschließbare Beutel Vakuumieren
HINWEIS ► Sie können den Vakuumiervorgang jederzeit unterbrechen, indem Sie die t erneut drücken. Die dazugehörige Kontrollleuchte t erlischt. Taste t erneut, wird der Vakuumiervorgang fortge- Drücken Sie die Taste setzt. Hat das Gerät schon in den Versiegelungsvorgang gewechselt und die Kontrollleuchte r leuchtet zusätzlich, kann der Vorgang auch mit der Taste r abgebrochen werden. - Page 97 HINWEIS ► Geeignete Beutel und Behälter sind über unseren Onlineshop separat erhältlich, sehen Sie dazu das Kapitel „Ersatzteile und Zubehör bestellen“. ► Die Vakuumschläuche u und die Adapter i/o/p sind auch mit Beuteln und Behältern von anderen Herstellern kompatibel. Adapter z.
-
Page 98: Reinigung
3) Schließen Sie den Gerätedeckel 1. Achten Sie dabei darauf, dass beide Ecken des Gerätedeckels 1 einrasten. Drücken Sie diese gegebenenfalls noch einmal an den Markierungen herunter, so dass der Gerä- tedeckel 1 einrastet und verriegelt ist. 4) Schließen Sie den Adapter i/o/p an die entsprechende Vorrichtung des Behälters an. -
Page 99: Aufbewahrung
♦ Spülen Sie die Auffangschale für Flüssigkeiten, die sich zwischen dem unte- ren Dichtungsring 5 befindet, in warmem Wasser mit etwas Spülmittel. Bei Bedarf können Sie die Auffangschale auch in der Spülmaschine reinigen. Achten Sie dabei darauf, die Auffangschale nicht einzu- klemmen und benutzen Sie, wenn möglich, den oberen Korb der Spülmaschine. -
Page 100: Entsorgung
Entsorgung Werfen Sie das Gerät keinesfalls in den normalen Hausmüll. Dieses Produkt unterliegt der europäischen Richtlinie 2012/19/EU (Waste Electrical and Electronic Equipment). Entsorgen Sie das Gerät über einen zugelassenen Entsorgungsbetrieb oder über Ihre kommunale Entsorgungseinrichtung. Beachten Sie die aktuell geltenden Vorschrif- ten. -
Page 101: Garantie Der Kompernaß Handels Gmbh
Garantie der Kompernaß Handels GmbH Sehr geehrte Kundin, sehr geehrter Kunde, Sie erhalten auf dieses Gerät 3 Jahre Garantie ab Kaufdatum. Im Falle von Mängeln dieses Produkts stehen Ihnen gegen den Verkäufer des Produkts gesetz- liche Rechte zu. Diese gesetzlichen Rechte werden durch unsere im Folgenden dargestellte Garantie nicht eingeschränkt. -
Page 102: Service
Abwicklung im Garantiefall Um eine schnelle Bearbeitung Ihres Anliegens zu gewährleisten, folgen Sie bitte den folgenden Hinweisen: ■ Bitte halten Sie für alle Anfragen den Kassenbon und die Artikelnummer (z. B. IAN 123456) als Nachweis für den Kauf bereit. ■ Die Artikelnummer entnehmen Sie bitte dem Typenschild am Produkt, einer Gravur am Produkt, dem Titelblatt der Bedienungsanleitung (unten links) oder dem Aufkleber auf der Rück- oder Unterseite des Produktes. -
Page 103: Ersatzteile Und Zubehör Bestellen
Ersatzteile und Zubehör bestellen Bestellen Sie die Ersatzteile oder Zubehör wie Folienrollen oder Beutel über un- sere Service-Hotline (siehe Kapitel „Service″) oder bequem auf unserer Webseite unter www.kompernass.com. Mit diesem QR-Code gelangen Sie direkt auf unsere Website und können die verfügbaren Ersatzteile bestellen: HINWEIS ►... - Page 104 KOMPERNASS HANDELS GMBH BURGSTRASSE 21 44867 BOCHUM GERMANY www.kompernass.com Estado de las informaciones · Versione delle informazioni · Estado das informações · Last Information Update · Stand der Informationen: 04 / 2020 · Ident.-No.: SV125C3-0320-1 IAN 346881_2001...
Need help?
Do you have a question about the 346881 2001 and is the answer not in the manual?
Questions and answers