Silvercrest 389185 2104 Operating Instructions Manual
Vacuum sealer
Hide thumbs
Also See for 389185 2104:
- Operating instructions manual (204 pages) ,
- Operating instructions manual (114 pages)

Subscribe to Our Youtube Channel
Related Manuals for Silvercrest 389185 2104


Summary of Contents for Silvercrest 389185 2104
- Page 1 VACUUM SEALER SV 125 C3 VACUUM SEALER ΣΥΣΚΕΥΉ ΣΦΡΆΓΙΣΉΣ ΤΡΟΦΙΜΩΝ Operating instructions Οδηүίες χρήσης VAKUUMIERER Bedienungsanleitung IAN 389185_2104...
- Page 2 Before reading, unfold the page containing the illustrations and familiarise yourself with all functions of the device. Πριν ξεκινήσετε την ανάγνωση, ανοίξτε τη σελίδα με τις εικόνες και εξοικειωθείτε με όλες τις λειτουργίες της συσκευής. Klappen Sie vor dem Lesen die Seite mit den Abbildungen aus und machen Sie sich anschließend mit allen Funktionen des Gerätes vertraut.
- Page 3 Soft...
-
Page 4: Table Of Contents
Contents Introduction ........... 2 Copyright . -
Page 5: Introduction
Introduction Congratulations on the purchase of your new appliance! You have decided in favour of a modern, high-quality product. These operating instructions are part of this product. They contain important information on safety, usage and disposal. Before using the product, familiarise yourself with all handling and safety guidelines. -
Page 6: Package Contents And Transport Inspection
Package contents and transport inspection The appliance is supplied with the following components as standard: ▯ Vacuum sealer ▯ 1 x film roll ▯ 2 x tubes ▯ 3 x adapters ▯ 1 x replacement sealing ring ▯ These operating instructions NOTE ►... -
Page 7: Description Of The Appliance
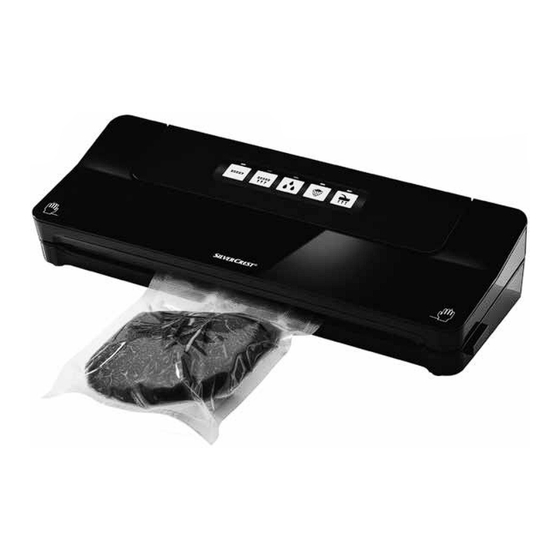
Description of the appliance Figure A 1 Appliance lid 2 Suction tube 3 Cable retainer 4 Welding wires 5 Lower sealing ring 6 Rear limiters 7 Front limiters 8 Lid release 9 Suction fitting 0 Upper sealing ring q Press seal Figure B button (start/cancel “sealing”... -
Page 8: Technical Data
Technical data Operating voltage 220 - 240 V ∼ (alternating current), 50/60 Hz Power consumption 125 W Protection class II / (double insulation) All of the parts of this appliance that come into contact with food are food-safe. This mark confirms that the product complies with the product safety requirements applicable in the UK. - Page 9 RISK OF INJURY! The mains power socket must be easily accessible, so that ■ the power cable can be easily disconnected in the event of an emergency. Cleaning and user maintenance tasks may not be carried ■ out by children unless they are supervised. The appliance and its connecting cable must be kept ■...
-
Page 10: Setting Up And Connecting
Setting up and connecting Set-up location requirements For safe and trouble-free operation of the device , the set-up location must fulfil the following requirements: ■ When setting it up, place the appliance on a firm, flat and horizontal surface. ■ Do not place the device in a hot, wet or extremely damp environment or in the vicinity of flammable materials. -
Page 11: Functions
Functions Button Function Start/cancel "sealing" function (without vacuum- ing) Start/cancel "vacuuming and sealing" function Activate/deactivate additional function "wet" (for particularly moist food products) Activate/deactivate additional function "soft" (for pressure-sensitive foods, e.g. fruit or cakes) Start/cancel "external vacuuming" function (for vacuuming using the hose and adapter) Tips The following table offers some useful information on optimal preparation and processing of various food items. - Page 12 Recom- Recom mended Food Notes mended additional container function – wash and dry Leafy vegeta- – Container – bles/lettuce not suitable for freezing – Refrigerator: container – Fruit peel or wash and dry – Freezer: bag – wash and dry –...
-
Page 13: Welding A Tube Film
Welding a tube film NOTES ON THE FILM ► The film width may not exceed 30 cm. Otherwise it cannot be welded correctly. ► Use only nylon PA/PE films with a structure (dots or grooves) on one side and a thickness of approx. 0.17–0.29 mm (170–290 μ) in this device. Otherwise, the weld seam will not be tight and the appliance may be damaged. - Page 14 NOTE The bag opening must lie flat on the welding wire 4. Otherwise the weld- ► ing does not work properly. 4) Close the appliance lid 1. The press seal q presses the bag onto the welding wire 4, to create a smooth seam. Ensure that both corners of the appliance lid 1 click closed.
- Page 15 CAUTION – PROPERTY DAMAGE! If the control lamp w does not turn off after a maximum of 10 seconds during the sealing process, the appliance is defective! ► Remove the plug from the mains power socket immediately. Do not attempt to repair the appliance yourself.
-
Page 16: Vacuum Sealing
Vacuum sealing Vacuuming the tube film You can also suck the air out of the bag (vacuum) during welding: NOTE ► If you want to vacuum seal bags with liquid contents only, it is best to freeze the liquid briefly so that it does not get sucked into the appliance during vacuuming. - Page 17 NOTE Ensure that the upper 0 and the lower sealing rings 5 are not damaged! ► Otherwise the device cannot suck the air out of the bag. If either one of the sealing rings 0/5 is damaged, simply pull it out of the ►...
-
Page 18: Vacuuming Containers And Resealable Bags
NOTE ► You can stop the vacuuming process at any time by pressing the button e again. The corresponding control lamp e goes out. Press the button e again to resume the vacuuming process. If the appliance has already switched to the sealing process and the control lamp w is also lit, the process can be stopped with the button w. - Page 19 NOTE ► You can order suitable bags and containers separately. Please refer to section "Ordering spare parts and accessories". The vacuum hoses u and adapters i/o/p are also compatible with ► bags and containers made by other manufacturers. Adapters e.g. suitable for FoodSaver lunch boxes, Ernesto, various Adapter A i bags with a valve...
-
Page 20: Cleaning
3) Close the appliance lid 1. Ensure that both corners of the appliance lid 1 click closed. If necessary, press them down once again on the markings so that the appliance lid 1 clicks into place and locks shut. 4) Connect the adapter i/o/p to the appropriate fitting on the container. Please refer to the instruction manual of the container for further information. -
Page 21: Storage
Storage The appliance has a built-in cable retainer 3 on the underside of the housing, on which you can wrap the power cable when it is not in use. Wind the power cable around the cable retainer 3 in the direction indicated by the arrows. This prevents the power cable from getting caught or soiled, or becoming a source of danger by hanging loosely down. -
Page 22: Kompernass Handels Gmbh Warranty
Kompernass Handels GmbH warranty Dear Customer, This appliance has a 3-year warranty valid from the date of purchase. If this product has any faults, you, the buyer, have certain statutory rights. Your statutory rights are not restricted in any way by the warranty described below. Warranty conditions The warranty period starts on the date of purchase. -
Page 23: Service
Warranty claim procedure To ensure quick processing of your case, please observe the following instructions: ■ Please have the till receipt and the item number (IAN) 389185_2104 available as proof of purchase. ■ You will find the item number on the type plate on the product, an engraving on the product, on the front page of the operating instructions (below left) or on the sticker on the rear or bottom of the product. -
Page 24: Importer
Importer Please note that the following address is not the service address. Please use the service address provided in the operating instructions. For EU market For GB market KOMPERNASS HANDELS GMBH Lidl Great Britain Ltd BURGSTRASSE 21 Lidl House 14 Kingston Road 44867 BOCHUM Surbiton GERMANY... -
Page 25: Ordering Replacement Parts
Ordering replacement parts You can order replacement parts for this product on the Internet at www.kompernass.com. Scan the QR code with your smartphone/tablet. You can use this QR code to go directly to our website to view and order the available spare parts. NOTE ►... - Page 26 Περιεχόμενα Εισαγωγή ........... . 24 Πνευματικά...
-
Page 27: Εισαγωγή
Εισαγωγή Συγχαρητήρια για την αγορά της νέας σας συσκευής! Με αυτή την αγορά αποφασίσατε την απόκτηση ενός μοντέρνου και υψηλής ποι- ότητας προϊόντος. Οι οδηγίες χρήσης αποτελούν τμήμα αυτού του προϊόντος. Περιέχουν σημαντικές υποδείξεις για την ασφάλεια, τη χρήση και την απόρριψη. Πριν... -
Page 28: Παραδοτέος Εξοπλισμός Και Έλεγχος Μεταφοράς
Παραδοτέος εξοπλισμός και έλεγχος μεταφοράς Η συσκευή παραδίδεται κανονικά με τα εξής στοιχεία: ▯ Συσκευή σφράγισης τροφίμων ▯ 1x Ρολό μεμβράνης ▯ 2 x Εύκαμπτοι σωλήνες ▯ 3 x Αντάπτορες ▯ 1x Εφεδρικός στεγανοποιητικός δακτύλιος ▯ Οι παρούσες οδηγίες χρήσης ΥΠΟΔΕΙΞΗ... -
Page 29: Περιγραφή Συσκευής
ΥΠΟΔΕΙΞΗ ► Εάν είναι δυνατό φυλάξτε τη γνήσια συσκευασία κατά τη διάρκεια της εγγύησης, για να μπορείτε σε περίπτωση εγγύησης να συσκευάσετε τη συσκευή σωστά. Περιγραφή συσκευής Εικόνα A 1 Καπάκι συσκευής 2 Σωλήνας αναρρόφησης 3 Διάταξη τύλιξης καλωδίου 4 Σύρματα συγκόλλησης 5 Κάτω... -
Page 30: Τεχνικά Χαρακτηριστικά
Τεχνικά χαρακτηριστικά 220 - 240 V ∼ (εναλλασσόμενη τάση), Τάση λειτουργίας 50/60 Hz Κατανάλωση ρεύματος 125 W Κατηγορία προστασίας II / (Διπλή μόνωση) Όλα τα εξαρτήματα αυτής της συσκευής, τα οποία έρχονται σε επαφή με τρόφιμα, μπορούν να χρησιμοποιούνται με ασφάλεια... - Page 31 ΚΙΝΔΥΝΟΣ ΤΡΑΥΜΑΤΙΣΜΟΥ! Επισκευές στη συσκευή επιτρέπεται να πραγματοποιού- ■ νται μόνο από εξουσιοδοτημένα και εξειδικευμένα συ- νεργεία ή από το τμήμα εξυπηρέτησης πελατών. Μέσω ακατάλληλων επισκευών μπορεί να προκληθούν κίνδυνοι τραυματισμών για το χρήστη ή ζημιές στη συσκευή. Επί- σης ακυρώνεται η αξίωση εγγύησης. Η...
-
Page 32: Τοποθέτηση Και Σύνδεση
ΥΠΟΔΕΙΞΗ Για την εναλλαγή του προϊόντος μεταξύ 50 και 60 Hz δεν ► απαιτείται κάποια ενέργεια από τον χρήστη. Το προϊόν προσαρμόζεται τόσο στα 50 όσο και στα 60 Hz. Τοποθέτηση και σύνδεση Απαιτήσεις για το χώρο τοποθέτησης Για μια ασφαλή και άψογη λειτουργία της συσκευής, ο χώρος τοποθέτησης πρέπει... -
Page 33: Λειτουργίες
Λειτουργίες Πλήκτρο Λειτουργία Έναρξη/διακοπή λειτουργίας «Συγκόλληση» (χωρία δημιουργία κενού) Έναρξη/διακοπή λειτουργίας «Δημιουργία κενού και συγκόλληση» Ενεργοποίηση/απενεργοποίηση επιπρόσθετης λειτουργίας «Wet» (για ιδιαίτερα υγρά τρόφιμα) Ενεργοποίηση/απενεργοποίηση επιπρόσθετης λειτουργίας «Soft» (για τρόφιμα με ευαισθησία στην πίεση, όπως π.χ. φρούτα ή τάρτες) Έναρξη/διακοπή λειτουργίας «Δημιουργία κενού εξωτερικά»... - Page 34 Προτεινόμενη Προτεινόμενο Τρόφιμο Υποδείξεις επιπρόσθετη δοχείο λειτουργία – Πλύσιμο και στέγνωμα Φυλλώδη λαχα- – Δοχείο – νικά/σαλάτα Δεν ενδείκνυνται για ψύξη – Ψυγείο: δοχείο – Ξεφλούδισμα ή πλύσιμο Φρούτα – και στέγνωμα Καταψύκτης: σακούλα – Πλύσιμο και στέγνωμα – Βότανα Σακούλα...
-
Page 35: Συγκόλληση Σωληνωτής Μεμβράνης
Συγκόλληση σωληνωτής μεμβράνης ΥΠΟΔΕΙΞΕΙΣ ΓΙΑ ΤΗΝ ΜΕΜΒΡΑΝΗ ► Η μεμβράνη επιτρέπεται να έχει μέγιστο πλάτος 30 εκ. Αλλιώς δεν μπορεί να συγκολληθεί σωστά. ► Χρησιμοποιείτε για αυτή τη συσκευή μόνο μεμβράνες που έχουν από τη μια πλευρά μια δομή (τελείες ή αυλακώσεις) και ένα πάχος περ. 0,17 - 0,29 χιλ. - Page 36 ΥΠΟΔΕΙΞΗ ► Το άνοιγμα της σακούλας πρέπει να εφάπτεται επακριβώς με το σύρμα συγκόλλησης 4. Αλλιώς η συγκόλληση δεν θα διεξαχθεί σωστά. 4) Κλείστε το καπάκι της συσκευής 1. Ο σύνδεσμος στεγανοποίησης q πιέζει την σακούλα στο σύρμα συγκόλλησης 4, έτσι ώστε να δημιουργηθεί μια λεία...
- Page 37 ΠΡΟΣΟΧΗ - ΥΛΙΚΕΣ ΖΗΜΙΕΣ Εάν η λυχνία ελέγχου w δεν σβήσει κατά τη διάρκεια της διαδι- κασίας σφράγισης μετά από το αργότερο 10 δευτερόλεπτα, η συσκευή παρουσιάζει βλάβη! ► Τραβήξτε αμέσως το βύσμα από την πρίζα. Μην προσπαθήσετε να επισκευ- άσετε...
-
Page 38: Δημιουργία Κενού
Δημιουργία κενού Δημιουργία κενού στη σωληνωτή μεμβράνη Κατά τη συγκόλληση μπορείτε να αναρροφήσετε και τον αέρα από τη σακούλα (δημιουργία κενού): ΥΠΟΔΕΙΞΗ ► Εάν επιθυμείτε να δημιουργήσετε κενό σε μια σακούλα αποκλειστικά με υγρό περιεχόμενο, είναι προτιμότερο να ψύξετε το υγρό για μικρό χρονικό διάστημα, ώστε... - Page 39 ΥΠΟΔΕΙΞΗ Προσέξτε ώστε ο άνω 0 και ο κάτω στεγανοποιητικός δακτύλιος 5 να ► μην πάθουν ζημιές! Αλλιώς η συσκευή δεν μπορεί να αναρροφήσει τον αέρα από την σακούλα. ► Εάν έχει υποστεί ζημιά ένας από τους στεγανοποιητικούς δακτυλίους 0/5, τραβήξτε τον έξω από την εσοχή και εισαγάγετε τον εφεδρικό στεγανοποιητικό...
-
Page 40: Δημιουργία Κενού Σε Δοχεία Και Επανασφραγιζόμενες Σακούλες
ΥΠΟΔΕΙΞΗ ► Μπορείτε να διακόψετε τη διαδικασία δημιουργίας κενού ανά πάσα στιγ- e. Η αντίστοιχη λυχνία ελέγχου e μή, πιέζοντας εκ νέου το πλήκτρο e εκ νέου, η διαδικασία δημιουργίας σβήνει. Εάν πιέσετε το πλήκτρο κενού συνεχίζεται. Εάν η συσκευή έχει μεταβεί ήδη στη διαδικασία ασφάλισης και επιπλέον ανάβει... - Page 41 ΥΠΟΔΕΙΞΗ ► Διατίθενται ξεχωριστά σακούλες και δοχεία στο ηλεκτρονικό μας κατάστημα, βλ. σχετικά το Κεφάλαιο «Παραγγελία ανταλλακτικών και αξεσουάρ». Οι εύκαμπτοι σωλήνες κενού u και οι αντάπτορες i/o/p είναι επίσης ► συμβατοί με σακούλες και δοχεία άλλων κατασκευαστών. Αντάπτορες π.χ. κατάλληλοι για δοχεία...
-
Page 42: Καθαρισμός
3) Κλείστε το καπάκι της συσκευής 1. Προσέξτε εδώ ώστε και οι δύο γωνίες του καπακιού της συσκευής 1 να κουμπώνουν. Πιέστε τις, εάν χρειάζεται, άλλη μια φορά στις σημάνσεις και προς τα κάτω, έτσι ώστε το καπάκι της συσκευής 1 να κουμπώσει και να ασφαλιστεί. 4) Συνδέστε... -
Page 43: Αποθήκευση
Εφόσον απαιτείται, μπορείτε να καθαρίζετε το δοχείο συλλογής και στο πλυντήριο πιάτων. Φροντίζετε ώστε να μην μαγκώσει το δοχείο συλλογής και, εφόσον είναι δυνατό, χρησιμοποιείτε το επάνω καλάθι του πλυντηρίου πιάτων. Αποθήκευση Η συσκευή έχει μια ενσωματωμένη διάταξη τύλιξης καλωδίου 3 στην κάτω πλευρά του... -
Page 44: Εγγύηση Της Kompernass Handels Gmbh
Εγγύηση της Kompernass Handels GmbH Αξιότιμη πελάτισσα, αξιότιμε πελάτη, Η παρούσα συσκευή διαθέτει 3 χρόνια εγγύηση από την ημερομηνία αγοράς. Στην περίπτωση ελλείψεων στο προϊόν έχετε νομικά δικαιώματα έναντι του πωλητή του προϊόντος. Αυτά τα νομικά δικαιώματα δεν περιορίζονται μέσω της κατωτέρω... -
Page 45: Σέρβις
Διαδικασία σε περίπτωση εγγύησης Για την εξασφάλιση γρήγορης επεξεργασίας του ζητήματός σας, τηρείτε τις ακόλουθες υποδείξεις: ■ Για όλες τις ερωτήσεις έχετε έτοιμη την απόδειξη αγοράς και τον κωδικό προϊόντος (IAN) 389185_2104 ως απόδειξη για την αγορά. ■ Για τον κωδικό προϊόντος, ανατρέξτε στην πινακίδα τύπου στο προϊόν, σε μια... -
Page 46: Παραγγελία Ανταλλακτικών
Παραγγελία ανταλλακτικών Μπορείτε πάντα να παραγγέλνετε με ευκολία ανταλλακτικά για το προϊόν αυτό στο ίντερνετ, στην ηλεκτρονική διεύθυνση www.kompernass.com. Σαρώστε τον κωδικό QR με το Smartphone/Tablet σας. Με αυτό τον κωδικό QR, μεταβαίνετε απευθεί- ας στον ιστότοπό μας και μπορείτε να δείτε και να παραγγείλετε... - Page 47 ■ 44 │ GR │ CY SV 125 C3...
- Page 48 Inhaltsverzeichnis Einleitung ........... . 46 Urheberrecht .
-
Page 49: Einleitung
Einleitung Herzlichen Glückwunsch zum Kauf Ihres neuen Gerätes! Sie haben sich damit für ein modernes und hochwertiges Produkt entschieden. Die Bedienungsanleitung ist Bestandteil dieses Produktes. Sie enthält wichtige Hinweise für Sicherheit, Gebrauch und Entsorgung. Machen Sie sich vor der Benutzung des Produkts mit allen Bedien- und Sicherheitshinweisen vertraut. Benutzen Sie dieses Produkt nur wie beschrieben und für die angegebenen Einsatzbereiche. -
Page 50: Lieferumfang Und Transportinspektion
Lieferumfang und Transportinspektion Das Gerät wird standardmäßig mit folgenden Komponenten geliefert: ▯ Vakuumierer ▯ 1x Folienrolle ▯ 2 x Schlauch ▯ 3 x Adapter ▯ 1x Ersatzdichtungsring ▯ Diese Bedienungsanleitung HINWEIS ► Prüfen Sie die Lieferung auf Vollständigkeit und auf sichtbare Schäden. ►... -
Page 51: Gerätebeschreibung
HINWEIS ► Heben Sie, wenn möglich, die Originalverpackung während der Garantiezeit des Gerätes auf, um das Gerät im Garantiefall ordnungsgemäß verpacken zu können. Gerätebeschreibung Abbildung A 1 Gerätedeckel 2 Absaugrohr 3 Kabelaufwicklung 4 Schweißdrähte 5 unterer Dichtungsring 6 hintere Begrenzungen 7 vordere Begrenzungen 8 Deckelentriegelung 9 Ansaugvorrichtung... -
Page 52: Technische Daten
Technische Daten Betriebsspannung 220 - 240 V ∼ (Wechselspannung), 50/60 Hz Leistungsaufnahme 125 W Schutzklasse II / (Doppelisolierung) Alle Teile dieses Gerätes, die mit Lebensmitteln in Berührung kommen, sind lebensmittelecht. Dieses Zeichen bestätigt, dass das Produkt den in Großbritannien geltenden Anforderungen an die Produktsicherheit entspricht. Sicherheitshinweise GEFAHR EINES ELEKTRISCHEN SCHLAGES! Kontrollieren Sie das Gerät vor der Verwendung auf... - Page 53 VERLETZUNGSGEFAHR! Lassen Sie Reparaturen am Gerät nur von autorisierten ■ Fachbetrieben oder dem Kundenservice durchführen. Durch unsachgemäße Reparaturen können Verletzungs- gefahren für den Benutzer entstehen oder das Gerät wird beschädigt. Zudem erlischt der Garantieanspruch. Die Steckdose muss leicht zugänglich sein, so dass das ■...
-
Page 54: Aufstellen Und Anschließen
HINWEIS Es ist keine Aktion seitens der Benutzer erforderlich, um das ► Produkt zwischen 50 und 60 Hz umzustellen. Das Produkt passt sich sowohl für 50 als auch für 60 Hz an. Aufstellen und Anschließen Anforderungen an den Aufstellort Für einen sicheren und fehlerfreien Betrieb des Gerätes muss der Aufstellort folgende Voraussetzungen erfüllen: ■... -
Page 55: Funktionen
Funktionen Taste Funktion Funktion „Verschweißen“ starten/abbrechen (ohne Vakuumieren) Funktion „vakuumieren und verschweißen“ star- ten/abbrechen Zusatz-Funktion „Wet“ aktivieren/deaktivieren (für besonders feuchte Lebensmittel) Zusatz-Funktion „Soft“ aktivieren/deaktivieren (für druckempfindliche Lebensmittel, wie z. B. Früchte oder Torten) Funktion „extern vakuumieren“ starten/abbrechen (zum Vakuumieren mit Schlauch und Adapter) Tipps In nachfolgender Tabelle erhalten Sie Hinweise zur optimalen Vorbereitung und Verarbeitung der Lebensmittel. - Page 56 Empfohlenes Empfohlene Lebensmittel Hinweise Behältnis Zusatz-Funktion – waschen und trocknen Blattgemüse/ – Behälter – Salat nicht zum Einfrieren geeignet – Kühlschrank: Behälter – schälen oder waschen und Obst trocknen – Gefrierschrank: Beutel – waschen und trocknen – Kräuter Beutel – ganze Stängel –...
-
Page 57: Schlauchfolie Verschweißen
Schlauchfolie verschweißen HINWEISE ZUR FOLIE ► Die Folie darf maximal 30 cm breit sein. Ansonsten kann sie nicht korrekt verschweißt werden. ► Benutzen Sie für dieses Gerät nur Folien, die auf einer Seite eine Struk- tur haben (Punkte oder Rillen) und eine Stärke von ca. 0,17 - 0,29 mm (170 - 290 μ) und aus Nylon (PA) - PE hergestellt sind. - Page 58 HINWEIS Die Beutelöffnung muss glatt auf den Schweißdrähten 4 liegen. Ansonsten ► funktioniert das Verschweißen nicht richtig. 4) Schließen Sie den Gerätedeckel 1. Die Anpressdichtung q presst den Beu- tel auf die Schweißdrähte 4, so dass eine glatte Naht entsteht. Achten Sie dabei darauf, dass beide Ecken des Gerätedeckels 1 einrasten.
- Page 59 ACHTUNG - SACHSCHADEN Wenn die Kontrollleuchte w während des Versiegelungsvor- gangs nach spätestens 10 Sekunden nicht erlischt, liegt ein Defekt des Gerätes vor! ► Ziehen Sie sofort den Netzstecker aus der Netzsteckdose. Versuchen Sie nicht, das Gerät selber zu reparieren. Wenden Sie sich an den Kunden- dienst.
-
Page 60: Vakuumieren
Vakuumieren Schlauchfolie vakuumieren Sie können beim Verschweißen auch die Luft aus dem Beutel saugen (vakuumieren): HINWEIS ► Wenn Sie Beutel mit ausschließlich flüssigem Inhalt vakuumieren wollen, frieren Sie die Flüssigkeiten am besten kurz an, damit sie während des Va- kuumierens nicht in das Gerät gesaugt werden. Sollten doch mal ungewollt kleinere Mengen an Flüssigkeiten oder Lebensmittel eingesaugt werden, gelangen diese in die kleine Auffangschale, die sich zwischen dem unteren Dichtungsring 5 befindet. - Page 61 HINWEIS Achten Sie darauf, dass der obere 0 und der untere Dichtungsring 5 ► nicht beschädigt sind! Ansonsten kann das Gerät die Luft nicht aus dem Beutel saugen. Sollte einer der Dichtungsringe 0/5 beschädigt sein, ziehen Sie diesen ► einfach aus der Vertiefung heraus und drücken Sie die Ersatzdichtung in die Vertiefung rein.
-
Page 62: Behälter Und Wiederverschließbare Beutel Vakuumieren
HINWEIS ► Sie können den Vakuumiervorgang jederzeit unterbrechen, indem Sie die e erneut drücken. Die dazugehörige Kontrollleuchte e erlischt. Taste e erneut, wird der Vakuumiervorgang fortge- Drücken Sie die Taste setzt. Hat das Gerät schon in den Versiegelungsvorgang gewechselt und die Kontrollleuchte w leuchtet zusätzlich, kann der Vorgang auch mit der Taste w abgebrochen werden. - Page 63 HINWEIS ► Geeignete Beutel und Behälter sind über unseren Onlineshop separat erhältlich, sehen Sie dazu das Kapitel „Ersatzteile und Zubehör bestellen“. Die Vakuumschläuche u und die Adapter i/o/p sind auch mit Beuteln ► und Behältern von anderen Herstellern kompatibel. Adapter z.
-
Page 64: Reinigung
3) Schließen Sie den Gerätedeckel 1. Achten Sie dabei darauf, dass beide Ecken des Gerätedeckels 1 einrasten. Drücken Sie diese gegebenenfalls noch einmal an den Markierungen herunter, so dass der Gerä- tedeckel 1 einrastet und verriegelt ist. 4) Schließen Sie den Adapter i/o/p an die entsprechende Vorrichtung des Behälters an. -
Page 65: Aufbewahrung
Bei Bedarf können Sie die Auffangschale auch in der Spülmaschine reinigen. Achten Sie dabei darauf, die Auffangschale nicht einzu- klemmen und benutzen Sie, wenn möglich, den oberen Korb der Spülmaschine. Aufbewahrung Das Gerät hat eine integrierte Kabelaufwicklung 3 an der Gehäuseunterseite, auf die Sie das Netzkabel bei Nichtgebrauch aufwickeln können. -
Page 66: Garantie Der Kompernaß Handels Gmbh
Garantie der Kompernaß Handels GmbH Sehr geehrte Kundin, sehr geehrter Kunde, Sie erhalten auf dieses Gerät 3 Jahre Garantie ab Kaufdatum. Im Falle von Mängeln dieses Produkts stehen Ihnen gegen den Verkäufer des Produkts gesetz- liche Rechte zu. Diese gesetzlichen Rechte werden durch unsere im Folgenden dargestellte Garantie nicht eingeschränkt. -
Page 67: Service
Abwicklung im Garantiefall Um eine schnelle Bearbeitung Ihres Anliegens zu gewährleisten, folgen Sie bitte den folgenden Hinweisen: ■ Bitte halten Sie für alle Anfragen den Kassenbon und die Artikelnummer (IAN) 389185_2104 als Nachweis für den Kauf bereit. ■ Die Artikelnummer entnehmen Sie bitte dem Typenschild am Produkt, einer Gravur am Produkt, dem Titelblatt der Bedienungsanleitung (unten links) oder dem Aufkleber auf der Rück- oder Unterseite des Produktes. - Page 68 KOMPERNASS HANDELS GMBH Lidl Great Britain Ltd BURGSTRASSE 21 Lidl House 14 Kingston Road 44867 BOCHUM Surbiton DEUTSCHLAND KT5 9NU www.kompernass.com SV 125 C3 DE │ AT │ CH │ 65 ■...
-
Page 69: Ersatzteile Bestellen
Ersatzteile bestellen Sie können Ersatzteile für dieses Produkt bequem im Internet unter www.kompernass.com dauerhaft nachbestellen. Scannen Sie den QR-Code mit Ihrem Smartphone/ Tablet. Mit diesem QR-Code gelangen Sie direkt auf unsere Webseite und können die verfügbaren Ersatzteile einsehen und bestellen. HINWEIS ►... - Page 70 KOMPERNASS HANDELS GMBH BURGSTRASSE 21 44867 BOCHUM GERMANY www.kompernass.com Last Information Update · Έκδοση των πληροφοριών Stand der Informationen: 07 / 2021 · Ident.-No.: SV125C3-072021-1 IAN 389185_2104...
Need help?
Do you have a question about the 389185 2104 and is the answer not in the manual?
Questions and answers