Table of Contents
Advertisement
Available languages
Available languages
Advertisement
Chapters
Table of Contents

Related Manuals for Silvercrest SV 125 C5


Summary of Contents for Silvercrest SV 125 C5
- Page 1 ENVASADORA AL VACÍO MACCHINA SIGILLASACCHETTI SV 125 C5 ENVASADORA AL VACÍO MACCHINA SIGILLASACCHETTI Instrucciones de uso Istruzioni per l'uso APARELHO DE SELAGEM A VÁCUO VACUUM SEALER Manual de instruções Operating instructions VAKUUMIERER Bedienungsanleitung IAN 389891_2201...
- Page 2 Antes de empezar a leer abra la página que contiene las imágenes y, en seguida, familiarícese con todas las funciones del dispositivo. Prima di leggere aprire la pagina con le immagini e prendere confidenza con le diverse funzioni dell'apparecchio. Antes de começar a ler abra na página com as imagens e, de seguida, familiarize-se com todas as funções do aparelho.
- Page 3 Soft...
-
Page 4: Table Of Contents
Pedido de recambios ......... . 22 SV 125 C5 ... -
Page 5: Introducción
Cualquier uso diferente o que supere lo indicado se considerará contrario al uso previsto. Se excluyen las reclamaciones de cualquier tipo en relación con los daños causados por un uso contrario al uso previsto. El riesgo será responsa- bilidad exclusiva del usuario. ■ 2 │ SV 125 C5... -
Page 6: Volumen De Suministro E Inspección De Transporte
Observe las indicaciones de los distintos materiales de embalaje y, si procede, recíclelos de la manera correspondiente. Los materiales de embalaje cuentan con abreviaciones (a) y cifras (b) que significan lo siguiente:1-7: plásticos, 20-22: papel y cartón, 80-98: materiales compuestos. SV 125 C5 │ 3... -
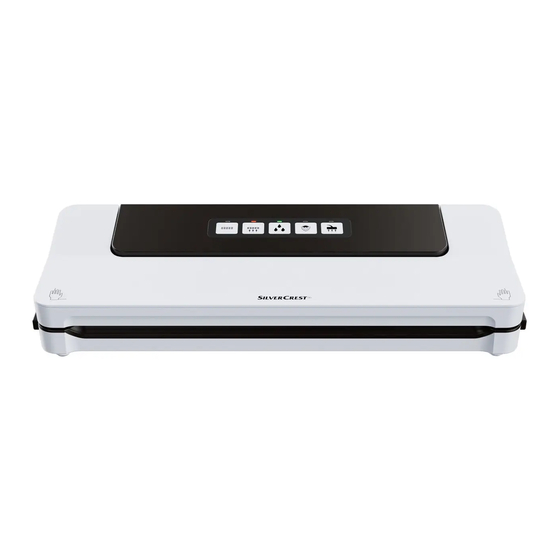
Page 7: Descripción Del Aparato
(verde) z Botón (inicio/cancelación de la función “Envasado al vacío externo”) con piloto de control (verde) Figura C u Tubo de envasado al vacío i Adaptador A o Adaptador B p Adaptador C ■ 4 │ SV 125 C5... -
Page 8: Características Técnicas
Retire la clavija de red de la base de enchufe antes de ■ comenzar con la limpieza. Durante la limpieza, asegúrese de que no penetre hume- ■ dad en la carcasa del aparato. SV 125 C5 │ 5 ■... - Page 9 ¡ATENCIÓN – DAÑOS MATERIALES! No utilice ningún tipo de reloj programador externo ni ■ sistema de control remoto para accionar el aparato. ■ 6 │ SV 125 C5...
-
Page 10: Colocación Y Conexión
Procure que el cable de red no se tense ni se doble demasiado. ► Evite que el cable de red quede colgando por las esquinas (para evitar tropiezos). ♦ Conecte la clavija de red a la base de enchufe. SV 125 C5 │ 7 ■... -
Page 11: Funciones
– Verduras Bolsa cocción con agua helada y séquelas para evitar una pérdida del sabor y del co- lor o la formación de gas* durante su conservación. ■ 8 │ SV 125 C5... - Page 12 – Recipiente Platos prepara- dos templados – Bolsa * Aplicable para todos los tipos de coles (brócoli, coles de Bruselas, col rizada, etc.), espá- rragos, tirabeques, judías, romanesco y pak choy. SV 125 C5 │ 9 ■...
-
Page 13: Sellado Del Rollo De Bolsas De Plástico
6 y debe quedar colocada entre los topes delanteros 7. Si la bolsa sobrepasa uno de los topes o ambos topes 6/7, no podrá sellarse correctamente: ■ 10 │ SV 125 C5... - Page 14 INDICACIÓN ► Puede detenerse en cualquier momento el proceso de sellado con solo w. Tras esto, el piloto de control w parpadea volver a pulsar el botón y se apaga. SV 125 C5 │ 11 ■...
- Page 15 8) Si no desea envasar la bolsa al vacío, selle ahora el otro extremo abierto. INDICACIÓN ► Espere unos segundos antes de sellar la siguiente bolsa para que el aparato pueda enfriarse. Durante la fase de enfriamiento no puede activarse la función “sellado”. ■ 12 │ SV 125 C5...
-
Page 16: Envasado Al Vacío
2) Cierre la tapa 1. Asegúrese de que las dos esquinas de la tapa 1 queden encastradas. En caso necesario, presiónelas hacia abajo sobre las marcas de forma que la tapa 1 quede encastrada y cerrada. SV 125 C5 │ 13... - Page 17 5) Una vez se apaguen ambos pilotos de control e/w, podrá abrir la tapa tras presionar los desencastres de la tapa 8 y tirar de la tapa 1 hacia arriba. Retire la bolsa sellada y envasada al vacío. ■ 14 │ SV 125 C5...
-
Page 18: Envasado Al Vacío De Recipientes Y De Bolsas Reutilizables
Pruebe qué adaptador i/o/p se acopla mejor y si realmente es necesario utilizar algún adaptador i/o/p. SV 125 C5 │ 15... - Page 19 En cuanto se succiona el aire de la bolsa, el piloto de control z se apaga. 7) A continuación, podrá retirar el adaptador A/B i/o de la bolsa. ■ 16 │ SV 125 C5...
-
Page 20: Limpieza
Limpie el anillo superior 0 y el anillo inferior de sellado 5, así como el ♦ sello de presión q, con un trapo húmedo. Asegúrese de que el aparato esté seco antes de volver a utilizarlo. SV 125 C5 │ 17... -
Page 21: Almacenamiento
5, así como sobre el sello de presión q, que podría afectar a su funcionamiento. ♦ Guarde el aparato en un lugar limpio, seco y protegido de la radiación solar directa. ■ 18 │ SV 125 C5... -
Page 22: Desecho
Si después de la compra del aparato, se detecta la existencia de daños o de defectos al desembalarlo, deben notificarse de inmediato. Cualquier reparación que se realice una vez finalizado el plazo de garantía estará sujeta a costes. SV 125 C5 │ 19... - Page 23 Con este código QR, accederá directamente a la página del Servicio Lidl (www.lidl-service.com) y podrá abrir las instrucciones de uso mediante la introducción del número de artículo (IAN) 389891_2201. ■ 20 │ SV 125 C5...
-
Page 24: Asistencia Técnica
Tenga en cuenta que la dirección siguiente no es una dirección de asistencia técnica. Póngase primero en contacto con el centro de asistencia técnica especificado. KOMPERNASS HANDELS GMBH BURGSTRASSE 21 44867 BOCHUM ALEMANIA www.kompernass.com SV 125 C5 │ 21 ■... -
Page 25: Pedido De Recambios
► Le rogamos que tenga en cuenta que no en todos los países a los que realizamos envíos se pueden pedir recambios por Internet. ■ 22 │ SV 125 C5... - Page 26 Ordinazione dei pezzi di ricambio ....... 44 SV 125 C5 IT │...
-
Page 27: Introduzione
Un uso diverso o esulante da quanto sopra è considerato non conforme. Sono escluse rivendicazioni di qualsiasi genere in caso di danni derivanti da uso non conforme. Il rischio è esclusivamente a carico dell’utente. ■ 24 │ IT │ MT SV 125 C5... -
Page 28: Volume Della Fornitura E Ispezione Per Eventuali Danni Da Trasporto
I materiali di imballaggio presentano codici costituiti da abbreviazioni (a) e numeri (b) con il seguente significato: 1–7: materie plastiche, 20–22: carta e cartone, 80–98: materiali compositi SV 125 C5 IT │ MT │... -
Page 29: Descrizione Dell'apparecchio
Tasto (avvio/interruzione della funzione “messa sottovuoto esternamente”) con spia di controllo (verde) Figura C u Tubo flessibile per messa sottovuoto i Adattatore A o Adattatore B p Adattatore C ■ 26 │ IT │ MT SV 125 C5... -
Page 30: Dati Tecnici
Non aprire mai l'alloggiamento dell'apparecchio! ■ Prima di cominciare con la pulizia, staccare sempre la ■ spina dalla presa. Impedire la penetrazione di umidità nell'apparecchio ■ durante la pulizia. SV 125 C5 IT │ MT │ 27 ■... - Page 31 ATTENZIONE - DANNI MATERIALI! Non utilizzare timer esterni o un sistema di telecomando sepa- ■ rato per azionare l'apparecchio. ■ 28 │ IT │ MT SV 125 C5...
-
Page 32: Installazione E Collegamento
Assicurarsi che durante il funzionamento il cavo di rete non venga teso o piegato. ► Non fare pendere il cavo di rete sugli angoli (effetto di inciampo). ♦ Inserire la spina nella presa di corrente. SV 125 C5 IT │ MT │ 29 ■... -
Page 33: Funzioni
– Verdure sacchetto re con acqua ghiacciata e asciugare, in modo da evitare la perdita di gusto e colore o la formazione di gas* durante la conservazione ■ 30 │ IT │ MT SV 125 C5... - Page 34 * Si applica ad es. a tutti i tipi di cavoli (broccoli, cavolini di Bruxelles, cavoli ricci ecc.), agli asparagi, alle taccole, ai fagioli, al broccolo romanesco e al cavolo cinese. SV 125 C5 IT │ MT │...
-
Page 35: Sigillatura Della Pellicola Tubolare
5. Il sacchetto non deve arrivare oltre i limiti posteriori 6 e deve trovarsi compreso tra i limiti anteriori 7. Se il sacchetto supera uno o entrambi i limiti 6/7, non può venire correttamente sigillato: ■ 32 │ IT │ MT SV 125 C5... - Page 36 AVVISO ► È possibile interrompere in ogni momento l’operazione di sigillatura w. La spia di controllo w lampeggia e premendo nuovamente il tasto poi si spegne. SV 125 C5 IT │ MT │ 33 ■...
- Page 37 AVVISO ► Attendere qualche secondo prima di saldare il sacchetto successivo, in modo da consentire all’apparecchio di raffreddarsi. Durante la fase di raffreddamento non è possibile attivare la funzione “Saldatura”. ■ 34 │ IT │ MT SV 125 C5...
-
Page 38: Messa Sotto Vuoto
1 scattino in posizione. All’occorrenza premer- li ancora una volta sulle apposite marcature verso il basso in modo tale che il coperchio dell’apparecchio 1 scatti in posizione e si blocchi. SV 125 C5 IT │ MT │ 35... - Page 39 5) Quando entrambe le spie di controllo e/w si sono spente, si può aprire il coperchio premendo sui dispositivi di sblocco del coperchio 8 e aprendo il coperchio dell’apparecchio 1 verso l’alto. Rimuovere il sacchetto messo sottovuoto e sigillato. ■ 36 │ IT │ MT SV 125 C5...
-
Page 40: Messa Sottovuoto Di Contenitori E Sacchetti Richiudibili
flessibile per messa sottovuoto u nel sacchetto/contenitore. Provare qual è l’adattatore i/o/p più idoneo o se l’adattatore i/o/p non è affatto necessario. SV 125 C5 IT │ MT │... - Page 41 6) Premere il tasto aspira l’aria dal sacchetto. Non appena l’aria è stata aspirata, la spia di controllo z si spegne. 7) Ora si può rimuovere l’adattatore A/B i/o dal sacchetto. ■ 38 │ IT │ MT SV 125 C5...
-
Page 42: Pulizia
Passare un panno umido sull’anello di tenuta superiore 0 e inferiore 5 ♦ nonché sulla guarnizione a pressione q. Accertarsi che l’apparecchio sia asciutto prima di utilizzarlo nuovamente. SV 125 C5 IT │ MT │ 39... -
Page 43: Conservazione
0 e inferiore 5 nonché sulla guarnizione a pressione q. Ciò potrebbe comprometterne il funzionamento. ♦ Sistemare l’apparecchio in un luogo fresco e asciutto privo di irradiazione solare diretta. ■ 40 │ IT │ MT SV 125 C5... -
Page 44: Smaltimento
Danni e vizi eventualmente già presenti al momento dell‘acquisto devono venire segnalati immediatamente dopo che l‘apparecchio è stato disimballato. Le riparazioni eseguite dopo la scadenza del periodo di garanzia sono a pagamento. SV 125 C5 IT │ MT │... - Page 45 Con questo codice QR si giunge direttamente al sito dell’assistenza cli- enti Lidl (www.lidl-service.com) e con la digitazione del codice articolo (IAN) 389891_2201 si può aprire il manuale di istruzioni di proprio interesse. ■ 42 │ IT │ MT SV 125 C5...
-
Page 46: Assistenza
Badi che il seguente indirizzo non è quello del servizio di assistenza clienti. Contatti innanzitutto il servizio di assistenza clienti indicato. KOMPERNASS HANDELS GMBH BURGSTRASSE 21 44867 BOCHUM GERMANIA www.kompernass.com SV 125 C5 IT │ MT │ 43 ■... -
Page 47: Ordinazione Dei Pezzi Di Ricambio
389891_2201), che può essere tratto dalla copertina di questo manu- ale di istruzioni. ► Si tenga presente che l’ordinazione online di pezzi di ricambio non è possibile in tutti i Paesi in cui effettuiamo consegne. ■ 44 │ IT │ MT SV 125 C5... - Page 48 Importador ............. 65 Encomendar peças sobresselentes ....... 66 SV 125 C5 ...
-
Page 49: Introdução
Qualquer utilização diferente ou fora do âmbito descrito é considerada incorreta. Estão excluídos quaisquer direitos de garantia relativos a danos resultantes de uma utilização incorreta. O risco é da responsabilidade exclusiva do utilizador. ■ 46 │ SV 125 C5... -
Page 50: Material Fornecido E Inspeção De Transporte
Tenha em atenção a identificação nos diversos materiais de embalagem e separe-os convenientemente. Os materiais de embalagem estão identificados com abreviaturas (a) e algarismos (b), com os seguintes significados: 1–7: plásticos, 20–22: papel e cartão, 80–98: compostos SV 125 C5 │ 47... -
Page 51: Descrição Do Aparelho
(ativar/desativar a função adicional “Soft”) com luz de controlo (verde) z Botão (iniciar/parar a função “Embalar em vácuo externo”) com luz de controlo (verde) Figura C u Mangueira de vácuo i Adaptador A o Adaptador B p Adaptador C ■ 48 │ SV 125 C5... -
Page 52: Dados Técnicos
Nunca abra o corpo do aparelho! ■ Retire a ficha de rede da tomada, antes de iniciar a ■ limpeza. Certifique-se de que, durante a limpeza, não se infiltra ■ humidade no aparelho. SV 125 C5 │ 49 ■... - Page 53 ATENÇÃO - DANOS MATERIAIS! Não utilize um temporizador externo ou um sistema de ■ controlo remoto em separado para operar o aparelho. ■ 50 │ SV 125 C5...
-
Page 54: Instalação E Ligação
Tenha atenção para que o cabo de alimentação não fique demasiado esticado ou dobrado. ► Não deixe o cabo de rede suspenso em cantos (efeito de tropeço). ♦ Insira a ficha na tomada de rede. SV 125 C5 │ 51 ■... -
Page 55: Funções
água a ferver, passar por água com gelo e secar, – Legumes Saco de modo a evitar a perda de cor e sabor ou a formação de gás* durante a conservação ■ 52 │ SV 125 C5... - Page 56 – Caixa de conservação Refeições cozinhadas, frias – Saco * Aplica-se, p. ex., a todos os tipos de couve (brócolos, couve-de-bruxelas, couve frisada, etc.), espargos, ervilhas de quebrar, feijão, romanesco e pak choy. SV 125 C5 │ 53 ■...
-
Page 57: Selar Película Tubular
6 e tem de ficar entre os limites dianteiros 7. Se o saco ultrapassar um ou os dois limites 6/7, o saco não pode ser selado devidamente: ■ 54 │ SV 125 C5... - Page 58 NOTA ► Pode interromper o processo de selagem em qualquer altura, premindo w. A luz de controlo w pisca e apaga-se em novamente o botão seguida. SV 125 C5 │ 55 ■...
- Page 59 8) Se não pretender fechar o saco com vácuo, sele o outro lado aberto. NOTA ► Aguarde alguns segundos antes de selar o saco seguinte, para que o aparelho possa arrefecer. Durante esta fase de arrefecimento, não pode iniciar a função “Selar”. ■ 56 │ SV 125 C5...
-
Page 60: Embalar Em Vácuo
2) Feche a tampa do aparelho 1. Certifique-se de que ambos os cantos da tampa do aparelho 1 encaixam. Prima estes, em caso de necessidade, mais uma vez nas marcações para baixo, para que a tampa do aparelho 1 encaixe e fique bloqueada. SV 125 C5 │ 57 ■... - Page 61 5) Se ambas as luzes de controlo e/w estiverem apagadas, pode abrir a tampa, carregando nos desbloqueios da tampa 8 e levantando a tampa do aparelho 1. Retire o saco com os alimentos embalados a vácuo e selado. ■ 58 │ SV 125 C5...
-
Page 62: Embalar Em Vácuo Com Recipientes E Sacos Reutilizáveis
Experimente qual dos adaptadores i/o/p fecha melhor e se é mesmo necessário um dos adaptadores i/o/p. SV 125 C5 │ 59... - Page 63 A luz de controlo z acende-se e o aparelho retira o ar 6) Prima o botão do saco. Assim que o ar tenha sido aspirado, a luz de controlo z apaga-se. 7) Poderá então remover o adaptador A/B i/o do saco. ■ 60 │ SV 125 C5...
-
Page 64: Limpeza
Limpe o anel vedante superior 0 e o anel vedante inferior 5, bem como ♦ a junta de compressão q com um pano húmido. Assegure-se de que o aparelho está seco antes de o voltar a utilizar. SV 125 C5 │ 61... -
Page 65: Armazenamento
0 e o anel vedante inferior 5, bem como sobre a junta de compressão q. Estes podem ser, por isso, prejudicados no seu funcionamento. ♦ Guarde o aparelho num local limpo e seco sem radiação solar direta. ■ 62 │ SV 125 C5... -
Page 66: Eliminação
Danos e defeitos que possam eventualmente já existir no momento da compra devem ser imediatamente comu- nicados, após retirar o aparelho da embalagem. Expirado o período da garantia, quaisquer reparações necessárias estão sujeitas a pagamento. SV 125 C5 │ 63... - Page 67 Com o código QR acede diretamente à página da Assistência Técnica Lidl (www.lidl-service.com) e poderá abrir o seu manual de instruções, introduzin- do o número de artigo (IAN) 389891_2201. ■ 64 │ SV 125 C5...
-
Page 68: Assistência Técnica
Por favor, observe que a seguinte morada não é a morada do Serviço de Assis- tência Técnica. Primeiro entre em contacto com o Serviço de Assistência Técnica. KOMPERNASS HANDELS GMBH BURGSTRASSE 21 44867 BOCHUM ALEMANHA www.kompernass.com SV 125 C5 │ 65 ■... -
Page 69: Encomendar Peças Sobresselentes
Ao encomendar, indique sempre o número de artigo (p. ex. 389891_2201), que se encontra na folha de rosto deste manual de instruções. ► Tenha em atenção que a encomenda online de peças sobresselentes não está disponível para todos os países de envio. ■ 66 │ SV 125 C5... - Page 70 Ordering replacement parts ........88 SV 125 C5 GB │...
-
Page 71: Introduction
It is not intended for any other use or use beyond that specified. Claims of any kind for damage arising as a result of incorrect use will not be accepted. The risk shall be borne solely by the user. ■ 68 │ GB │ MT SV 125 C5... -
Page 72: Package Contents And Transport Inspection
20–22: paper and cardboard, 80–98: composites NOTE ► If possible, keep the original packaging during the warranty period so that the device can be properly packed for returning in the event of a warranty claim. SV 125 C5 GB │ MT │ 69... -
Page 73: Description Of The Appliance
220 - 240 V ∼ (alternating current), 50/60 Hz Power consumption 125 W Protection class II / (double insulation) All of the parts of this appliance that come into contact with food are food-safe. ■ 70 │ GB │ MT SV 125 C5... -
Page 74: Safety Guidelines
They will also invalidate any warranty claim. The mains power socket must be easily accessible, so that ■ the power cable can be easily disconnected in the event of an emergency. SV 125 C5 GB │ MT │ 71 ■... - Page 75 NOTE No user action is required to switch the product between ► 50 and 60 Hz. The product adapts automatically to either 50 or 60 Hz. ■ 72 │ GB │ MT SV 125 C5...
-
Page 76: Setting Up And Connecting
Ensure that the power cable is not taut or kinked. ► Do not let the power cable hang over edges (trip wire effect). ♦ Insert the plug into the mains power socket. SV 125 C5 GB │ MT │ 73... -
Page 77: Functions
– blanch for a few minutes in boiling water, rinse with ice – Vegetables water and dry to avoid loss of flavour and colour or gas formation* during storage ■ 74 │ GB │ MT SV 125 C5... - Page 78 – Container Cooled, cooked foods – * Applies, for example, to all types of cabbage (broccoli, Brussels sprouts, kale, etc.), asparagus, sugar snap peas, beans, romanesco and pak choy. SV 125 C5 GB │ MT │ 75 ■...
-
Page 79: Welding A Tube Film
6 and must lie between the front limiters 7. If the bag lies over one or both of the two limiters 6/7, then the bag cannot be correctly welded. ■ 76 │ GB │ MT SV 125 C5... - Page 80 flashes briefly and then goes out. NOTE button w ► You can halt the sealing process at any time by pressing the again. The control lamp w flashes and then goes out. SV 125 C5 GB │ MT │ 77 ■...
- Page 81 8) If you do not want to vacuum the bag, you can now weld the other, open side. NOTE ► Wait a few seconds to allow the appliance to cool down before sealing the next bag. During this cool-down phase, you cannot start the “seal” function. ■ 78 │ GB │ MT SV 125 C5...
-
Page 82: Vacuum Sealing
2) Close the appliance lid 1. Ensure that both corners of the appliance lid 1 click closed. If necessary, press them down once again on the markings so that the appliance lid 1 clicks into place and locks shut. SV 125 C5 GB │ MT │... - Page 83 5) Once both control lamps e/w have gone out, you can open the lid by pressing the lid releases 8 and flipping the lid 1 upwards. Remove the vacuum-sealed bag. ■ 80 │ GB │ MT SV 125 C5...
-
Page 84: Vacuuming Containers And Resealable Bags
Experiment to find out which adapter i/o/p creates the best seal or whether you even need an adapter i/o/p at all. SV 125 C5 GB │ MT ... - Page 85 As soon as all the air is sucked out, the control lamp z goes out. 7) You can now remove the adapter A/B i/o from the bag. ■ 82 │ GB │ MT SV 125 C5...
-
Page 86: Cleaning
Wipe the vacuum hoses u, and the adapters i/o/p with a damp cloth. If ♦ there is heavy soiling, you can also clean these parts in hot water with a little detergent. Ensure that all components are completely dry before the next use. SV 125 C5 GB │ MT │ 83... -
Page 87: Storage
5, as well as the press seal q. This can negatively affect their function. ♦ Store the appliance in a clean, dry place away from direct sunlight. ■ 84 │ GB │ MT SV 125 C5... -
Page 88: Disposal
This also applies to replaced and repaired components. Any damage and defects present at the time of purchase must be reported immediately after un- packing. Repairs carried out after expiry of the warranty period shall be subject to a fee. SV 125 C5 GB │ MT │... - Page 89 This QR code will take you directly to the Lidl service page (www.lidl-service.com) where you can open your operating instructions by entering the item number (IAN) 389891_2201. ■ 86 │ GB │ MT SV 125 C5...
-
Page 90: Service
Please note that the following address is not the service address. Please use the service address provided in the operating instructions. KOMPERNASS HANDELS GMBH BURGSTRASSE 21 44867 BOCHUM GERMANY www.kompernass.com SV 125 C5 GB │ MT │ 87 ■... -
Page 91: Ordering Replacement Parts
Please always quote the article number (e.g. 389891_2201) when order- ing. You can find it on the title page of these operating instructions. ► Please note that online ordering of replacement parts is not possible for all countries. ■ 88 │ GB │ MT SV 125 C5... - Page 92 Ersatzteile bestellen ......... . 110 SV 125 C5 DE │...
-
Page 93: Einleitung
Eine andere oder darüber hinausgehende Benutzung gilt als nicht bestimmungs- gemäß. Ansprüche jeglicher Art wegen Schäden aus nicht bestimmungsgemäßer Verwendung sind ausgeschlossen. Das Risiko trägt allein der Benutzer. ■ 90 │ DE │ AT │ CH SV 125 C5... -
Page 94: Lieferumfang Und Transportinspektion
Beachten Sie die Kennzeichnung auf den verschiedenen Verpackungsmaterialien und trennen Sie diese gegebenenfalls gesondert. Die Verpackungsmaterialien sind gekennzeichnet mit Abkürzungen (a) und Ziffern (b) mit folgender Bedeutung: 1–7: Kunststoffe, 20–22: Papier und Pappe, 80–98: Verbundstoffe. SV 125 C5 DE │ AT │ CH │... -
Page 95: Gerätebeschreibung
(Zusatz-Funktion „Soft“ aktivieren/deaktivieren) mit Kontrollleuchte (grün) z Taste (Funktion „extern vakuumieren“ starten/abbrechen) mit Kontrollleuchte (grün) Abbildung C: u Vakuumschlauch i Adapter A o Adapter B p Adapter C ■ 92 │ DE │ AT │ CH SV 125 C5... -
Page 96: Technische Daten
Ziehen Sie den Netzstecker aus der Steckdose, bevor Sie ■ mit der Reinigung beginnen. Stellen Sie sicher, dass bei der Reinigung keine Feuchtig- ■ keit in das Gerät eindringt. SV 125 C5 DE │ AT │ CH │ 93 ■... - Page 97 Arbeitsunterbrechungen stets den Netzstecker aus der Steckdose, um versehentliches Einschalten zu vermeiden. ACHTUNG - SACHSCHADEN! Benutzen Sie keine externe Zeitschaltuhr oder ein separates ■ Fernwirksystem, um das Gerät zu betreiben. ■ 94 │ DE │ AT │ CH SV 125 C5...
-
Page 98: Aufstellen Und Anschließen
Achten Sie darauf, dass das Netzkabel nicht straff gespannt oder geknickt wird. ► Lassen Sie das Netzkabel nicht über Ecken hängen (Stolperdrahteffekt). ♦ Stecken Sie den Netzstecker in die Netzsteckdose. SV 125 C5 DE │ AT │ CH │ 95 ■... -
Page 99: Funktionen
Minuten in kochen- dem Wasser blanchieren, mit – Gemüse Beutel Eiswasser abschrecken und abtrocknen, um den Verlust von Geschmack und Farbe oder Gasbildung* während der Lagerung zu vermeiden ■ 96 │ DE │ AT │ CH SV 125 C5... - Page 100 Beutel – Behälter Abgekühlte, ge- garte Speisen – Beutel * Gilt z. B. für alle Kohlarten (Brokkoli, Rosenkohl, Grünkohl etc.), Spargel, Zuckerschoten, Bohnen, Romanesco und Pak Choy. SV 125 C5 DE │ AT │ CH │ 97 ■...
-
Page 101: Schlauchfolie Verschweißen
Der Beutel darf maximal bis an die hinteren Begrenzungen 6 stoßen und muss zwischen den vorderen Begrenzungen 7 liegen. Wenn der Beutel über einer oder beiden Begrenzungen 6/7 liegt, kann der Beutel nicht korrekt verschweißt werden: ■ 98 │ DE │ AT │ CH SV 125 C5... - Page 102 Versiegelungsvorgang abgeschlossen ist, blinkt die Kontrollleuchte w und erlischt dann. HINWEIS ► Sie können den Versiegelungsvorgang jederzeit abbrechen, indem Sie die w erneut drücken. Die Kontrollleuchte w blinkt und erlischt dann. Taste SV 125 C5 DE │ AT │ CH │ 99 ■...
- Page 103 Seite. HINWEIS ► Warten Sie einige Sekunden, bevor Sie den nächsten Beutel verschweißen, damit das Gerät abkühlen kann. Während dieser Abkühlphase können Sie die Funktion „Verschweißen“ nicht starten. ■ 100 │ DE │ AT │ CH SV 125 C5...
-
Page 104: Vakuumieren
2) Schließen Sie den Gerätedeckel 1. Achten Sie dabei darauf, dass beide Ecken des Gerätedeckels 1 einrasten. Drücken Sie diese gegebenenfalls noch einmal an den Markierungen herunter, so dass der Gerä- tedeckel 1 einrastet und verriegelt ist. SV 125 C5 DE │ AT │ CH │ 101 ■... - Page 105 5) Wenn beide Kontrollleuchten e/w erloschen sind, können Sie den Deckel öffnen, indem Sie die Deckelentriegelungen 8 drücken und den Gerätede- ckel 1 nach oben hin öffnen. Entnehmen Sie den vakuumierten und versiegel- ten Beutel. ■ 102 │ DE │ AT │ CH SV 125 C5...
-
Page 106: Behälter Und Wiederverschließbare Beutel Vakuumieren
Adapter i/o/p nötig ist und Sie direkt das schwarze Kupplungsstück am Vakuumschlauch u in den Beutel/den Behälter schieben können. Probieren Sie aus, welcher Adapter i/o/p am besten abschließt und ob einer der Adapter i/o/p überhaupt nötig ist. SV 125 C5 DE │ AT │ CH │... - Page 107 6) Drücken Sie die Taste zieht die Luft aus dem Beutel. Sobald die Luft abgesaugt wurde, erlischt die Kontrollleuchte z. 7) Sie können den Adapter A/B i/o nun vom Beutel entfernen. ■ 104 │ DE │ AT │ CH SV 125 C5...
-
Page 108: Reinigung
Wischen Sie den oberen 0 und den unteren Dichtungsring 5 sowie die ♦ Anpressdichtung q mit einem feuchten Tuch ab. Stellen Sie sicher, dass das Gerät wieder trocken ist, bevor Sie es erneut verwenden. SV 125 C5 DE │ AT │ CH │... -
Page 109: Aufbewahrung
Druck auf den oberen 0 und unteren Dichtungsring 5 sowie auf die Anpressdichtung q ausgeübt. Diese können dadurch in Ihrer Funktion beeinträchtigt werden. ♦ Lagern Sie das Gerät an einem sauberen, trockenen Ort ohne direkte Sonneneinstrahlung. ■ 106 │ DE │ AT │ CH SV 125 C5... -
Page 110: Entsorgung
Die Garantiezeit wird durch die Gewährleistung nicht verlängert. Dies gilt auch für ersetzte und reparierte Teile. Eventuell schon beim Kauf vorhandene Schäden und Mängel müssen sofort nach dem Auspacken gemeldet werden. Nach Ablauf der Garantiezeit anfallende Reparaturen sind kostenpflichtig. SV 125 C5 DE │ AT │ CH │... - Page 111 Auf www.lidl-service.com können Sie diese und viele weitere Handbücher, Produktvideos und Installationssoftware herunterladen. Mit diesem QR-Code gelangen Sie direkt auf die Lidl-Service-Seite (www.lidl-service.com) und können durch die Eingabe der Artikelnummer (IAN) 389891_2201 Ihre Bedienungsanleitung öffnen. ■ 108 │ DE │ AT │ CH SV 125 C5...
-
Page 112: Service
IAN 389891_2201 Importeur Bitte beachten Sie, dass die folgende Anschrift keine Serviceanschrift ist. Kontaktieren Sie zunächst die benannte Servicestelle. KOMPERNASS HANDELS GMBH BURGSTRASSE 21 44867 BOCHUM DEUTSCHLAND www.kompernass.com SV 125 C5 DE │ AT │ CH │ 109 ■... -
Page 113: Ersatzteile Bestellen
Bitte geben Sie immer die Artikelnummer (z. B. IAN 389891_2201), die Sie dem Titelblatt dieser Bedienungsanleitung entnehmen können, bei Ihrer Bestellung mit an. ► Bitte beachten Sie, dass nicht für alle Lieferländer eine Online-Bestellung von Ersatzteilen möglich ist. ■ 110 │ DE │ AT │ CH SV 125 C5... - Page 114 KOMPERNASS HANDELS GMBH BURGSTRASSE 21 44867 BOCHUM GERMANY www.kompernass.com Estado de las informaciones · Versione delle informazioni · Estado das informações · Last Information Update · Stand der Informationen: 01 / 2022 · Ident.-No.: SV125C5-012022-1 IAN 389891_2201...
Need help?
Do you have a question about the SV 125 C5 and is the answer not in the manual?
Questions and answers
Como se usa
To use the Silvercrest SV 125 C5:
1. Prepare the Bag: Place the open end of the bag inside the device so that it is centered within the lower sealing ring. Ensure it does not go beyond the rear stops and stays between the front stops. Otherwise, vacuuming and sealing will not work.
2. Close the Lid: Close the device lid and ensure both corners snap into place. Press down on the marked areas if necessary until the lid is locked.
3. Check Sealing Rings: Ensure the upper and lower sealing rings are not damaged. If a sealing ring is damaged, remove it and insert a replacement.
4. Select Additional Functions: If needed, choose an additional function suitable for your food.
5. Prevent Liquid Intake: Briefly freeze foods with liquid content to prevent them from being sucked into the device. If small amounts of liquid are drawn in, they will collect in the small catch tray.
Following these steps ensures proper operation of the device.
This answer is automatically generated