Table of Contents
Advertisement
Advertisement
Table of Contents

Related Manuals for JDE PROFESSIONAL CAFITESSE QUANTUM TOUCH


Summary of Contents for JDE PROFESSIONAL CAFITESSE QUANTUM TOUCH
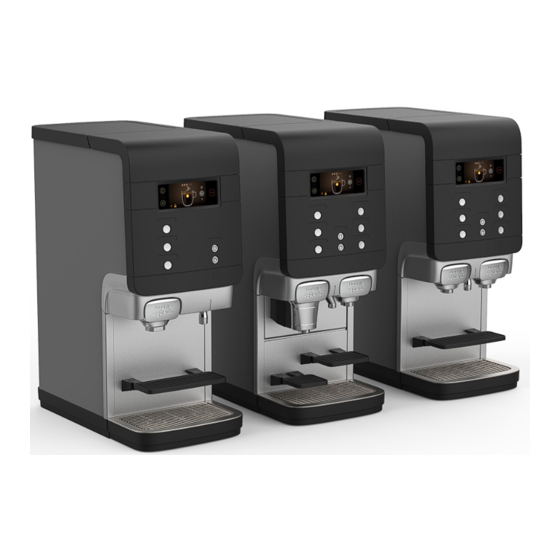
- Page 1 CAFITESSE QUANTUM TOUCH User Manual PN: 10043691_02 Date: 2023-07-14...
- Page 2 "JDE" ). This manual was prepared for the internal use of the customers. Without the prior written consent of JDE, no part of the document shall be used, duplicated, translated, or transmitted by any means or for any commercial purposes.
-
Page 3: Table Of Contents
TABLE OF CONTENTS 1- BEFORE INITIAL START-UP ..............6 2- SAFETY INSTRUCTIONS .................7 2.1 Safety Categories ....................7 2.2 Safety and Warning Symbols ................7 2.2.1 Hazard symbols ......................8 2.2.2 Prohibition symbols ....................8 2.2.3 Mandatory action symbols ..................8 2.3 User Groups ......................9 2.4 Necessary Safety Instructions ................9 2.5 General ........................11 2.6 Refrigeration system information ..............12... - Page 4 8- DAILY OPERATION ................29 8.1 Safety for Operation ....................29 8.2 Place cups and pots correctly ................30 8.3 Drink delivery ......................31 8.4 Drink delivery with preselections ...............32 8.4.1 COLD-preselection (option) ................... 32 8.4.2 VOLUME-preselection .................... 32 8.4.3 STRENGTH-preselection ..................33 8.5 Inserting and removing product packs ..............34 8.6 Replacing an empty product pack ..............35 8.7 Switching on the dispenser .................36 8.8 Switching off the dispenser .................37...
- Page 5 12- OPTIONS .....................66 Software options ..................66 12.1 QUANTUM TOUCH...
-
Page 6: 1- Before Initial Start-Up
JDE for technical support. Keep this manual during the lifespan of the Machine. JDE recommends to keep this manual near the Machine for easy reference. Do not remove any pages from this manual. If the manual is lost, damaged, or unreadable, please download the manual from: https://www.jacobsdouweegbertsprofessional.support/... -
Page 7: 2- Safety Instructions
2- SAFETY INSTRUCTIONS 2.1 Safety Categories JDE uses the danger, warning and caution statements in the document when it is necessary to take special precautions to prevent the possible damage or injuries. The warning statements are classified into the following three categories according to the severity of the hazard and the level of risk specified in the ISO 3864 standard. -
Page 8: Hazard Symbols
2- SAFETY INSTRUCTIONS 2.2.1 Hazard symbols These hazard symbols identify dangerous situations or operations, and give warnings on situations that can cause the damage and injury: Hot surface hazards Electrical hazards High temperature surface Hand crushing hazards hazards 2.2.2 Prohibition symbols These prohibition symbols identify dangerous situations or operations, and give warnings on situations that can cause the damage and injury: No smoking... -
Page 9: User Groups
It is forbidden for personnel not approved to access to the service area, especially handle and operate and perform cleaning tasks and maintain adequate hygiene. Do not make any changes to Coffee Machine and its accessories without JDE’s written consent. - Page 10 2- SAFETY INSTRUCTIONS Children should not play with the machine. Do not use the machine if the mains cable and plug are damaged or the appli- ance has fallen over. Cleaning and user maintenance shall not be made by children without supervision. Warning Do not use the machine unless you have read and understood this manual and manuals for accessories.
-
Page 11: General
2- SAFETY INSTRUCTIONS 2.5 General Warning The liquids delivered by the dispenser are hot! Avoid scalding! Keep hands and other body parts away from the dispenser while drinks are being dispensed and during the rinsing program. Do not place cups, pots, or containers filled with hot liquids on top of the dispenser. There is the risk of being scalded, in case the cups/pots/ containers fall down. -
Page 12: Refrigeration System Information
2- SAFETY INSTRUCTIONS Caution Check and empty the drip tray of the dispenser regularly to avoid the risk of being scalded and to avoid a wet floor (slip danger) when (hot) liquids spill out of the drip tray. Please read the instructions in this operator manual carefully before using, cleaning or moving the dispenser. -
Page 13: Replacement Of Worn Parts
2- SAFETY INSTRUCTIONS 2.7 Replacement of Worn Parts Warning Defects caused by natural wear by liquids, are deemed not to be subject to warranty or guarantee. Please observe that the CAFITESSE QUANTUM TOUCH contains components that are subject to wear by liquids through normal usage even if the machine is maintained under the stipulated service procedures. -
Page 14: Servicing The Dispenser
2- SAFETY INSTRUCTIONS 2.11 Servicing the dispenser Warning If the mains cable of the dispenser is damaged, switch the dispenser off and contact your Cafitesse system supplier to have the mains cable replaced. The servicing, repair and programming of the dispenser may only be carried out by authorised and appropriately trained service technicians assigned by your Cafitesse system supplier. -
Page 15: Food Safety Instructions (Haccp)
2- SAFETY INSTRUCTIONS 2.13 Food safety instructions (HACCP) As the operator of the dispenser, you are responsible for its safe and hygienic operation. Please comply therefore with the following instructions in order to meet the food safety standards. Storage of product packs 1. -
Page 16: 3- Transportation And Storage
3- TRANSPORTATION AND STORAGE 3- TRANSPORTATION AND STORAGE Danger Do not tilt the machine during transportation. Do not stack several machines on top of each other. Do not put any other objects on the machine. Do not expose the machine to any jolts or vibrations while it is being transported. Keep packaging materials away from children. -
Page 17: 4- Technical Specifications
4- TECHNICAL SPECIFICATIONS 4- TECHNICAL SPECIFICATIONS 4.1 Specifications Facts Description 40 Kg (Empty) Weight 50 Kg (Operational with filled water tank) Defaults for coffee: S=100ml, M = 125ml, L = 180ml Defaults for coffee: S=700ml, M = 900ml, L = 1200ml Power supply 230V, 50/60Hz Power consumption... -
Page 18: Dimensions - Q100
4- TECHNICAL SPECIFICATIONS 4.2 Dimensions - Q100 • A = 69 cm • B = 29 cm • C = 26 cm • D = 12 cm • E = 8.6 cm • F = 91 cm • G = 54 cm •... -
Page 19: Dimensions - Q200
4- TECHNICAL SPECIFICATIONS 4.3 Dimensions - Q200 • A = 69 cm • B = 29 cm • C = 11 cm • D = 12 cm • E = 8.6 cm • F = 92 cm • G = 54 cm •... -
Page 20: Dimensions - Q300
4- TECHNICAL SPECIFICATIONS 4.4 Dimensions - Q300 • A = 69 cm • B = 29 cm • C = 26 cm • D = 12 cm • E = 8.6 cm • F = 91 cm • G = 54 cm •... -
Page 21: 5- Part Overview Description
5- PART OVERVIEW DESCRIPTION 5- PART OVERVIEW DESCRIPTION 5.1 Front view & back view USB key port Display Condenser Drink buttons Door lock with key (option) Drink outlets Hot water outlet Power cord Water supply hose Water supply hose for cold water (option) QUANTUM TOUCH... -
Page 22: Interior View
5- PART OVERVIEW DESCRIPTION 5.2 Interior view Dispenser door Standby / Lock dispenser button Cooling compartment Cup tray Drip tray QUANTUM TOUCH... -
Page 23: Button Functions
5- PART OVERVIEW DESCRIPTION 5.3 Button functions USB key port Drink buttons Hot water (cup) Hot water (pot) / Cold water (option) NOTE: Some options are not available in all markets. 5.4 Display overview Icon Area (B) Legend Boiler heating up Warning Messages Cleaning required Icon Area (C) Legend... -
Page 24: 6- Installation And Initial Start-Up
6- INSTALLATION AND INITIAL START-UP 6- INSTALLATION AND INITIAL START-UP Warning Sharp edges! Risk of cuts to hands. Wear cut-resistant gloves when carrying out work in the vicinity of sharp edges. It is essential to read this operating manual thoroughly before installing the machine and starting it up for the first time. -
Page 25: Install The Machine
6- INSTALLATION AND INITIAL START-UP 6.2 Install the Machine Danger Risk of electric shock. Never touch live cables and components with wet hands. Observe the accident prevention regulations regarding electricity. Warning Only maintenance technician can install the machine. The machine can only be installed in suitable places, and supervised by trained personnels. -
Page 26: Dispenser Start-Up
6- INSTALLATION AND INITIAL START-UP 6.3 Dispenser start-up When installing the machine, unobstructed dimensions are required as follow image: 1. Place the dispenser on a flat horizontal surface. 2. Connect the water inlet hose (A to A). 3. Then open the water tap (B) and check for leaks. 4. -
Page 27: Dispenser Storage
6- INSTALLATION AND INITIAL START-UP 6.4 Dispenser storage Take the following preparations when the dispenser will not to be used for a long period (e.g.- holidays): • Remove the product packs and check the expiry date, if they will soon expire they should be disposed of. -
Page 28: 7- Ingredient Pack Handling
7- INGREDIENT PACK HANDLING 7- INGREDIENT PACK HANDLING NOTE: · Always observe basic and personal hygiene, wash hands before handling ingredient packs. · Use only food-grade cleaning agents for the drink dispenser. Clean the dispenser’s exterior parts with a soft, clean, damp cloth. ·... -
Page 29: 8- Daily Operation
8- DAILY OPERATION 8- DAILY OPERATION 8.1 Safety for Operation Danger Never place your hands and fingers directly under the water outlet during operation to avoid burns and severe burns. Warning Do not use the machine unless you have read and understood this manual. Obey the safety instructions while using the machine. -
Page 30: Place Cups And Pots Correctly
8- DAILY OPERATION 8.2 Place cups and pots correctly Caution Place your cup or pot under the outlet below the drink button of your selection. The dispenser has two product outlets: • Left: for coffee and tea • Right: for hot water 1. -
Page 31: Drink Delivery
8- DAILY OPERATION 8.3 Drink delivery Warning The liquids dispensed by the dispenser are hot! Avoid scalding! Keep hands and other body parts away from the dispenser while drinks are being delivered. Never leave children unsupervised near the dispenser. 1. Place your cup on the cup tray. 2. -
Page 32: Drink Delivery With Preselections
8- DAILY OPERATION 8.4 Drink delivery with preselections Your dispenser supports preselection options. The service technician may have activated these preselection options during installation. When the preselection button is pressed, the following preselection options are shown on the display: • COLD-preselection (option) •... -
Page 33: Strength-Preselection
8- DAILY OPERATION 8.4.3 STRENGTH-preselection Warning The liquids dispensed by the dispenser are hot! Avoid scalding! Keep hands and other body parts away from the dispenser. Press the touch screen and choose "STRENGTH" according to demands. NOTE: All preselection can be combined with one another. ... -
Page 34: Inserting And Removing Product Packs
8- DAILY OPERATION 8.5 Inserting and removing product packs If you select a drink and the corresponding product pack is empty, a drink will not be delivered. The WARNING - "please replace the empty pack" will be shown on the display. The delivery of hot or cold water is still possible. -
Page 35: Replacing An Empty Product Pack
8- DAILY OPERATION 8.6 Replacing an empty product pack Caution Before inserting a new product pack, follow the instructions in chapter "Food safety instructions (HACCP)“. Read the instructions on the product pack. Never use a damaged product pack. Do not use a product pack if the "Best before“ date has expired. 1. -
Page 36: Switching On The Dispenser
8- DAILY OPERATION 8.7 Switching on the dispenser Caution Ensure that the dispenser is connected to the water supply. 1. Open the water tap and Insert the power plug. The dispenser starts heating up water and starts cooling down the cooling compartment. -
Page 37: Switching Off The Dispenser
8- DAILY OPERATION 8.8 Switching off the dispenser Warning Do not freeze product packs! 1. Remove the product pack and check the "Expiry” date. Store the product pack c o ff la tt e tt e in a refrigerator until you switch the e e la c o ff c o ff... -
Page 38: Locking/Unlocking The Dispenser
8- DAILY OPERATION 8.9 Locking/unlocking the dispenser 1. When the LOCK icon is displayed on the screen, the drink delivery is blocked. The cooling compartment and the boiler will remain in operation. Press the LOCK icon to unlock the machine. 2. -
Page 39: 9- Cleaning
Only use cleaning materials that are suitable for food environments and that have been recommended by JDE to clean your machine. Unsuitable cleaning materials that have not been approved by JDE may result in increased wear or cause machine defects. -
Page 40: Cleaning Procedures
9- CLEANING 9.2 Cleaning procedures Caution It is mandatory to run the “Cleaning” program at least once a week to guarantee food safety. There are two different cleaning programs: • “Flushing” the drink outlets. • “Cleaning” the cooling compartment and the drink outlets. -
Page 41: Exterior Cleaning
9- CLEANING 9.3 Exterior cleaning 1. Remove the drip tray and cup tray. Empty the drip tray if needed. Clean the drip tray and cup tray with a cloth or brush under warm running water. Either in a dishwasher for 15 minutes in warm water with a cleaning agent, approved by the food industry. -
Page 42: Flushing
9- CLEANING 9.4 Flushing Warning The flushing water is very hot! Avoid scalding! Keep hands and other body parts away from the dispenser during the flushing process. Never let children perform the flushing procedures. 1. Press (A) and then press (B) to enter the MAINTENANCE mode. - Page 43 9- CLEANING 5. Place a flush bin and press "Enter". 6. Press enter to start flushing. 7. Wait until flushing has been completed. NOTE: You can flush the dispenser at any time. QUANTUM TOUCH...
-
Page 44: Cleaning The Doser Openings And Cooler Box - Q100 & Q300
9- CLEANING 9.5 Cleaning the doser openings and cooler box - Q100 & Q300 1. Press (A) and then press (B) to enter the MAINTENANCE mode. 2. Enter PIN to access maintenance mode. 3. Press "Start Cleaning". 4. Remove product packs. QUANTUM TOUCH... - Page 45 9- CLEANING 5. Clean coolbox and press "Enter". 6. Then waiting for the boiler to heat up the water. 7. Place a flush bin and press "Enter". 8. Press enter to start flushing. QUANTUM TOUCH...
- Page 46 9- CLEANING 9. Wait until flushing has been completed. 10. Remove and clean the driptray. 11. After cleaning the driptray, please return it. QUANTUM TOUCH...
-
Page 47: Cleaning The Doser Openings And Cooler Box - Q200
9- CLEANING 9.6 Cleaning the doser openings and cooler box - Q200 1. Press (A) and then press (B) to enter the MAINTENANCE mode. 2. Enter PIN to access maintenance mode. 3. Press "Start Cleaning". 4. Remove product packs. QUANTUM TOUCH... - Page 48 9- CLEANING 5. Clean coolbox and press "Enter". 6. Remove the cup tray. Pull the outlet cover down. 7. Pull the release bar to release the complete mixing console and press "Enter". 8. Rotate the mixing bowl counterclockwise to release it and remove it with the sealing ring.
- Page 49 9- CLEANING 9. Clean the mixing bowl and the sealing ring and press "Enter". • Either in a dishwasher, or soak it for 15 minutes in warm water with a cleaning agent, approved by the food industry. • Rinse the mixing bowl and sealing ring with clear water and dry off with a clean paper cloth.
- Page 50 9- CLEANING 13. Place a flush bin and press "Enter". 14. Press enter to start flushing. 15. Wait until flushing has been completed. 16. The boiler needs to cool down by flushing extra water. Press Enter to start flushing. QUANTUM TOUCH...
- Page 51 9- CLEANING 17. Wait until flushing has been completed. 18. Remove and clean the driptray. 19. After cleaning the driptray, please return it. QUANTUM TOUCH...
-
Page 52: 10- User Programming
10- USER PROGRAMMING 10- USER PROGRAMMING 10.1 Activating the operator mode Remove the cover and insert the supplied operator USB key. This immediately starts the operator mode. The first menu item (UI settings) is displayed. Please note that some menu items might be disabled by the service technician. -
Page 53: Ui Settings
10- USER PROGRAMMING 10.3 UI settings In the UI Settings menu you can adjust Screen Intensity and set the screen display. You can set the Unit format of the screen display. QUANTUM TOUCH... -
Page 54: Date / Time
10- USER PROGRAMMING 10.4 Date / time In the Date / Time menu you can adjust the date and time. 10.5 Language In the language menu you can select the languages from which the user can choose, including the order of appearance as well as the default language. QUANTUM TOUCH... -
Page 55: Eco Settings
10- USER PROGRAMMING 10.6 Eco settings In the ECO Settings menu you can enable or disable the ECO mode, set the automatic wakeup (allows a user to interupt ECO mode when necessary to make a drink) and set ECO mode hours for each day of the week. -
Page 56: Summer / Winter Time
10- USER PROGRAMMING 10.7 Summer / winter time In the Summer / Winter Time menu you can set automatic summer/winter time adjustment. 10.8 Happy hour In the Happy Hour Setting menu you can set up to four free vending times during all days when drinks can be dispensed without payment, or enable and disable Happy Hour if preferred. -
Page 57: Payment
10- USER PROGRAMMING 10.9 Payment In the Payment menu you can select the payment mode, select the currency and set drink prices. QUANTUM TOUCH... -
Page 58: Non-Resettable Counters
10- USER PROGRAMMING 10.10 Non-resettable counters In the Non-resettable Counters menu you can read the drinks dispensed by selecting each drink separately. QUANTUM TOUCH... -
Page 59: Cleaning Schedule
10- USER PROGRAMMING 10.11 Cleaning schedule In the Cleaning Day menu you can adjust the day(s) that the dispenser will automatically request to be cleaned by selecting Yes for automatic request on that day, or No to prevent cleaning request on that day. -
Page 60: Resettable Counters
10- USER PROGRAMMING 10.12 Resettable counters In the Resettable Counters menu you can view the drinks dispensed since the last reset by selecting each drink separately, or reset all drink counters at one time by pressing All. QUANTUM TOUCH... -
Page 61: Water System
10- USER PROGRAMMING 10.13 Water system In the Water System menu you can enable or disable the warning and check remaining volume for water filter. 10.14 System Info In the System Info menu you can get the information "Machine ID", "QntHmi", "Language File", "Recipe File", "QntSat Subnode"... -
Page 62: Contact Info
10- USER PROGRAMMING 10.15 Contact info In the Contact Info menu you can set the operator and service phone numbers. 10.16 Maintenance Pin In the Maintenance Pin menu you can set the pin. QUANTUM TOUCH... -
Page 63: Global Drink Settings
10- USER PROGRAMMING 10.17 Global drink settings In the Global Drinks Settings menu by pulling the slider left or right you can adjust the Global Strength and Global Volume. You can view the new strength percentage (XX%). QUANTUM TOUCH... -
Page 64: 11- Display Message And Trouble Shooting
11- DISPLAY MESSAGE AND TROUBLE SHOOTING 11- DISPLAY MESSAGE AND TROUBLE SHOOTING Symbol Display Message Cause Action Empty ingredient Refill right pack pack (right hand Replace the right ingredient pack side) Empty ingredient Refill left pack pack (left hand Replace the left ingredient pack side) Replace the empty product packs. - Page 65 12- OPTIONS 12- OPTIONS The features and options listed in this section may not apply in each country. Please consult your Cafitesse system supplier for more information. Software options 12.1 On customer demand the service technician can enable or disable specific functions of your dispenser.
- Page 66 Welbilt (Hangzhou) Appliance Technology Co., Ltd. No. 800 Binkang Road, Binjiang District, Hangzhou, Zhejiang, China www.creminternational.com...
Need help?
Do you have a question about the PROFESSIONAL CAFITESSE QUANTUM TOUCH and is the answer not in the manual?
Questions and answers