Table of Contents
Advertisement
Quick Links
Advertisement
Table of Contents

Subscribe to Our Youtube Channel
Related Manuals for JDE EXCELLENCE COMPACT BLACK


Summary of Contents for JDE EXCELLENCE COMPACT BLACK
- Page 1 EXCELLENCE COMPACT BLACK User Manual PN: 6165350_01 Date: 2017-03-07...
-
Page 3: Table Of Contents
Content 1- Safety instructions ............................5 2- Technical specifications ..........................7 2.1 Specifications ..................................... 7 2.2 Dimensions ......................................8 3- Part overview description ...........................9 3.1 Front view ......................................9 3.2 Interior view ....................................... 9 3.3 Button functions .....................................10 3.4 Display overview ....................................10 4- Dispenser start up &... - Page 4 Content 8.71 ENABLED/DISABLED ECO mode ............................26 8.72 Setting the ECO start and stop times ...........................26 8.73 Setting the ECO boiler temperature .............................27 8.8 TELEPHONE# ....................................27 8.81 ENABLED/DISABLED telephone numbers ..........................27 8.82 Set telephone numbers ................................27 8.9 Language ......................................28 9- Troubleshooting ............................29 User manual...
-
Page 5: 1- Safety Instructions
1- Safety instructions 1.1 Introduction The following general safety precautions apply to the operation and maintenance of the dispenser and must always be observed. Non-compliance with these instructions or any other safety precautions mentioned in this manual could impair the dispenser’s safety features and lead to potentially dangerous situations and dispenser damage for which the manufacturer cannot be held responsible. - Page 6 1- Safety instruction experience of the appliance; in particular as far as safety and hygiene are concerned. • This dispenser is not suitable for installation where a pressure washer may be used. • This dispenser must not be cleaned by a pressure washer. •...
-
Page 7: 2- Technical Specifications
2- Technical specifications 2.1 Specifications Facts Description 24 Kg (Empty) - 24.1Kg (Operational, non-water tank version) Weight 25.6Kg (Operational with filled water tank) Volume: Factory setting = 125ml adjustable ±10% Factory Setting = 900ml adjustable ±10% Dispensing time: 110 seconds ±10% Max height: 160ml Interval between pots 160 seconds (230 V) -
Page 8: Dimensions
2- Technical specifications 2.2 Dimensions Position Description Millimeters Dispenser width Dispenser depth Dispenser depth with door open Dispenser height Dispenser height with door open Distance from top of dispenser to front of open door Clearance with drip tray in place Clearance with drip tray removed User manual... -
Page 9: 3- Part Overview Description
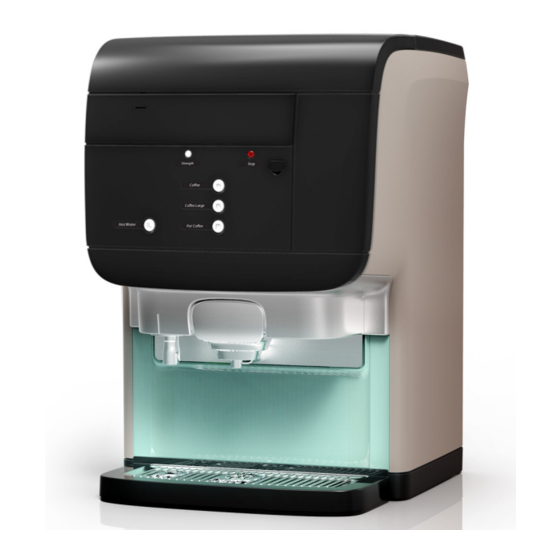
3- Part overview description 3.1 Front view Water tank (Option) Air ventilation Display Strength Stop Removable ventilation Drink buttons Co ee cover Co ee large Hot water Pot co ee Air ventilation Hot water outlet Drink outlets Cup tray Drip tray Main power socket Water connection 3/4”... -
Page 10: Button Functions
3- Part overview description Note: 3.3 Button functions Some options are not available in all markets. Strength selection Stop/Operator mode: Back USB key port (for Operator mode) Strength Stop Co ee Standard Coffee/Operator mode: Up Co ee large Large Coffee/Operator mode: Down Hot water Pot co ee Pot Coffee/Operator mode: Enter... -
Page 11: 4- Dispenser Start Up & Storage
4- Dispenser start up & storage 4.1 Dispenser start-up • Place the dispenser on a flat horizontal surface designed to support the operational weight of the dispenser. • Connect the water inlet hose (A to A), and then open the water tap/filter (B to B). Check for leaks. •... -
Page 12: 5- Product Pack Handling
5- Product pack handling Note: • Always observe basic and • Wash hands first, shake pack personal hygiene, wash at least 10 times, remove hands before handling plastic film. product packs. • Use only food-grade cleaning agents for the drink dispenser. Clean the dispenser’s exterior parts •... -
Page 13: 6- Daily Operation
6- Daily operation 6.1 Dispensing a cup of coffee or hot water • Place a cup on the drip tray under the middle outlet for a coffee (A) or under the left outlet for hot water (B). • Press the coffee button or hot water button for a cup of drink. Warning: - The drinks dispensed are hot! Avoid scalding! - Keep hands and other body parts away from the... -
Page 14: Drink Delivery With Pre-Selections
6- Daily operation 6.3 Drink delivery with pre-selections Your dispenser supports pre-selection options. The service technician may activate pre-selection options during installation. When the pre-selection button is pressed, the following pre-selections can be activated. • Strength (mild, regular or strong drinks) Strength pre-selection •... -
Page 15: Filling Water Tank
6- Daily operation 6.5 Filling water tank Only for dispensers fitted with water tank option. The display shows an icon when the internal water tank is empty (A). In this state the dispenser will also be blocked from dispensing drinks (B), it will be unlocked once the tank is refilled. -
Page 16: 7- Cleaning
7- Cleaning 7.1 Navigation buttons In operator and cleaning mode, 4 UI buttons are used to enter the cleaning mode and navigate the menus. Stop = BACK Drink button top right = UP Strength Stop Drink button middle right = DOWN Co ee Co ee large Drink button bottom right = ENTER... -
Page 17: Flushing
7- Cleaning 7.4 Flushing FLUSHING A+B: Strength Stop Strength Stop Co ee Co ee Co ee large Co ee large Hot water Pot co ee Hot water Pot co ee Fig.1 Fig.2 Note: You can flush the dispenser at any time by using the procedure described below. -
Page 18: Cleaning The Doser Opening And Cooler Box
7- Cleaning CLEANING Strength Stop A+B: Co ee Strength Stop Co ee large Co ee Co ee large Hot water Pot co ee Hot water Pot co ee Fig.1 Fig.2 7.5 Cleaning the doser opening and cooler box 1. Press and hold STOP (A) and ENTER (B) buttons simultaneously for 2-3 seconds to enter the cleaning mode (See Fig.1). -
Page 19: Removing And Cleaning The Mixing Tray
7- Cleaning 7.6 Removing and cleaning the mixing tray 1. The display will show: REMOVE AND CLEAN MIXING TRAY 2. Follow the steps below: A. Open the water treatment panel. There will be an audible beep. B. Pull the mixing tray straight out. There will be another audible beep. -
Page 20: Replacing Product Pack And Flushing The Outlet
7- Cleaning 7.7 Replacing product pack and flushing the outlet 1. When the pack is removed, the display will show: PLACE BACK PRODUCT PACK Reinstall the product pack if it has not passed the expiry date. If expired, replace with a new product pack (See Fig. 1). 2. -
Page 21: Cleaning The Foam Air Filter
7- Cleaning 7.8 Cleaning the foam air filter 1. Remove the fixing screw and open the removable ventilation cover to access the foam air filter. (See Fig.1) 2. Rinse the air filter and cover with warm water to remove any accumulated dust. -
Page 22: Cleaning The Water Tank
7- Cleaning 7.9 Cleaning the water tank 1. Remove the water tank by lifting slightly, then pulling straight out. (See Fig.1) 2. Wash the water tank with clean water, 20-40°C . A food-safe cleaning agent may be used as needed. (See Fig.2) 3. -
Page 23: 8- User Programming
8- USER PROGRAMMING 8.1 Activating the operator mode Remove the cover and insert the supplied operator USB key. This immediately starts the operator mode. The first menu item (COUNTERS) is displayed. The following menus are available: • COUNTERS - read counters •... -
Page 24: Strength
8- USER PROGRAMMING 8.4 STRENGTH In the STRENGTH menu, you can change the drink strength for all available drinks at once in the range of +10% to -10%. 1. Select the STRENGTH menu by using and press to access it. The following message appears on the display: STRENGTH: + X % 2. -
Page 25: Setting "Clean" Days
8- USER PROGRAMMING Note: You can always set more cleaning and/or flushing days than the minimum required number of days. 8.62 Setting “Clean” days 1. Use to select the CLEAN submenu. The icon indicates the active day(s) for cleaning: SUN MON TUE WED THU FRI SAT CLEAN 2. -
Page 26: Eco Settings
8- USER PROGRAMMING that day. Press to confirm the selections. The flushing icon will appear under the activated flushing day(s). Note: Several days for flushing can be set in sequence. 5. Press STOP to go back one level within the CLEANING DAYS menu. 8.7 ECO SETTINGS You can reduce power consumption by using the menu ECO SETTING. -
Page 27: Setting The Eco Boiler Temperature
8- USER PROGRAMMING 5. Use to set the desired time (hours). 6. Confirm with . The option minutes setting flashes and is active. 7. Use to set the desired time (minutes). 8. Confirm with . The new ECO time is shown on the display. 8.73 Setting the ECO boiler temperature 1. -
Page 28: Language
8- USER PROGRAMMING 2. Use to change the first digit. 3. Confirm with . When confirmed the second digit starts flashing. 4. Repeat steps 2 and 3 until all 10 digits are set. The new telephone number will be shown on the display. 8.9 Language 1. -
Page 29: 9- Troubleshooting
9- Troubleshooting Symbol Cause Action • Replace the empty product pack. The product pack is: • Check whether the product pack is inserted 1. Empty correctly. • Insert a product pack. 2. Incorrectly positioned • Call the operator when the number is shown 3. - Page 30 9- Troubleshooting Symbol Cause Action • Check if the water supply line to the dispenser is blocked / pinched and confirm that the water tap is E17/ E18 opened completely. Water system error • Press and hold the LOCK/CLEAR button for 5 seconds to restart the dispenser.
- Page 32 Produced by Crem International (Shanghai) Co., Ltd. Address: Building 5, No 521-551 KangYi Road, Pudong New Area, Shanghai, China www.creminternational.com...
Need help?
Do you have a question about the EXCELLENCE COMPACT BLACK and is the answer not in the manual?
Questions and answers