Table of Contents
Advertisement
Quick Links
Advertisement
Table of Contents

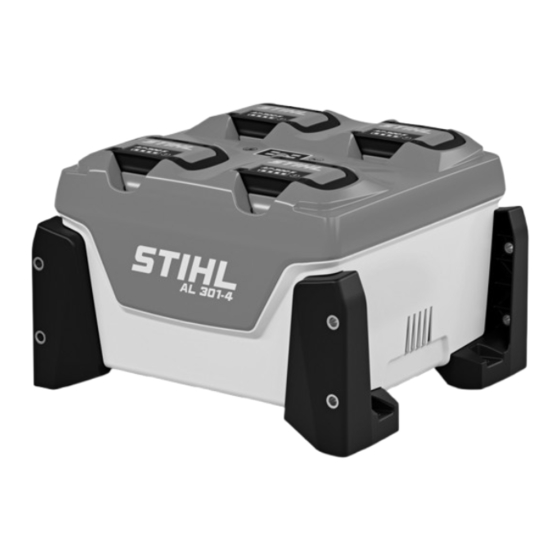
Summary of Contents for Stihl AL 301-4
- Page 1 STIHL AL 301-4 Instruction Manual...
-
Page 3: Table Of Contents
3.2 Icons ..........3 13.1 STIHL AL 301-4 Charger......13 13.2 Extension Cords . -
Page 4: Introduction
STIHL expressly commit themselves to a sustainable and responsible handling of natural resources. This user manual is intended to help you use your STIHL product safely and in an environmentally friendly manner over a long service life. WARNING... -
Page 5: Overview
English 3 Overview 4 Locking lever 3 Overview The locking lever holds the battery in the battery compartment. 5 Holders Charger The holders are used to mount the charger at the wall, on the table, on a shelf or in a drawer. 6 Connecting cable The connecting cable connects the charger to the mains plug. -
Page 6: Intended Use
Intended Use – The user is able to recognize and assess the risks The STIHL AL 301-4 charger can recharge up to four STIHL involved in using the charger. AP and AR batteries. – The user is an adult, or is being trained in an... -
Page 7: Safe Condition
► Replace worn or damaged labels. ► Do not use and store the charger outside of the ► If you have any doubts, be sure to consult a STIHL specified temperature limits, @ 13.3. dealer. ■ People can trip over the connecting cable. People may be injured and the charger may be damaged. -
Page 8: Connecting To The Power Supply
4 Safety Precautions WARNING ► Never stack more than three chargers. ► Do not stack chargers while a STIHL AR ■ Overvoltage can occur in the charger if the line voltage or battery is being charged. frequency are incorrect during charging. The charger may be damaged. -
Page 9: Transport
English 4 Safety Precautions ■ The extension cable warms up in operation. If that heat ■ The connecting cable must not be used for carrying the cannot escape, it may cause a fire. charger. The connecting cable and the charger may be damaged. -
Page 10: Cleaning, Maintenance And Repair
► Do not attempt to service or repair the charger. ■ If the connecting cable is faulty or damaged: ► Have the connecting cable replaced by a STIHL dealer. 5 Preparing Charger for Use ► Align the charger so that the connecting cable (1) is on the left. -
Page 11: Charging The Battery
LEDs (1) on the battery stop emitting light: The the charging time indicated. The charging time is indicated battery (2) is fully charged and can be taken out of the at www.stihl.com/charging-times. charger (3). ► If the charger (3) is no longer required. Disconnect the The charging process starts automatically when the mains mains plug (6) from the wall outlet (7). -
Page 12: Leds On Charger
English 7 Removing and Fitting the Battery Removing the Battery ► Depress the pushbutton (1). The LEDs (2) at the charger and the LEDs (3) at the batteries are activated and indicate the status of the charger and the charging status of the batteries. LEDs on charger The LED indicates the operating status of the charger or any malfunctions. -
Page 13: Cleaning
The charger cannot be serviced or repaired by the user. ► If your charger has a malfunction or is damaged or requires servicing: Contact your STIHL dealer. ► If the connecting cable has a malfunction or is damaged: Do not use the charger and have the connecting cable replaced by a STIHL dealer. -
Page 14: Troubleshooting
STIHL dealer. red. The LED for There is a malfunction in ► Do not use the charger and contact the respective the charger. your STIHL dealer for assistance. battery compartment does not emit light or flash when you insert the battery. -
Page 15: Specifications
– Cord length 10 m up to 30 m: AWG 12 / 3.5 mm² parts and original STIHL accessories. 13.3 Temperature limits STIHL recommends the use of original STIHL spare parts and accessories. WARNING Despite ongoing market observation, STIHL is unable to judge the reliability, safety and suitability of other The battery is not protected against all ambient conditions. -
Page 16: Disposal
English 15 Disposal 15 Disposal 15.1 Disposing of the charger Contact the local authorities or your STIHL dealer for information on disposal. Improper disposal can be harmful to health and pollute the environment. ► Take STIHL products including packaging to a suitable collection point for recycling in accordance with local regulations. - Page 17 English 15 Disposal 0458-829-0121-A...
- Page 18 English 15 Disposal 0458-829-0121-A...
- Page 20 0458-829-0121-A englisch www.stihl.com *04588290121A* 0458-829-0121-A...


Need help?
Do you have a question about the AL 301-4 and is the answer not in the manual?
Questions and answers