
Related Manuals for S&P HTD-130 MR


Summary of Contents for S&P HTD-130 MR
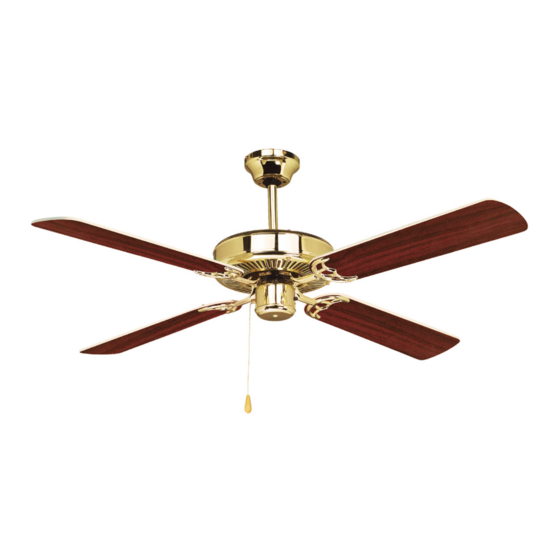
- Page 1 Потолочные вентиляторы Soler & Palau HTL 130 4 130 1 HTD 130 HTD 130 B: Инструкция пользователя...
- Page 2 HTD-130 MR HTD-130 B HTL-130 4F HTL-130 1G MANUAL DE INSTALACIÓN E INSTRUCCIONES DE USO INSTALLATION MANUAL AND OpERATING INSTRUCTIONS NOTICE D’INSTALLATION ET D’UTILISATION MANUAL DE INSTALAÇÃO E INSTRUÇÕES DE USO MANUALE D’INSTALLAZIONE E ISTRUZIONI MONTAGEANLEITUNG UND GEBRAUCHSANWEISUNG ИНСТРУКЦИЯ ПО МОНТАЖУ И ЭКСПЛУАТАЦИИ...
- Page 3 Fig 1...
- Page 4 Fig 2 Fig 4 Fig 3...
- Page 5 Fig 5 Fig 6 Fig 7 Fig 8...
- Page 6 Fig 9 Fig 10 MODELO HTS-130 1G...
- Page 7 Fig 11 230V AC/50Hz MARRON AZUL ROJO (KIT DE LAMPARA OPCIONAL) A - AMARILLO-VERDE MOTOR B- AMARILLO-VERDE CARCASA C- AMARILLO-VERDE SOPORTE TUBO (OPCIONAL INSTALACION CON SOPORTE) BROWN BLUE RED (LAMP KIT OPTIONAL) A - GREEN-YELLOW MOTOR B- GREEN-YELLOW HOUSING C- GREEN-YELLOW TUB SUPORT (SUPPORT INSTA- LLATION OPTIONAL) MARRON BLEU...
-
Page 8: Normas De Seguridad General
ESpAÑOL Aviso: Lea todas las instrucciones detenidamente para asegurar una operación e instalación segura del equipo. Ni el fabricante ni el agente/distribuidor ni el comercio donde se compró este producto tendrán responsabilidad alguna por daños o perdidas ocasionadas por la compra y/o instalación de este producto. -
Page 9: Instrucciones De Desembalaje
INSTRUCCIONES DE DESEMBALAJE Antes de montar el ventilador de techo, saque las piezas de dentro del embalaje y compruebe que todos los componentes de la lista, estén incluidos. (Fig.1) El número de componentes se refleja en la siguiente tabla (según el modelo adquirido). MODELO T LAMPARA HTL-130 1G 1... -
Page 10: Nota Importante
Fijación en un techo de hormigón Para asegurar una fijación adecuada, practique cuatro agujeros en el techo de hormigón del diámetro del taco (S). Inserte los tacos suministrados y fije el soporte de chapa (A) mediante los cuatro tornillos (p) y arandelas (O) suministrados para este propósito. (Fig.2) Fijación en un techo de poca resistencia Practique un boquete en el techo falso, suficiente para introducir por él un travesaño rígido de metal o madera lo más largo posible, y nunca menor de 25 cm. -
Page 11: Instrucciones De Operación
4.- Mediante los cuatro tornillos (Q) y las arandelas de seguridad (R), suministradas aparte, ensamble todo el conjunto ventilador. Asegúrese que los tornillos están bien apretados. (Fig.1) Sistema de fijación con soporte (Figura 5B) 1.- Pase el tubo de soporte (C) por el interior de la cubierta (B), teniendo en cuenta de que la patilla de la cubierta debe encajar con la ranura del tubo de soporte. -
Page 12: Mantenimiento
Si desea que el aire circule en la dirección opuesta, apagar el ventilador, esperar hasta que su rotación haya terminado y accione el interruptor deslizante a la posición opuesta. Las ‘palas de la hélice girarán en la dirección opuesta y el flujo de aire será al revés. 3.- Kit de lamparas. -
Page 13: Solucionar Problemas
SOLUCIONAR PROBLEMAS NOTA IMPORTANTE: Antes de manipular en ventilador, asegúrese de que està desconectado de la red eléctrica. Solución sugerida Problema Causa probable 1.- Asegurar que el interruptor este Ventilador no arranca 1.-Interruptor de direccion en posición completamente a un lado neutral 2.-Comprobar fusibles y cortacircui- 2.-Fusible fundido o cortacircuitos... - Page 14 KIT DE BALANCEO El equipo de balanceo debe usarse unicamente si persiste una cantidad inaceptable de tambaleo de palas despues de completar todos los pasos indicados en la seccion ( Fijacion de la palas de la hélice) en su Manual del Usuario. 1.- Conecte el ventilador y coloque el interruptor de velocidad en la posicion donde se produzca un mayor tambaleo.
-
Page 15: General Safety Rules
ENGLISH Caution : For safe operation and installation, read all instructions carefully. Neither the manufacture nor the manufacturer’s agent/distributor nor the retailer from whom this product was purchased shall be in any way responsible for any loss or damage of whatever nature caused by the installation of this product. -
Page 16: Unpacking Instructions
UNpACKING INSTRUCTIONS Before assembling the ceiling fan, remove all parts from the shipping carton and check them against the parts listed below (fig. 1 ) : MODEL LAMP HTL-130 1G 1 10 10 15 4 KIT 1 HTL-130 4F 1 10 10 15 15 4 KIT 4... - Page 17 Fitting to a false ceiling Make a hole in the false ceiling that is large enough to allow the introduction of a rigid, wooden or metal cross beam. This should be as long as possible and under no circumstances less than 25cm. in length, to allow the best distribution of the weight of the fan.
- Page 18 screws on both sides of the cotter pin (Fig. 8) 3. First fix the support plate(A) to the ceiling using the screws (P), and the wall plugs (S) provided then attach the fan to the hook on the back plate using the hole in the canopy (B) In this way the electrical connections can be made between the mains supply cables and the fan connectors (Fig.
-
Page 19: Maintenance
MODEL LAMP KIT MAXIMUM POWER HTL-130 4F MOVEABLE 4x60W HTL-130 1G 2x60W Note: Light bulbs are not supplied. ASSEMBLY OF THE LAMp KITS IMPORTANT: Remember to disconnect the fan from the mains supply (mains fuse or contact breaker) before working on the fan. Connect the lamp kit cables using the lower fan electrical connectors. -
Page 20: Problem Solving
pROBLEM SOLVING Problems Probable cause Suggested solution Fan does not start Sliding direction switch in Ensure that the switch is set completely to one side. neutral position. Check fuses or circuit Blown fuse or circuit breaker. breaker. Loose connections to the Tighten connections mains supply or the switch housing. -
Page 21: Balancing Kit
If adjustments do not correct the fan vibration or shaking, use the fan blade balancing kit supplied with your fan. (See instructions in Balancing Kit). The balancing kit should only be used if the fan suffers unacceptable vibration or shaking after having taken the corrective measures outlined in the section “Fitting the fan blades”... -
Page 22: Normes Generales De Securite
FRANÇAIS Avertissement: Lire toute la notice avec attention afin de réaliser une installation sure et bien utiliser l’appareil. Ni le fabricant, ni le distributeur, ni le point de vente où a été acheté ce produit, ne sera tenu responsable des dommages occasionnés par une mauvaise installation. NORMES GENERALES DE SECURITE Pour réaliser une installation correcte et sûre du ventilateur de plafond, lire attentivement les normes de sécurité... -
Page 23: Contenu De L'emballage
CONTENU DE L’EMBALLAGE Avant de monter le ventilateur de plafond, sortir toutes les pièces de l’emballage et vérifier que tous les composants de la liste suivante sont bien présents. (Fig.1) Le nombre de composants est repris dans la table suivante (suivant modèle). MODELE T LAMPE HTL-130 1G 1... -
Page 24: Montage Du Ventilateur
Fixation à un plafond en ciment Pour assurer une fixation correcte, percer le plafond au diamètre des chevilles (S) fournies avec l’appareil. Insérer les 4 chevilles et fixer le support en tôle (A) avec les 4 vis (P) et rondelles (O) fournies. -
Page 25: Instruction D'utilisation
Système de fixation avec tige (Figure 5B) 1. Passer la tige (C) à l’intérieur du cache (B), en faisant entrer la languette du cache dans la rainure de la tige (Fig.8) 2. Passer les câbles du moteur à l’intérieur de la tige (C). Assembler le moteur avec la tige et placer la goupille (E) puis la goupille de sécurité... -
Page 26: Entretien
KIT LUMIERE MODELE KIT LUMIERE PUISSANCE MAXIMALE HTL-130 4F ORIENTABLES 4x60W HTL-130 1G 2x60W NOTA: Les ampoules ne sont pas fournies avec les produits. MONTAGE DES KITS LUMIERES NOTE IMPORTANTE: Avant d’installer le kit lumière vérifier que la ligne d’alimentation électrique est déconnectée du réseau. - Page 27 SOLUTIONNER DES pROBLEMES SIMpLES Problème Cause du problème Solution suggérée Ventilateur ne démarre Fusible fondus ou Changer le fusible ou disjoncteur déconnecté. enclencher le disjoncteur. Mauvaise connexion au Vérifier le raccordement bornier de raccordement. électrique au bornier. Interrupteur du sens Vérifier la position de de rotation en position l’interrupteur du sens de...
-
Page 28: Normas Gerais De Segurança
pORTUGUÊS AVISO: Leia atentamente todas as instruções para assegurar um funcionamento e uma instalação segura do equipamento. Nem o fabricante nem o distribuidor nem o comerciante têm responsabilidade por algum dano ou perdas ocasionadas pela instalação do aparelho. NORMAS GERAIS DE SEGURANÇA Para uma instalação segura do seu ventilador de tecto, leia as seguintes normas de segurança antes de iniciar a instalação. -
Page 29: Instruções De Instalação
INSTRUÇÕES pARA DESEMBALAR Antes de montar o ventilador de tecto, retire as peças de dentro da embalagem e comprove que todos os componentes da lista estão incluídos (fig.1). O numero de componentes reflecte-se na seguinte tabela (conforme o modelo adquirido). MODELO T LAMPADA HTL-130 1G 1... - Page 30 FIXAÇÃO NUM TECTO DE BETÃO Para assegurar uma fixação adequada, aplique quatro furos no tecto de betão com o diâmetro das buchas (S). Aplique as buchas fornecidas e fixe o suporte de chapa (A) mediante os quatro parafusos (p) e as anilhas (O) fornecidas para este propósito (fig.2). FIXAÇÃO NUM TECTO DE pOUCA RESISTÊNCIA Abra uma brecha no tecto falso, suficiente, para introduzir por ela uma trave rígida de metal ou madeira o mais largo possível e nunca inferior a 25 cm de comprimento, afim de assegurar uma...
-
Page 31: Instruções De Funcionamento
Sistema de fixação com suporte (Fig.5 B) 1- Passe o tubo de suporte (C) pelo interior da cobertura (B), tendo em conta que a patilha da cobertura deve encaixar com a ranhura do tubo de suporte. (fig.8) 2- Passe os cabos do motor pelo interior do tubo de suporte (C). Monte os conjuntos e introduza a cavilha (E). - Page 32 ter terminado e accione o interruptor deslizante para a posição oposta. As pás da hélice girarão na direcção oposta e o fluxo de ar será ao contrario. “Kit” de lâmpadas 1....ON 2....OFF “KITS” DE LÂMpADAS MODELO KIT DE LAMPADA POTÊNCIA MÁXIMA HTL-130 4F ORIENTÁVEIS 4x60W...
- Page 33 SOLUCIONAR pROBLEMAS PROBLEMA CAUSA DO PROBLEMA SOLUÇÃO SUGERIDA Ventilador não arranca Interruptor de direcção em Assegurar que o interruptor posição neutra. está completamente a um Fusíveis fundidos ou lado. interruptor geral desligado. Verificar fusíveis. Ligações soltas na régua Verificar ligações. de ligação.
- Page 34 ITALIANO Avviso : Leggere tutte le istruzioni attentamente per eseguire correttamente e con sicurezza l’installazione del prodotto. Sia il Costruttore, sia l’Agente e o Distributore e o Rivenditore non sono responsabili per eventuali danni causati dall’installazione di questo prodotto. NORME GENERALI pER LA SICUREZZA Per eseguire una installazione sicura del suo ventilatore da soffitto, legga le seguenti norme di sicurezza generali prima di iniziare l’installazione.
-
Page 35: Istruzioni Per L'installazione
ISTRUZIONE DI DISIMBALLO Prima di procedere al montaggio del ventilatore da soffitto , togliere tutti i componenti dall’imballo e verificare che tutti i pezzi corrispondano alla lista inclusa . ( Fig. 1 ) Il numero dei pezzi è indicato nella tabella seguente ( secondo il modello acquistato ) MODELLO A T LAMPADA HTL-130 1G 1... - Page 36 Fissaggio a soffitto in cemento Praticare quattro fori nel soffitto del diametro del tassello ( S ) . Inserire i tasselli forniti e fissare il supporto in lamiera ( A) con le quattro viti ( P ) e le rondelle ( O ) ( Fig. 2 ) Fissaggio a un soffitto di scarsa resistenza.
-
Page 37: Istruzioni Di Funzionamento
Sistema di fissaggio con asta (Fig. 5 B) 1-Infilare l’asta ( C ) nella coppa di copertura (B), facendo attenzione a far coincidere la sagoma della coppa con la scanalatura dell’asta. ( Fig. 8) 2-Passare i cavi del motore all’interno dell’asta ( C ). Fissare la coppa e l’asta con la spina di fissaggio ( D ) e avvitare i due bulloni ai lati della spina di fissaggio. -
Page 38: Manutenzione
3- KIT LAMpADA 1) Tirare ON ( Acceso) 2) Tirare di nuovo OFF (Spento) KIT LAMpADE MODELLO KIT DELLA LAMPADA POTENZA MASSIMA HTL-130 4F ORIENTAZIONE 4x60W HTL-130 1G 2x60W NOTA : Le lampadine sono escluse dalla fornitura. MONTAGGIO DEL KIT LAMpADA NOTA IMPORTANTE : Prima di iniziare i collegamenti , togliere il fusibile o scollegare l’interruttore generale della rete elettrica. -
Page 39: Risoluzione Dei Problemi
RISOLUZIONE DEI pROBLEMI NOTA IMpORTANTE : Prima di procedere a qualsiasi intervento assicurarsi che il ventilatore sia scollegato dalla rete elettrica. Problema Causa del problema Soluzione suggerita L’interruttore di direzione è Il ventilatore non parte Verificare che l’interruttore di in posizione neutra. Ventilatore rumoroso direzione sia attivato. - Page 40 KIT DI BILANCIATURA Il sistema di bilanciatura deve essere impiegato solo se persiste un difetto inaccettabile di oscillazione della ventola dopo aver eseguito tutte le verifiche e i rimedi indicati nel Manuale d’ Istruzioni e Installazione. 1. Avviare il ventilatore alla velocità che produce la maggiore oscillazione. 2.
-
Page 41: Allgemeine Sicherheitsvorschriften
DEUTCH Hinweis: Lesen Sie die folgenden Anweisungen aufmerksam durch, um eine sichere Montage und einen sicheren Betrieb des Geräts zu gewährleisten. Weder der Hersteller noch der Händler/Vertreiber oder Einzelhändler haften für die durch die Montage dieses produkts entstandenen Schäden und Verluste. ALLGEMEINE SICHERHEITSVORSCHRIFTEN Bitte lesen Sie folgende Sicherheitsvorschriften, um eine sichere Montage Ihres Deckenventilators zu gewährleisten. -
Page 42: Auspacken Des Geräts
AUSpACKEN DES GERÄTS Vor der Montage entnehmen Sie die Bauteile des Deckenventilators aus der Verpackung und überprüfen Sie die Vollständigkeit anhand der folgenden Packliste: (Abb..1) Die Anzahl der Bauteile können Sie der folgenden Tabelle entnehmen (je nach erworbenem Modell). MODELL T LAMPEN HTL-130 1G 1 10 10... - Page 43 Befestigung an einer Decke mit geringer Tragfähigkeit. Schneiden Sie eine Öffnung in die abgehängte Decke, ausreichend zum Einbringen einer möglichst langen Holz- oder Metallleiste (mindestens jedoch 25 cm lang), um das Ventilatorgewicht besser zu verteilen. Versehen Sie die Leiste im mittleren Bereich mit einer Nut, ohne jedoch deren mechanische Festigkeit zu gefährden, und richten Sie die Leiste so aus, dass diese Nut über der Deckenöffnung zu liegen kommt.
- Page 44 2.- Ziehen Sie die Motorkabel in das Halterohr ein (C). Fügen Sie beide Baugruppen zusammen und stecken Sie den Bolzen durch (E). Sichern Sie den Bolzen anschließend mit dem Sicherungsstift (D) und ziehen Sie dann die Schrauben auf beiden Seiten des Bolzens an. (Abb.8) 3.- Hängen Sie die montierte Baugruppe mit dem Loch des Deckels (B) in den Haken des zuvor an der Decke angebrachten Halteblechs (A) ein.
-
Page 45: Wartung
3.- Lampensatz. 1) Ziehen: ....... EIN 2) Erneut ziehen: ..AUS LAMpENSÄTZE MODELL LAMPENSATZ MAX. LEUCHTKRAFT HTL-130 4F VERSTELLBAR 4x60W HTL-130 1G 2x60W HINWEIS: Die Glühbirnen sind nicht im Lieferumfang enthalten. ZUSAMMENBAU DER LAMpENSÄTZE WICHTIGER HINWEIS: Bitte achten Sie darauf, vorher die Stromversorgung über die Sicherungen oder den Hauptschalter zu unterbrechen. -
Page 46: Fehlerbehebung
FEHLERBEHEBUNG WICHTIGER HINWEIS: Vor Beginn der Arbeiten am Ventilator ist dieser unbedingt vom Stromnetz zu trennen. Fehlerursache Fehler Lösungsvorschlag Richtungsschalter in Ventilator läuft nicht an Überprüfen, ob der Schalter Mittelstellung ganz auf einer Seite steht Sicherung durchgebrannt Sicherungen und oder Sicherungsautomat Sicherungsautomat überprüfen. - Page 47 Kann das Schlingern das Ventilators auf diese Weise nicht behoben werden, verwenden Sie das mitgelieferte Trimmset. (Siehe Montageanleitung zum Trimmset) TRIMMSET Das Trimmset wird nur dann verwendet, wenn trotz Ausführung aller im Abschnitt (Anbringen der Ventilatorflügel) der Montageanleitung beschriebenen Schritte ein übermäßig starkes Schlingern der Flügel auftritt.
-
Page 48: Основные Правила Безопасности
РУССКИЙ Пожалуйста, перед установкой вентилятора, внимательно изучите данную инструкцию. Она содержит важную информацию по монтажу и обслуживанию вентилятора, а также по технике безопасности. Производитель или продавец не несут ответственности за ущерб, полученный вследствие неправильного монтажа и эксплуатации данного оборудования. ОСНОВНЫЕ ПРАВИЛА БЕЗОПАСНОСТИ 1. - Page 49 РЕКОМЕНДАЦИИ ПО РАСПАКОВКЕ Прежде чем приступить к сборке вентилятора проверьте комплектность товара (Рис.1/Fig.1), в соответствии с данными приведенным в нижеследующей таблице: Модель LAMP HTL-130 1G 1 10 10 15 4 KIT 1 HTL-130 4F 1 10 10 15 15 4 KIT 4 HTD-130MR 1 12 12 4...
- Page 50 Крепление вентилятора к подвесному потолку. Возьмите подходящую перекладину (деревянную или металлическую) для равномерного распределения веса вентилятора по плоскости потолка (длиной не менее 25 см) (Рис.3/Fig.3). Сделайте по центру перекладины неглубокую канавку, таким образом, чтобы не ослабить несущие способности перекладины. Проделайте в подвесном потолке отверстие и введите перекладину...
- Page 51 d) ВАЖНО: Для моделей с лампочками необходимо подключить красный провод к клемме “L” (коричневый). Для моделей без лампочек красный провод остается не задействованным. Подключите вентилятор к сети электропитания (Рис.12/Fig.12). e) При помощи четырех шурупов (Q) и шайб (R) закрепите декоративный колпак на крепежной пластине...
- Page 52 3. Блок освещения. 1) один раз – Вкл. 2) два раза – Выкл. Модель Блок освещения Максимальная мощность Вт HTL-130 4F 4x60 Вт HTL-130 1G 2x60 Примечание: лампочки не входят в комплект поставки. ОБСЛУЖИВАНИЕ Перед проведением обслуживания убедитесь, что вентилятор выключен, а кабель подвода электропитания...
-
Page 53: Возможные Неисправности
ВОЗМОЖНЫЕ НЕИСПРАВНОСТИ Проблема Неисправность Возможные решения Вентилятор не 1. Переключатель 1. Убедитесь, что переключатель включается направления вращения направления вращения вентилятора находится в находится в правильном нейтральном положении. положении. 2. Перегорел 2. Проверьте предохранитель и предохранитель или автоматический выключатель. сработал автоматический 3. - Page 54 Если не удалось устранить дисбаланс вентилятора приведенными выше способами – используйте балансировочный комплект, который поставляется вместе с вентилятором. Балансировочный комплект следует использовать только после того, как вы убедились, что все крепления достаточно затянуты, а лопасти установлены ровно. БАЛАНСИРОВОЧНЫЙ КОСПЛЕКТ 1.Включите вентилятор на ту скорость вращения, на которой вибрации наиболее высокие. 2.Выключите...
- Page 57 C/Llevant,4 Polígono Industrial Llevant 08150 Parets del Vallès (Barcelona) ESPAÑA Tel. 93 571 93 00 Fax. 93 571 93 01 Tel. int. +34 93 571 93 00 Fax. int. +34 93 571 93 11 http://www.solerpalau.com consultas@solerpalau.com...
- Page 58 Рекуператоры Вентиляторы Вентиляционные решетки Воздуховоды и монтажные элементы...
Need help?
Do you have a question about the HTD-130 MR and is the answer not in the manual?
Questions and answers