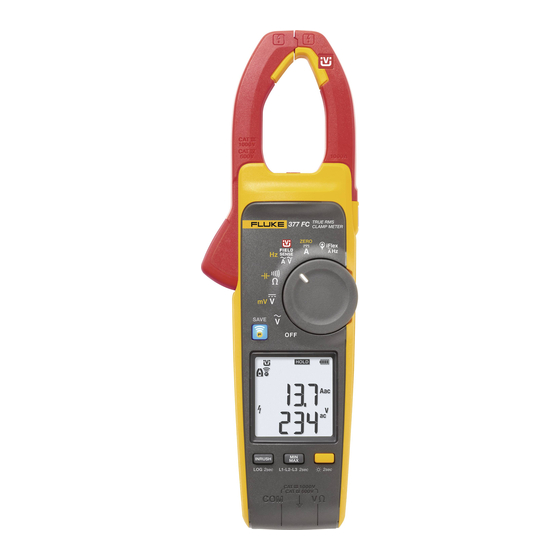
Fluke 377 Calibration Manual
Clamp meter
Hide thumbs
Also See for 377:
- User manual (22 pages) ,
- Manual (24 pages) ,
- Calibration manual (20 pages)
Table of Contents
Advertisement
Quick Links
Advertisement
Table of Contents

Subscribe to Our Youtube Channel
Summary of Contents for Fluke 377
- Page 1 377/377 FC/378/378 FC Clamp Meter Calibration Manual 8/2021 Rev. 1, 9/2023 ©2021-2023 Fluke Corporation. All rights reserved. Specifications are subject to change without notice. All product names are trademarks of their respective companies.
- Page 2 Fluke authorized resellers shall extend this warranty on new and unused products to end-user customers only but have no authority to extend a greater or different warranty on behalf of Fluke. Warranty support is available only if product is purchased through a Fluke authorized sales outlet or Buyer has paid the applicable international price.
-
Page 3: Table Of Contents
Table of Contents Title Page Introduction ....................Contact Fluke .................... Safety Information ..................Specifications .................... Performance Tests..................Performance Test Procedures ..............AC Voltage ..................DC Voltage ..................Resistance/Capacitance ..............DC Current (Jaw with Calibrator, 52120A, and Coil) ......AC Current (Jaw with Calibrator, 52120A, and Coil) ...... - Page 4 377/377 FC/378/378 FC Calibration Manual...
-
Page 5: Introduction
Read Safety Information before you use the Product. This manual explains the Performance Tests for the 377/377 FC/378/378 FC Clamp Meter (the Product, the Jaw, or the device under test (DUT)). See the 377/377 FC/378/378 FC Users Manual for usage information. -
Page 6: Performance Tests
To prevent possible electrical shock, fire, or personal injury, do not perform the performance test procedures unless the Product is fully assembled. Fluke recommends a 1-year cycle for the Performance Tests. If the Product fails any test, return the Product to a Fluke Service Center or Authorized Service Partner. See Contact Fluke for more information. -
Page 7: Dc Voltage
Clamp Meter Performance Test Procedures Caution To prevent damage to the DUT, verify the applied voltage to the DUT does not exceed the rating of the DUT insulation and the interconnection wiring. b. Push to activate the Calibrator output and apply the voltage to the DUT. 5. -
Page 8: Dc Current (Jaw With Calibrator, 52120A, And Coil)
377/377 FC/378/378 FC Calibration Manual 5. On the DUT, verify the measurement on the display is within the readout limits for the test. 6. To verify capacitance, push on the DUT to go to capacitance mode. 7. Set the Calibrator to the desired capacitance output. - Page 9 Clamp Meter Performance Test Procedures Figure 1. Wire Placement with DUT >3.3 mm Ø <34 mm Ø Figure 2. DUT Placement with Coil Conductor 6. Set the Calibrator to the desired dc current output. 7. Put the 52120A in standby mode. 8.
-
Page 10: Ac Current (Jaw With Calibrator, 52120A, And Coil)
377/377 FC/378/378 FC Calibration Manual AC Current (Jaw with Calibrator, 52120A, and Coil) To verify ac current measurement with the Jaw: 1. Connect the Calibrator. For test points <20 A, use a single-wire short between the 20 A and AUX LO jacks on the ... -
Page 11: Ac Current
Calibrator into an output current up to 120 A, then sources the current into the Coil to produce up to 2500 Amp-turns ac. Caution Read all safety Information before you use the 377/378, 52120A, and the Coil. High currents are used during this test. To verify iFlex ac current with the Probe: 1. -
Page 12: Performance Tests And Readout Limits
377/377 FC/378/378 FC Calibration Manual 2. Connect the Calibrator NORMAL output LO terminal to the black COM jack on the DUT. Figure Figure 3. iFlex Current Probe Connections Calibrator • 3. Set the DUT to 4. Set the Calibrator to the desired voltage and frequency output. - Page 13 Clamp Meter Performance Tests and Readout Limits Table 2. Performance Test and Readout Limits Readout Limit Test 52120A Calibrator Output (Switch Position) Range High 30 V @ 20 Hz 30 V @ 55 Hz 29.2 V 30.8 V 30 V @ 500 Hz 570 V @ 45 Hz 570 V @ 55 Hz 563.8 V...
- Page 14 377/377 FC/378/378 FC Calibration Manual Table 2. Performance Test and Readout Limits (cont.) Readout Limit Test 52120A Calibrator Output (Switch Position) Range High using 52120A/COIL3KA -975 A (-0.39 V dc) 120 A -995.0 A -955.0 A DC Amps: Jaw -450 A (-1.80 V dc)
- Page 15 Clamp Meter Performance Tests and Readout Limits Table 2. Performance Test and Readout Limits (cont.) Readout Limit Test 52120A Calibrator Output (Switch Position) Range High using using 52120A/COIL3KA 52120A/COIL6KA 0.6 V @ 10 Hz 0.30 V @ 10 Hz 20 A 145.0 A 155.0 A 0.6 V @ 55 Hz...
-
Page 16: Maintenance
If the Product is used appropriately it does not require special maintenance or repair. In case of repair, go to www.fluke.com for contact information of Fluke Service Centers worldwide. Warning To prevent possible electrical shock, fire, or personal injury: •... -
Page 17: How To Clean The Case
Replace the batteries when the low battery indicator shows to prevent incorrect measurements. • When batteries are changed, ensure that the calibration seal in the battery compartment is not damaged. If damaged, the Product may not be safe to use. Return the Product to Fluke for replacement of the seal. - Page 18 377/377 FC/378/378 FC Calibration Manual Caution To prevent damage to the battery: • Repair the Product before use if the battery leaks. • Do not expose battery to heat sources or high-temperature environments such as an unattended vehicle in the sun.
-
Page 19: User Replaceable Parts
To maintain optimum performance, an authorized Fluke Calibration service center should service the Product every two years. Contact your equipment distributor or authorized Fluke Calibration Service Center for any equipment performance failure or to schedule regular maintenance service. See Contact Fluke for more information.


Need help?
Do you have a question about the 377 and is the answer not in the manual?
Questions and answers