Subscribe to Our Youtube Channel
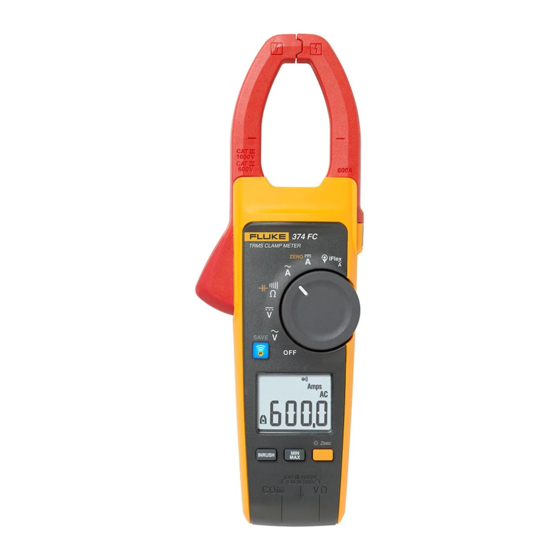
Summary of Contents for Fluke 374 FC
- Page 1 374 FC/375 FC/376 FC/ 902 FC Clamp Meter Calibration Manual February 2017 Rev. 1, 9/19 ©2017-2019 Fluke Corporation. All rights reserved. All product names are trademarks of their respective companies.
- Page 2 Buyer for importation costs of repair/replacement parts when product purchased in one country is submitted for repair in another country. Fluke's warranty obligation is limited, at Fluke's option, to refund of the purchase price, free of charge repair, or replacement of a defective product which is returned to a Fluke authorized service center within the warranty period.
-
Page 3: Table Of Contents
VAC Adjustment Procedure ....................12 VDC/mVDC Adjustment Procedure ................13 Ohm/Cap Adjustment Procedure ................13 AAC Adjustment Procedure (374 FC, 375 FC, 376 FC) ........... 14 AAC Adjustment Procedure (902 FC) ..............14 ADC Adjustment Procedure (374 FC, 375 FC, 376 FC) .......... 14 uADC Adjustment Procedure (902 FC) .............. - Page 4 374 FC/375 FC/376 FC/902 FC Calibration Manual...
-
Page 5: Introduction
Product. This manual provides all the information necessary to perform basic maintenance and make calibration adjustments for the 374 FC/375 FC/376 FC and the 902 FC Clamp Meters (the Product). All figures show the 376 FC unless noted. -
Page 6: Safety Information
374 FC/375 FC/376 FC and 902 FC Calibration Manual Safety Information A Warning identifies hazardous conditions and procedures that are dangerous to the user. A Caution identifies conditions and procedures that can cause damage to the Product or the equipment under test. - Page 7 When batteries are changed, ensure that the calibration seal in the battery compartment is not damaged. If damaged, the Product may not be safe to use. Return the Product to Fluke for replacement of the seal. • Do not use in CAT III or CAT IV environments without the protective cap of test probe, The protective cap decreases the expose probe metal <4mm.
-
Page 8: The Product
376 FC ..............3 @ 500 A 2.5 @ 600 A 1.42 @ 1000 A 374 FC and 375 FC..........2.5 @ 350 A 1.42 @ 600 A Note: Add 2 % for C.F. > 2 AC Current via Flexible Current Probe Range..............2500 A... -
Page 9: Position Sensitivity
Measurement uncertainty assumes centralized primary conductor at optimum position, no external electrical or magnetic field, and within operating temperature range. DC Current Range 374 FC and 375 FC ..........600.0 A 376 FC ..............999.9 A Resolution ............... 0.1 A Accuracy ..............2 % ±5 digits AC Voltage Range .............. -
Page 10: Frequency Via Jaw
374 FC/375 FC/376 FC and 902 FC Calibration Manual Frequency via Jaw Range 375 FC and 376 FC..........5.0 Hz to 500.0 Hz Resolution ...............0.1 Hz Accuracy..............0.5 % ±5 digits ≥ Trigger Level ............5 Hz to 10 Hz, 10 A ≥... -
Page 11: Mechanical Specifications
902 FC Electrical Specifications Mechanical Specifications Size (L x W x H) 374 FC/375 FC/376 FC........249 mm x 85 m x 45 mm 902FC ..............230 mm x 83.7 mm x 45.4 mm Weight 374 FC/375 FC/376 FC........410 g 902 FC .............. -
Page 12: Performance Tests
374 FC/375 FC/376 FC and 902 FC Calibration Manual Performance Tests Performance tests make sure that the Product operates within the published specifications. Do the performance tests periodically and after service or repair. If the Product fails any part of the verification test, repair, and/or calibration adjustments are required. -
Page 13: Calibration Adjustment
Clamp Meter Calibration Adjustment Table 2. Performance Tests (cont.) Meter Reading Limit Function Calibrator Output 374 FC 375 FC 376 FC 902 FC Lower Limit Upper limit √ -19.5 A -995 A -955 A √ √ √ -12 A -612.5 A -587.5 A... - Page 14 374 FC/375 FC/376 FC and 902 FC Calibration Manual h Static Awareness h Semiconductors and integrated circuits can be damaged by electrostatic discharge during handling. This notice explains how to minimize damage to these components. Understand the problem. Learn the guidelines for proper handling.
-
Page 15: Calibration Setup
Clamp Meter Calibration Adjustment Calibration Setup To set up the Product for calibration: Turn the Product over and use a flat-head screwdriver to remove the battery compartment screw. See Figure 3. Remove the battery door. Remove the batteries. fig02.eps Figure 3. Remove Batteries Remove the calibration sticker. -
Page 16: Vac Adjustment Procedure
374 FC/375 FC/376 FC and 902 FC Calibration Manual 5522A CALIBR ATOR ghn50.eps Figure 5. Current Calibration Setup For each calibration adjustment: Turn the rotary knob to select the function. Apply the required output from the source to the Product. -
Page 17: Vdc/Mvdc Adjustment Procedure
Clamp Meter Calibration Adjustment VDC/mVDC Adjustment Procedure Step LCD Display 374 FC 375 FC 376 FC 902 FC Calibrator Output √ √ √ √ C-08 √ √ √ √ C-09 600 V √ √ √ √ C-10 √ √ √... -
Page 18: Aac Adjustment Procedure (374 Fc, 375 Fc, 376 Fc)
374 FC/375 FC/376 FC and 902 FC Calibration Manual AAC Adjustment Procedure (374 FC, 375 FC, 376 FC) Step LCD Display 374 FC 375 FC 376 FC Calibrator Output √ √ √ C-24 0 A, 0 Hz √ √ √... -
Page 19: Rogo Adjustment Procedure (374 Fc, 375 Fc, 376 Fc)
Clamp Meter Maintenance ROGO Adjustment Procedure (374 FC, 375 FC, 376 FC) Step LCD Display 374 FC 375 FC 376 FC Calibrator Output √ √ √ C-34 0 V, 0 Hz √ √ √ C-35 60 mV, 50 Hz √... -
Page 20: Replacement Parts
374 FC/375 FC/376 FC and 902 FC Calibration Manual Replacement Parts Replacement parts and accessories are listed in Tables 4. To order parts and accessories, see How to Contact Fluke. Table 4. Replacement Parts and Accessories Fluke Part Number Description...


Need help?
Do you have a question about the 374 FC and is the answer not in the manual?
Questions and answers