Table of Contents
Advertisement
Quick Links
EN
LEXPERT PROFILE L
INSTRUCTION MANUAL
Zoom 15-30 & Zoom 25-50
AG2300E41200 - AG2500E41200
Congratulations on choosing an ADB product! We thank you for your custom.
Please note that this xture - like all the others in the wide ADB range - has been designed and made with total
quality assurance to ensure excellent performance and best meet your expectations and requirements.
www.adbstagelight.com
Advertisement
Table of Contents

Related Manuals for Osram ADB Stagelight LEXPERT PROFILE L


Summary of Contents for Osram ADB Stagelight LEXPERT PROFILE L
- Page 1 LEXPERT PROFILE L INSTRUCTION MANUAL Zoom 15-30 & Zoom 25-50 AG2300E41200 - AG2500E41200 Congratulations on choosing an ADB product! We thank you for your custom. Please note that this xture - like all the others in the wide ADB range - has been designed and made with total quality assurance to ensure excellent performance and best meet your expectations and requirements.
- Page 2 INDEX SAFETY INSTRUCTION THE UNIT CONSTRUCTION INSTALLATION POWER CONTROL PANEL MAIN FUNCTION HOW TO CONTROL THE UNIT DMX Address Setting DMX Configuration DMX Connection TROUBLESHOOTING FIXTURE CLEANING DATASHEET L XP RT PROFIL L...
-
Page 3: Safety Information
1. SAFETY INFORMATION How to get your SAFETY INSTRUCTIONS in multilingual version. You may always download the multilingual Safety Instruction manual for this ADB product from: www.adbstagelight.com Rif: FIS00X - Safety Information LEXPERT PROFILE L Come ottenere le INFORMAZIONI DI SICUREZZA nella versione multilingue. -
Page 4: Installation Notes
Warning: Please keep this User Guide for future consultation. If you sell the unit to another user, be sure that they also receive this instruction booklet. • Unpack and check carefully there is no transportation damage before using the unit. •... -
Page 5: Installation
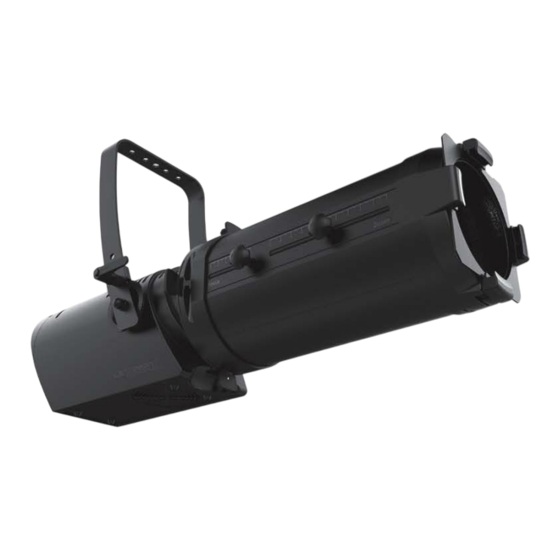
2. THE UNIT CONSTRUCTION 1. Lens Module 2. Clip for Gel Holder 3. Bracket 4. Main Body 5. Gobo Slot 3. INSTALLATION Screw Two triangles signs Loosen two screws on two sides of Main Body (MB), rotate the zoom as the arrow and align it with two triangles signs, put the zoom into the MB - Fig. 2 Screw Two triangles Two triangles... - Page 6 4. POWER The power requirements are as follows: Voltage: AC100-240V, 50/60Hz The fixture is supplied with a power cable (14 AWG brown and blue cables) installed ready for connection. Yellow/Green Power cord colors - Fig. 4 Lock out power to the installation. Connect the conductors in the power cable to the distribution circuit as follows: Connect the brown wire to live (one phase).
-
Page 7: Control Panel
5. CONTROL PANEL 1. Display: To show the various menus and the selected functions. 2. LED: MASTER Master Mode SLAVE Slave Mode DMX input present 3. Dimmer Adjust Knob: Adjust the lightness for the unit 4. Button: MENU To select the programming functions DOWN To go backward in the selected functions To go forward in the selected functions... -
Page 8: Main Function
6. MAIN FUNCTION To select any functions, press the MENU button until the required function is showing on the display. Select the function by pressing the ENTER button and the display will blink. Use the DOWN and UP button to change the mode. Once the required mode has been selected, press the ENTER button to setup to go back to the functions without any changes press the MENU button again. - Page 9 Firmware Network Mask DHCP on/off Art-net Sub Net Universe Dimmer Dimmer fine DMX Value Strobe Control Information Led Fan Fan Speed PCB Fan Led: Temperature CPU: MENU DMX in Rate in ms Frequency Fred Selec. Unit I out Unit Hours Leds Device ID Dimmer...
-
Page 10: Dmx Address
DMX Address To select the DMX Address, press the ENTER button to show DMX ADDRESS on the display. Use the DOWN/UP button to adjust the address from 1 to 512. Once the address has been selected, press the ENTER button to setup, to go back to the functions without any changes press the MENU button again. - Page 11 Network To select the Network, press the ENTER button to show Network on the display. Use the DOWN/UP button to select the IP or Mask. Once the mode has been selected, press the ENTER button to setup, to go back to the functions without any changes press the MENU button again. Hold and press the MENU button for one second or wait for one minute to exit the menu mode.
-
Page 12: Manual Ctrl
MENU button again. Hold and press the MENU button for one second or wait for one minute to exit the menu mode. Fan Speed To display the Fan Speed, press the ENTER button to show Fan Speed on the display. Use the DOWN/UP button to select the Led Fan or PCB Fan. Once the mode has been selected, press the ENTER button to setup, to go back to the functions without any changes press the MENU button again. -
Page 13: How To Control The Unit
To select the Slave Mode, press the ENTER button to show Slave Mode on the display. Use the DOWN/UP button to select the Master or Slave. Once the mode has been selected, press the ENTER button to setup, to go back to the functions without any changes press the MENU button again. Hold and press the MENU button for one second or wait for one minute to exit the menu mode. - Page 14 Channel Mode 2 Channel Function Channel Mode DIMMER – → ∼ Light Off Maximum Intensity (0% 100%) STROBE 000 – 009 Maximum Intensity 010 – 057 Strobe at variable speed 058 – 059 Maximum Intensity 060 – 108 Pulse Slow closing / Fast opening at variable speed 109 –...
-
Page 15: Channel Mode
Channel Mode 4 Channel Function Channel Mode DIMMER – → ∼ Light Off Maximum Intensity (0% 100%) DIMMER FINE – ∼ 100% STROBE 000 – 009 Maximum Intensity 010 – 057 Strobe at variable speed 058 – 059 Maximum Intensity 060 –... - Page 16 Channel Mode 5 Channel Function Channel Mode DIMMER – → ∼ Light Off Maximum Intensity (0% 100%) DIMMER FINE – ∼ 100% STROBE 000 – 009 Maximum Intensity 010 – 057 Strobe at variable speed 058 – 059 Maximum Intensity 060 –...
-
Page 17: Dmx Connection
7.3 DMX Connection DMX OUT DMX Controller COMMON DMX - DMX + DMX INPUT DMX OUTPUT Not Used Not Used 1. At last unit, the DMX cable has to be terminated with a terminator. Solder a 120-ohm 1/4W resistor between pin 2(DMX-) and pin 3(DMX+) into a 5- pin XLR-plug and plug it in the DMX-output of the last unit. -
Page 18: Troubleshooting
8. TROUBLESHOOTING Following are a few common problems that may occur during operation. Here are some suggestions for easy troubleshooting: A. The unit does not work, no light and the fan does not work 1. Check the connection of power and main fuse. B. -
Page 19: Data Sheet
10. DATASHEET ELECTRICAL SPECIFICATIONS OPERATIONAL SPECIFICATIONS • Power supply: • Minimum distance to illuminated surface: Electronic auto-ranging. 0.50 m. • Input Voltage range: • Ambient temperature: AC 100-240V, 50/60Hz. Max +40°C. • Max power consumption: • Max surface temperature: AC 230V: 382W, 1.7A, 80°C. - Page 20 I - 24068 Seriate (BG) - via Pastrengo, 3/b Phone +39 035 654311 - www.adbstagelight.com...
Need help?
Do you have a question about the ADB Stagelight LEXPERT PROFILE L and is the answer not in the manual?
Questions and answers