Table of Contents
Advertisement
Quick Links
Advertisement
Table of Contents

Related Manuals for Glaeser home mia 500


Summary of Contents for Glaeser home mia 500
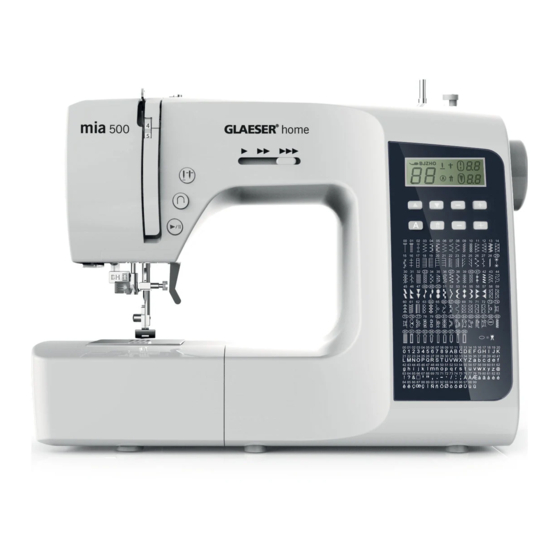
- Page 1 HANDBUCH mia 500 Sewing tips & tricks GLAESER® home...
- Page 2 IMPORTANT SAFETY INSTRUCTIONS When using an electrical appliance, basic safety precautions should always be followed, including the following. Read all instructions before using this sewing machine. DANGER – To reduce the risk of electric shock: 1. Do not allow to be used as a toy. Close attention is necessary when this sewing machine is used by or near children.
- Page 3 SAVE THESE INSTRUCTIONS This product is for household use, or equivalent. This appliance complies with EMC Directive 2014/30/EU covering the electromagnetic compatibility. Please note that on disposal, this product must be safely recycled in accordance with relevant National legislation relating to electrical/ electronic products. If in doubt please contact your retailer for guidance.
-
Page 4: Table Of Contents
Straight stitching ............................18 Zig zag and decorative sewing ......................18 Bobbin tension ............................18 Changing presser foot ..........................19 Functions of control panel for Mia 500 .....................19 Letter pattern mode ..........................19 Pattern number selection buttons .....................20 Twin needle mode ............................20 Stitch length and stitch width/needle position adjustment buttons ........21 Adjust the spacing between letters ....................21... - Page 5 Dual purpose reverse/tacking stitch button ................22 Sewing speed control ..........................23 Helpful messages ............................23 Useful sewing tips .............................24 Starting to sew ............................25 Straight stitching ...........................25 Inserting zippers and piping.........................26 Hand-look quilt stitch ...........................26 Zigzag stitching .............................27 Adjusting stitch width and length ......................27 Satin stitch ..............................27 Placement of patterns ..........................27 Blindhem stitch...
- Page 6 Greek key stitch .............................34 Edge-joining stitch ..........................34 Wizard stitch ............................35 Thorn stitch .............................35 Fishbone stitch ............................35 Chevron stitch ............................35 More decorative stitches ........................36 Buttonhole Making: Automatic Buttonhole ...................37 Using Buttonhole foot ..........................37 Corded buttonholes ..........................39 Twin needle ..............................39 Straight stitch needle position ......................40 Caring for your machine .........................41 Cleaning the feed dogs and shuttle area ..................41 Performance checklist ..........................42...
-
Page 7: Knowing Your Sewing Machine
KNOWING YOUR SEWING MACHINE MACHINE IDENTIFICATION 1. Thread guide 2. Thread take-up lever 3. Thread tension control 4. Face cover 5. Thread cutter 6. Buttonhole lever 7. Extension table (Accessory box) 8. Bobbin winder shaft 9. Bobbin winder stop 10. Sewing speed control 11. -
Page 8: Accessories
ACCESSORIES 1. Needles 2. Twin needle 3. Ripper/ Brush 4. Small screwdriver 5. Screwdriver for needle plate 6. Auxiliary spool pin 7. Bobbins (4 total - 1 in machine) 8. Spool pin cap 9. Zipper foot 10. Satin stitch foot(Z) 11. -
Page 9: Spool Pins
SPOOL PINS HORIZONTAL SPOOL PIN FOR NORMAL Spool THREAD SPOOL Place thread spool on the pin and secure with a spool cap to ensure smooth flow of thread. If the thread spool has a thread retaining slit, it Vertical spool pin should be placed to the right. -
Page 10: Converting To Free-Arm Sewing
CONVERTING TO FREE-ARM SEWING Your machine can be used either as a flat- bed or as a free-arm model. With the extension table in position, it provides a large working surface as a standard flat-bed model. To remove the extension table, hold it firmly with both hands and pull it off to the left as shown. -
Page 11: Threading The Bobbin Thread
THREADING THE BOBBIN THREAD 1. Raise the needle to its highest position by 2. Remove the bobbin cover plate by pushing rotating the hand wheel toward you. the release button to the right. Bobbin cover will pop up sufficiently to allow you to remove the cover. -
Page 12: Threading The Top Thread
THREADING THE TOP THREAD A. Raise the presser foot lifter. Always be sure to raise the presser foot lifter before thread- ing the top thread. (If the presser foot lifter is not raised, correct thread tension cannot be obtained.) B. Turn the hand wheel toward you until the needle is in its highest position and the thread take-up is visible. -
Page 13: Using Automatic Needle Threader
USING AUTOMATIC NEEDLE THREADER Raise the needle to its highest position by rotating the hand wheel towards you. 1. Hook thread to thread guide as illustrated. 2. Pull down lever while holding the end of thread. 3. Rotate the lever to the rear of the machine. - Page 14 4. Guide thread into hooked end and pull the thread upward. 5. Return the lever and needle will be threaded automatically. 6. Release the lever and pull thread away from you.
-
Page 15: Picking Up Bobbin Thread
PICKING UP BOBBIN THREAD 1. Raise the presser foot lifter. 2. Holding needle thread loosely with your left hand, turn hand wheel toward you with your right hand first lowering the needle and continuing until the needle comes to its highest position. -
Page 16: Needle, Thread And Fabric Chart
NEEDLE, THREAD AND FABRIC CHART Your fabric will determine the choice of a needle and thread. The following table is a practical guide to needle and thread selection. Always refer to it before a new sewing project. And be sure to use the same size and type of thread in the bobbin as in the top thread supply. -
Page 17: Changing The Needle
CHANGING THE NEEDLE 1. Raise the needle bar to its highest position by turning the hand wheel toward you. Flat side 2. Loosen the needle clamp screw by turning it toward you. 3. Remove the needle by pulling it downward. Needle 4. -
Page 18: Adjusting Top Thread Tension
ADJUSTING TOP THREAD TENSION Under side 90% of your sewing will be done with the ten- sion control set at “4”. Well balanced Top side Top stitch Top stitch too tight too loose STRAIGHT STITCHING The good looking appearance of your stitching is largely determined by the balanced tension of both top and bobbin threads. -
Page 19: Changing Presser Foot
Foot release button 3. Lower the presser foot lifter so that the foot holder snaps on the foot. Foot holder FUNCTIONS OF CONTROL PANEL FOR MIA 500 Needle position indicator Twin needle mode indicator Presser foot indicator BJZHO Stitch length... -
Page 20: Pattern Number Selection Buttons
PATTERN NUMBER SELECTION BUTTONS Pattern number reference guide When the machine is turned on, straight stitch is selected and pop-up screen for individual preference settings appears on the LCD display. Press the side of to increase or reduce the number by one. Long press the side of to increase or reduce the number by ten. -
Page 21: Stitch Length And Stitch Width/Needle Position Adjustment Buttons
STITCH LENGTH AND STITCH WIDTH/ NEEDLE POSITION ADJUSTMENT Default stitch BUTTONS length indicator Your sewing machine will produce your stitch- Stitch length ing requirements at an Auto/Default stitch length and width. Manual adjustment buttons for stitch You can manually change the length, width or length needle position for straight stitch according to your preference pushing manual adjustment... -
Page 22: Operation Buttons
OPERATION BUTTONS The operation buttons help you to easily per- form various basic sewing machine operations. START/STOP BUTTON Start/Stop Button When sewing without having the foot con- troller connected, the machine starts slowly Reverse stitch button when the start/stop button is pushed. When it Needle position button is pushed again, needle moves and stops at its highest position. -
Page 23: Sewing Speed Control
SEWING SPEED CONTROL Sewing speed is set by using the sewing speed Slow Fast control. The sewing speed control is moved horizontally to determine the amount of speed required. Regardless of the setting, maximum speed may be limited depending on which pattern has been selected. -
Page 24: Useful Sewing Tips
USEFUL SEWING TIPS 1. Trial sewing Use different stitch width and length for trial sewing. When you have finished, select the best look- ing stitch width and length for correct sewing. For the trial sewing, use a piece of fabric and thread that are the same as those used for your project, and check the thread tension and stitch length and width. -
Page 25: Starting To Sew
STARTING TO SEW STRAIGHT STITCHING Straight stitch is most frequently used for every aspect of sewing. Lets learn how to sew follow- ing the steps below. 1. Settings: Presser foot - General Purpose Foot (J) Thread tension control -4 A Thread tension control NOTE: Based upon the weight of the fabric, slight “fine tuning”... -
Page 26: Inserting Zippers And Piping
INSERTING ZIPPERS AND PIPING Use zipper foot to sew to the right or left of the zipper or close to the cord. Inserting zippers To sew down the right side, attach left side of zipper foot to presser foot holder so that the Needle to Needle to right of foot... -
Page 27: Zigzag Stitching
ZIGZAG STITCHING Under side Settings: Presser foot - General Purpose Foot (J) Thread tension control -4 The top thread may appear on the bottom depending on the thread, fabric, type of stitch Top side and sewing speed, but the bobbin thread must never appear on the top of the fabric. -
Page 28: Blindhem Stitch
BLINDHEM STITCH The blindhem stitch is primarily used for hem- Fine fabric ming curtains, trousers, skirts, etc. Settings: Presser foot – Blind stitch foot (H) Thread Tension Control: 4 Under side Under side Regular blind stitch for normal firm fabrics Elastic blind stitch for soft, stretchable fabrics 1. -
Page 29: Multi-Stitch Zigzag
MULTI-STITCH ZIGZAG Settings: Presser foot – General purpose foot(J) Thread tension control: 4 This is a strong stitch because as its name implies, it makes three short stitches where the normal zig-zag makes only one. For this reason it is highly recommended for overcasting all types of fabrics. -
Page 30: Sewing On A Button
SEWING ON A BUTTON Settings: Presser foot – Button fitting foot (O) Feed dog control – Push the lever in the direction of the arrow to drop the feed dog, Attach button fitting foot (O). Position your fabric and button under the presser foot. -
Page 31: Honeycomb Stitch
HONEYCOMB STITCH The Honeycomb stitch is ideal for smocking and useful for overcasting and attaching elastic and stretch lace. 1. For smocking, first make several rows of gathers across the fabric that you wish to smock. 2. Cut an underlay fabric (such as organdy) and place it under the shirring. -
Page 32: Ric-Rac Stitch
RIC-RAC STITCH The ric-rac stitch is primarily used for a decora- tive topstitch. It is ideal for edging neck-bands, armholes, sleeves and hems. When manually adjusted to a very narrow width, it also can be used for sewing high stress seams. -
Page 33: Ladder Stitch
LADDER STITCH The ladder stitch is primarily used for drawn thread hemstitching. It can also be used for sewing over thin tape in a contrasting or same color. Place the stitch in the center and a special effect will be obtained for decoration. Another use for the ladder stitch is couching over narrow ribbon, yarn or elastic. -
Page 34: Slant Overedge Stitch
SLANT OVEREDGE STITCH Seams and overcasts in one operation to pro- duce a narrow , supple seam, particularly suited to swimwear, sportswear, t-shirts, baby wear in stretch nylon, jersey and cotton jersey. CROSSED STITCH Use to sew and finish elastic fabrics or for deco- rative work. -
Page 35: Wizard Stitch
WIZARD STITCH Used mainly for decorative machine stitching. THORN STITCH It is a versatile stitch used for joining fabric pieces and as a decorative touch. FISHBONE STITCH Use to create decorative borders and for embroidery. CHEVRON STITCH Use to create decorative borders and for embroidery. -
Page 36: More Decorative Stitches
MORE DECORATIVE STITCHES Settings: Presser foot – General Purpose Foot(J) or Satin Stitch Foot (Z) Thread tension control -4 oder 3 Following are examples of how to use and sew these stitches. You can use some other decora- tive stitches in the same way. You should carry out a test sewing on an extra piece of the fabric being sewn to check the decorative pattern to be used. -
Page 37: Buttonhole Making: Automatic Buttonhole
BUTTONHOLE MAKING: AUTOMATIC BUTTONHOLE Tab B Tab A USING BUTTONHOLE FOOT Your machine offers you two different widths of bartack, keyhole and round end buttonholes sewn by a system that measures the size of the button and calculates the size of buttonhole required. - Page 38 6. Place the fabric under the foot. Pull out the bobbin thread underneath the fabric to a length of about 10 cm to the rear. 7. Align the buttonhole mark on the fabric with the mark on the buttonhole foot, and then lower the buttonhole foot.
-
Page 39: Corded Buttonholes
CORDED BUTTONHOLES Dorn Hook filler cord (such as crochet thread or but- tonhole twist) over the spur and pull both ends of the cord forward under the foot and tie off the cord as shown in the illustration. Sew buttonhole so that zigzag stitches cover the cord. -
Page 40: Straight Stitch Needle Position
STRAIGHT STITCH NEEDLE POSITION The position of the needle when sewing straight stitch may be adjusted to anyone of 13 different positions with the stitch width control as illustrated: Toward left Toward right Stitch width adjustment button... -
Page 41: Caring For Your Machine
CARING FOR YOUR MACHINE CLEANING THE FEED DOGS AND SHUTTLE AREA Always disconnect the machine from power supply by removing the plug from the wall-outlet. To ensure the best possible operation of your machine, it is necessary to keep the essential parts clean at all times. -
Page 42: Performance Checklist
PERFORMANCE CHECKLIST STITCHING PROBLEMS Machine skips stitches GENERAL PROBLEMS · Needle is not all the way up into needle clamp: Machine does not sew Replace the needle (see page 17). · Power switch is turned off: · Needle is bent or blunt: Turn on the switch. -
Page 43: Thread Problems
THREAD PROBLEMS Thread bunches · Top and bobbin threads are not drawn back under presser foot before starting seam: Draw both threads back under presser foot about 10 cm and hold until a few stitches are formed. Needle thread breaks ·... - Page 44 6–99 Stoffe Vielfalt Nähkurse Zubehör Heimtextilien Filiale Aalen | Benzstr. 5 | 73431 Aalen Filiale Marktoberdorf | Kaufbeurener Str. 74 | 87616 Marktoberdorf Filiale Mindelheim | Krumbacher Str. 38 | 87719 Mindelheim Filiale Renningen | Weil der Städter Str. 51 | 71272 Renningen Filiale Ulm | Blaubeurer Str.
Need help?
Do you have a question about the mia 500 and is the answer not in the manual?
Questions and answers