Table of Contents
Advertisement
Quick Links
Advertisement
Table of Contents

Related Manuals for Glaeser home mia 300


Summary of Contents for Glaeser home mia 300
- Page 1 INSTRUCTION MANUAL mia 300 Tips & Tricks around sewing GLAESER® home...
- Page 2 IMPORTANT SAFETY INSTRUCTIONS When using an electrical appliance, basic safety precautions should always be followed, including the following. Read all instructions before using this sewing machine. DANGER – To reduce the risk of electric shock: 1. Do not allow to be used as a toy. Close attention is necessary when this sewing machine is used by or near children.
- Page 3 CAUTION: Moving parts-To reduce risk of injury, switch off before servicing. Close cover before operating machine. SAVE THESE INSTRUCTIONS This appliance complies with EMC Directive 2014/30/EU covering the electromagnetic compatibility. Please note that on disposal, this product must be safely recycled in accordance with relevant National legislation relating to electrical/ electronic products.
-
Page 4: Table Of Contents
TABLE OF CONTENTS Important safety instructions ......................... 2 Knowing your sewing machine ......................7 Main parts ..............................7 Accessories ..............................8 Power line cord / foot control ......................... 8 Power/light switch ............................8 Setting up your machine .......................... 8 Converting to free-arm sewing ......................9 Presser foot lifter ............................ - Page 5 Sewing curves ............................18 Sewing thick fabrics ..........................18 Sewing elastic fabric or the fabric that is easy to cause skipping stitches ......18 Sewing thin fabric or silk ........................18 Sewing stretch fabrics ..........................18 Straight stitch .............................19 Zigzag stitch ..............................20 Overlock stitch ............................20 Overedge stitch ............................20 Tricot stitch ..............................21 Triple strength stitch ..........................21...
-
Page 7: Knowing Your Sewing Machine
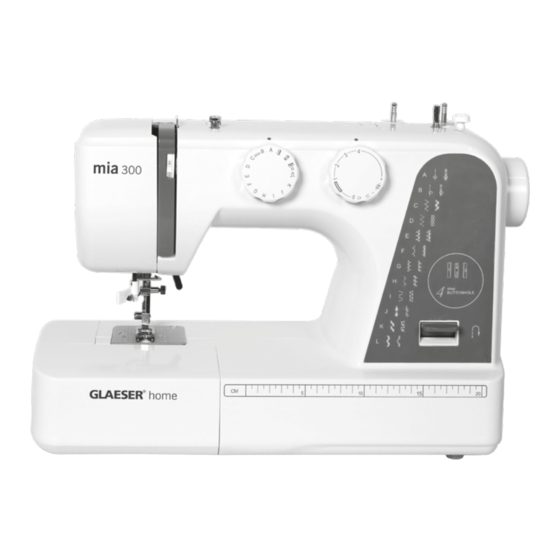
KNOWING YOUR SEWING MACHINE MAIN PARTS 1. Stitch length dial 2. Pattern selector dial 3. Thread tension control dial 4. Face cover 5. Thread take up lever 6. Thread guide 7. Bobbin winder thread guide 8. Carry handle 9. Spool pins 10. -
Page 8: Accessories
ACCESSORIES 1. Bobbins (3pcs) 2. Needle box (needles 3 pcs and twin needle 1 pcs) 3. Multi-function screwdriver 4. Seam guide 5. Ripper / Brush 6. Buttonhole foot 7. Guide presser foot 8. Zipper foot 9. Button fitting foot The foot that comes on your sewing machine is called zigzag foot and will be used for the majority of your sewing. -
Page 9: Converting To Free-Arm Sewing
CONVERTING TO FREE-ARM SEWING Your machine can be used either as a flat-bed or as a free-arm model. With the extension table in position, it provides a large working surface as a standard flat-bed model. To remove the extension table, hold it firmly with both hands and pull it off to the left as shown. -
Page 10: Seam Guide Line
SEAM GUIDE LINE The numbers on the needle plate indicate the distance between the center needle position and the indicating line. The numbers in the front indicate in Millime- ters. The numbers in the back indicate in inches. SETTING SPOOL PINS The spool pins are used for holding the spool of thread in order to feed thread to the machine. -
Page 11: Removing Or Replace The Bobbin Case
REMOVING OR REPLACE THE BOBBIN CASE 1. Refer to page 9 to remove the Extension table, raise the needle by turning the hand wheel toward you, then open the shuttle cover. 2. Take out bobbin case holding the latch (Fig 2). 3. -
Page 12: Changing The Presser Foot
CHANGING THE PRESSER FOOT 1. Turn the hand wheel toward you to raise the needle to its highest position. Raise the presser foot. 2. Press the lever on the back of the presser foot holder. The presser foot will drop off. 3. -
Page 13: Threading The Machine
THREADING THE MACHINE Raise take-up lever to its highest position by turning hand wheel toward you. Raise presser foot. Place spool on spool pin as shown, with thread coming from the back of the spool. 1. Draw thread into thread guide using both hands. -
Page 14: Using Automatic Needle Threader
USING AUTOMATIC NEEDLE THREADER Raise the needle to its highest position by rotat- ing the hand wheel towards you. 1. Hook thread to thread guide as illustrated. 2. Pull down lever while holding the end of thread. Note: For smooth threading it is recommend- ed you select straight stitching when using 3. -
Page 15: Drawing Up Bobbin Thread
DRAWING UP BOBBIN THREAD 1. Raise the presser foot and hold the needle thread lightly with you left hand. 2. Turn the hand wheel slowly towards you with your right hand until the needle goes down and continue turning the hand wheel until the take-up lever is at its highest position. Lightly draw up the needle thread forming a loop of the bobbin thread. -
Page 16: Needle, Thread And Fabric Chart
NEEDLE, THREAD AND FABRIC CHART Your fabric will determine the choice of a needle and thread. The following table is a practical guide to needle and thread selection. Always refer to it before a new sewing project. And be sure to use the same size and type of thread in the bobbin as in the top thread supply. -
Page 17: Pattern Selector Dial
PATTERN SELECTOR DIAL Raise the needle above the fabric and select the desired pattern at the setting mark by turning the pattern selector dial. A B C D E SELECTING STRETCH STITCH PATTERNS When sewing stretch, set the stitch length dial at “SS”. When forward and reverse feeds become unbalanced depending upon the type of fabric, correct the hand as follows. -
Page 18: Useful Sewing Tips
USEFUL SEWING TIPS SEWING THICK FABRICS If the fabric does not fit under the presser Various ways to achieve better sewing results foot are described below. Refer to these tips when Raise the presser foot even higher to bring the sewing. -
Page 19: Straight Stitch
STRAIGHT STITCH Wählen Sie die Position Ihrer Nadel: Pos. A: in der Mitte Pos. B: links (wenn der Stoff entlang der rechten Kante des Füßchens geführt wird, entsteht eine Nahtbreite von 1 cm) Machine Setting 1 .5 ~ 4 2 ~ 6 Raise the presser foot and position the fabric next to a stitching guide line on the needle plate. -
Page 20: Zigzag Stitch
ZIGZAG STITCH Machine Setting Simple zigzag stitching is widely used for over- 0 .5 ~ 4 castting, sewing on buttons etc. 2 ~ 5 OVERLOCK STITCH Machine Setting 1 ~ 2 This type of stitch is used on the seam allow- ance to prevent fabrics from fraying at raw edges. -
Page 21: Tricot Stitch
Jersey Stitch? TRICOT STITCH Machine Setting Place the fabric under the presser foot so that 0 .5 ~ 1 .5 the edge will be slightly inside the right hand side of the presser foot. 1 ~ 4 Guide the work so the right hand stitches fall at the edge of the fabric. -
Page 22: Sewing Buttons
SEWING BUTTONS Machine Setting Note: 1. Drop the feed dog (Refer to page 9) . After C ~ B you finish sewing, set the drop feed lever 1 ~ 3 to the original position. 2. You do not have to adjust the stitch length dial ("O"). -
Page 23: Buttonhole Stitch
BUTTONHOLE STITCH Machine Setting 0 .5 ~ 1 1 ~ 5 Replace the buttonhole foot. Before you sew the actual buttonholes on the actual garment, make several practice buttonholes on a fabric sample. Use interfacing on stretch fabrics. A. Select , draw both thread to the left under the foot. Insert the garment under the foot. -
Page 24: Buttonhole Stitch
BUTTONHOLE STITCH Slightly reduce the upper tension to produce better results. Use backing material for fine or stretchy mate- rials. We recommend placing a pin across the end of the buttonhole as a precaution against cutting the stitches with the seam ripper. It is advisable to use gimp cord for stretch or knit fabrics. -
Page 25: Blind Stitch
BLIND STITCH Machine Setting Fold up the fabric as illustrated. Lower the presser foot, then loosen the foot holder screw 0 .5 ~ 1 to place the hem guide between the screw and the shank of foot holder. Tighten the screw 1 ~ 4 making sure the wall of hem guide is placed in the middle of the toes of the presser foot. -
Page 26: Decorative Stitching
DECORATIVE STITCHING SHELL TUCK STITCH Machine Setting Place the folded edge along the slot of foot. the needle should fall off the edge of the fabric on 2 ~ 3 the right forming a tuck. 3 ~ 9 STRETCH STITCHES Machine Setting When forward and reverse feeds become unbalance depending upon the type of fabric,... -
Page 27: Decorative Satin Stitch
DECORATIVE SATIN STITCH Machine Setting Sew a row of stitches and adjust the thread tension so the upper thread should appear on 0 .5 ~ 1 the reverse side of the fabric. 1 ~ 4 Test the stitch on actual fabric for the best results. -
Page 28: Box Stitch
BOX STITCH Machine Setting Use this stitch to join heavy weight interlining. 1 ~ 2 Overlap two raw edges together and use this stitch to join them. 1 ~ 4 FREE SEAM Machine Setting Sie können nach eigenen Wünschen Dekor- Linien nähen (evtl. -
Page 29: Care Of Your Machine
CARE OF YOUR MACHINE DISMANTLING AND ASSEMBLING SHUTTLE RACE To dismantle the shuttle race and oil the shuttle race. Raise the needle to its highest position Note: and open the shuttle cover. 1. Use oil sparingly as over oiling will cause it 1. -
Page 30: To Assembling The Shuttle Race
TO ASSEMBLING THE SHUTTLE RACE 1. Hold the Shuttle by the center pin and fit it carefully back into the shuttle race, forming a perfect circle with the shuttle driver. 2. Attach the shuttle race cover making sure that the bottom pin fits into the notch. -
Page 31: Oiling The Machine
OILING THE MACHINE 1. Loosen the face cover screw and remove the Screw face cover to left side. 2. Oil the points shown by the arrows. Face cover Oil point Oil point Apply a few drops of fine quality sewing machine oil to the point indicated by the arrows in the figures. -
Page 32: Oiling The Connecting Rod
OILING THE CONNECTING ROD Little top cover screw 1. Loosen the little top cover screw used the screwdriver. Little top cover 2. Remove the little top cover. Apply a few drops of fine quality sewing ma- chine oil to the point indicated by the arrows in the figures. -
Page 33: Troubleshooting
TROUBLESHOOTING Errors Causes Solution Top thread broken Improper top threading. Threading the top thread again. (Refer to page 13) Excessively tight top tension. Adjust the top tension. (Refer to page 15) Blunt or bend needle. Replace the needle. (Refer to page 16) Improper fixing of needle. - Page 34 Skipping stitches Improper fixing of needle. Reinstall the needle. (Refer to page 16) Blunt or bend needle. Reinstall the needle. (Refer to page 16) The needle and (or) thread is un- Replace the proper needle and suitable for the used fabric. thread.
- Page 35 The warranty covers defects which the product already had at the time of purchase. If you detect a defect in the mia 300, you can demand a repair or otherwise rework from GLAESERhome. If the seller believes that the defect has arisen after the purchase, he is obligated to proof so within the first six months after purchase.
- Page 36 6–99 Stoffe Vielfalt Nähkurse Zubehör Heimtextilien Filiale Aalen | Benzstr. 5 | 73431 Aalen Filiale Marktoberdorf | Kaufbeurener Str. 74 | 87616 Marktoberdorf Filiale Mindelheim | Krumbacher Str. 38 | 87719 Mindelheim Filiale Renningen | Weil der Städter Str. 51 | 71272 Renningen Filiale Ulm | Blaubeurer Str.
Need help?
Do you have a question about the mia 300 and is the answer not in the manual?
Questions and answers