Table of Contents
Advertisement
Quick Links
Technical Support and E-Warranty Certificate
www.vevor.com/support
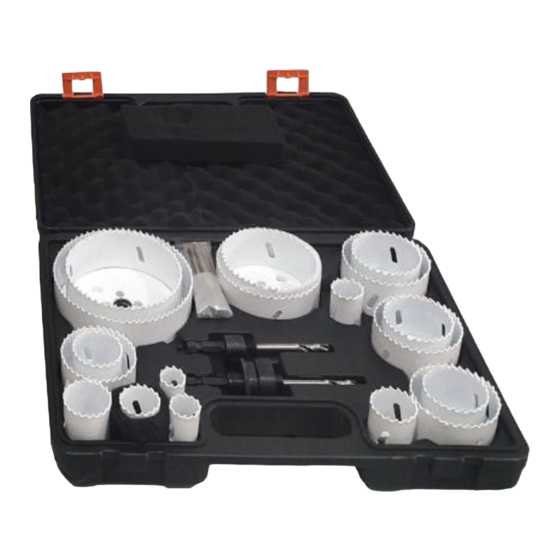
Hole Saw
We continue to be committed to provide you tools with competitive price.
"Save Half", "Half Price" or any other similar expressions used by us only represents an
estimate of savings you might benefit from buying certain tools with us compared to the
major top brands and doses not necessarily mean to cover all categories of tools offered by
us. You are kindly reminded to verify carefully when you are placing an order with us if you
are actually saving half in comparison with the top major brands.
Advertisement
Table of Contents

Related Manuals for VEVOR RD03-4001


Summary of Contents for VEVOR RD03-4001
- Page 1 Technical Support and E-Warranty Certificate www.vevor.com/support Hole Saw We continue to be committed to provide you tools with competitive price. "Save Half", "Half Price" or any other similar expressions used by us only represents an estimate of savings you might benefit from buying certain tools with us compared to the major top brands and doses not necessarily mean to cover all categories of tools offered by us.
- Page 3 CustomerService@vevor.com This is the original instruction, please read all manual instructions carefully before operating. VEVOR reserves a clear interpretation of our user manual. The appearance of the product shall be subject to the product you received. Please forgive us that we won't inform you again if there are any technology or software updates on our product.
-
Page 4: Safety Precautions
INSTRUCTIONS Thank you very much for choosing this hole saw. Please read all of the instructions before using it.The information will help you achieve the best possible results. The products in this catalog may be different in color than the actual item. Warning-To reduce the risk of injury, user must read instructions manual carefully. - Page 5 Use spare parts that comply with the product specification. The product and its size must be appropriate for the specification of the electrical drill used. Model and Parameters Model RD03-4001 RD03-4002 3/4, 7/8, 1, 1-1/8, 1- 3/4, 7/8, 1, 1-1/8, 1-1/4, 1-3/8, 1- 3/8,...
-
Page 6: Assembly And Usage
Mandrels For Hole Saws Fits Hole Saws Hole Saws Mandrels inches RD03-1009M-5 3/4, 7/8 , 1 , 1-1/8 19, 22, 25, 29 RD03-1006M-2 1-1/4, 1-3/8, 1-1/2, 1-3/4, 2, 32, 35, 38, 44, 51, 54, 57, 2-1/8, 2-1/4, 2-3/8, 2-1/2, 60, 64, 68, 76, 83, 95, 114 2-11/16, 3, 3-1/4, 3-3/4, 4-1/2 Assembly and Usage... - Page 7 CAUTION TO PREVENT INJURY: Wear heavy-duty work gloves and ANSI-approved safety goggles during setup and whenever handling the saws. 1. Select the desired size Hole Saw and either the Large or Small Mandrel. NOTE: Unthread the 2-1/2" and 2-1/8" Hole Saws from one another before use. 2.
-
Page 8: Precautions On Use
C. Tighten the knurled Locking Collar to extend the Locking Pins through the holes in the Hole Saw. D. Tighten the knurled Locking Collar securely to hold the Hole Saw in place. The shank shape allows for most chuck diameter. Precautions on use Securely chuck the shank to prevent swinging or falling. - Page 9 Hole Saws Recommended Cutting Speeds Hole Saw Diameter Material RPM(Rotation Per Minute) stainless steel aluminium wood Ø mm Ø inch steel 3000 3000 2700 1-1/8 2400 1-1/4 2400 1-3/8 2400 1-1/2 2400 1-3/4 2100 2000 2-1/8 2000 2-1/4 2000 2-3/8 2000 2-1/2 1850...
-
Page 10: Operation
Operation 1. Holding the drill at 90° to the workpiece, set the Hole Saw on the workpiece. 2. Press the drill's trigger to turn it on. 3. If the drill is a variable speed type, cut the work piece slowly until a circular groove is made in the workpiece. - Page 12 Technical Support and E-Warranty Certificate www.vevor.com/support...
Need help?
Do you have a question about the RD03-4001 and is the answer not in the manual?
Questions and answers