Table of Contents
Advertisement
Quick Links
P-XX1596 ISSUE 1
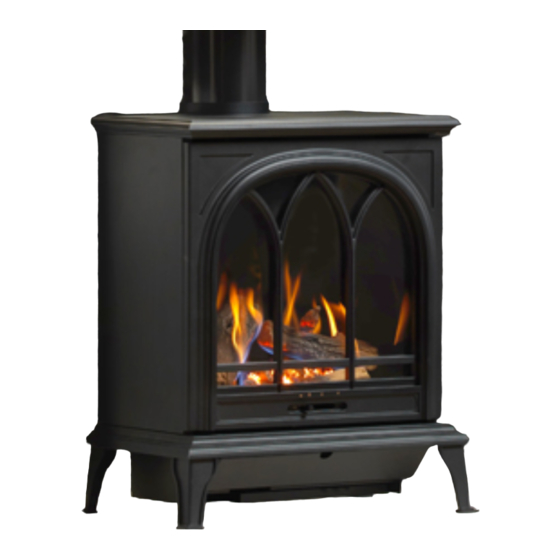
RAVEL 400C & 400T ROOM SEALED
BALANCED FLUE GAS FIRE
USER INSTRUCTIONS
INSTALLATION INSTRUCTIONS
SERVICE INSTRUCTIONS
Do not use this appliance if the front glass panel is broken, removed or fi ed incorrectly.
It is a regula on that these instruc ons be handed to the customer a er installa on is
complete. It is also the responsibility of the installa on engineer to ensure that the customer is
Model number: F-181XX2/ / / / F-181XY2 SLIDE for use on Natural Gas (G20) at a supply pressure of 20 mbar in GB /IE
(XX denotes trim/door type)
THIS INSTRUCTION MANUAL MUST BE LEFT
WITH THE CUSTOMER AFTER INSTALLATION
Advertisement
Table of Contents

Subscribe to Our Youtube Channel
Related Manuals for Wildfire RAVEL 400C


Summary of Contents for Wildfire RAVEL 400C
- Page 1 P-XX1596 ISSUE 1 RAVEL 400C & 400T ROOM SEALED BALANCED FLUE GAS FIRE USER INSTRUCTIONS INSTALLATION INSTRUCTIONS SERVICE INSTRUCTIONS Do not use this appliance if the front glass panel is broken, removed or fi ed incorrectly. It is a regula on that these instruc ons be handed to the customer a er installa on is complete.
-
Page 2: Table Of Contents
Contents Appliance Commissioning Check List ………………………………...……..…..……………......3 User Instruc ons—Important Informa on & Warnings ……………………………..………………..4 User Instruc ons—Controls & Opera on …………………………………………..……………………………... 5 User Instruc ons—General Maintenance ….……………….………………...………………………...…….…. 6 Log Layout Instruc ons …………………………………………………………………………………………………..8 Running In And Troubleshoo ng …………………………...……………………………………………………………..13 Unpacking the Appliance ...………………………………………………………………………………………….……….. -
Page 3: Appliance Commissioning Checklist
Safety Check APPLIANCE COMMISSIONING CHECKLIST It is the installers responsibility to complete the following checklist when commissioning this appliance. The informa on recorded on this page may be requested at the me of any warranty call made. If the informa on is not made available it may affect the warranty support for the customers appliance. -
Page 4: User Instruc Ons-Important Informa On & Warnings
USER INSTRUCTIONS Welcome 2.0 Congratula ons on the purchase of your new Wildfire Ravel 400 balanced flue gas stove. Ensure you keep these instruc ons in a safe place as they will be required for installa on, service and general upkeep of your appliance. These instruc ons should be followed precisely to ensure that you receive many years of trouble free service from your appliance. -
Page 5: User Instruc Ons-Controls & Opera On
USER INSTRUCTIONS Controls 2.1 This appliance has a slide control lever. It is posi oned in the space between door and the stove base plate. The lever will slide from right to le , this movement controls all func onality of the appliance, from igni on, flame control and turning the appliance off. -
Page 6: User Instruc Ons-General Maintenance
The control knob must also be unscrewed on the 400T model. See diagrams below. The door frame is now released from the firebox. RAVEL 400T RAVEL 400C Once released, the door frame can now be li ed ver cally upwards. There are two capture points on the le and right side of the door frame which must be cleared before the door frame will come away from the stove—it is important to keep the... - Page 7 USER INSTRUCTIONS Re-installa on of the panel should take place in reverse order, ensure the panel is securely GLASS DOOR located in its retaining bracket at the top, swing the glass panel inwards at the bo om and replace the two hexagonal headed screws. Note: Should the threads in the retaining bosses become damaged, they can be replaced by removing the two screws either side of the boss.
-
Page 8: Log Layout Instruc Ons
USER INSTRUCTIONS LOG SETUP 2.3 The following instruc ons detail how the ceramic fuel bed and loose components are to be installed onto the appliance. Great care should be taken when handling these ceramic parts as they are fragile and can easily be broken. Do not force any component into posi on, if it does not fit easily then you are not fi... - Page 9 USER INSTRUCTIONS Place the volcanic rock on top of the centre burner as shown. Ensure a 3-4 mm gap is le FUELBED between each piece. Then using quarter of the glowing ember wire supplied, ruffle between fingers to make it loose, about 20mm wide and as long enough to cover the volcanic rock then align over the rock as shown.
- Page 10 USER INSTRUCTIONS Place Log C as shown in the picture. Place Log E as shown in the picture.
- Page 11 USER INSTRUCTIONS Place Log A as shown in the picture. Place Log B as shown in the picture.
- Page 12 USER INSTRUCTIONS Place Log F as shown in the picture. Place Log G as shown in the picture.
-
Page 13: Running In And Troubleshoo Ng
USER INSTRUCTIONS Running In 2.4 When this appliance is first used it is important to note that you will experience some fumes and smells in the room of opera on. Any fumes emi ed during the first few minutes of use can be quite pungent and it is advised that a window is opened un l this subsides. -
Page 14: Unpacking The Appliance
INSTALLATION INSTRUCTIONS Unpacking 3.0 THIS APPLIANCE IS SHIPPED IN TWO CARTONS. CARTON ONE CONTAINS appliance THE APPLIANCE AND CARTON TWO CONTAINS THE FLUE KIT. ENSURE YOU HAVE BOTH CARTONS BEFORE PROCEEDING WITH THE INSTALLATION. TAKE GREAT CARE WHEN UNPACKING THE APPLIANCE—SOME PARTS CAN BE EASILY DAMAGED. -
Page 15: Regulatory Informa On
INSTALLATION INSTRUCTIONS Regulatory 3.1 NOTE THE FOLLOWING PRIOR TO THE INSTALLATION OF THIS APPLIANCE. Informa on This gas appliance MUST be installed by a GAS SAFE registered installer by law. It must be installed in accordance to these installa on instruc ons and the GAS SAFETY (Installa on &... -
Page 16: Si Ng Requirements
INSTALLATION INSTRUCTIONS 3.4.1 Do not place so wall coverings (i.e. embossed papers etc,) furniture or other Site combus ble items too close to the appliance as they may discolour or scorch. Requirements Do not place or throw rubbish or otherwise on the fuel-bed. It is very important that you arrange for a GAS SAFE registered engineer to service your appliance every year –... -
Page 17: Regulatory Requirements For Flue Terminal Loca On
INSTALLATION INSTRUCTIONS 3.4.5 REGULATORY REQUIREMENTS FOR FLUE TERMINAL LOCATION THE FOLLOWING MUST BE NOTED PRIOR TO THE INSTALLATION OF THIS APPLIANCE. Figure 1 Terminal Posi on Minimum Distance Directly below an opening, airbrick, opening window etc. 300mm Above an opening, air brick, opening window etc. 300mm Horizontally to an opening, air brick opening window etc. -
Page 18: Si Ng The Appliance And Preparing The Opening
INSTALLATION INSTRUCTIONS 3.4.6 SITING THE APPLIANCE Figure 2 Figure 2 shows the maximum length flue a ached to the appliance. If the distance from the rear face of the stove panel to the outside wall exceeds 578mm the installa on cannot proceed. In most installa ons the flue sec on will need to be cut to the appropriate size. - Page 19 INSTALLATION INSTRUCTIONS 3.4.4 The following drawings show the recommended fireplace openings required Clearances from combus bles and non combus bles for installa on. This drawing shows Combus bles minimum clearances from combus ble materials. minimum clearance of 50mm must be le at the rear of the appliance (from the back ver cal face).
- Page 20 INSTALLATION INSTRUCTIONS Timber Frame Buildings If the appliance is being installed into a mber framed building the hole through which the flue will pass must have a steel sleeve posi oned such that a minimum 25mm air gap exists between the outside diameter of the flue pipe and the metal sleeve –...
- Page 21 INSTALLATION INSTRUCTIONS Fixing the Appliance. With the UNCUT FLUES FITTED to the appliance, drill the 3 holes as shown in the OUTER flue and fix with the 3 screws provided. Next place the fire into its installa on posi on, temporarily, while the flue lengths are confirmed.
- Page 22 INSTALLATION INSTRUCTIONS The rear face of the wall plate should be sealed with proprietary sealing compound or mortar. The outer flue The inner flue...
-
Page 23: Fi Ng The Terminal & Terminal Guard
INSTALLATION INSTRUCTIONS 3.4.7 FITTING THE TERMINAL & TERMINAL GUARD ONLY THE TERMINAL AND TERMINAL GUARD SUPPLIED WITH THIS PRODUCT SHOULD BE FITTED. THIS TERMINAL GUARD ALLOWS CLEARANCE FOR BLAST FLAP CLEARANCE. From the outside carefully insert the inner flue, the flue guides should be towards the outside wall, to keep the two flues concentric before they enter the terminal. - Page 24 INSTALLATION INSTRUCTIONS Using the diagram below, fold the terminal guard, aligning the screw fixing holes in each corner to create the correct shape. Now fix the guard to the wall using the screws Screw the guard to the terminal loca ng bracket (fi ed and plugs provided.
-
Page 25: Appliance Data Informa On
INSTALLATION INSTRUCTIONS 4.1 Appliance Data Gas Type Natural Gas Inlet Pressure 20mbar ±1mbar Gas Connec on 8mm pipe Injector 0.71(3) 0.81(2) Pilot Body P-XX1318A Thermocouple c/w Microswitch P-XX13181 Input High Rate (Gross) 4.0kW (0.38m /hr) Input Low Rate Slide Control (Gross) 2.6kW (0.24m /hr) Ba ery Type (Electronic Igniter) -
Page 26: Log Layout Instruc Ons
INSTALLATION INSTRUCTIONS LOG SETUP 4.2 The following instruc ons detail how the ceramic fuel bed and loose components are to be installed onto the appliance. Great care should be taken when handling these ceramic parts as they are fragile and can easily be broken. Do not force any component into posi on, if it does not fit easily then you are not fi... - Page 27 INSTALLATION INSTRUCTIONS Place the volcanic rock on top of the centre burner as shown. Ensure a 3-4 mm gap is le FUELBED between each piece. Then using quarter of the glowing ember wire supplied, ruffle between fingers to make it loose, about 20mm wide and as long enough to cover the volcanic rock then align over the rock as shown.
- Page 28 INSTALLATION INSTRUCTIONS Place Log C as shown in the picture. Place Log E as shown in the picture.
- Page 29 INSTALLATION INSTRUCTIONS Place Log A as shown in the picture. Place Log B as shown in the picture.
- Page 30 INSTALLATION INSTRUCTIONS Place Log F as shown in the picture. Place Log G as shown in the picture.
-
Page 31: Ligh Ng The Fire
INSTALLATION INSTRUCTIONS LIGHTING 4.3 Opera ng Instruc ons This appliance has a slide control lever. It is posi oned in the THE FIRE space between door and the stove base plate. The lever will slide from right to le , this movement controls all func onality of the appliance, from igni on, flame control and turning the appliance off. -
Page 32: Complete The Installa On
INSTALLATION INSTRUCTIONS Complete the 4.4 INFORM THE CUSTOMER OF THE FOLLOWING TO COMPLETE THE INSTALLATION installa on Demonstrate the ligh ng of the appliance and the controls to control the heat se ngs. Demonstrate how to turn the fire off. Demonstrate the removal of the door frame and how to reinstall correctly. - Page 33 SERVICING INSTRUCTIONS HEALTH AND SAFETY NOTICE This appliance uses fuel effect pieces manufactured from Refractory Ceramic Fibres (RCF). Care must be taken to avoid excessive exposure to these materials as they may cause irrita on to the eyes, skin, nose and throat. When Handling avoid inhaling and contact with skin and eyes.
-
Page 34: Servicing The Appliance
SERVICING INSTRUCTIONS 5.0 Servicing the Appliance. Servicing The following procedures can and should only be performed by a Gas Safe registered installer. This appliance should be serviced annually by a Gas Safe registered installer. Isolate the appliance using the restrictor elbow and remove the 8mm nut from the restrictor as detailed below. -
Page 35: Removal/Replacement Of The Side Glass Panels
SERVICING INSTRUCTIONS 5.2 Removal/Replacement of the Side Glass Panels. These glass panels can simply be slid out from the appliance once the front glass panel is removed. 5.3 Removal/Replacement of the Side Ceramic Plates. To remove the side ceramic plates, the side glass panels must first be removed –see above. Now the side ceramic plates can be rotated from the bo om and slid out from the firebox. -
Page 36: Removal/Replacement Of The Rear Glass Panel
SERVICING INSTRUCTIONS 5.4 Removal/Replacement of the Rear Glass Panel. To remove the rear glass panel, the side glass panels and side ceramic plates must be removed first –see previous page. And then remove the 9 screws shown in the diagram below, the LH and RH burners, the LH and RH cover plates can be removed. -
Page 37: Removal Of The Burner Tray
SERVICING INSTRUCTIONS 5.6 Removal of the burner tray. Remove the 4 (four) screws to remove the middle burner as shown in the first diagram. The removal and replacement of all the gas carrying components will require the removal of the burner tray. -
Page 38: Removal Of The Pilot
SERVICING INSTRUCTIONS 5.7 Removal of the pilot. A er the removal of the burner tray, remove the HT lead from the base of the spark electrode and unscrew the pilot gas inlet nut as shown in the diagram below. HT lead pilot gas inlet nut Now remove the two screws to release the pilot. - Page 39 SERVICING INSTRUCTIONS 5.7 Removal of the pilot— Con nued. Now remove the thermocouple from the back of the slide valve and then remove the two small screws securing the microswitch to the underside of the burner tray.
-
Page 40: Remove Of Slide Gas Valve
SERVICING INSTRUCTIONS 5.8 Remove of Slide Gas Valve. Release the gas inlet, main burner outlet and pilot outlet nuts from the slide valve. Then remove the thermocouple from the back of the valve. Unscrew the clamping nut from the front of the valve (see lower diagram) . Whilst holding the opera ng control lever in the OFF posi on, the valve can be carefully manipulated from the burner tray. -
Page 41: Removal Of Tee Valve
SERVICING INSTRUCTIONS 5.9 Removal of Tee Valve (High Se ng). Remove the 3 (three) gas connec ons from the Tee Valve as shown below. Now remove the 2 (two) nuts securing the Tee Valve as shown in the diagram below. The Tee Valve can now be removed. -
Page 42: Remove Of Spark Generator
SERVICING INSTRUCTIONS 5.10 Remove of spark generator. This service work will not require removal of the burner tray. The spark generator carrier plate can be removed by taking out the two screws shown in the diagram below. Once the carrier plate is removed, unscrew the ba ery cap, remove the ba ery then unscrew the large nut securing the spark generator to the plate. -
Page 43: Removal Of Injectors
SERVICING INSTRUCTIONS 5.11 Removal of Injectors. This service work will not require removal of the lower access door, the glass panels, the ceramic plates or the burner tray. Remove the 4 screws as shown in the diagram. The LH and RH burners can now be removed. - Page 44 SERVICING INSTRUCTIONS 5.11 Removal of Injectors — Con nued. Remove the 4 screws as shown in the diagram. The middle burners can now be removed. The #71 injector can be accessed using the socket drive. #71 Injector...
-
Page 45: Record Of Annual Services
SERVICING INSTRUCTIONS 6.0 Record of annual services The extended warranty of the specified components within this appliance is condi onal on the annual service of the appliance by a Gas Safe registered engineer. Failure to maintain the product or to use the product in away which is not intended will void the manufacturer's warranty. -
Page 46: Product Fiche
Product Fiche Manufacturer : Hearth Products Ltd Model No. F-181XX2 Fuel Type Natural Gas I Energy Efficiency Class Indirect Hea ng Func onality Direct Heat Output kW 3.0kW Indirect Heat Output kW 75.2% Useful Energy Efficiency (NCV) High : 84.2% Useful Energy Efficiency (NCV) Nominal Heat Output High : 3.0kW... -
Page 47: Manufacturers Instruc Ons And User Replaceable Spares
User Replaceable Parts Part Number Descrip on P-XX1235 Ceramic Log Set P-XX1212A Volcanic Rock Pack P-XX1213 Ceramic Bark Pack P-XX1234 Ember Wire Pack P-140018A Glass Door Panel Assembly Hearth Products Ltd Unit 14 Tollgate Industrial Estate, Stafford, ST16 3SU Www.hearthproducts.co.uk Tel: 01785 225401 Fax: 01785 225501 Email: info@hearthproducts.co.uk Due to our policy of con nual product improvement, some diagrams and small details may not be accurate however if there is any...
Need help?
Do you have a question about the RAVEL 400C and is the answer not in the manual?
Questions and answers