Table of Contents
Advertisement
Quick Links
IN480 Series
Inverted Biological
Microscope
INSTRUCTIONS
This manual is for the using method, troubleshooting and maintenance about
IN480 series biological microscope. Please study this manual thoroughly before
operating, and keep it with the instrument. The manufacturer reserves the rights to
the modifications. Technical specifications may be subject to changes without
notice.
Advertisement
Table of Contents

Related Manuals for AmScope IN480 Series


Summary of Contents for AmScope IN480 Series
- Page 1 INSTRUCTIONS This manual is for the using method, troubleshooting and maintenance about IN480 series biological microscope. Please study this manual thoroughly before operating, and keep it with the instrument. The manufacturer reserves the rights to the modifications. Technical specifications may be subject to changes without...
-
Page 2: Table Of Contents
Contents IN480 Series Before Use 1.Components ......................1 2.Assembling ....................... 3 2-1 Assembling Scheme ..................3 2-2 Assembling Steps ....................4 3.Adjustment Device ....................8 4.Using Adjustment Device ..................10 4-1 Stand ........................10 4-2 Stage ........................11 4-3 Observing Tube ....................12 4-4 Illumination Device .................. - Page 3 Before Use IN480 Series 1. Operation Notice 1. As the microscope is a high precision instrument, always operate it with care, and avoid physical shake during the operation. 2. Do not expose the microscope in the sun light directly, neither in the high temperature, damp, dust or acute shake.
- Page 4 IN480 Series 3. Safety Sign Sign Signification Hot at surface, do not touch. Study the instructions before use. Unsuitable operation would lead to person hurt or instrument faulty. Main switch ON Main switch OFF...
-
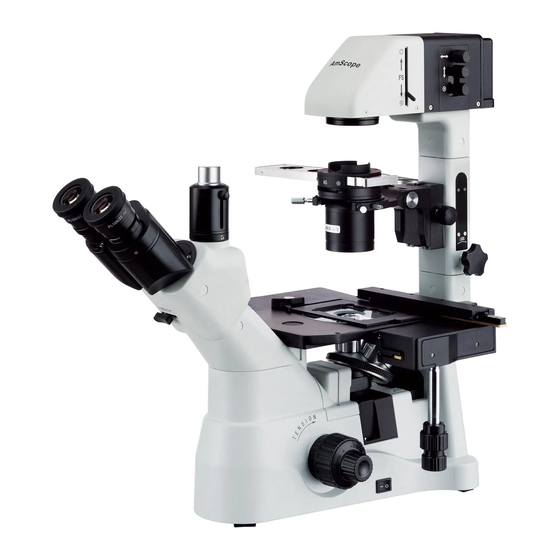
Page 5: Components
1. Components IN480 Series IN480B Koehler Illuminator Objective Light Source Illumination Holder Phase-contrast Slider Long Working Eyepiece Distance Condenser Binocular Circular Central Stage Observing Tube Metal Stage ● Glass Stage ● Nosepiece Stand Stage Stage Extension Board ● Attachable Mechanical Stage... - Page 6 IN480 Series IN480T Koehler Illuminator Light Source Objective Illumination Holder Phase-contrast Slider Long Working Distance Condenser Eyepiece Circular Central Stage Metal Stage ● Trinocular Glass Stage ● Observing Tube Stand Stage Nosepiece Stage Extension Board ● Attachable Mechanical Stage ●...
-
Page 7: Assembling
2. Assembling IN480 Series 2-1 Assembling Scheme Following is the Assembling Scheme, and the numbers denote the assembling order. ★ Before assembling, make sure there is no dust or dirt. Assemble carefully and do not scrap any part or touch the glass surface. -
Page 8: Assembling Steps
IN480 Series 2-2 Assembling Steps 2-2-1 Assemble and change the bulb (see Fig.1) ◎ Lamp selected only: 6V/30W HAL bulb (Philips 5761) ★ Do not touch the bulb with finger. If there is a fingerprint, wipe it with clean and soft cloth. - Page 9 IN480 Series ◎ For ease of use, please following this assemble direction. ◎ It can also be assembled by aperture on the stage. ★★★★ Clean the objectives periodically because the inverted microscope objectives are sensitive. ★★★★ Cover the hole on the nosepiece with a dust cap③...
- Page 10 IN480 Series 2-2-5 Circular central stage (see Fig.7) 1. Assemble the metal stage① on the stage aperture. Turn the metal stage V② facing to the user. It is easier to check the objective. 2. Lay glass stage flat when using it. There is special direction.
- Page 11 IN480 Series 2-2-8 Assemble the filter (see Fig.10) ★★★★ Make sure the filter has completely cool down before changing it. 1. Place the filter① into the filter holder②. 2. Filter can overlap on another filter when needed, but the thickness must not exceed 8mm.
-
Page 12: Adjustment Device
3. Adjustment Device IN480Series IN480B ★ Main Switch, Coarse Tension Adjusting Ring, Tumbler Lock Knob, Field Diaphragm Adjusting Rod, Light Source Centering Knob is on the right of the equipment. See XD30A for its location. ★ Phase-contrast slide adopt phase center adjustable slide configured with phase center presetting rod. - Page 13 IN480 Series IN480T ★The Brightness Adjusting Knob and Frosted Glass Flapper is on the left of the equipment. Light Source Field Diaphragm Centering Knob Adjusting Rod Filter Holder Phase-contract Slider Aperture Diaphragm Adjusting Rod Condenser Up-down Knob Interpupillary Distance Pointer...
-
Page 14: Using Adjustment Device
4. Using Adjustment Device IN480 Series 4-1 Stand 4-1-1 Turn on the light (see Fig.14) Connect the power cord. Turn on the main switch① to “—” (on). Fig. 14 4-1-2 Adjusting brightness (see Fig.15) Turn the dial① clockwise to brighten the light. -
Page 15: Stage
IN480 Series 4-2 Stage 4-2-1 Placing sample (see Fig.17&Fig.18) Place the sample in the center of the stage. ★ Please select the container like Petri dish, culture flask etc, with the thickness matching objective mark to get the best observe effects. -
Page 16: Observing Tube
IN480 Series 4-3 Observing Tube 4-3-1 Adjusting diopter (see Fig.19&Fig.20) ◎ For IN480B 1. Turn coarse focusing knob and fine focusing knob to focus the specimen when observing the left eyepiece with left eye. 2. Then observe the right eyepiece with right eye. - Page 17 IN480 Series 4-3-3 Use the eye-cap (see Fig.22) 1. If the user wears glasses, turn over the eye- cap① to prevent the glasses from touching the eyepiece and avoid damaging the glasses and the eyepiece. 2. If the user doesn’t wear glasses, open the eye-cap②.
-
Page 18: Illumination Device
IN480 Series 4-4 Illumination Device 4-4-1 Using filters ◎ Use filters to increase the accuracy of Color filter Purpose the observation and photomicrography. Monochromatic contrast filter (Green) IF550 Suggest using LBD filter to get more (Use in phase-contrast observation) neutral hue when observing bright-field... - Page 19 IN480 Series 4-4-3 Adjusting the Field Diaphragm By limiting the diameter of the beam entering the condenser, the field diaphragm can prevent other light and make the image contrast sharper. When the image is just on the edge of the field of view, the objective can show the best performance and obtain the clearest image.
- Page 20 IN480 Series 4-4-6 Changing Condenser (see Fig.28) ◎ When changing from low magnification observe high magnification observe, condenser need to be changed to N.A.0.5 condenser. Loosen condenser fixing rod①, take out N.A.0.3 condenser and replace with a N.A.0.5 condenser. Tighten condenser fixing rod.
-
Page 21: Phase-Contrast Observation
5. Phase-contrast observation IN480 Series 5-1 Nomenclature 5-1-1 Phase-contrast objective ◎ Magnification: 10X, 20X, 40X. ◎ Replace the objectives with phase-contrast objectives as 2-2-3. 5-1-2 XDSLP phase-contrast slider (see Fig.30) ◎ Phase center presetting slider ● Light loop center is preset, no need of adjustment. -
Page 22: Assembling And Operating
IN480 Series 5-2 Assembling and operating 5-2-1 Assemble phase-contrast slider (see Fig.32) 1.Place phase-contrast slider ① upward (the side with letters). Insert it into the illumination holder from right to left. 2. Each diaphragm has its corresponding part. Enter the diaphragm into optical way by moving the slide until click sound heard. - Page 23 IN480 Series 6. Repeat the steps to center the other phase- contrast. Remember to use the same phase- contrast slider with 10X and 20X. Move the objective which has not been centered into light path to see if the light loop① overlays with the phase loop②.
-
Page 24: Tv Device & Photography Device
6. TV device & Photography device IN480 Series 6-1 TV device 6-1-1 Choosing the light path (see Fig.35) ★ For trinocular head only. 1. Move the block for light path shifting as the figure shows. 2. Move it until hearing a click. -
Page 25: Photography Device
IN480 Series 6-2 Photography Device 6-2-1 Choosing light path ★ For trinocular head only. See 6-1-1 and 4-3-4 for details. 6-2-2 Assemble the Photography device (see Fig.38 & Fig.39) 1. Loosen the lock-screw① on the trinocular head and remove the dust-cover② of the trinocular. - Page 26 IN480 Series 6-2-3 Focus Set 20% of brightness to make binocular observation. Focus the specimen by view finder when taking photo. See instructions of the camera assembly parts for details. 6-2-4 Adjusting color temperature ◎ Use daylight type film to take photo 1.
-
Page 27: Technical Specifications
7. Technical Specifications IN480 Series 7-1 Technical Parameters Optical system Color corrected infinity optical system (CSIS) Gemel type of binocular head, 45° inclined, Gemel type of trinocular head, 45° inclined, Head light splitting rate: binocular 100%, binocular 50%/ trinocular 50%, (interpupillary distance range:50-76mm) -
Page 28: Troubleshooting
8. Troubleshooting IN480 Series Reference Problem Cause Solution page 1. Optical Part: Lamp base is not connect to Connect it correctly and firmly illumination device The bulb burns out Replace it with new one The light adjust dial is turned 1. - Page 29 IN480 Series Reference Problem Cause Solution page Interpupillary distance is wrong Adjust the interpupillary distance 6. The eyes feel tired Diopter adjustment is wrong Adjust the diopter easily. The right field of view doesn’t Do not goggle at the specimen...
Need help?
Do you have a question about the IN480 Series and is the answer not in the manual?
Questions and answers