Advertisement
Quick Links
Advertisement

Related Manuals for HighSecLabs SX42 U-3 Series


Summary of Contents for HighSecLabs SX42 U-3 Series
- Page 1 SECURE MINI-MATRIX SWITCHES | QUICK SETUP GUIDE Table of Contents SECTIONS Models: SX42xU-3 – Secure 4P to 2P DVI-I / HDMI / DP Video KVM Mini-Matrix w/fUSB, PP 3.0 SX82xU-3 – Secure 8P DP to 2P DP / DVI-I Video KVM Mini-Matrix w/fUSB HDC12275 Rev.
- Page 2 Table of Contents SECTIONS TABLE OF CONTENTS Introduction HSL Secure Mini-Matrix Package Contents Before Installation Tamper-Evident Labels Active Anti-Tampering System Installation Installing the Mini-Matrix Initial Setup Operation Operating the Mini-Matrix 4-Port Presets 8-Port Presets Advanced Presets Keyboard Shortcut Options HSL Mini-Matrix Quick Setup Guide...
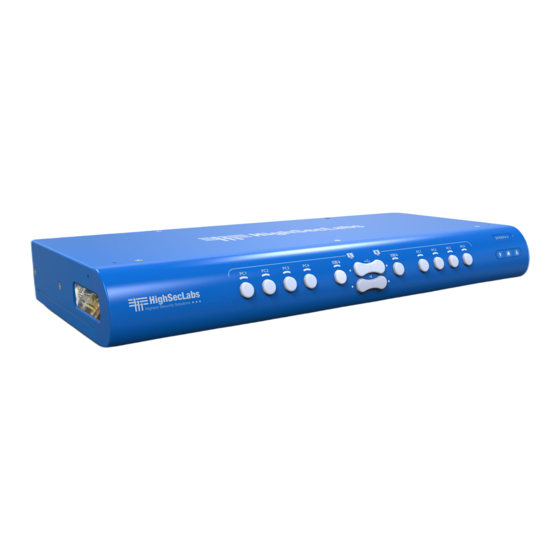
- Page 3 Table of Contents SECTIONS INTRODUCTION HSL Secure Mini-Matrix environments, where users are required to view and Optimizes user experience when working with interact with several computers, while maintaining multiple computers. Enables you to view and control the highest isolation between computers and two out of four computers, at the same time, while peripherals.
- Page 4 Table of Contents SECTIONS INTRODUCTION Package Contents Inside the product packaging is the following: Model Description Secure 4P to 2P DVI-I / HDMI / DP Video KVM Mini-Matrix w/fUSB, PP 3.0 SX42xU-3 Power cable Secure 8P to 2P DP to DP Video KVM Mini-Matrix w/fUSB SX82xU-3 Rack mount kit Power cable...
- Page 5 Table of Contents SECTIONS INTRODUCTION Before Installation Unpacking the Product • Before opening the product’s sealed packaging, inspect the seal’s condition to assure that the product was not accessed or tampered with during delivery. If the packaging seal looks suspicious contact the HSL support team and do not use the product.
-
Page 6: Tamper-Evident Labels
Table of Contents SECTIONS INTRODUCTION Tamper-Evident Labels • The Mini-Matrix KVM Switch uses a holographic tamper evident label to provide visual indications in case of enclosure intrusion attempts. These labels indicate white dots or the text “VOID”, once removed. When opening the product’s packaging, inspect the tampering evident label. -
Page 7: Active Anti-Tampering System
Table of Contents SECTIONS INTRODUCTION Active Anti-Tampering System • The Mini-Matrix KVM Switch is equipped with an always-on active antitampering system. mechanical intrusion is detected by this system, the switch is permanently disabled and the LED blinks continuously. • If the product indicates a tampered state (all LEDs blinking) - call HSL Technical Support and avoid using the product. -
Page 8: Installation
Step 1 – Install Cables source computers that have multiple screens (currently available only for Windows) Connect the console port peripherals: (http://highseclabs.com/dl.php?fid=446). • Connect the video displays to the Mini-Matrix primary and secondary display ports. Note: It is highly recommended to use identical primary and secondary display models. - Page 9 Table of Contents SECTIONS INSTALLATION Step 2 - Power ON the Mini-Matrix Turn ON all the PCs. Connect the power supply and power ON the Mini-Matrix (approximate boot time is 10 seconds). The Mini-Matrix boots in to duplicate mode, where the source number 1 is presented on both displays.
- Page 10 Table of Contents SECTIONS INSTALLATION Step 3 - Reset to Factory Defaults Important Notes: Reset to factory defaults clears the device settings and 1. Always use the left control key (Ctrl) unless otherwise specified. restores the device to its original configuration. You have the 2.
- Page 11 Table of Contents SECTIONS OPERATION • Use the front-panel push buttons to independently Operating the Mini-Matrix switch the video/usb /audio/keyboard and mouse ports between the primary and secondary computers. This is Step 1 - Display and Control Options useful for various scenarios, for example: Display and control options define which source to display and ◦...
-
Page 12: Operation
Table of Contents SECTIONS OPERATION How to define the mouse state Step 2 - Relative vs. Absolute Mouse • Use the key combination { L Ctrl | L Ctrl | F11 | c } to The Mini-Matrix is set up with the following mouse settings: enable absolute mouse (VDT). - Page 13 Table of Contents SECTIONS OPERATION Step 3 - Predefined Display Layouts (Presets) What are presets? Note: Presets do not apply to 2P SX22x-3. • Presets reflect the layout and boarders of computer displays to the Mini-Matrix. • The Mini-Matrix includes six predefined presets, described below.
- Page 14 Table of Contents SECTIONS OPERATION - 4-PORT ADVANCED PRESETS Preset #1 (default) { L Ctrl | L Ctrl | F11 | F1 } (applicable for both 4P and 8P) Setup: • Connect PCs to the computer/source ports: Connect each computer’s display, USB, and audio cables to the corresponding computer port.
- Page 15 Table of Contents SECTIONS OPERATION - 4-PORT ADVANCED PRESETS Preset #2 { L Ctrl | L Ctrl | F11 | F2 } (applicable for both 4P and 8P) • Two displays/monitors (monitors 1 and 2) are connected to the primary and secondary console ports.
- Page 16 Table of Contents SECTIONS OPERATION - 4-PORT ADVANCED PRESETS Preset #4 { L Ctrl | L Ctrl | F11 | F4 } • Same as Preset #3 when source #4 is directly connected to a primary screen. • Two display/monitors (monitors 1 and 2) are connected to the primary and secondary console ports.
- Page 17 Table of Contents SECTIONS OPERATION - 4-PORT ADVANCED PRESETS Preset #6 { L Ctrl | L Ctrl | F11 | F6 } • Two displays/monitors (monitors 1 and 2) are connected to the primary and secondary console ports. • Two dual-display sources (PC 1 and 2) are connected to the Mini-Matrix source ports 1-4. •...
- Page 18 Table of Contents SECTIONS OPERATION - 4-PORT ADVANCED PRESETS Preset #7 { L Ctrl | L Ctrl | F11 | F7 } • Two displays/monitors (monitors 1 and 2) are connected to the primary and secondary console ports. • Two dual-display sources (PC 1 and 2) are connected to the Mini-Matrix source ports 1-4. •...
- Page 19 Table of Contents SECTIONS OPERATION - 4-PORT ADVANCED PRESETS Preset #8 { L Ctrl | L Ctrl | F11 | F8 } • Two displays/monitors (monitors 1 and 2) are connected to the primary and secondary console ports. • Two single-display sources (PCs 1 and 2) and one dual-display source (PC 3) are connected to the Mini-Matrix source ports 1-4.
- Page 20 Table of Contents SECTIONS OPERATION - 4-PORT ADVANCED PRESETS Preset #9 { L Ctrl | L Ctrl | F11 | F9 } • Two displays/monitors (monitors 1 and 2) are connected to the primary and secondary console ports. • Two single-display sources (PCs 2 and 3) and one dual-display source (PC 1) are connected to the Mini-Matrix source ports 1-4.
- Page 21 Table of Contents SECTIONS OPERATION - 4-PORT ADVANCED PRESETS Preset #10 { L Ctrl | L Ctrl | F11 | F10 } • One display/monitor (monitor 1) is connected to the primary console port. • One display/monitor (monitor 2) is connected directly to PC #1 primary-display adapter.
- Page 22 Table of Contents SECTIONS OPERATION - 8-PORT ADVANCED PRESETS Preset #1 (default) { L Ctrl | L Ctrl | F11 | F1 } (applicable for both 4P and 8P) Setup: • Connect PCs to the computer/source ports: Connect each computer’s display, USB, and audio cables to the corresponding computer port.
- Page 23 Table of Contents SECTIONS OPERATION - 8-PORT ADVANCED PRESETS Preset #2 { L Ctrl | L Ctrl | F11 | F2 } (applicable for both 4P and 8P) • Two displays/monitors (monitors 1 and 2) are connected to the primary and secondary console ports.
- Page 24 Table of Contents SECTIONS OPERATION - 8-PORT ADVANCED PRESETS Preset #4 { L Ctrl | L Ctrl | F11 | F4 } • Two display/monitors (monitors 1 and 2) are connected directly to the PC #6 and PC #7 primary- display adapter.
- Page 25 Table of Contents SECTIONS OPERATION - 8-PORT ADVANCED PRESETS Preset #6 { L Ctrl | L Ctrl | F11 | F6 } • One display/monitor (monitor 2) is connected to the primary console port. • One display/monitor (monitor 1) is connected directly to the PC #1 primary- display adapter.
- Page 26 Table of Contents SECTIONS OPERATION - 8-PORT ADVANCED PRESETS Preset #7 { L Ctrl | L Ctrl | F11 | F7 } • One display/monitor (monitor 2) is connected to the primary console port. • One display/monitor (monitor 3) is connected to the secondary console port. •...
- Page 27 Table of Contents SECTIONS OPERATION - ADVANCED PRESETS Preset { L Ctrl | R Ctrl | M } - Legacy Mode - functioning as KVM (applicable for both 4P and 8P) • One display/monitor is connected to the primary console ports. •...
- Page 28 Table of Contents SECTIONS OPERATION - ADVANCED PRESETS Preset { L Ctrl | L Ctrl | F11 | D } - Switch to dual-head KVM preset (applicable for both 4P and 8P) The KVM behaves like a 2P or 4P dual head KVM. e.
-
Page 29: Action Description
Table of Contents SECTIONS OPERATION Keyboard shortcut options Action Description Keyboard Action Description Keyboard Switch DPP to the right Reset to factory defaults L-Ctrl | L-Ctrl | F11 | R (press second time to lock, press R-Ctrl | R-Ctrl | [Arrow] down third time to unlock) Activate relative mode L-Ctrl | L-Ctrl | F11 | B... - Page 30 Highseclabs.com ©2019 All rights reserved. HSL logo and product names are trademarks or service trademarks of HighSecLabs Ltd (HSL). All other marks are the property of their respective owners. Images for demonstration purposes only. This document may contain confidential and/or proprietary information of HSL...
Need help?
Do you have a question about the SX42 U-3 Series and is the answer not in the manual?
Questions and answers