
Subscribe to Our Youtube Channel
Related Manuals for Envertech EVT400-R


Summary of Contents for Envertech EVT400-R
- Page 1 User Manual Envertech Corporation Ltd. Tel: +86 21 6858 0086 Web: www.envertec.com EVT400-R Email: info@envertec.com Add: No.138, Xinjunhuan road, Minhang District, Shanghai, China USM-R-2023-V01...
-
Page 2: Table Of Contents
Content Important Safety Information ....... 1 Read it First ............... 1 Safety Instructions ............ 1 Envertech Microinverter System ......1 How it Works ............2 Monitoring Device EnverBridge ........ 2 Optimal Reliability............. 3 Simple Design ............3 Product Information ..........3 Overview .............. -
Page 3: Important Safety Information
Please be kindly note that the Envertech microinverter itself is a heat sink. Under normal operating conditions, its temperature is 20°C above ambient, but under extreme conditions, the microinverter can reach a temperature of 90°C. -
Page 4: How It Works
EnverBridge (Optional): Monitoring and protecting PV system. You can view the real-time data from a web browser or Envertech app. This integrated solar system maximizes energy harvest, increases system reliability. Simplifies design, installation and management. EnverPortal: http://www.envertecportal.com 2.1 How it Works The Envertech microinverter maximizes energy production from your photovoltaic (PV) array. -
Page 5: Optimal Reliability
The distributed nature of a microinverter system ensures that there is no single point failure in the PV system. Envertech Microinverters are designed to operate at full power at ambient temperatures as high as +65 ℃ (150 ℉ ). The microinverter casing is designed for outdoor installation and complies with the IP67 protection level. -
Page 6: Datasheet
13 Units 4. Preparation Cable) 4.1 Packing Checklist Efficiency After you receive the Envertech microinverter, please check if there is any Peak Efficiency 96.5% damage on the carton, and then check the inside completeness for any visible MPPT Efficiency 99.9% external damage on the microinverter and accessories. -
Page 7: Product Description
No unauthorized perforations or modifications Any unauthorized perforations or modifications are strictly forbidden. If any defect or damage (device/person) is occurred, Envertech shall not take any responsibility for it. -
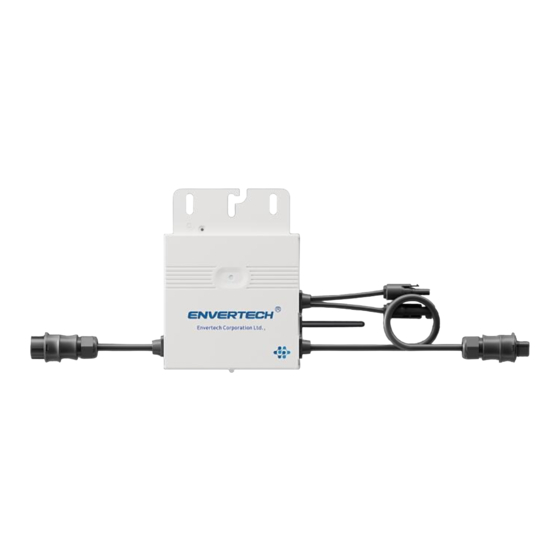
Page 8: Accessories
Mount all microinverters under modules to avoid rain and sun, with the trademark facing downward. Only qualified personnel may connect the Envertech microinverter to Note: Please make sure that there are less than 13 units of EVT400 in each the utility grid after receiving prior approval from the electrical utility company. - Page 9 Step 6. Fasten AC cables and seal the unused connector Fasten AC cables and grounding cables to the rack with cable ties. Insert the end cap directly into the connector on the unused end, and check if it is inserted in place. Step 3.
- Page 10 EnverBridge Installation Extension cable Step 10. WI-FI Configuration Option 1. Use EnverView app to configure Wi-Fi Option b. Put the open parts of the extension cable into the plug and use Note: Please place the EVT400 as close as possible to the router. the plug to connect to the socket The EVT400 has built-in WI-FI modular which is able to connect the router directly.
- Page 11 of 2.4GHz Wi-Fi network. Please allow EnverView app to use your location. Or you will fail to configure Wi-Fi. d. Click Configuration and wait for success. Note: 1. Please carefully check the Wi-Fi password, such as extra spaces. 2. Ensure that the Wi-Fi name and password do not contain , ; = or other special characters.
- Page 12 5. Fill in the corresponding Wi-Fi password and press "Save". 2. Use a browser to open the webpage: http://10.10.100.254 . Log in to the account with the credentials below. Username: admin Password: admin 6. After the above operation, click "Restart". It will restart after 5 seconds. 3.
- Page 13 Fields marked with an asterisk (*) are required. For Device S/N, you can find S/N labeling on EVT400 or outer packaging. Enter the last 8 digits of it or scan the corresponding barcode. 2) MI Binding Option 1. Use EnverView app to bind MI Step 1.
- Page 14 Step 2. On EVB Overview page, enter Settings. Click Add MI you could choose enter MI SN manually or click the grid icon to scan the MI SN automatically. c. Click“+” button behind the EnverBridge SN, then enter the SN of the EVT400, click OK to finish binding.
- Page 15 Installation Once USB flash drive has been installed, the data will be recorded in USB flash Quick Query drive automatically. There are 3 buttons, Today, Nearly three days and Nearly a week. Enter the local history query interface Click and select the time range to get the detailed data Open EnverView APP, click [Local Mode]>>>...
-
Page 16: Debugging And Operating
The microinverter does not detect that the utility grid is within operable voltage/frequency range. The microinverter cannot produce The Envertech microinverter is powered on when there is sufficient DC voltage power until this is solved. from the PV module. The LED light of each microinverter will blink green to indicate normal start-up operation approximately 1 minute after DC power is applied. -
Page 17: Troubleshoot An Inoperable Microinverter
Envertech microinverter. or damaged, it needs replacement. WARNING: Envertech microinverters are powered by DC power from the PV 11. Verify with your utility company that grid frequency is within the regulated modules. Please disconnect and reconnect DC power to check the LED blinks 1 range. -
Page 18: System Diagram
8. System Diagram 6 Router Grid 1. Single phase 1 PV Module 1 PV Module 1 PV Module Distribution control box 2 Microinverter 2 Microinverter 2 Microinverter RJ45 Cable length 245 mm 3 Cable End Cap length 1150 mm length 905 mm Microinverter(n=13) 1 PV Module 1 PV Module... -
Page 19: Recycling And Disposal
9. Recycling and Disposal WARNING: Do not attempt to repair the Envertech microinverter. It contains no user-serviceable parts. If the microinverter fails, contact your direct supplier or Envertech customer service to obtain an RMA (return merchandise authorization) number and start the replacement process.
Need help?
Do you have a question about the EVT400-R and is the answer not in the manual?
Questions and answers