Table of Contents
Advertisement
Available languages
Available languages
Quick Links
I N S P I R I N G T H E W O R L D ' S K I T C H E N
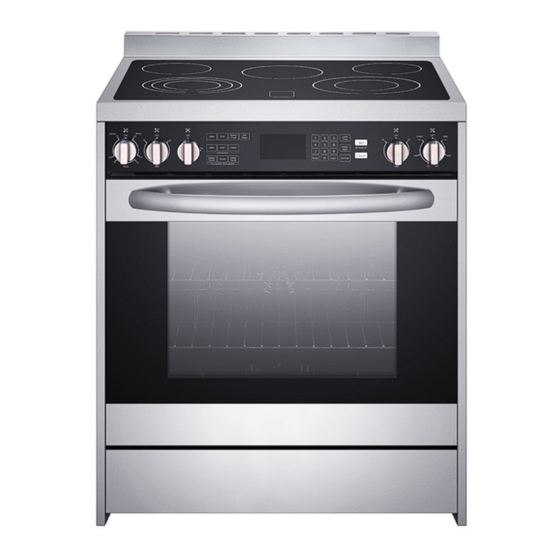
30 IN. ELECTRIC FREE- STANDING RANGE
CUISINIÈRE ÉLECTRIQUE AUTOPORTANTE DE 30 PO
COS-305AEC
INSTRUCTIONS D'INSTALLATION
IMPORTANT SAFETY INSTRUCTIONS
Carefully read the following Important information redarding installation
safety and maintenance. Keep these instruction for future reference.
Instructions d'installation
Installation Instructions
Advertisement
Chapters
Table of Contents

Related Manuals for Cosmo COS-305AEC


Summary of Contents for Cosmo COS-305AEC
- Page 1 I N S P I R I N G T H E W O R L D ’ S K I T C H E N 30 IN. ELECTRIC FREE- STANDING RANGE CUISINIÈRE ÉLECTRIQUE AUTOPORTANTE DE 30 PO COS-305AEC INSTRUCTIONS D’INSTALLATION IMPORTANT SAFETY INSTRUCTIONS Carefully read the following Important information redarding installation safety and maintenance.
-
Page 2: Table Of Contents
Electrical Requirements - U.S.A. Only ..............Electrical Requirements - Canada Only ..............INSTALLATION INSTRUCTIONS ................COSMO appliances are designed according to the strictest safety and performance Step 1 - Unpack Range .................... standard for the North American market. We follow the most advanced Step 2 - Install Anti-Tip Bracket ................ -
Page 3: Range Safety
Range Safety Range Safety Your safety and the safety of others are very important. We have provided many important safety messages in this manual State of California Proposition 65 Warnings: and on your appliance. Always read and obey all safety messages. WARNING: This product contains one or more chemicals known to This is the safety alert symbol. -
Page 4: Installation Requirements
Installation Requirements Installation Requirements LOCATION REQUIREMENTS TOOLS AND PARTS VENTILATION Gather the required tools and parts before starting installation. Read and follow IMPORTANT: Observe all governing codes and ordinances. the instructions provided with any tools listed here. • It is the installer’s responsibility to comply with installation clearances, if TOOLS NEEDED specified, on the model/serial rating plate. - Page 5 Installation Requirements Installation Requirements POWER SUPPLY DIMENSIONS IMPORTANT: To connect to an outlet in the wall, the electrical outlet must be PRODUCT/OPENING recessed. If the electrical outlet is in the floor, it can be either recessed or Opening dimensions shown are for 25" (64 cm) countertop depth, 24" (61 cm) surface mounted.
-
Page 6: Electrical Requirements - U.s.a. Only
Installation Requirements Installation Requirements • For direct wire installations, install a suitable conduit box (not furnished). An appropriately sized, UL conduit connector must be used to correctly attach the conduit to the junction box. • Do not use an aluminum wire receptacle with copper-wired power cord and plug (or vice versa). -
Page 7: Installation Instructions
Installation Instructions Installation Instructions STEP 2 - INSTALL ANTI-TIP BRACKET IMPORTANT: This appliance shall be installed only by authorized persons and in accordance with the manufacturer’s installation instructions, local gas fitting regulations, municipal building codes, electrical wiring regulations, local water supply regulations. -
Page 8: Step 3 - Make Electrical Connection
Installation Instructions Installation Instructions STEP 3 - MAKE ELECTRICAL CONNECTION 3. Install a UL listed strain relief (not provided) to the power cord opening in the bracket, and then completely tighten the strain relief nut. After reading the requirements for each Electrical Connection method, follow 4. - Page 9 Installation Instructions Installation Instructions 4-WIRE CONNECTION: POWER SUPPLY CORD 5. Remove the green jumper wire from under the ground screw and replace IMPORTANT: Use this method for new branch-circuit installations (1996 with the green wire from the power cord and tighten ground screw. NEC), mobile homes, recreational vehicles, or in an area where local codes prohibit grounding through the neutral.
- Page 10 Installation Instructions Installation Instructions 3-WIRE CONNECTION (GROUNDED NEUTRAL) DIRECT WIRE - U.S.A. ONLY WARNING WARNING Electrical Shock Hazard Electrical Shock Hazard Disconnect power before servicing. Grounding through the neutral conductor is prohibited for new branch-circuit installations (1996 NEC); mobile homes; and Improper connection of aluminum house wiring and copper recreational vehicles, or in an area where local codes prohibit appliance leads can result in an electrical hazard or fire.
- Page 11 Installation Instructions Installation Instructions 3. Connect the neutral (white) wire and the ground (green or bare) wire 5. Using a 5/16" nut driver and one of the l0-32 hex nuts, connect the ground the range cable) using a UL listed wire connector. (green or bare) wire from the flexible metal conduit to the center terminal 4.
-
Page 12: Step 4 - Install Range
Installation Instructions Installation Instructions 6. Loop the green jumper wire removed from the ground screw back onto its Connect to the Range end that is fastened to the center post on the terminal block. IMPORTANT: Use this method for new branch-circuit installations (1996 7. -
Page 13: Step 5 - Complete Installation
Household fuse is intact and tight; or circuit breaker has not tripped. • Range is plugged into a grounded outlet. • Electrical supply is connected. Contact a qualified electrician to verify the electrical supply. COS-305AEC Circuit Diagram INSTRUCTIONS D’INSTALLATION Back g rill Bottom G rill Top Grill High... - Page 14 Sécurité de la Cuisinière Table des Matières SÉCURITÉ DE LA CUISINIÈRE ................24 Votre sécurité et celle des autres est très importante. Nous donnons de nombreux messages de sécurité importants EXIGENCES D’INSTALLATION ................25 dans ce manuel et sur votre appareil ménager. Assurez-vous de Outillage et pièces ....................25 toujours lire tous les messages de sécurité...
-
Page 15: Sécurité De La Cuisinière
Sécurité de la Cuisinière Exigences d'installation PIÈCES FOURNIES AVERTISSEMENT Vérifier que toutes les pièces sont présentes. Risque de basculement Vis de 16 x 1 5/8" (2) Un enfant ou une personne adulte peut faire basculer la cuisinière ce qui peut causer un décès. La bride antibasculement Joindre la bride antibasculement au pied arrière de la cuisinière. -
Page 16: Exigences D'emplacement
Exigences d'installation Exigences d'installation EXIGENCES D’EMPLACEMENT DIMENSIONS VENTILATION IMPORTANT : Respecter les dispositions de tous les codes et réglements en PRODUIT/OUVERTURE vigueur. Les dimensions de l’ouverture correspondent à une installation entre des • C’est à l’installateur qu’incombe la responsabilité de respecter les distances placards de 24”... -
Page 17: Exigences Électriques
Exigences d'installation Exigences d'installation EXIGENCES ÉLECTRIQUES Arrière de la cuisinière IMPORTANT : Cet appareil est fabriqué avec le châssis raccordé au neutre par un cavalier vert de liaison à la terre. Utiliser un cordon d’alimentation à 3 fils, homologué UL, un cordon d’alimenation de 50 ampères (queue de cochon); ou si les codes locaux ne permettent pas la mise à... - Page 18 Exigences d'installation Exigences d'installation EXIGENCES ÉLECTRIQUES - CANADA UNIQUEMENT AVERTISSEMENT AVERTISSEMENT Risque de choc électrique Risque de choc électrique L’alimentation électrique du circuit du branchement du four doit être coupée lorsque les connexions des lignes sont mises en place. Déconnecter la source de courant électrique avant l'entretien. Ne pas utiliser pas de rallonge avec cet appareil.
-
Page 19: Instructions D'installation
Instructions d'installation Instructions d'installation ÉTAPE 2 - INSTALLATION DE LA BRIDE ANTIBASCULEMENT IMPORTANT : Cet appareil doit être installé uniquement par des personnes autorisées et en conformité avec les instructions d’installation du fabricant, les règlements locaux en matière de raccordement au gaz, les codes du bâtiment municipaux, les règlements spécifiques au câblage électrique, les règlements d’approvisionnement en eau locaux. -
Page 20: Étape 3 - Raccordement Électrique
Instructions d'installation Instructions d'installation 5. Fixer la bride antibasculement dans le sol à l’aide des deux vis fournies. REMARQUE : Un pied arrière de la cuisinière sera centré dans la bride antibasculement lorsqu’elle est déplacée à sa position finale. Panneau d’accès au raccordement à... - Page 21 Instructions d'installation Instructions d'installation 8. Positionner la partie inférieure du serre-câble sous le cordon Faire passer le câble d’alimentation électrique à travers le serre-câble. d’alimentation et serrer les vis du serre-câble. Laisser suffisamment de mou pour raccorder facilement le câblage au REMARQUE : Avant de serrer les vis, veiller à...
- Page 22 Instructions d'installation Instructions d'installation RACCORDEMENT DIRECT - É.-U. UNIQUEMENT CORDON D’ALIMENTATION ÉLECTRIQUE - CANADA UNIQUEMENT AVERTISSEMENT AVERTISSEMENT Risque de choc électrique Déconnecter la source de courant électrique avant l’intervention. Risque de choc électrique Un raccordement incorrect du câblage en aluminium du domicile au câblage en cuivre de l'appareil peut créer un risque électrique ou déclencher un incendie.
- Page 23 Instructions d'installation Instructions d'installation 2. Connecter ensemble les 2 conducteurs noirs avec un connecteur de CONNEXION À 3 FILS (NEUTRE MIS À LA TERRE) fils (homologation UL). 3. Connecter le conducteur neutre (blanc) et le conducteur vert (ou nu) de liaison à...
- Page 24 Instructions d'installation Instructions d'installation CONNEXION À 4 FILS (NEUTRE NON MIS À LA TERRE) Raccordement à l’alimentation électrique du domicile - É.-U. uniquement IMPORTANT : Utiliser le câble à 4 conducteurs provenant de l’alimentation électrique du domicile aux États-Unis lorsque les codes locaux ne permettent pas la mise à...
-
Page 25: Étape 4 - Installation De La Cuisinière
Instructions d'installation Instructions d'installation Raccordement à la cuisinière IMPORTANT : Utiliser cette méthode pour les nouvelles installations à circuit de dérivation (code des installations électriques des USA (NEC) 1996), les 5. Retirer le cavalier vert de sous la vis de terre et le remplacer par le résidences mobiles et les véhicules de loisirs, ainsi que dans toute région où... - Page 26 For full warranty details on this product please visit: Pour tout problème concernant ce produit, veuillez contacter http://www.cosmoappliances.com/warranty le service des consommateurs Cosmo Customer Support au TO RECEIVE WARRANTY SERVICE, YOUR +1(888) 784-3108 PRODUCT MUST BE REGISTERED. TO REGISTER, VISIT: UNE PREUVE D’...
- Page 27 Cosmo is constantly making efforts to improve the quality and performance of our products, so we may make changes to our appliances without updating this manual. Electronic version of this manual is available at: www.cosmoappliances.com...
Need help?
Do you have a question about the COS-305AEC and is the answer not in the manual?
Questions and answers