Table of Contents
Advertisement
Quick Links
Advertisement
Table of Contents

Subscribe to Our Youtube Channel
Related Manuals for Duratuf SENTRY SS2007


Summary of Contents for Duratuf SENTRY SS2007
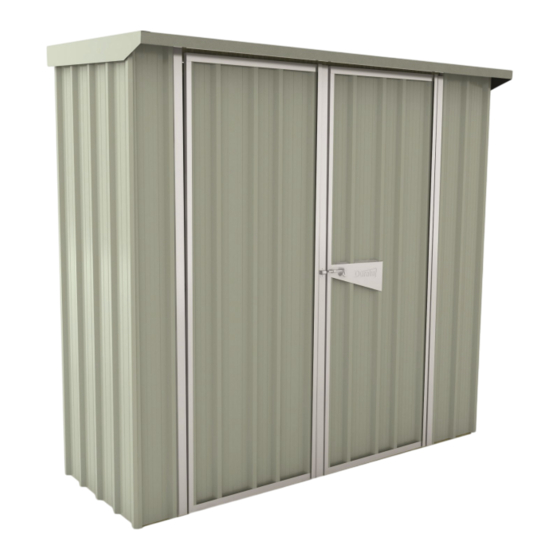
- Page 1 ASSEMBLY INSTRUCTIONS SS2007 BASE SIZE: 2.020m x 0.685m...
- Page 2 Giving you visual guidance through sections that seem tricky on pa- per, and helping you achieve a flawless end result. To view the video visit www.duratuf.co.nz/sentry-assembly Note: Assembly video features a SL1520. But can be used for reference for any other Sentry model.
-
Page 3: Before You Start
CONGRATULATIONS ON PURCHASING A DURATUF SENTRY SHED. BEFORE YOU BEGIN THE ASSEMBLY PLEASE NOTE SOME IMPORTANT POINTS: BEFORE YOU START: • Read all instructions carefully • Identify all parts and check quantities against parts list • Select a level site •... - Page 4 SS2007 PARTS LIST CLADDING + FLASHING + HARDWARE PACK 1 DESCRIPTION DIAGRAM CHECKED Back Wall - 1.890m Side Wall - 1.850m Side Wall 1 Pan - 1.850m Front Wall Sheet 1 Pan - 1.850m Front Wall Sheet 2 Pan - 1.850m Roof - 0.770m Door Sheets (Full Width) - 1.810m Door Sheets 1 Pan - 1.810m...
- Page 5 SS2007 PARTS LIST PACK 2 TIMBER PACK DESCRIPTION DIAGRAM Front/Back Bottom Plates - H4 (Green) 2.020 m Front Top Plate - H1 (Red) 2.020 m Back Top Plate - H1 (Red) 2.020 m Side Wall Bottom Plates - H4 (Green) 0.685m Side Wall Top Plates - H1 (Red) 0.685m...
-
Page 6: Parts Location
PARTS LOCATION Roof Sheets Ridge Barge Flashing Spouting Back Wall Sheets Top Plate Side Top Plate Back Top Plate Front Front Wall Sheets Door Brace Door Sheets Door Jambs Side Wall Sheets Padbolt Support Hinge Bottom Plate Side Bottom Plate Front Front Wall 1 Pan Sheet Door Top/Bottom Flashing QUICK OVERVIEW... - Page 7 FOUNDATION No doubt by now you will have decided what sort of base you are putting down. Please read the section that applies to your situation. If you choose to pour a concrete base you will need to decide whether you wish to raise the base plate of your shed. This allows the cladding to protrude below the surface of the concrete and ensures a water tight pad.
- Page 8 ASSEMBLE DOOR SELECT: 2 x 1.810m Door Sheets 2 x 1.810m Door Sheets 1 pan 4 x 0.715m Door Top/Bottom Flashings 4 x 1.810m Door Side Flashings 1 x 1.810m Weather-strip 6 x Hinges 1 x Padbolt Support Flashing 4 x 1.100m Door Brace Flashings 106 x Rivets fig.3 STEP 1:...
- Page 9 ASSEMBLE SIDE PANELS SELECT: IMPORTANT—IF YOU CHOOSE TO RAISE YOUR TIMBER BASE PLATE –READ THE FOLLOWING; 2 x 1.850 Wall Sheets For sheds with Raised Base Plate option only (see page 6), deduct 2 x 1.850 1 Pan Wall Sheets 30mm from measurement shown between Top and Bottom Plates on 2 x 0.685 Top Plates (Red) all wall panels, so cladding protrudes 20mm below bottom plate...
- Page 10 ASSEMBLE BACK PANEL IMPORTANT—IF YOU CHOOSE TO RAISE YOUR TIMBER SELECT: BASE PLATE –READ THE FOLLOWING; 4 x 1.890m Wall Sheets For sheds with Raised Base Plate option only (see page 57, deduct 1 x 2.020 m Top Plate (Red) 30mm from measurement shown between Top and Bottom Plates on 1 x 2.020 m Bottom Plate (Green) all wall panels, so cladding protrudes 20mm below bottom plate...
- Page 11 ASSEMBLE FRONT PANEL IMPORTANT—IF YOU CHOOSE TO RAISE YOUR TIMBER SELECT: BASE PLATE –READ THE FOLLOWING; 1 x 1.850 2 Pan Wall Sheet For sheds with Raised Base Plate option only (see page 6), deduct 1 x 1.850 1 Pan Wall Sheet 30mm from measurement shown between Top and Bottom Plates on 1 x 2.020 Top Plate (Red) all wall panels, so cladding protrudes 20mm below bottom plate...
-
Page 12: Wall Panel Assembly
WALL PANEL ASSEMBLY SELECT: 4 x Pre-made Wall Panels 12 x 40mm Screws 75mm X 2 SIDE 4 x 75mm Screws OVERLAPS BACK 16 x Rivets TOP PLATE BACK WALL STEP 1: • Stand the Back Panel and the Side Panel BOTTOM PLATE up using someone to support the panels SIDE... -
Page 13: Roof Assembly
ROOF ASSEMBLY IMPORTANT IMPORTANT SELECT: Use 50mm Clouts only on outside ribs covered by Barge flashings. Predrill Use 50mm Clouts only on outside ribs covered by Barge flashings and back holes using a 3.5mm drill bit. Use Roofing Screws on all other ribs. wall top plate. - Page 14 Secure your shed using Treated Timber Pegs or a Bolt Down Kit TIMBER PEGS—WOODEN FLOOR • The optional Duratuf Timber Peg Down Kit includes six H5 treated timber pegs that can be hammered into the ground and then at- tached to the Base Plate with stainless steel screws. A Sentry timber floor can then be fitted on top of the Base Plate.
- Page 15 Using 10mm drill bit, drill hole into top and bottom timber plates. IMPORTANT— CLEAN UP REMOVE ALL DRILL FILINGS FROM ROOF, WALLS AND CHANNELS THOROUGHLY. FAILURE TO DO THIS WILL RESULT IN CORROSION AND COULD THEREFORE VOID THE WARRANTY YOUR DURATUF SENTRY SHED IS NOW COMPLETE. RELAX…...
-
Page 16: Year Warranty
20 YEAR WARRANTY Riverlea Group Ltd warrant that the cladding used in the manufacture of the Sentry shed will not rust within 20 years from the date of purchase. Any liability for product failure that may arise will be limited to repair or replacement of the defective product and will only apply for the benefit of the original purchaser.
Need help?
Do you have a question about the SENTRY SS2007 and is the answer not in the manual?
Questions and answers