Table of Contents
Advertisement
Owner's Manual
12 in. COMPOUND
MITER SAW
Double Insulated
Model No.
315.212220
Save this manual
for
future reference.
CAUTION:
Read and follow
all Safety
Rules and Operating
Instructions
before first use of
this product.
Customer
Help Line: 1-800-932-3188
Sears,
Roebuck
and Co., Hoffman
Estates,
IL 60179
Visit the Craftsman
web page: www.sears.com/craftsman
USA
• Safety
• Features
• Adjustments
• Operation
• Maintenance
• Parts List
®
972000-712
10-02
US
Advertisement
Table of Contents

Related Manuals for Craftsman 12 IN. COMPOUND MITER SAW 315.21222


Summary of Contents for Craftsman 12 IN. COMPOUND MITER SAW 315.21222
- Page 1 Rules and Operating Instructions before first use of this product. Customer Help Line: 1-800-932-3188 Sears, Roebuck and Co., Hoffman Visit the Craftsman web page: www.sears.com/craftsman 972000-712 10-02 • Safety • Features • Adjustments • Operation • Maintenance • Parts List...
- Page 2 Co., Dept. 817WA, Hoffman Your saw has many features for making cutting operations more pleasant and enjoyable. Safety, performance and dependability have been given top priority in the design of this saw making it easy to maintain and operate. Look for this symbol...
- Page 3 KEYS AND WRENCHES. Get in the habit of checking to see that hex keys and adjusting wrenches are removed from tool before turning on saw. The safety warnings do IMPORTANT Servicing requires extreme care and knowledge of the system and should be performed only by a qualified service technician.
- Page 4 NEVER LEAVE TOOL RUNNING UNAT- TENDED. TURN THE POWER OFF. Do not leave tool until it comes to a complete stop. FIRMLY CLAMP OR BOLT your miter saw to a workbench or table at approximately USE ONLY CORRECT BLADES. Do not use blades with incorrect size holes.
- Page 5 Allow motor qualified service technician at a Sears store. WARNING: Craftsman replacement parts. Use of any other parts may create a hazard or cause product damage. NEVER USE IN AN EXPLOSIVE ATMO- SPHERE.
- Page 6 A plastic throat plate inserted in the miter table that allows for blade clearance. When you make your first cut with your compound miter saw, the saw blade cuts a slot through the throat plate the exact width of the blade.
- Page 7 • Your saw has been shipped with the saw arm locked in the down position. To release saw arm, push down on top of saw arm and pull out the lock pin. See Figure 4. • Hand pressure should remain on the saw arm to prevent sudden rise upon release of the lock pin.
- Page 8 The following items are included with your Compound Miter Saw: • Saw Blade-12 • Miter Lock Handle • Dust Guide • Blade Wrench 10 mm HEX KEY 6 mm HEXKEY 5 mm HEXKEY MITERLOCKHANDLE WARNING: The use of attachments or accessories not listed might be hazardous and could cause serious personal injury.
- Page 9 Do not operate saw without guards in place. Do not perform any operation freehand. Never reach around the saw blade. Turn off tool and wait for saw blade to stop before moving workpiece or changing settings. • Disconnect the saw from the power source before changing blade or servicing.
- Page 10 12 in. BLADE A 12 in. saw blade is included with your compound miter saw. It will cut materials up to 7-7/8 in. wide, depending upon the thickness of the material and the setting at which the cut is being made.
- Page 11 4. To transport, turn off and unplug your saw, then lower the saw arm and lock it in the down position. Lock saw arm by depressing the lock pin.
- Page 12 Four 1/2 in. bolt holes have been provided in the saw base for this purpose. Each of the four mounting holes should be bolted securely using 7/16 in. machine bolts, lock washers, and hex nuts (not included).
- Page 13 Failure to unplug your saw could result in accidental starting causing possible serious personal injury. Push down on the saw arm and pull out the lock pin to release saw arm. Raise saw arm to its full raised position. Be cautious, saw arm is spring loaded to raise.
- Page 14 CAUTION: FLAT(S) blade teeth and the arrow printed on the side of ON SPINDLE the blade pointing down at the front of the saw. INNERBLADE The direction of blade rotation is also stamped WASHERWITH with an arrow on the upper blade guard.
- Page 15 Turn your saw off and allow the blade to come to a complete stop before raising the saw arm.
- Page 16 Lay a framing square flat on the miter table. Place one leg of the square against the fence. Slide the other leg of the square against the flat part of saw blade. Note: Make sure that the square contacts the flat part of the saw blade, not the blade teeth.
- Page 17 21. FENCE MITER TABLE Fig. 20 If the top or bottom of the saw blade angles away from the square as shown in figures 22 and 23, adjustments are needed. FENCE _ COMBINATION_ one-...
- Page 18 The saw arm should rise completely to the up position by itself. If the saw arm does not raise by itself or if there is play in the pivot joints, have saw repaired by a qualified service technician at your nearest Sears store to avoid risk of personal injury.
- Page 19 TO CROSSCUT SAW: • Pull out the lock pin and lift saw arm to its full height. • Loosen the miter lock handle. Rotate the miter lock handle approximately one-half turn to the left to loosen.
- Page 20 MOUNTING BRACKET TO BEVEL CUT WITH SAW: • Pull out the lock pin and lift saw arm to its full height. • Loosen the miter lock handle. Rotate the miter lock handle approximately one-half turn to the left to loosen.
- Page 21 See Figure 27. If one side becomes difficult to read as you move the saw arm to the left, simply refer to the other side. Align the indicator point for the side you choose with the desired angle.
- Page 22 TO MAKE A COMPOUND YOUR MITER SAW: • Pull out the lock pin and lift saw arm to its full height. • Loosen the miter lock handle. Rotate the miter lock handle approximately one-half turn to the left to loosen.
- Page 23 The support should let the workpiece lay flat on the base of the saw and work table during the cutting operation. Use the work clamp or a C-clamp to secure the workpiece.
- Page 24 CUTTING COMPOUND MITERS To aid in making the correct settings, the compound angle setting chart below has been provided. Since com- pound cuts are the most difficult to accurately obtain, trial cuts should be made in scrap material, and much thought and planning made, prior to making your required cut.
- Page 25 CUTTING CROWN MOLDING Your compound miter saw does an excellent job of cutting crown molding. In general, compound miter saws do a better job of cutting crown molding than any other tool made. In order to fit properly, crown molding must be com- pound mitered with extreme accuracy.
- Page 26 Whencuttingcrownmolding bythismethod thebevel angleshould besetat 33.85 °.Themiterangleshould besetat 31.62 ° eitherrightor left,depending o nthe desired cutfortheapplication. Seethechartbelow for correct a nglesettings andcorrect p ositioning o f crown molding onmitertable. Thesettings inthechartbelowcanbeusedforcutting AllStandard (U.S.)crownmolding with52° and38° angles. T hecrownmolding is placed flatonthe miter tableusing the compound f eatures ofyourmitersaw.
- Page 27 ,_ WARNING:Whenservicing, useonlyidentical Craftsman r eplacement parts.Useof anyother partmaycreatea hazard or causeproduct damage. GENERAL Avoid using solvents when cleaning plastic parts. Most plastics are susceptible to damage from various types of commercial solvents and may be damaged by their use. Use clean cloths to remove dirt, carbon dust, etc.
- Page 28 To prevent accidental starting that could cause possible serious personal injury, assemble all accessories to your saw before connecting it to power supply. Saw should never be connected to power supply when you are assembling parts, making adjustments, installing or removing blades or accessories, or when not in use.
- Page 29 The stop block is useful as a stop for cutting multiple EXTENSION pieces to the same length. It can be installed on either table extension on either side of the saw base: Fig. 39 • Slide the stop block on the back arm of either table extension, then insert the table extension into the saw base.
- Page 30 HOLESFOR CLAMP EXTENSION ROD The work clamp provides greater control by clamping the workpiece to the fence or the saw table. It also prevents the workpiece from creeping toward the saw blade. This is very helpful when cutting compound miters.
- Page 31 Insert the grooved end of the clamp extension rod into the back, top hole of the clamp support. This will allow the clamp to press the workpiece against the saw table. See Figures 42 and 45. CLAMP EXTENSION ROD KNOB...
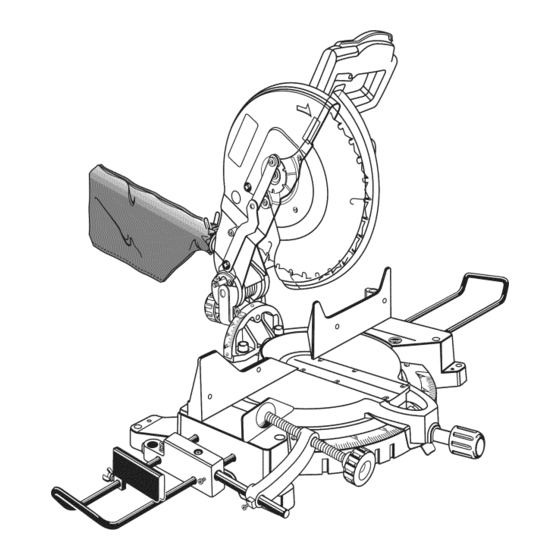
- Page 32 • CRAFTSMAN COMPOUND MITER SAW- MODEL NUMBER 315.212220 • FigureA...
- Page 33 980231-001 980240-001 977435-001 977434-001 MITER SAW- MODEL regarding your COMPOUND MITER SAW or when ordering repair parts. PAGE FOR PARTS ORDERING PARTS LIST FOR FIGURE A DESCRIPTION * Flat Washer (M10) ... * Self-Locking Nut (M10) ... Spring Washer ...
- Page 34 • CRAFTSMAN Figure B COMPOUND MITER SAW- MODEL " NUMBER 315.212220 j°J°_ 15 i...
- Page 35 • CRAFTSMAN The model number will be found on a plate attached to the motor housing. Always mention the model number in all correspondence COMPOUND MITER SAW or when ordering repair parts. SEE BACK PART NUMBER DESCRIPTION 1 ** STD851012 * Flat Washer (M12) ...
- Page 36 • CRAFTSMAN COMPOUND MITER SAW- MODEL NUMBER 315.212220 SEE NOTE "A" FigureC...
- Page 37 • CRAFTSMAN The model number will be found on a plate attached to the motor housing. Always mention the model number in all correspondence COMPOUND MITER SAW or when ordering repair parts. SEE BACK PAGE FOR PARTS ORDERING Part Number...
- Page 38 For repair of major brand appliances no matter who made it, no matter who sold it! 1-800-4-MY-H O ME To bring in products such as vacuums, iiiiiiiiii r epair, ca_ fo_ the location of your nearest Sears Parts & Repair Center. iiiiiiiiii To purchase or inquire about a Sears Service Agreement: Para pedir servicio...
Need help?
Do you have a question about the 12 IN. COMPOUND MITER SAW 315.21222 and is the answer not in the manual?
Questions and answers