Table of Contents
Advertisement
Quick Links
Advertisement
Table of Contents

Related Manuals for Bosch HCE644123R


Summary of Contents for Bosch HCE644123R
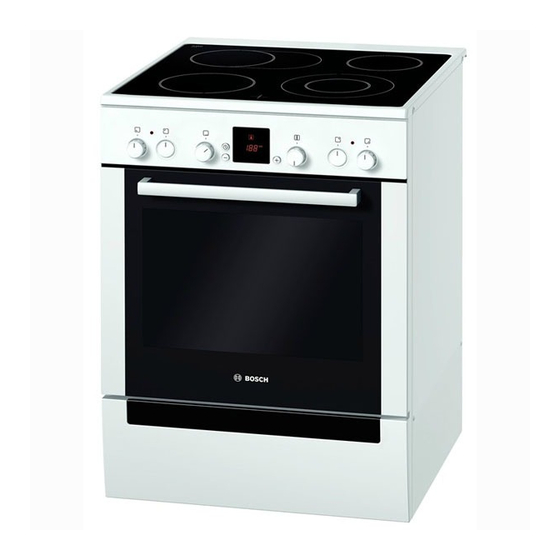
- Page 1 Free standing cooker HCE644123R [en] Instruction manual...
-
Page 3: Table Of Contents
Installation and connection ............6 For the installer..................6 Additional information on products, accessories, replacement Levelling the cooker ................7 parts and services can be found at www.bosch-home.com and Your new cooker.................7 in the online shop www.bosch-eshop.com General information ................7 Cooking area ..................7 The oven....................8... -
Page 4: Important Safety Information
: Important safety information Read these instructions carefully. Only then greaseproof paper loosely over will you be able to operate your appliance accessories during preheating. Always safely and correctly. Retain the instruction weight down the greaseproof paper with a manual for future use or for subsequent dish or a baking tin. - Page 5 During operation, the surfaces of the or switch off the fuse in the fuse box. ■ appliance become hot. Do not touch the Contact the after-sales service. surfaces when they are hot. Keep children The cable insulation on electrical Risk of electric shock and serious injury! ■...
-
Page 6: Causes Of Damage
Causes of damage Overview The following table provides an overview of the most frequent Caution! kinds of damage: Rough pot and pan bases scratch the ceramic. ■ Avoid boiling pots dry. This may cause damage. ■ Never place hot pots or pans on the control panel, the ■... -
Page 7: Levelling The Cooker
Levelling the cooker Always place the cooker directly on the floor. Pull out the plinth drawer and lift it up and out. There are adjustable feet at the front and rear on the inside of the plinth. Use an Allen key to raise or lower the adjustable feet as necessary until the cooker is level (picture A). -
Page 8: The Oven
Hotplate controls Temperature selector You can use the four hotplate controls to control the heat Use the temperature selector to set the temperature and the output provided by each hotplate. grill setting. Setting Meaning Positions Function Off position The hotplate is switched off. Zero position Oven not hot. -
Page 9: Your Accessories
Your accessories The accessories supplied with your appliance are suitable for Note: The accessories may deform when they become hot. making many meals. Ensure that you always insert the Once they cool down again, they regain their original shape. accessories into the cooking compartment the right way round. This does not affect their operation. -
Page 10: After-Sales Service Products
Optional accessories HEZ number Function Enamel baking tray with non-stick coating HEZ331011 The baking tray is ideal for laying out cakes and biscuits. Place the baking tray in the oven with the sloping edge towards the oven door. Universal pan HEZ332003 For moist cakes, pastries, frozen meals and large roasts. -
Page 11: Setting The Hob
Setting the hob This section informs you how to set the hotplates. The table æ symbol = extended cooking zone shows heat settings and cooking times for various meals. Then immediately turn it back to the desired heat setting. Switching back to the small area Setting procedure Turn the hotplate control to 0 and make new settings. -
Page 12: Setting The Oven
Setting the oven Switching off the oven automatically There are various ways in which you can set your oven. Here we will explain how you can select the desired type of heating Enter a cooking time for your dish. and temperature or grill setting. You can select the cooking time and end time for your dish on the oven. -
Page 13: Setting The Timer
Setting the timer You can use the timer as a kitchen timer. It runs independently A signal sounds. Press the Clock button. The timer display of the oven. The timer has a special signal. This means that you goes out. can tell whether the timer or cooking time has expired. -
Page 14: Detaching And Refitting The Rails
Area Cleaning agents Seal Hot soapy water: Do not remove. Clean with a dish cloth. Do not scour. Accessories Hot soapy water: Soak and clean with a dish cloth or brush. Plinth drawer Hot soapy water: Clean with a dish cloth. Detaching and refitting the rails The rails can be removed for cleaning. -
Page 15: Removing And Installing The Door Panels
Removing and installing the door panels Risk of injury! To facilitate cleaning, you can remove the glass panels from the Scratched glass in the appliance door may develop into a oven door. crack. Do not use a glass scraper, sharp or abrasive cleaning aids or detergents. -
Page 16: Glass Cover
Glass cover You must replace a damaged glass cover. Suitable glass covers may be obtained from the after-sales service. Please specify the E number and FD number of your appliance. After-sales service Our after-sales service is there for you if your appliance needs Please note that there will be a fee for a visit by a service to be repaired. -
Page 17: Tested For You In Our Cooking Studio
Tested for you in our cooking studio Cakes and pastries Here you will find a selection of dishes and the ideal settings for them. We will show you which type of heating and which temperature are best suited for your dish. You can find Baking tins information about suitable accessories and the height at which It is best to use dark-coloured metal baking tins. -
Page 18: Baking Tips
Small baked products Accessories Level Type of Temperature in Cooking time heating °C in minutes Biscuits Baking sheet 150-170 10-20 Viennese whirls (preheat) Baking sheet 140-150 30-40 Almond biscuits Baking sheet 110-130 30-40 Meringue Baking sheet 80-100 100-190 Choux pastry Baking sheet 200-220 30-40... -
Page 19: Meat, Poultry, Fish
Meat, poultry, fish Tips for grilling When grilling, preheat the oven for approx. 3 minutes, before Ovenware placing the food into the cooking compartment. You may use any heatresistant ovenware. The baking tray is Always grill with the oven door closed. also suitable for large roasts. -
Page 20: Tips For Roasting And Grilling
Meat Weight Accessories and Level Type of Temperature in Cooking time ovenware heating °C, grill setting in minutes Sausage Sausage Wire rack For duck or goose, pierce the skin on the underside of the Poultry wings. This allows the fat to run out. The weights indicated in the table refer to oven-ready poultry (without stuffing). -
Page 21: Bakes, Gratins, Toast With Toppings
Bakes, gratins, toast with toppings Always place the ovenware on the wire rack. How well cooked the bake is will depend on the size of the dish If you are grilling directly on the wire rack, you should also and the height of the bake. The figures in the table are only insert the baking tray at level 1. -
Page 22: Drying
Drying The baking tray is placed at level 4, the wire rack is placed at level 2. Use undamaged fruit and vegetables only and wash them Line the baking tray and the wire rack with greaseproof or thoroughly. parchment paper. Drain off any excess water from fruit and vegetables and dry Turn very juicy fruit or vegetables several times. -
Page 23: Acrylamide In Foodstuffs
Acrylamide in foodstuffs Acrylamide is mainly produced in grain and potato products toast, bread rolls, bread or fine baked goods (biscuits, prepared at high temperatures, such as potato crisps, chips, gingerbread, cookies). Tips for keeping acrylamide to a minimum when preparing food Keep cooking times to a minimum. - Page 24 Robert Bosch Hausgeräte GmbH Carl-Wery-Straße 34 81739 München Germany www.bosch-home.com *9000933385* 020993 9000933385...
Need help?
Do you have a question about the HCE644123R and is the answer not in the manual?
Questions and answers