
Related Manuals for Broil King DPA151P-1


Summary of Contents for Broil King DPA151P-1
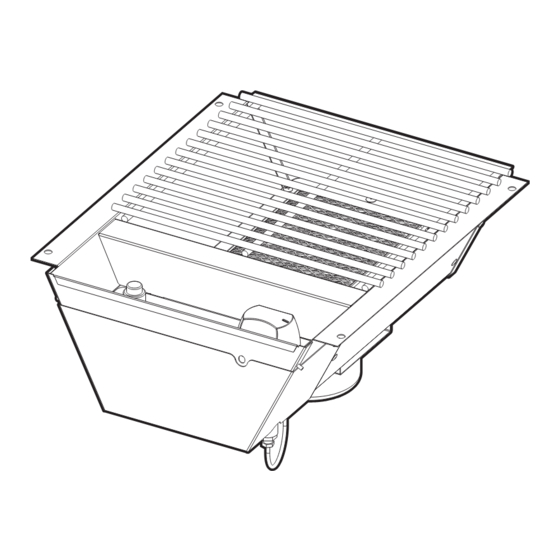
- Page 1 P R E M I U M G R ILL S IR S uRneR NATURAL OR PROPANE DPA151(N,P)-1 ’ etaIn wneR anual fOR utuRe efeRence Page 1...
- Page 2 IMPORTANT INFORMATION IMPORTANT his manual should be read thoroughly by the person installing the IR Side Burner and all persons who will use and maintain the IR Side Burner. The installer should be sure the manual is left in the possession of the user. The user should retain this manual for future reference when using or cleaning the IR Side Burner and to properly identify any repair parts that may be required.
- Page 3 Thank you for purchasing a Broilmaster IR Side Burner. Broilmaster takes pride in its reputation as the The Most Durable Grill Known to Man. From its thick aluminum casting to its massive cooking grids, your Broilmaster is built to last. In fact we still make replacement parts for Broilmaster grills built more than 30 years ago.
-
Page 4: Table Of Contents
TABLE OF CONTENTS You have chosen the finest grill for your outdoor cooking pleasure. Please take time to read this entire manual before assembling your Broilmaster IR Side Burner. ASSEMBLY INSTRUCTIONS ..................... 5 DPA151 IR SIDE BURNER ASSEMBLY ................6-15 DPA151 PARTS DIAGRAM .................... -
Page 5: Assembly Instructions
ASSEMBLY INSTRUCTIONS Before You Begin Compare the parts in the box to the parts list provided in this manual. If any are missing, contact your Broilmaster dealer before beginning assembly. This Side Burner must be installed into either a DPA152 Built-In Sleeve or a DPA153 Side Shelf. CAUTION: Parts may have sharp edges. -
Page 6: Dpa151 Ir Side Burner Assembly
DPA151 IR SIDE BURNER ASSEMBLY DPA151 PARTS DIAGRAM R11588 (1) ORIFICE 1.40MM (NAT) B102073 (1) BURNER SCREEN REPLACEMENT KIT R11587 (1) ORIFICE 1.00MM (LP) B101922 (1) INFRARED BURNER B069747 (1) LUG IGNITOR GROUND B069756 (1) HOSE & LPS REGULATOR B072684 (1) IGNITOR GROUND WIRE B102081 (1) SHEET METAL ASSEMBLY... -
Page 7: Dpa151 Hardware Pack - B102087
DPA151 HARDWARE PACK - B102087 BATTERY, AA FLARE, MALE 3/8” GREASE B076529 “TEE” B070323 B101473 Standard hardware items such as bolts, screws, washers, and nuts can be purchased at your local hard- ware store. Do not order individual pieces of standard hardware. A replacement hardware pack may be ordered using the hardware pack part number at the top of the page. -
Page 8: Removing Lid (If Shelf Is Already Installed)
REMOVING LID (IF SHELF IS ALREADY INSTALLED) SELF-DRILLING PHILLIPS PAN HEAD SCREW, SS, 10-16 X 1/2 R4059 (2) Remove two screws holding lid in place. Remove two screws holding stiffener in place. Set lid and Stiffener aside until needed at later step. -
Page 9: Removing Framing (If Shelf Is Already Installed)
REMOVING FRAMING (IF SHELF IS ALREADY INSTALLED) PHILLIPS TRUSS HEAD SCREW, 10-24 X 3/4 B076522 (4) FRAME TOOL HOOKS Remove four screws holding frame and tool hooks bar in place. Set frame and tool hooks bar aside until needed at later step. B102245-1-0415 Page 9... -
Page 10: Install Ir Side Burner To Frame
INSTALL IR SIDE BURNER TO FRAME PHILLIPS TRUSS HEAD SCREW, 10-24 X 3/4 B076522 (4) Insert the tool hooks bar in front between the frame and support bracket, then tighten screws. Page 10 B102245-1-0415... -
Page 11: Battery Placement
BATTERY PLACEMENT BATTERY, AA B076539 (1) B102245-1-0415 Page 11... -
Page 12: Attaching Ir Side Burner To Bracket
ATTACHING IR SIDE BURNER TO BRACKET PHILLIPS PAN HEAD TYPE F SCREW, SS, 10-32 X ½ R11387 (2) Hang the side Brackets on the lower Pins of the Bracket. Install the two locking screws this will permanently secure the shelf and prevent from lowering. -
Page 13: Install Grate
INSTALL GRATE B102245-1-0415 Page 13... -
Page 14: Orient Lifter Tab
ORIENT LIFTER TAB FRONT EDGE Remove Lifter Tab and re-orient as shown with attached nuts and screws. Insert lid cutouts on the two rear hinge pins. Page 14 B102245-1-0415... -
Page 15: Install Grease Cup
INSTALL GREASE CUP GREASE CUP B101473 (1) B102245-1-0415 Page 15... -
Page 16: Propane Gas Connection
PROPANE GAS CONNECTION IR Side Burner Location you draw this vapor from the top of the tank, the liquid below expands and turns to vapor. Once all of the liquid turns to vapor, This IR Side Burner is designed for outdoor use only. pressure inside the cylinder drops and gas flow stops. - Page 17 PROPANE GAS CONNECTION Propane Cylinder Requirements WARNING Your Broilmaster Premium Gas Grill and IR Side Burner re- quires a standard 20-lb propane gas cylinder, which is available se Propane gas cylinders equipped with an Overfill from your grill dealer, your LP supplier, and at most hardware Protection Device (OPD).
- Page 18 PROPANE GAS CONNECTION Pressure Regulator and Hose Assembly The pressure regulator has an outlet pressure of not more than eleven inches water column. It must be connected to the propane gas cylinder’s female valve outlet before the Grill and IR Side Burner can be operated.
- Page 19 PROPANE GAS CONNECTION B102245-1-0415 Page 19...
-
Page 20: Natural Gas Connection
NATURAL GAS CONNECTION Infrared Burner Location CAUTION Your Grill and Infrared burner have been designed for outdoor use ONLY. he grill and its individual shutoff valve must be discon- nected from the gas supply piping system during any This Infrared Burner only mounts into the DPA153 side shelf on system pressure testing at test pressures in excess of either side of a Broilmaster Gas Grill and cannot be used with 1/2 PSIG. - Page 21 NATIONAL GAS CONNECTION Attach one end of the 10 inch stainless steel flex line to the end of the grill’s gas valve. Attach the other end of the stainless steel flex line to the brass Attach one end of the 34 inch stainless steel flex line to the end “tee”.
-
Page 22: Completed Assembly
COMPLETED ASSEMBLY Thank you for purchasing a Broilmaster IR Side Burner and we hope you enjoy years of great meals prepared on your Broilmaster. Please feel free to visit the Broilmaster Facebook page and share photos of your Broilmaster grill. Thank You! Page 22 B102245-1-0415... -
Page 23: Owner's Manual For Dpa151 Ir Side Burner
OWNER’S MANUAL FOR DPA151 IR SIDE BURNER OPERATIONAL - PROPANE AND NATURAL GAS Checking for Gas Leaks CAUTION Check for gas leaks each time you connect your Broilmaster gas Grill and Infrared Side Burner to a propane gas cylinder, when f a burner fails to light after 5 seconds, turn the burner a connected cylinder has not been used recently, or when the OFF for 5 minutes, to allow the gas to clear, then try again. -
Page 24: Infrared Cooking
INFRARED COOKING General Overview During the searing period, flashing might occur when juices va- porize on contact with the cooking grid and burner surfaces. Broilmaster Infrared Side Burner make it possible for you to The flashes and smoke greatly enhance the flavor of food. enjoy cooking outdoors quickly and effortlessly. -
Page 25: Ir Side Burner Maintenance
IR SIDE BURNER MAINTENANCE General Overview Burner be covered with a heavy duty vinyl cover at all times when it is not in use. Do not attempt to operate your IR Side Proper care, maintenance and cleaning will help ensure a long Burner in the open air while it is raining. -
Page 26: Important Safety Information
IMPORTANT SAFETY INFORMATION WARNING piders and insects can nest in gas grill burners causing the gas ignite under the control panel. This is very dangerous and can damage the grill, making it unsafe to operate. Inspect the grill at least twice per year and more often when spiders are active. Be sure all grill controls are turned off and the grill is cool before using any type of aerosol cleaner on or around the grill. - Page 27 IMPORTANT SAFETY INFORMATION Practice Safe Grilling Do not wear loose fitting clothing or flammable clothing (such as synthetics) around the grill. Never let clothing, pot holders, or other flammable materials come in contact with or too close to any grate, burner or hot surface.
-
Page 28: Cooking Tips
COOKING TIPS Cook Food To Proper Temperatures Cooking food safely requires that you raise the internal temperature of the meat high enough and for a long enough period of time to kill any food-borne bacteria that may cause illnesses. Color is not the best indicator that food is safe to eat. Use a high-quality probe thermometer to be sure your food is properly cooked. -
Page 29: Warranty Terms
WARRANTY TERMS Empire Comfort Systems Inc. warranties this Broilmaster premium gas grill to be free from defects at the time of purchase and for the periods specified below. Broilmaster Premium Gas Grills must be installed by a qualified technician and must be main- tained and operated safely, in accordance with the instructions in the owner’s manual. -
Page 30: Master Parts Distributor List
MASTER PARTS DISTRIBUTOR LIST To order parts under warranty, please contact your local Broilmaster dealer. See the dealer locator at www.broilmaster.com. To provide warranty service, your dealer will need your name and address, purchase date and serial number, and the nature of the problem. -
Page 31: Grill Maintenance History
GRILL MAINTENANCE HISTORY Date Maintenance Performed B102245-1-0415 Page 31... - Page 32 PR EM IU M GR ILL S BROILMASTER A Division of Empire Comfort Systems, Inc. 918 Freeburg Ave. Belleville, Illinois 62220 .broilmaster.com isit our web site at www If you have a general question about our products, please e-mail us at info@empirecomfort.com. If you have a service or repair question, please contact your dealer.
Need help?
Do you have a question about the DPA151P-1 and is the answer not in the manual?
Questions and answers